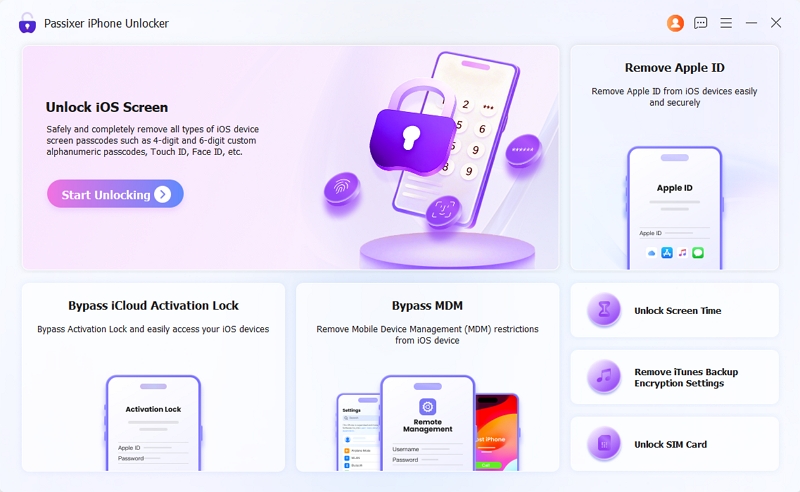
Welcome to the official user guide for Eassiy iPhone Access. This manual is designed to help you navigate every feature of our software with ease. Whether you are dealing with a forgotten screen passcode, a locked Apple ID, an iCloud Activation Lock, or MDM restrictions, follow these detailed steps to regain full access to your iOS device.
Eassiy seamlessly bypasses common roadblocks—such as iTunes errors, Two-Factor Authentication hurdles, and tedious manual operations. It handles all the complex technical heavy lifting in the background, providing you with a clean, intuitive interface and a smooth, error-free experience.
Registration & License Activation
To unlock the full potential of Eassiy and remove all trial limitations, please follow these steps to register your software:
Download and install Eassiy iPhone Access on your computer. Launch the program once the installation is complete.
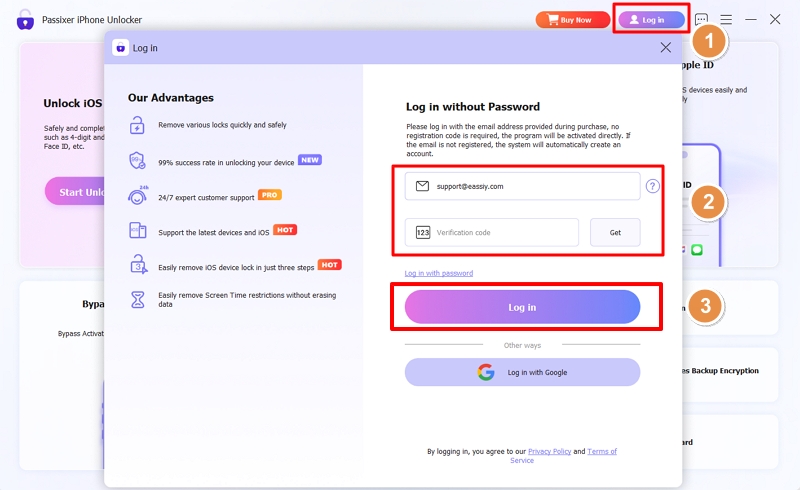
Click the "Log In" icon in the top-right corner of the interface. In the pop-up window, enter the email address used for your purchase. Click the "Get" button, and you will receive a verification code in your email to complete the login.
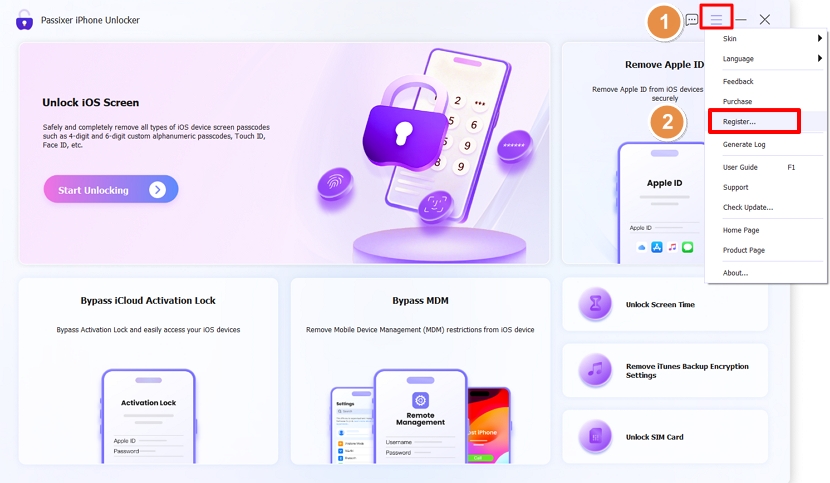
Once logged in, click the "Menu" icon in the top-right corner and select "Register" from the drop-down list.
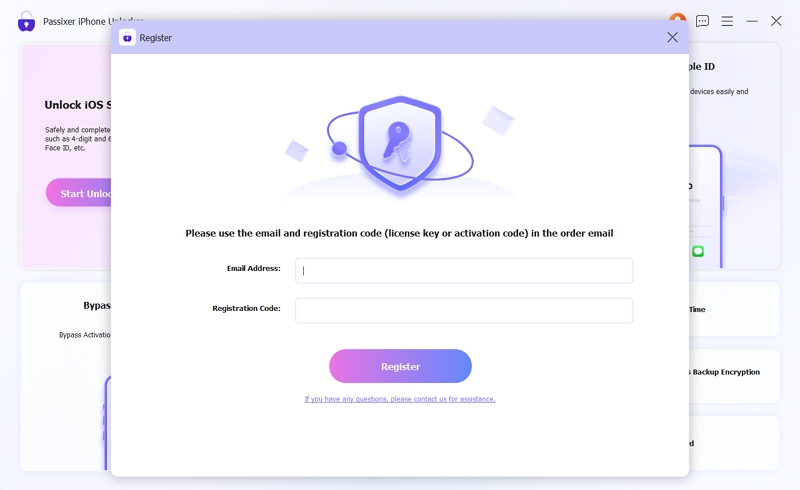
When the Registration window appears, copy and paste the Registration Code from your purchase email into the field, then click "Register." You now have access to all premium features.
We highly recommend copying and pasting your registration code directly from your purchase email to avoid common character errors
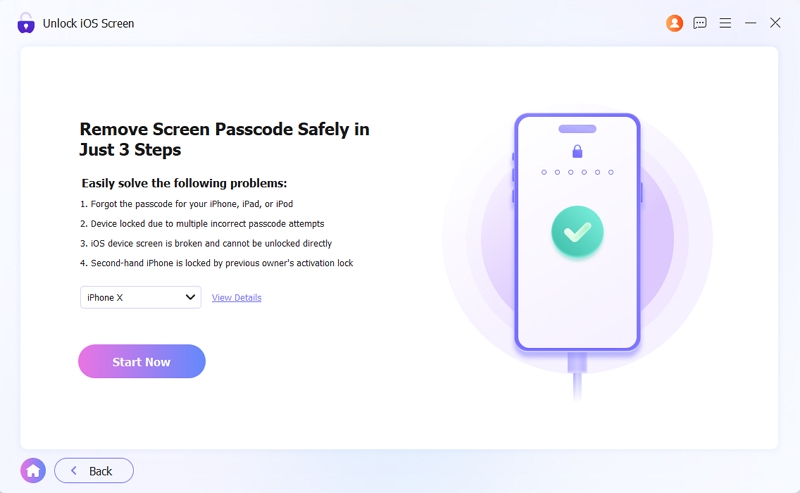
Remove Screen Lock
Use this mode to bypass 4-digit/6-digit passcodes, Touch ID, Face ID, or to fix "iPhone Disabled", "iPhone Unavailable" and "Security Lockout" messages.
Note: Removing the screen lock will erase all data on your device. This is a strict hardware-level security restriction enforced by Apple that no software on the market can bypass.
Select "Unlock iOS Screen" from the main interface and click "Start Unlocking."
Connect your iPhone/iPad to the computer via a stable USB cable. The software will detect and display your device category, type, and model. Verify the information and click "Start."
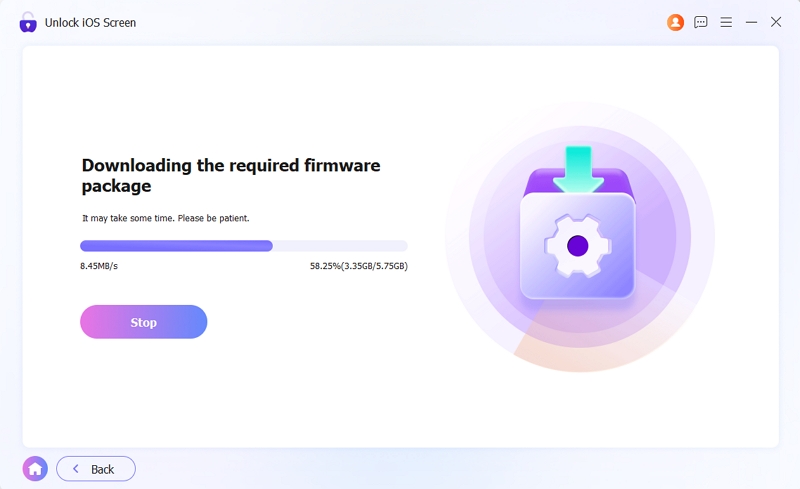
Eassiy will download the required firmware package for your device. Please wait for the download to finish.
Once the firmware is ready, an "Unlock Confirmation" prompt will appear. Review the information and click "OK" to proceed.
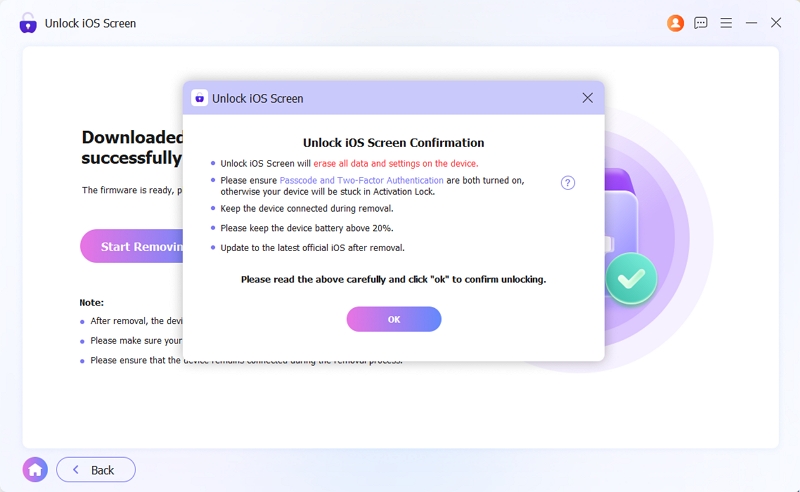
Keep your device connected and do not close the program during the process.
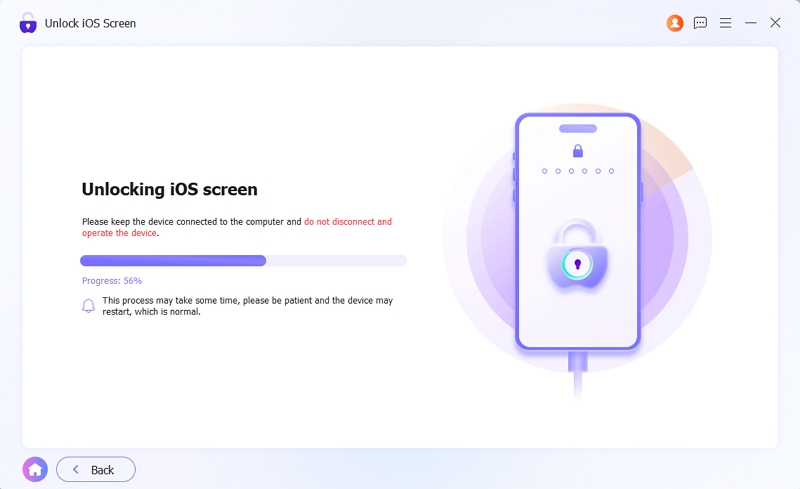
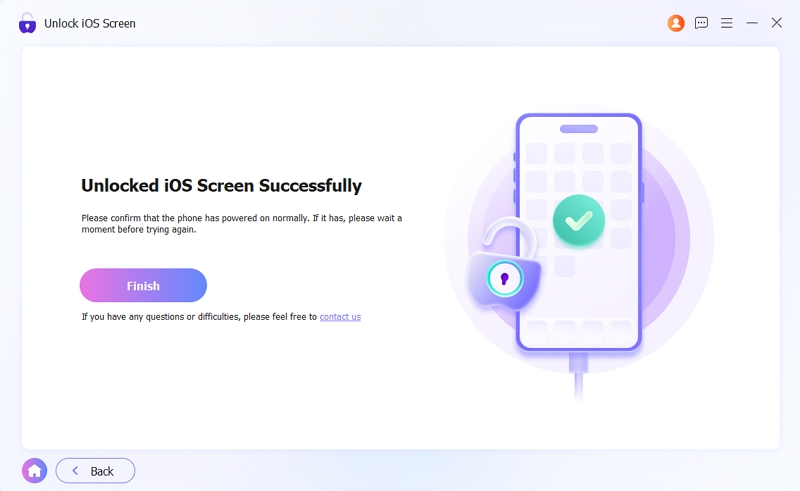
Once the process is complete, the 'Unlock iOS Screen Successfully' message will appear. Your device will restart, and you can set it up as new. Please note: If 'Find My' was enabled, you must enter the original Apple ID and password to complete the iCloud Activation Lock step during the initial setup.
Bypass iCloud Activation Lock
This feature allows you to bypass the iCloud Activation Lock without a password, enabling you to regain access to your iPhone or iPad.
Before proceeding, please carefully review the following requirements and limitations:
- This feature supports iPhone 6s through iPhone X running iOS 12 to 16.7.10.
- Device jailbreaking is required for this process.
- After successfully bypassing the iCloud lock, you will have access to most of your device's features over Wi-Fi. However, you cannot make phone calls, use cellular data, or sign into iCloud with a new Apple ID from the settings.
- Avoid factory resetting or flashing your device, as the Activation Lock will reappear. If this happens, you can simply run Eassiy again to restore the unlock.
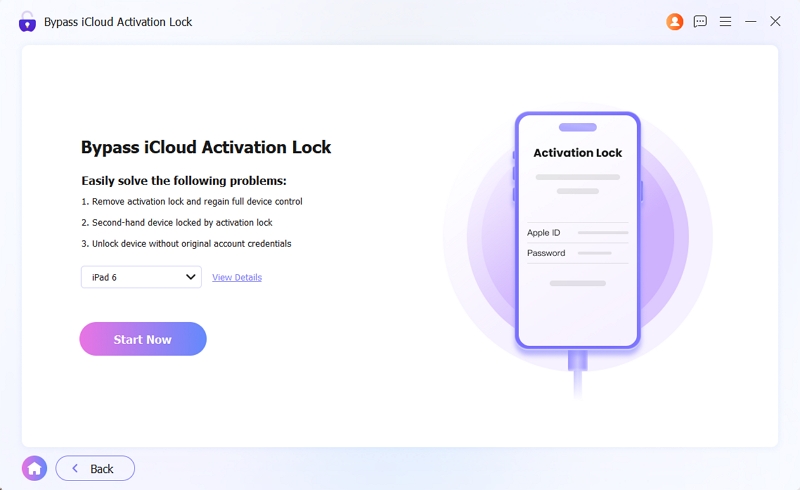
Launch Eassiy iPhone Access on your computer and select the "Bypass iCloud Activation Lock" module from the main dashboard.
Connect your iPhone or iPad to the computer using a stable USB cable. Once the device is recognized, click "Start Now" to proceed.
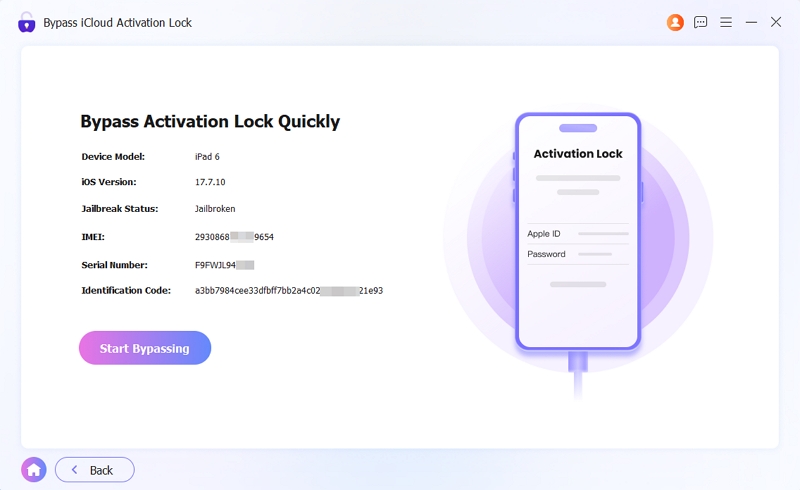
The software will display your device’s specifications and current jailbreak status. Carefully review the information. Once confirmed, click "Start Bypassing."
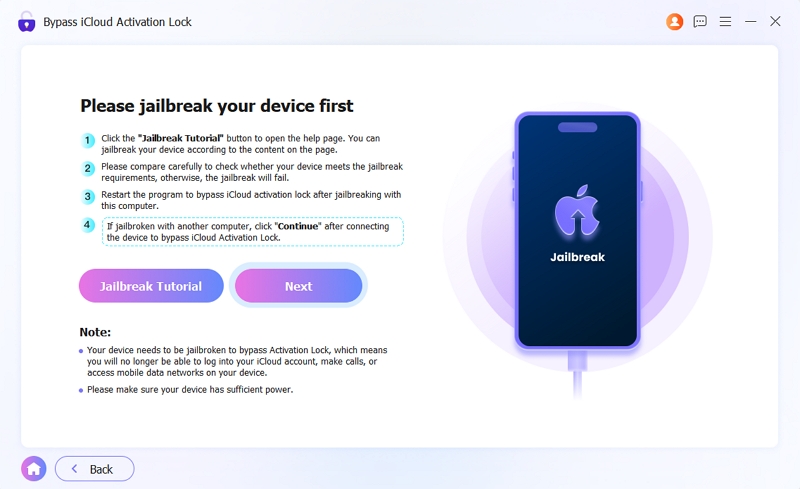
Click the "Jailbreak Tutorial" button and follow the comprehensive step-by-step instructions to jailbreak your device.
Once the jailbreak is complete, restart Eassiy iPhone Access and select "Bypass iCloud Activation Lock" again. The software will automatically begin the bypass process.
Note: If you used a different computer to perform the jailbreak, simply reconnect your device to your current computer and click "Next" to continue the process.
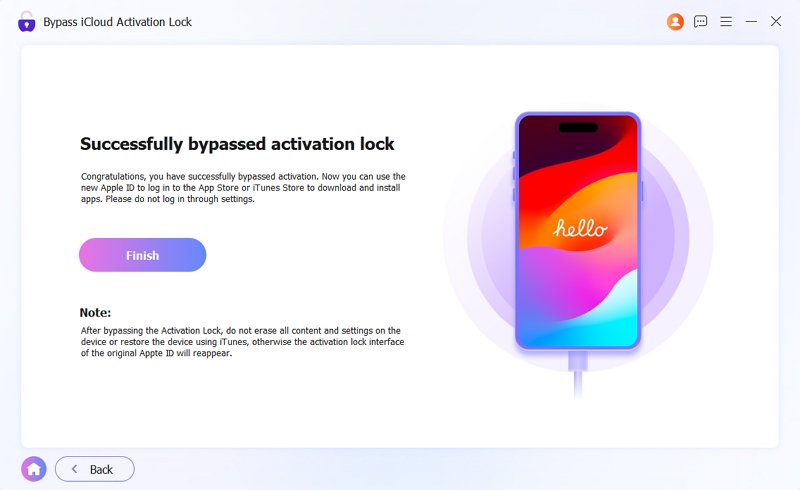
Once the iCloud Activation Lock is successfully bypassed, a confirmation screen will appear. You can now disconnect your device and start using it.
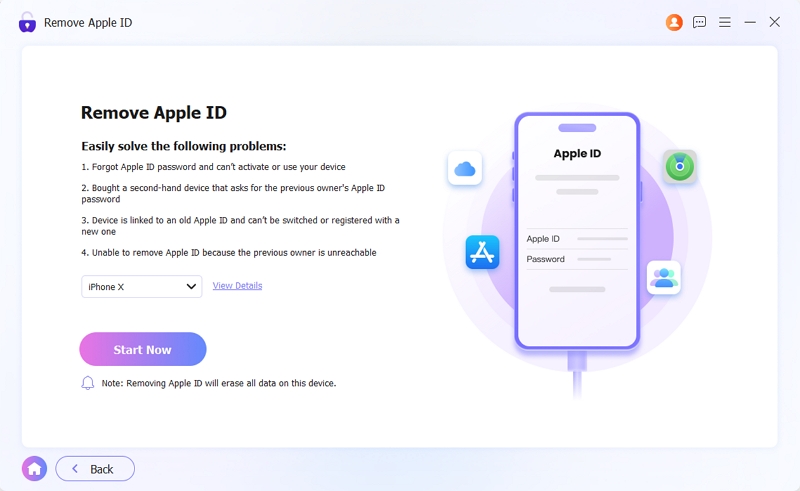
Remove Apple ID without Password
This feature allows you to remove the existing Apple ID from your device, enabling you to sign in with a new account and regain access to all iCloud services and Apple Store features.
Notes:
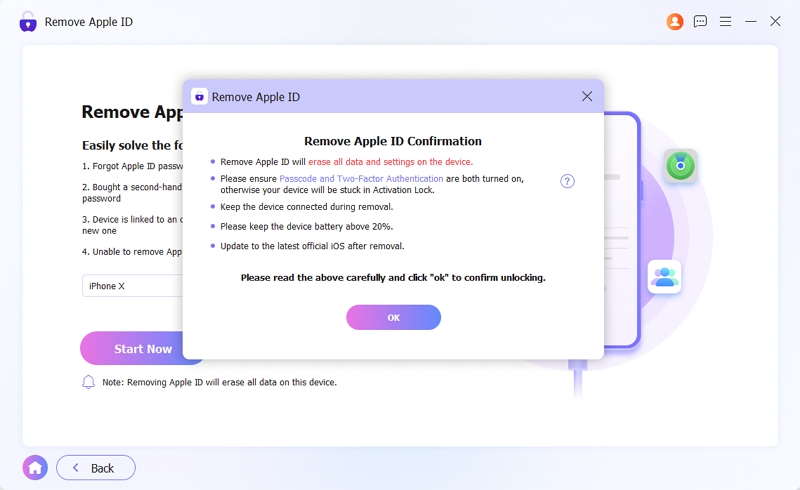
- This process will erase all data on your device.
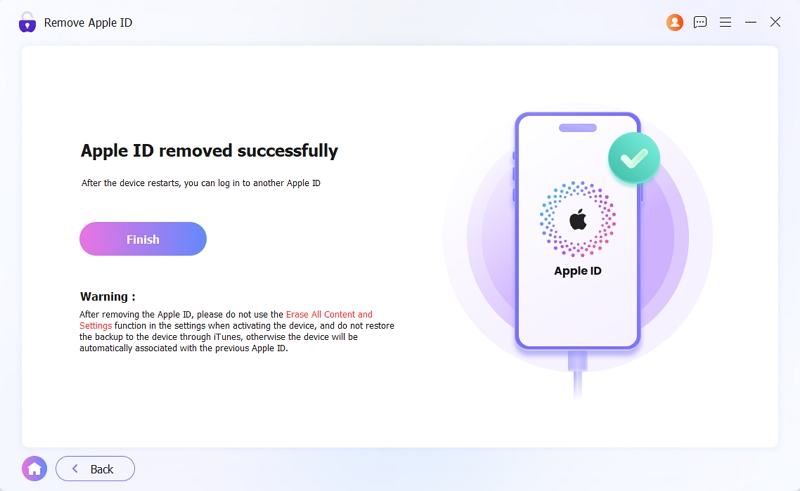
- After successfully removing the Apple ID, do NOT select "Erase All Content and Settings" in your device settings or use iTunes/Finder to update or restore your device. These actions will relink your device to the previous Apple ID and may cause a permanent lock.
Launch the software and select the Remove Apple ID mode from the main dashboard.
Connect your device. Click "Start Now".
For devices running iOS 11.4 or later, ensuring Two-Factor Authentication (2FA) is on. If 2FA is currently disabled, navigate to Settings > [Your Apple ID] > Password & Security on your device to toggle it ON. Once enabled, return to the software and click OK. Follow this by clicking Confirm Again to authorize the removal.
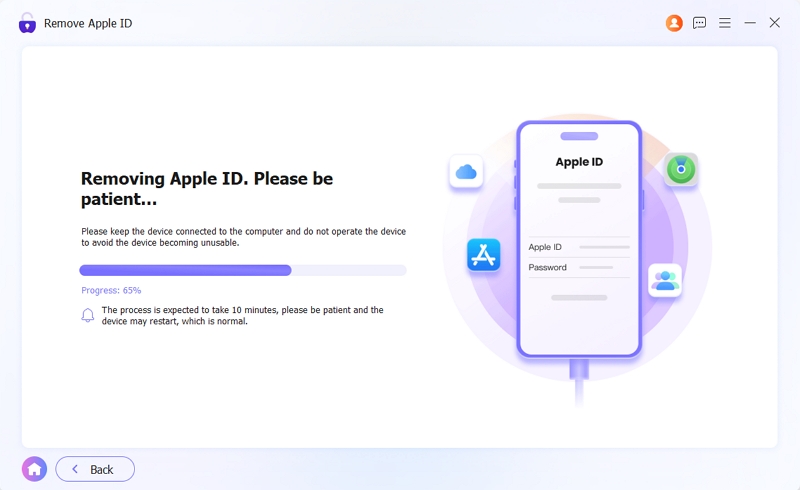
Eassiy iPhone access will now begin removing the Apple ID. Please keep your device connected and do not disconnect until the process is finished.
Once the reset is complete, follow the on-screen instructions to set up your device.
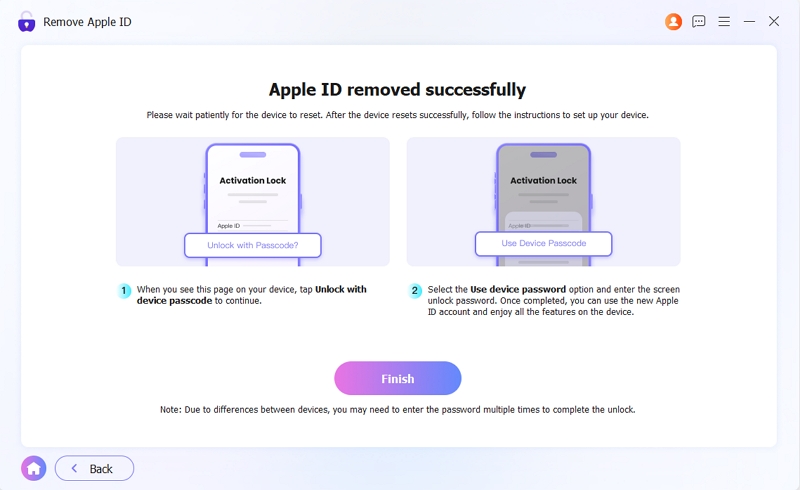
After your iPhone restarts, the previous Apple ID will have been successfully removed. You can now sign in with a new Apple ID or create a new one.
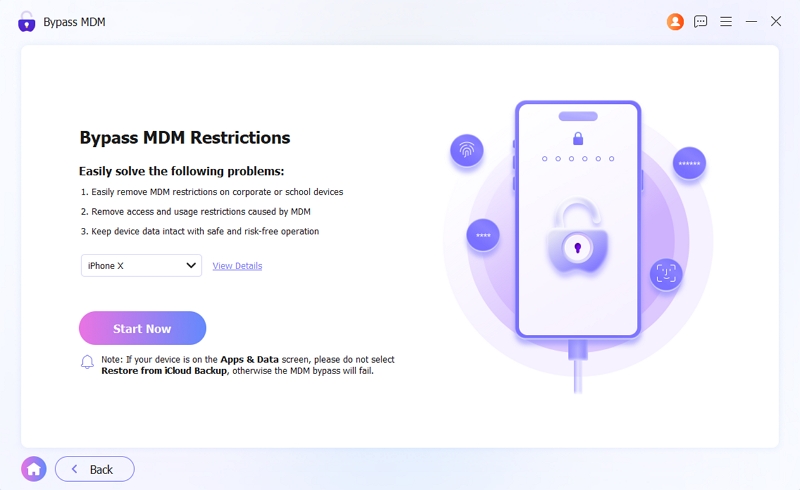
Bypass MDM Lock
If your iPhone or iPad is restricted by a company or school's MDM (Mobile Device Management) profile, use this mode to bypass the Remote Management screen and regain full control of your device.
Note:
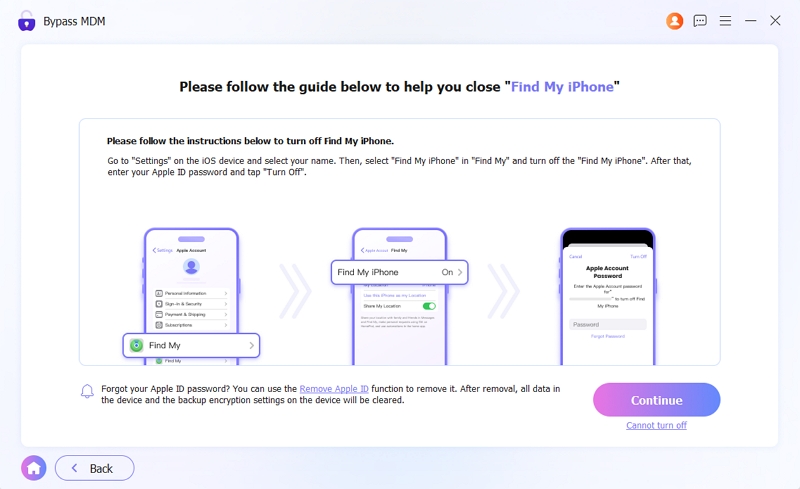
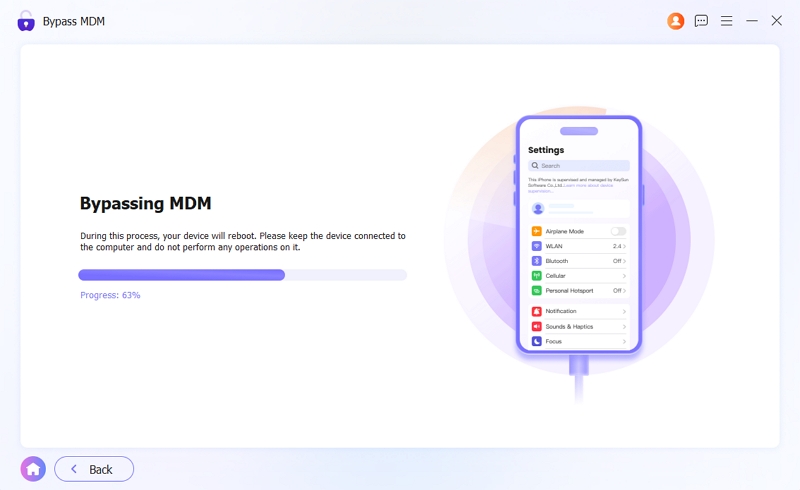
- You will be required to turn off "Find My" during the process.
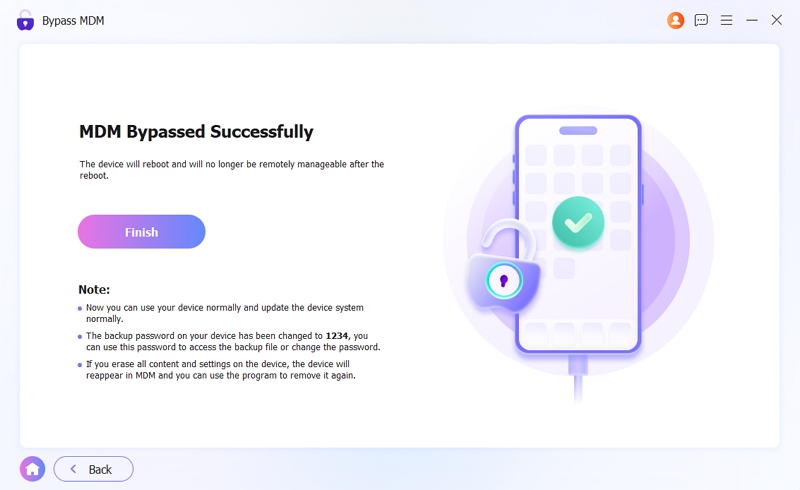
- To facilitate the bypass, your iTunes/Finder backup password will be temporarily set to "1234". You can customize or change this password once the process is complete.
Select "Bypass MDM" from the dashboard and connect your device to the computer.
Once recognized, click "Start Now".
Eassiy will automatically detect the "Find My" status on your device:
- If OFF: The MDM bypass will begin immediately.
- If ON: Go to Settings > [Your Name] > Find My on your device to turn it off. Once disabled, click "Continue" in the software to proceed.
Eassiy will now bypass the MDM restrictions. Your device will automatically restart.
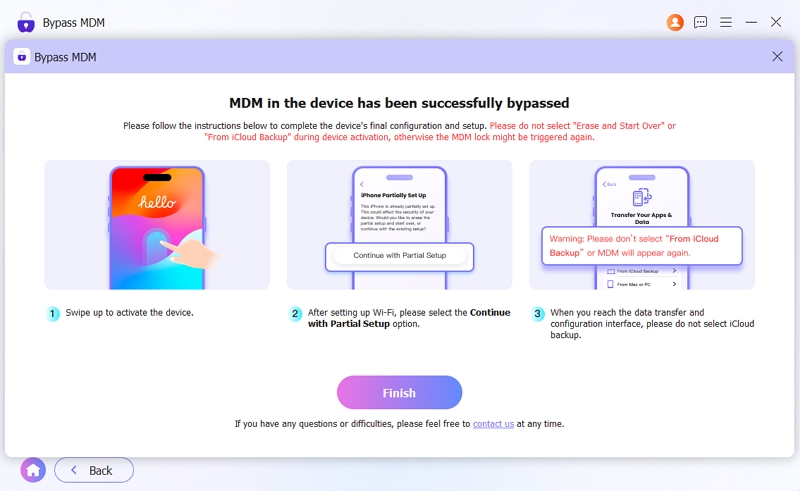
Once your device restarts, follow the on-screen setup assistant to configure your settings.
Once finished, you can enjoy a unrestricted iPhone/iPad experience.
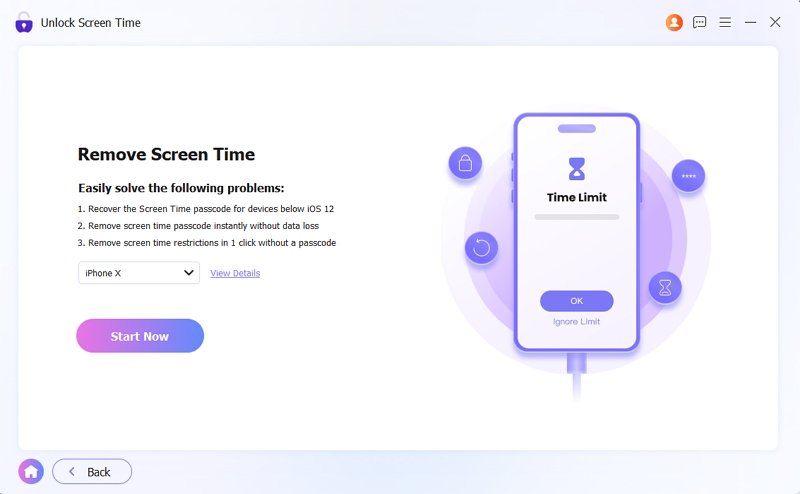
Remove Screen Time Passcode
Use this specialized feature to bypass or remove Screen Time passcodes on any iPhone, iPad, or iPod touch. Most importantly, you can regain control over app limits and restrictions without losing any of your personal data.
Select "Unlock Screen Time" from the main dashboard and connect your iOS device to the computer using a USB cable.
To ensure a successful unlock, identify how the Screen Time passcode was originally created:
- Set up directly on the device: Choose this if the passcode was created manually on this specific device.
- Through Family settings: Select this if the passcode was set up and managed by a family organizer from a different device.
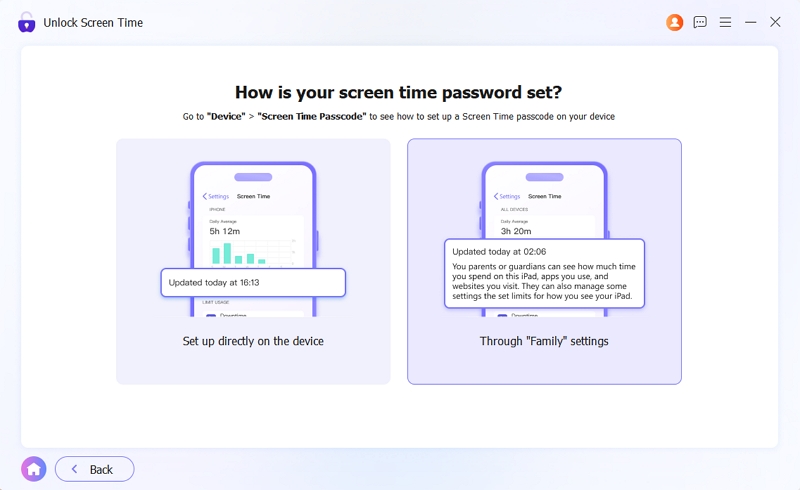
After making your selection, click "Start Now" to proceed.
Scenario A: For passcodes set up directly on the device
Turn Off Find My: You must first disable "Find My" on your iPhone or iPad. (Navigate to Settings > [Your Name] > Find My and toggle it OFF).
Once deactivated, return to the software and click "Continue" at the bottom-right corner.

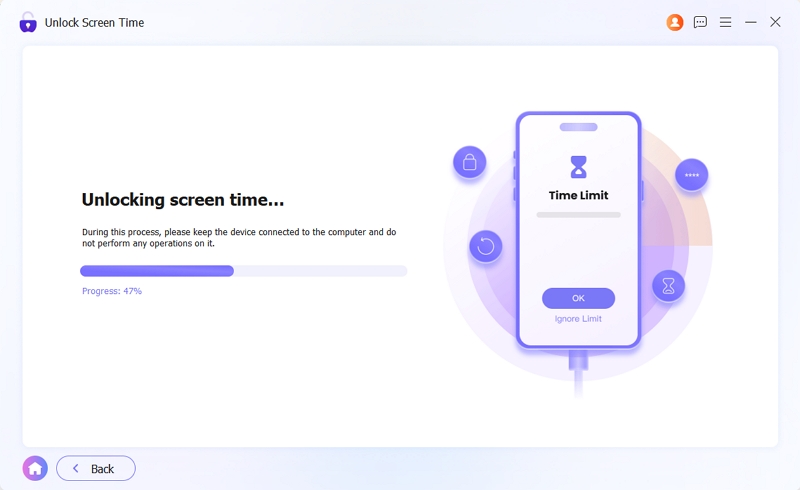
The Screen Time passcode will be cleared within minutes.
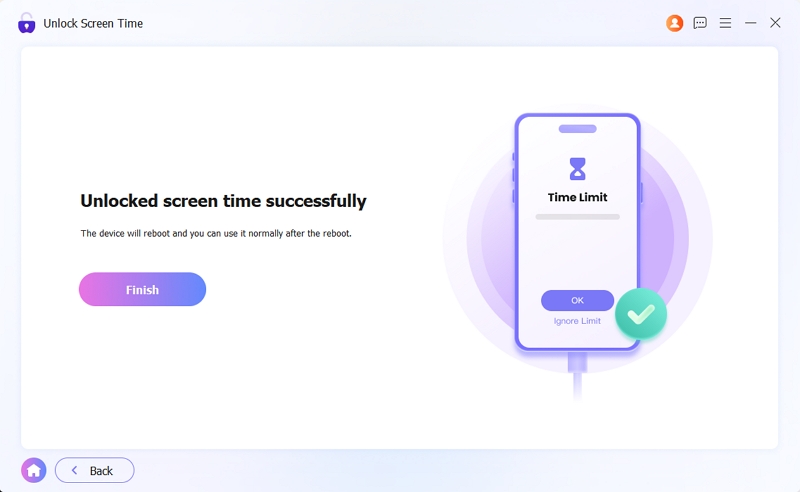
Your device will restart, and you can use it normally once the process is complete.
Scenario B: For passcodes managed via Family Sharing
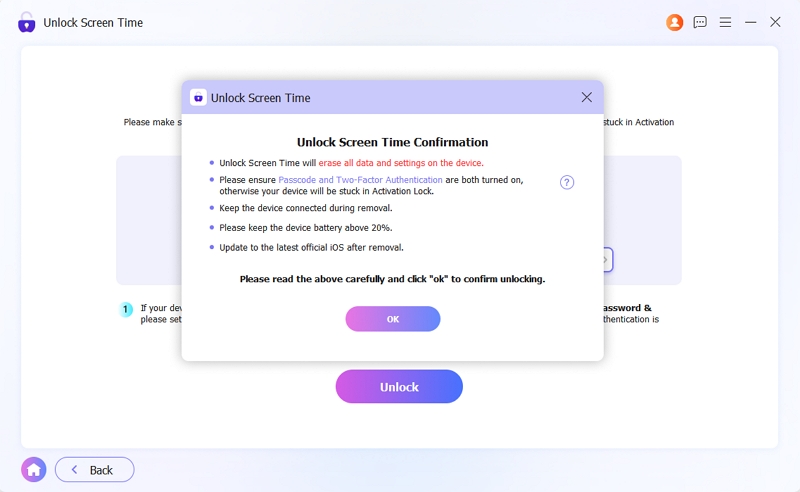
Ensure that a Screen Passcode and Two-Factor Authentication (2FA) are currently enabled on your device.
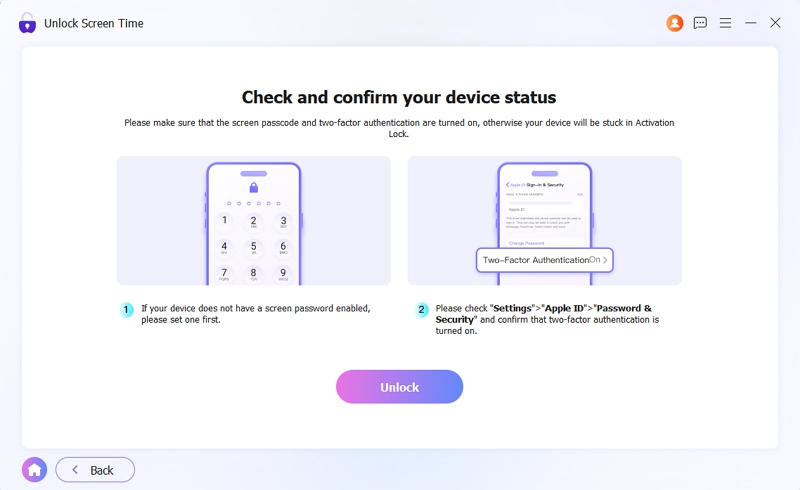
Carefully read the on-screen prompts, then click "OK" to initiate the process.
Eassiy will remove the Screen Time passcode from your device shortly.
Remove SIM Lock
This feature allows you to bypass carrier limitations and remove SIM locks without data loss. Please ensure your device meets the following requirements before proceeding:
- Supports iPhone 5s through iPhone X running iOS 12.0 to 14.8.1.
- Devices with a blocked IMEI or those on a carrier blacklist are not supported.
- Device jailbreaking and disabling "Find My" are required for this process.
- Avoid factory resetting or flashing your device, as the SIM lock may reappear. If it does, simply run Eassiy again to restore the unlock.
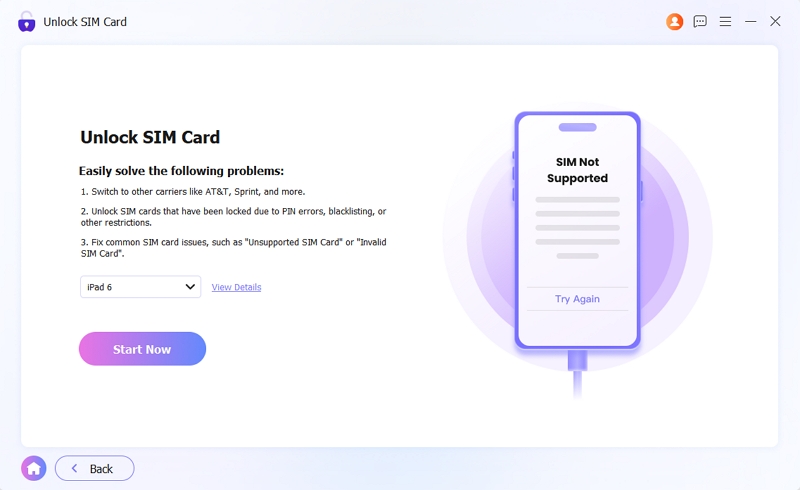
On the main dashboard, locate and select the "Remove SIM Lock" module.
Connect your iPhone to your PC or Mac using a USB cable, then click "Start Now".
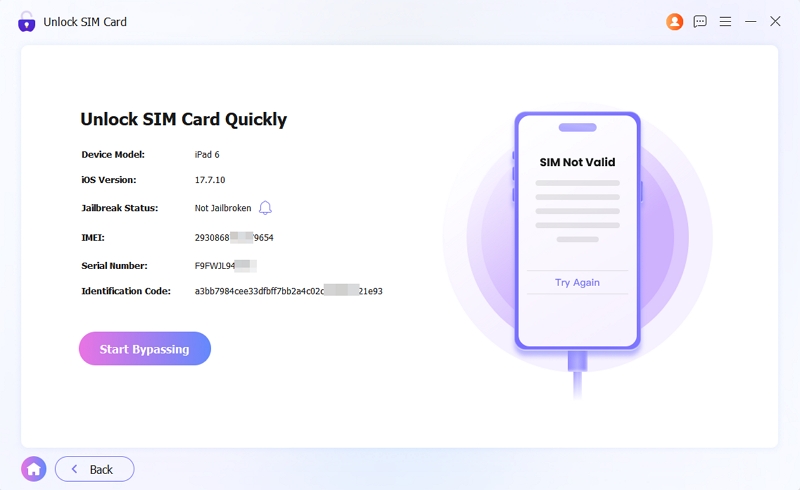
Eassiy will automatically scan and detect your device’s status. Carefully review the displayed specifications to ensure they match your hardware. Once verified, click "Start Bypassing".
Click the "Jailbreak Tutorial" button and follow the step-by-step instructions. Once the jailbreak is complete, restart Eassiy iPhone Access and select "Remove SIM Lock" again.
Note: If you used a different computer for the jailbreak, simply reconnect your device to this computer and click "Next" to continue.

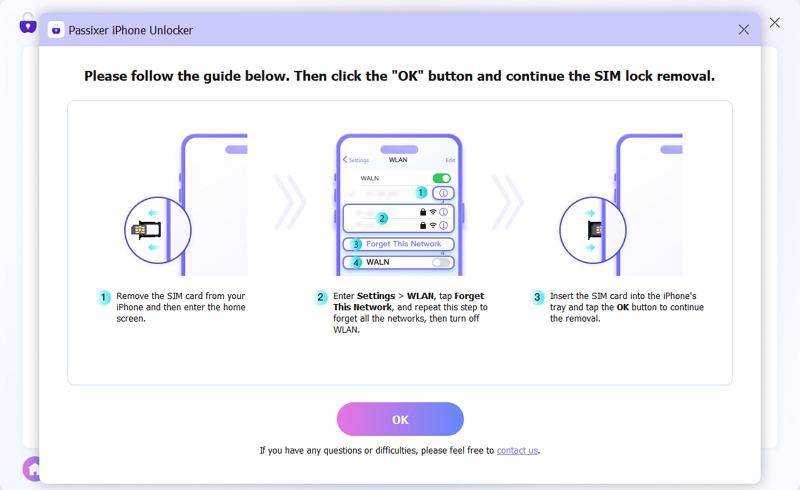
To ensure a successful bypass, please "Forget" all saved Wi-Fi networks in your iPhone Settings and toggle Wi-Fi OFF entirely.
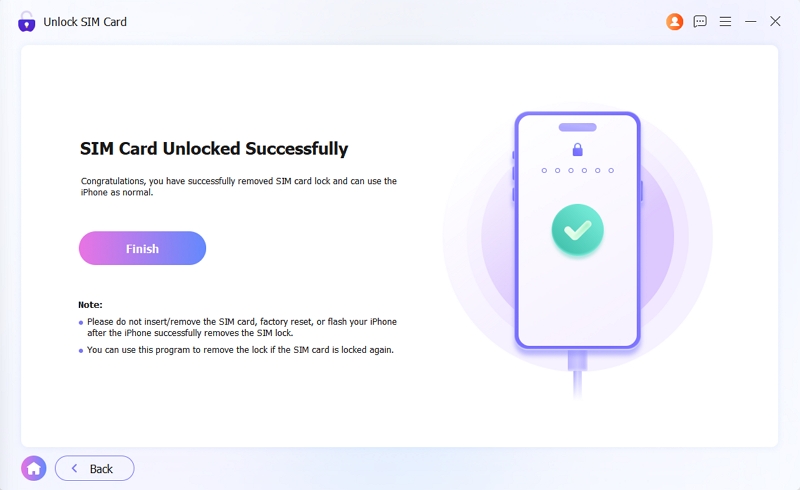
Eassiy will automatically initiate the removal process. Once finished, your iPhone will be unlocked, allowing you to use any SIM card from any carrier worldwide.
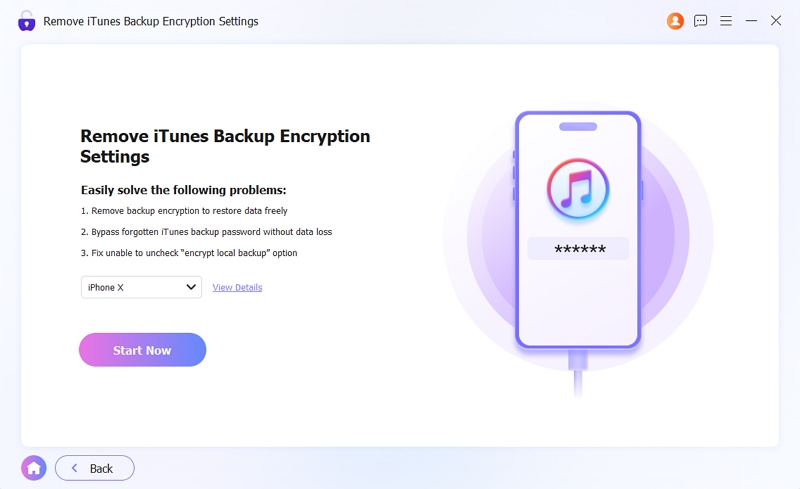
Remove iTunes Backup Encryption Settings
Eassiy iPhone Access provides a safe and reliable way to remove existing backup encryption settings, if you have forgotten your iTunes backup password. Once removed, you can reset your preferences and create a new backup password for future use.
Note: This process removes encryption settings for future backups only. Please be aware that existing backups will remain encrypted and cannot be accessed without their original passwords.
Select "Remove iTunes Backup Encryption Settings" from the main dashboard. Connect your iPhone to the computer using a USB cable.
Click "Start Now" to initiate the process.
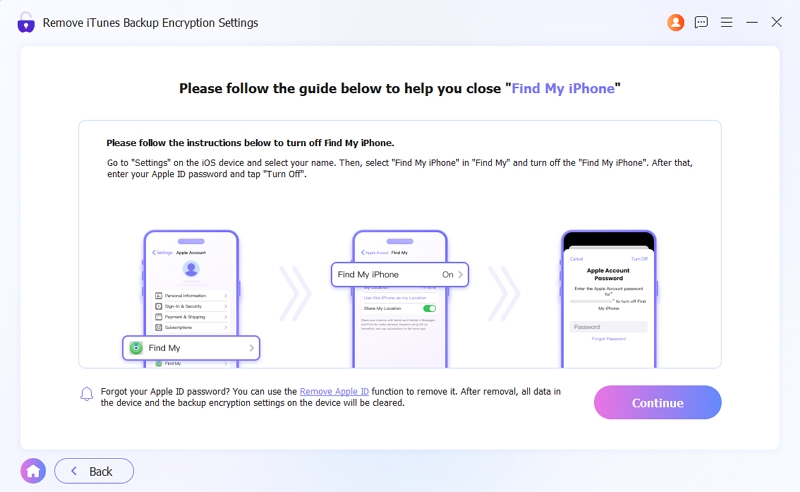
You will be prompted to turn off "Find My" on your device (Settings > [Your Name] > Find My). Once disabled, click "Continue" to proceed.
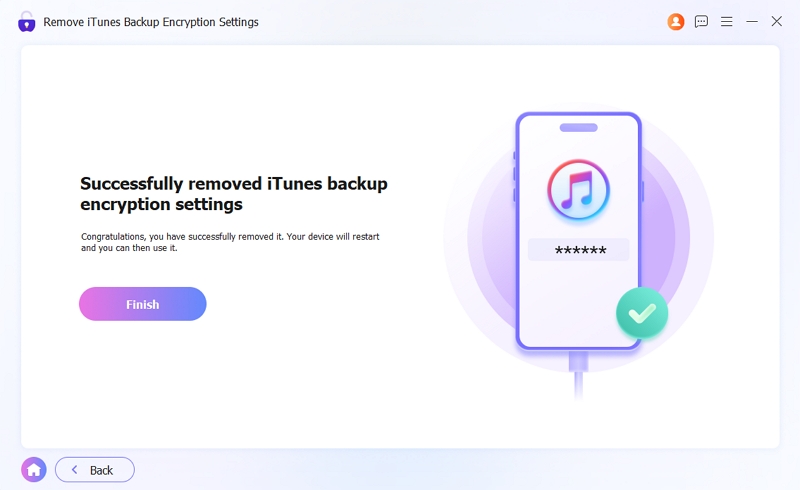
Eassiy will securely wipe the iTunes backup encryption settings from your device. Once the removal is complete, your iPhone will automatically restart. You can now create a new backup password during your next iTunes or Finder synchronization.