






 Help Center
Updated on 2026-07-06
views
5min read
You just hit the Stop Recording button after finishing a 3-hour tutorial and now you're wondering: where does OBS save recordings? This guide will help you find that folder, whether you’re on Windows, Mac, Linux and Ubuntu. We'll also show you how to change the default save location, so OBS records directly to an external drive. If OBS fails to save your recording or crashes, producing a corrupted file, we'll help you avoid those problems either.
Where Does OBS Save Recordings
For OBS to save a clip, you must have clicked the Start Recording button, not just Start Streaming. You can confirm that OBS is recording by looking for the red recording indicator at the bottom of the window.
So if you saw the red recording indicator, it is a confirmation that OBS was definitely recording and your video should have been saved successfully after you stopped the recording.
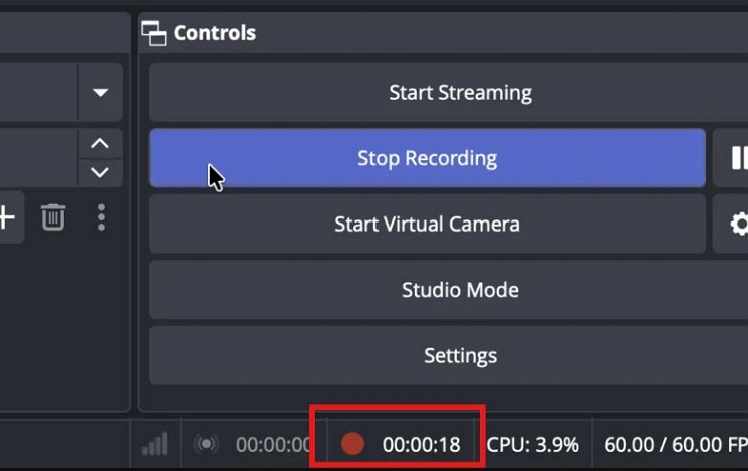
After that, the recording will be located in:
- The default OBS recordings folder, if you never changed the save location
- A custom folder, if you configured a different recording path earlier.
Here's exactly where to check in both cases.
Where Does OBS Save Recordings by Default
If you've never touched the recording settings and just used Start Recording and Stop Recording, your file lands in your OS's default video folder. Here's where that is on each platform.
On Windows 11 or Earlier
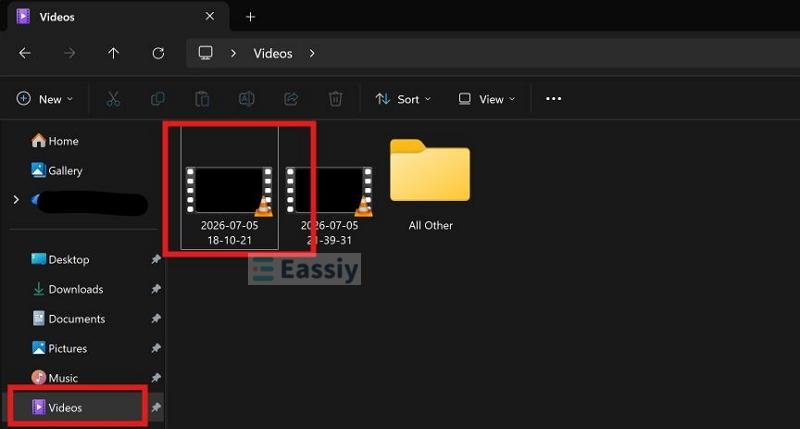
Default path: C:\Users\[your username]\Videos
Not sure of your username? Open the C drive, click Users and match the folder name to your account.
There’s also another way to get to the folder manually:
- Press Windows + E to open File Explorer.
- Then click Videos in the left sidebar (it's pinned there by default).
OBS just saves the video in the folder. So don’t look for any OBS-specific subfolder.
By default, OBS recordings are named by date and timestamp. For instance, if you created the recording on March 5, 2026, at 8:15 PM, look for the video title that shows 2026-03-05 20-15-33.mkv (or .mp4) to find the actual video.
On Mac
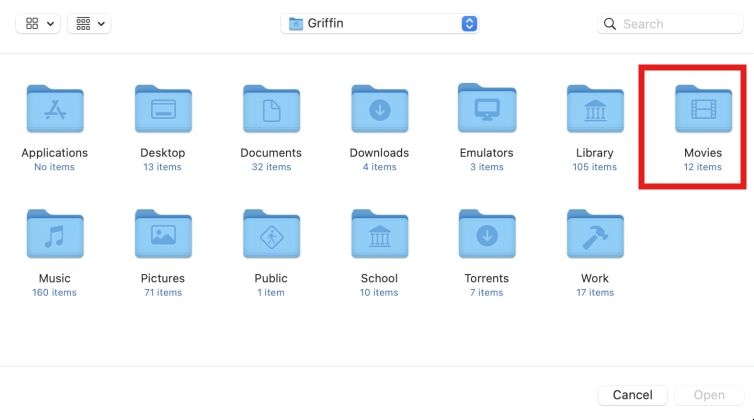
The default path is: Macintosh HD/Users/[your username]/Movies
You can also navigate to the folder manually. For this:
- Open Finder.
- Click Movies under Favorites in the sidebar.
Tip: If Movies isn't pinned under Favorites, press Shift + Command + H to open your home folder and then click Movies.
On Linux
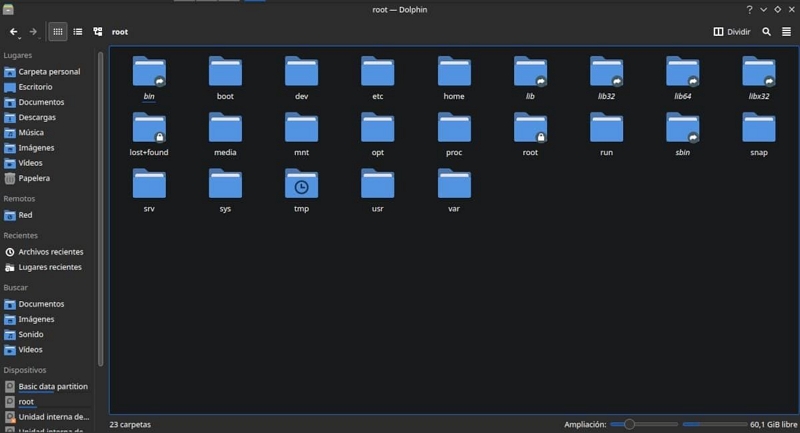
Even on Linux, OBS follows the standard Linux desktop conventions. So, the default system path where the OBS recordings are saved is: /home/[your username]/Videos
However, depending on your distro and file manager, this folder might be labeled as:
- Videos
- Video
- Or it will just be inside your Home directory.
On Ubuntu
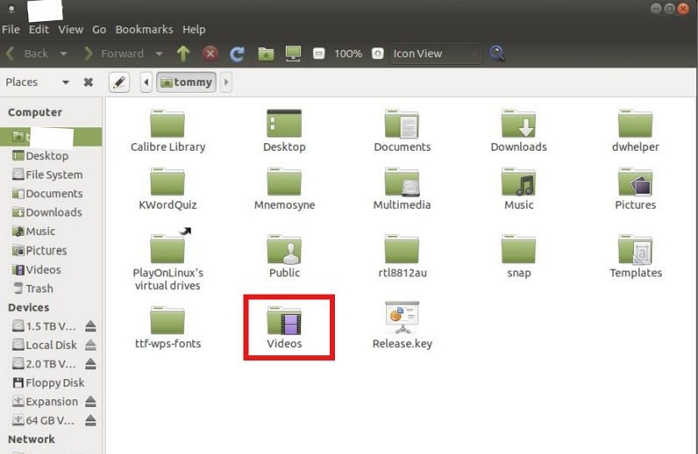
Ubuntu follows the same convention as other Linux distros: /home/[your username]/Videos
Or you can navigate manually:
- Open the Files app.
- Select Videos from the sidebar. The recordings will be sitting there.
How to Find Where OBS Recordings Are Saved After Changing the Location
If you've previously pointed OBS to an external SSD or another custom folder, your recordings won't be in the default folder above. If you don’t remember the location, here’s how you can find out. You can follow the same steps regardless of your OS.
Way 1. Via Show Recordings Option
- Open OBS.
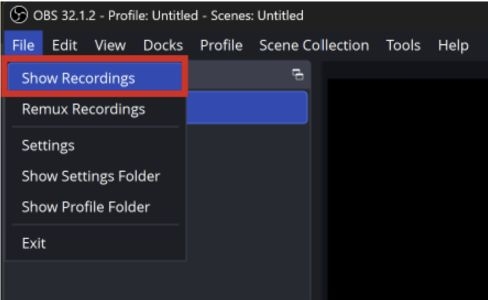
- In the upper pane, click File > Show Recordings.
That’s it! OBS will take you straight to the current save folder, with your most recent recording already highlighted.
Way 2. Check Recording Path
You can also check the recording path and manually navigate to the folder:
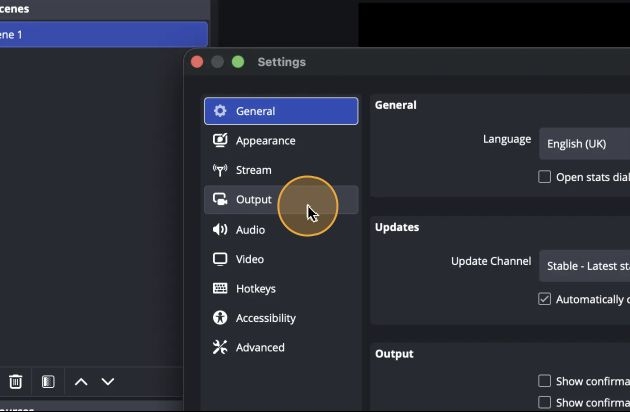
- Open OBS. Go to Settings > Output.
- Scroll to the Recording section to find the Recording Path.
- Click Browse to open that folder directly or copy the path and paste it into File Explorer (Windows), Finder (Mac) or Files (Ubuntu/Linux).
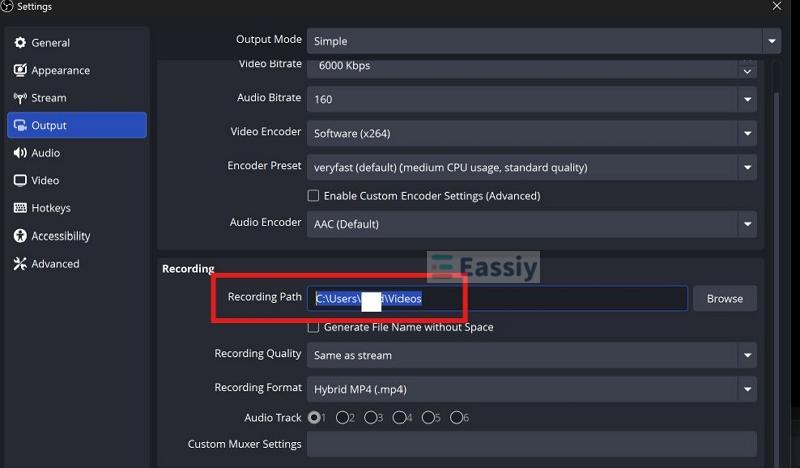
How to Change OBS Folder Location
- Go to Settings > Output > Recording Path.
- Then click Browse next to it. You can point to an existing folder or create a new one on your computer’s drive or even an external one. After that, hit Apply. From now on, every future recording will be saved to the new location.
Keep in mind that if you choose the recording path to the external drive, don’t disconnect it. If it gets disconnected, OBS will refuse to record. So in that scenario, you can just reconnect the drive or point OBS to a valid folder on your computer again.
Why Did My OBS Recording Disappear
If a recording seems to have vanished, it's almost always one of a handful of predictable reasons but not something actually gone wrong with your files.
First, double-check the obvious cause: did you actually click “Start Recording” or just “Start Streaming”? If you did hit the correct button but OBS didn’t save the clip, here's what's likely going on. In some cases, you can track down the recorded file. However, if it was a glitch and OBS didn’t save at that time, these fixes will at least help prevent that behavior from happening again.
| Reason | Why It Happens | How to Fix |
|---|---|---|
| You changed the recording folder a while back and forgot | Easy to lose track of your recordings, especially if you'd pointed it to an external SSD or hard drive at some point |
|
| OBS got stuck on "Stopping Recording..." | Common with MP4 output. OBS needs time to finalize the file, especially with longer recordings or multiple audio tracks |
Don't force-close OBS. Wait for the message to clear, then go to File > Show Recordings. Plus, recording in MKV will avoid this entirely. |
| OBS crashed before the recording finished | MP4 files can end up corrupted or unreadable if OBS closes unexpectedly mid-recording. This is why OBS developers recommend MKV. |
You can set your recording format to MKV under Settings > Output. Remux to MP4 afterward if you need that format. |
| You're using multiple OBS profiles | Each profile keeps its own independent settings, including its own recording path | Check which profile was active in the top menu. Then look up its path under Settings > Output > Recording Path. |
| Replay Buffer was on instead of standard recording | Replay Buffer only holds footage temporarily in memory. And nothing will save to disk unless you press the save hotkey |
|
| Your drive ran out of space | Long recordings, high bitrates, or lossless formats will fill up storage fast. Once space runs out, OBS will simply stop writing. So you will end up with a corrupted file. |
Free up space or move your recording path to a drive with more room. |
Ultimate Fix to OBS Recordings Disappear
If your OBS recordings keep going missing and you can’t or don’t want to fix the issue, switching to a better alternative to OBS, like Eassiy Screen Recorder Ultimate is a good option. Eassiy is designed to simplify the recording process, whether you're creating tutorials, capturing gameplay, or recording your screen for presentations. Unlike OBS, you don’t need to set up scenes, sources, and profiles before you start the recording. Meanwhile, Eassiy will prompt you to set an output destination before saving the recordings. It also gives you advanced features to record the screen the way you want, without causing any problems. For instance, let’s start with the recording feature itself. You’re not locked into recording the full screen or a fixed window. Eassiy allows you to set a custom region and record only that region. There are also advanced recording modes, such as Game Recorder and Window Recorder.
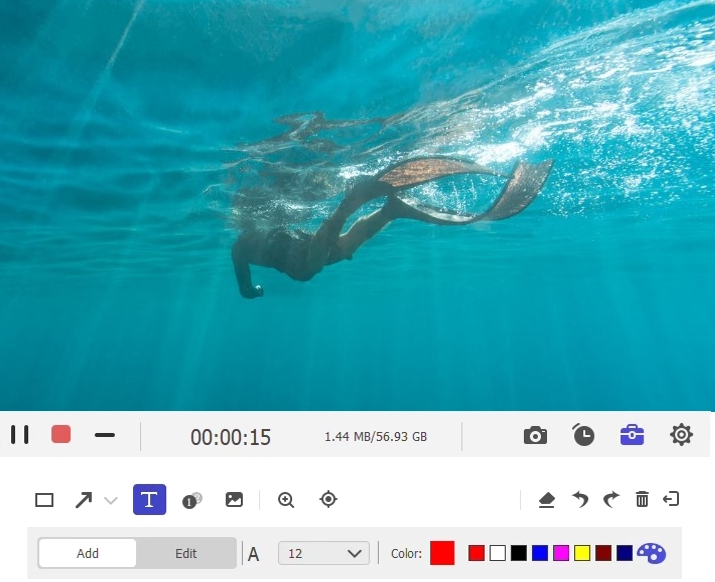
Eassiy also features stuff that OBS doesn’t really touch at all. There’s real-time annotation that lets you mark up the screen as you record and it comes in handy for tutorials. Besides, you can schedule your recordings to precisely capture what you want.
Key Features:
- Dedicated recorders for screen, game, webcam, window, and audio, each built for that specific job.
- Custom recording area: fixed region, follow-mouse, or around-mouse framing.
- Schedule recordings and set auto-stop by time or file size, so nothing runs unattended.
- Real-time annotation while recording, plus built-in trim, merge, and compress tools afterward.
- Record microphone and system sound together or separately, with noise cancellation built in.
- Connect and record a phone’s screen (Android or iPhone, internal audio included) directly alongside your computer screen.
How to Record Screen on Windows PC or Mac
Step 1. Download and install Eassiy Screen Recorder Ultimate for your Windows PC or Mac.
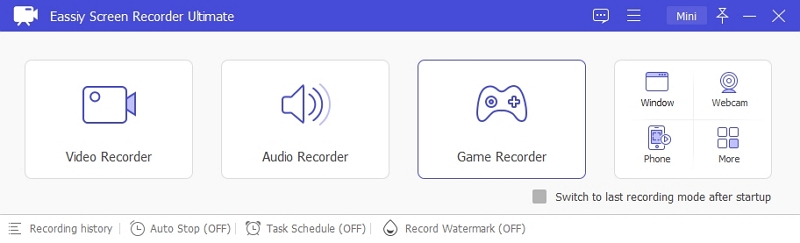
Step 2. Select Video Recorder from the main interface.
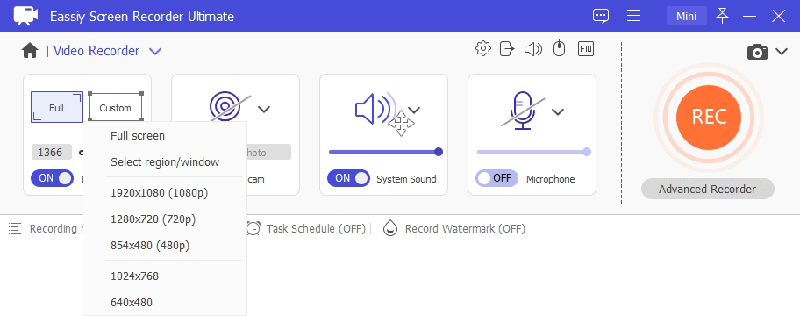
Step 3. Set your recording area — full screen or a custom region. If you want your webcam included, turn it on and select your camera from the drop-down. You can adjust its position, style, and transparency under Settings.
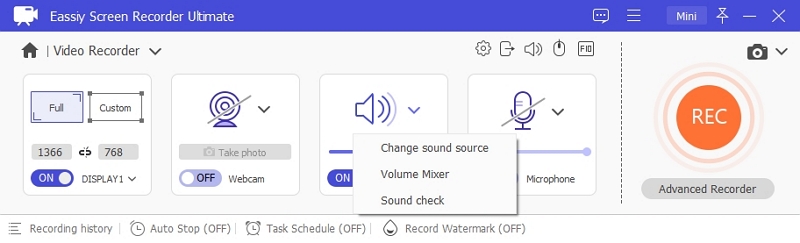
Step 4. Turn on your audio sources — system sound, microphone, or both, depending on what you want in the final recording.
Step 5. Click the orange REC button to start. When you’re finished, click Stop.
You can save it manually or share it directly to social channels.
FAQ: How to Save OBS Recordings as MP4
On Windows and Linux, OBS already defaults to a format called Hybrid MP4. And Mac defaults to its own equivalent, Hybrid MOV.
Standard, plain MPEG-4 (.mp4) is still an option in the Recording Format drop-down on all OS, but it's not recommended for use with OBS. The problem with plain MP4 comes down to how the format is built. Its file index — the part that tells a player where every frame lives, only gets written once the recording is finished. That is, when you hit the Stop Recording button.
So if OBS crashes, your PC loses power, or the drive fills up mid-recording, that index will never get written and the file will become unplayable. The video file will be corrupted and you cannot fix it.
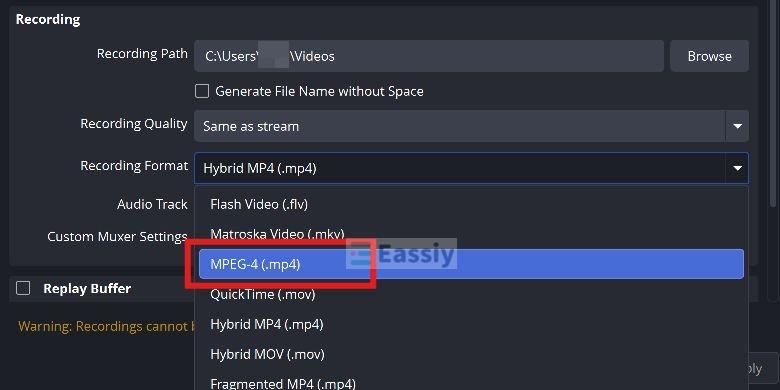
OBS gives you a couple of ways around this:
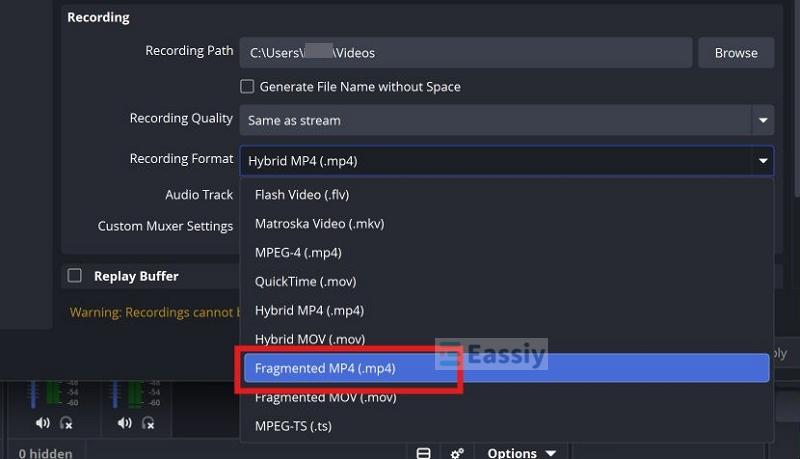
- Choose Fragmented MP4/MOV. This writes the file in self-contained chunks as you record. So if something goes wrong, everything up to the last completed chunk will survive. The trade-off is compatibility — some file browsers won't show an accurate duration for these files and older editors will refuse to open them properly.
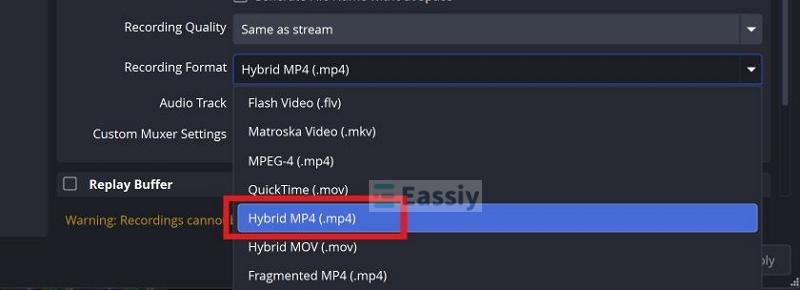
- Hybrid MP4 (Windows/Linux)/Hybrid MOV (Mac). This is the .mp4 you should use. And it’s the current default. It records as a fragmented file internally for that same crash protection, but it will quickly rewrite the file header of all fragments the moment you stop capturing. So the finished video file will look and behave exactly like a standard MP4 or MOV everywhere — editors, YouTube, QuickTime, all of it. Put simply, you will get MKV-level safety without having to manually use the Remux Recording option for MP4 compatibility.
The other route, although older, is to record in MKV, then convert it afterward. For instance, the MKV container doesn’t need finalizing as an MP4 container does. So, even when an OBS recording gets cut off mid-session, it will stay fully playable. To convert MKV to MP4,
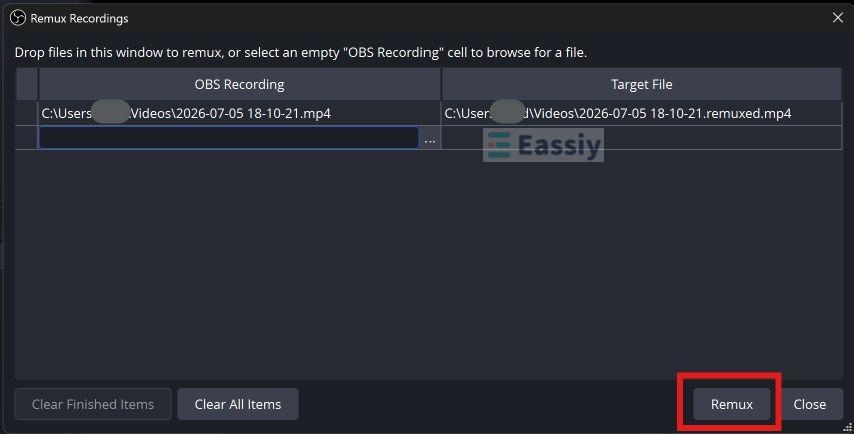
- Go to File > Remux Recordings.
- Select the MKV file.
- OBS will convert it to MP4 in seconds.
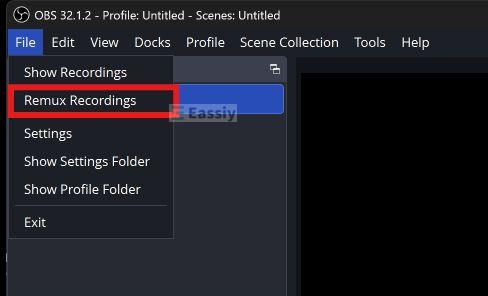
Keep in mind that this isn't re-encoding. When you select the Remux Recording option, OBS will keep the exact video and audio streams and just repackage them into a different container. So there's zero quality loss either way.
Final Words
Now you know where OBS actually saves your recordings, whether on Windows, Mac, Linux, or Ubuntu. And you even know how to fix things when a recording goes missing or the file won't open.
Also, if you just use OBS for screen recording, a dedicated tool like Eassiy Screen Recorder Ultimate is a better choice. It gives you flexible recording modes and built-in annotation tools in one place — things that would normally take two or three separate apps alongside OBS to pull off. And running many tools at once eats up your system resources fast. So you can avoid all that by using Eassiy.