
Updated on 2026-07-03
views
5min read
From building your dream house to capturing your Sim’s graduation party, the Sims 4 is all about creating moments worth remembering and screenshotting. So, it’s always helpful to learn the best tips and tricks to capture those scenes, not just with built-in tools but also with more advanced methods.
In this guide, we’ll show you how to take Sims 4 screenshots, whether you’re on Windows, macOS, or even consoles like Xbox or PlayStation 4/5. You’ll also get the way to capture clean yet aesthetic shots, remove HUD elements and improve your image quality.
And of course, we’ll also touch on recording video clips in Sims 4 for creating tutorials or reaction videos using professional-grade tools like Eassiy Screen Recorder Ultimate.

How to Take Sims 4 Screenshots on PC/Mac
You have multiple ways to capture moments on both Windows and macOS. There’s Sims 4’s built-in system, but that’s just the start. From advanced tools to Cinematic Mode shortcuts, this section covers every method worth knowing for capturing advanced screenshots in the Sims 4.
Way 1. Via Sims 4 Panel
You can use the dedicated built-in Camera Panel for taking in-game screenshots. The good thing about this method is that you can manually click without needing to remember any hotkeys.
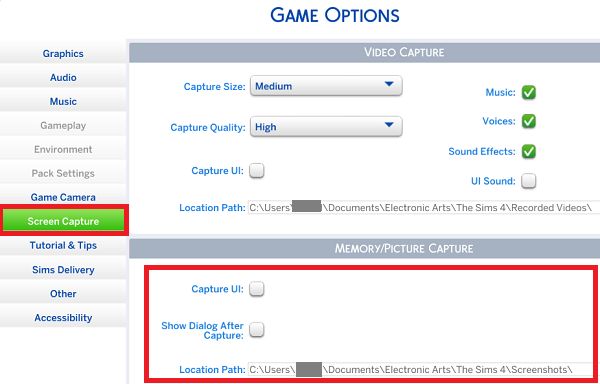
Keep in mind that all the game pictures you take will include HUD elements and other game menus. To take a cleaner screenshot, go to Game Options, select Screen Capture, uncheck the Capture UI option and other things you needn’t, and apply the changes.
Then, follow these steps to capture your image using the Sims 4 built-in panel:
Step 1. Hover your mouse over the Camera Wheel in the Live Mode Control Panel.
Step 2. From the list, click the Photo Camera Icon to take a screenshot.

Step 3. After capturing, you will see a small notification at the top right corner confirming that your screenshot was saved.

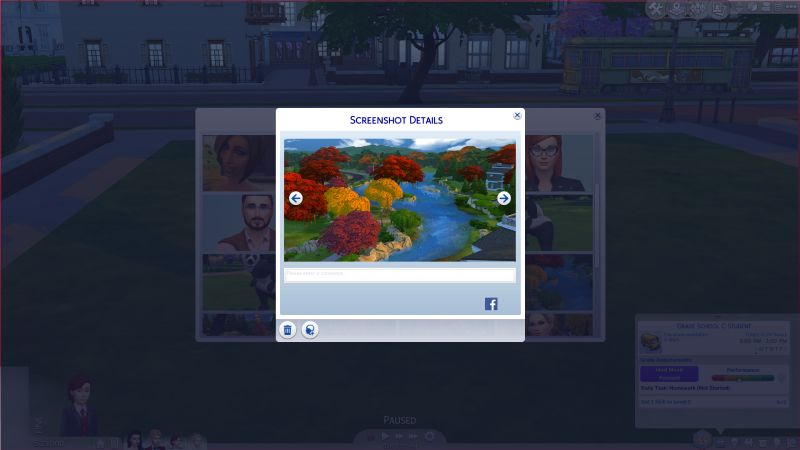
Step 4. From the same Camera panel, you can also open the Capture Manager, where you can review, delete, and even share screenshots to your social media linked to the game.
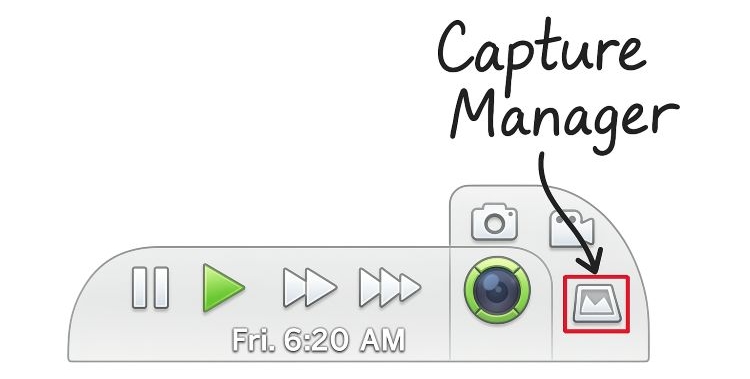
Step 5. Inside the Capture Manager, you can view all your saved screenshots and share them if needed using the built-in options.
Way 2. Press C Button
If you prefer speed over setup, Sims 4 offers a one-button solution: simply press C on your keyboard to instantly snap a screen capture. That’s the default hotkey—C for Camera, making it super easy to remember while playing.
The best part about using this shortcut is that you won’t even see a pop-up or notification. The in-game photo is quietly saved in the background and you can view it later through the Capture Manager.
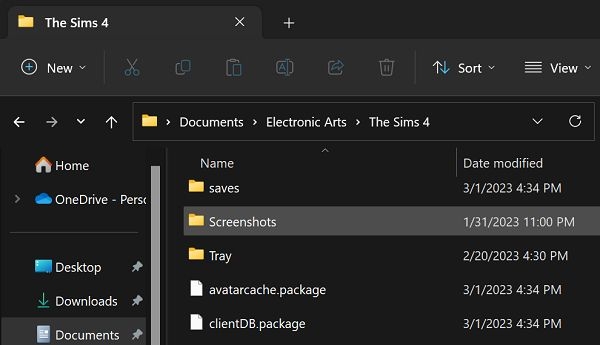
To find Sims 4 screen captures manually on your Mac or Windows device, navigate to Documents > Electronic Arts > The Sims 4 > Screenshots.
Way 3. Through Shortcuts
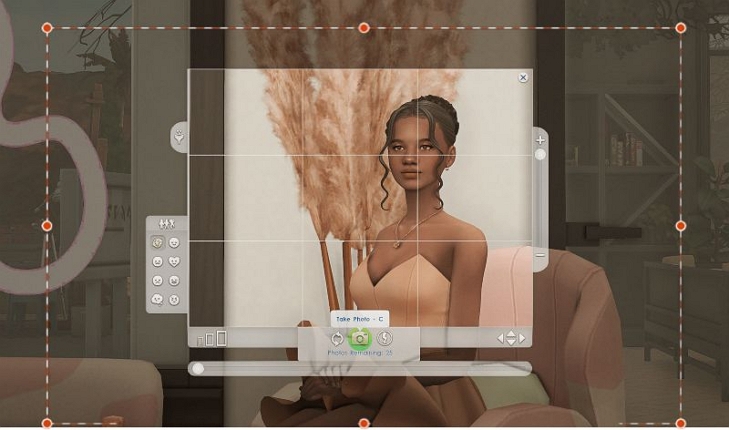
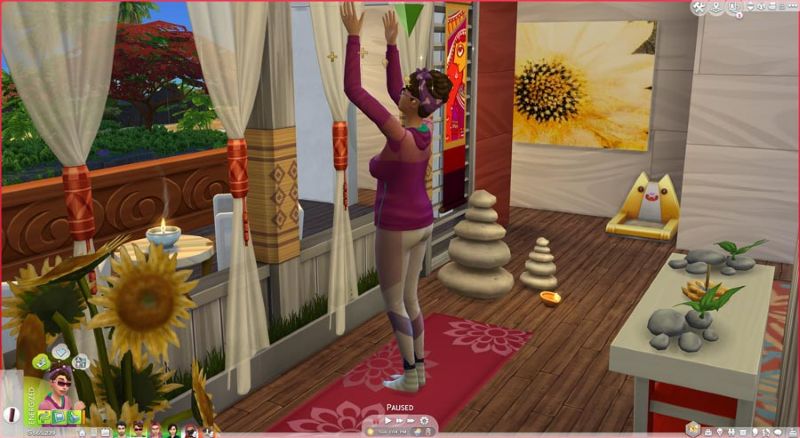
For capturing professional-looking in-game photos or screenshots, such as cinematic shots and carefully framed scenes without HUD elements, you can use keyboard shortcuts. They work on both the PC and Mac versions of the Sims 4.
One of the best ways to take clean, cinematic screenshots is by using Free Camera Mode: Press the Tab key in live mode to enter Cameraman Mode. All HUD elements will instantly disappear, giving you a clear view of what is about to be captured.
You can now move the camera freely across the world:
- Use W, A, S, D keys to move forward, left, backward, and right as you usually control your Sim.
- Press Q to lower the camera and E to raise it vertically.
- Use Z and X to zoom in or out depending on your framing needs.
Once you have the perfect angle, press C to capture your image.
For more control, you can save specific camera angles by holding Control + 5, 6, 7, 8, or 9. Later, you can press the assigned number instantly and return you to that exact camera position.

Way 4. Use Specialized Screen Capture Software
Eassiy Screen Recorder Ultimate is the most popular choice among Simmers because of its powerful and easy-to-use screen capturing features. It gives you full freedom to grab anything you want during your gameplay.
You can take full-screen photos of your entire Sims 4 world, or snap a single window like the Build Mode menu, or capture just a small part of your screen, like a close shot of your Sim’s face or a new item you placed in the room.
If you want to capture more than what fits on one screen, there is the Scrolling Capture mode, which lets you move around the world view and take a long, continuous screenshot of your entire neighborhood or house.
Another rare bonus: you can even create GIFs and animations directly from your Sims gameplay, something you won’t hard to find in other screenshot tools.
Eassiy also gives you powerful editing and annotations tools. For instance, you can blur out private parts of the image, highlight important areas like a Sim’s new outfit, draw arrows to point at something, or add quick text labels before you share your screenshots with friends.
Eassiy Screen Recorder Ultimate
An all-in-one tool for smart screen recording, effortless interface capturing, and powerful editing features.
Key Features
- 10+ Professional-Grade Tools, including a full professional screen and webcam recorder to capture detailed gameplay sessions or tutorials.
- Save your screenshots in multiple formats, including PNG, JPG, JPEG, BMP (Bitmap), GIF, or TIFF, depending on your needs.
- Set up dedicated hotkeys for each type of screenshot you want to take.
- Capture things like error codes, menu settings, in-game overlays, or anything that pops up mid-session without missing a frame.
How to Take a Screenshot in Sims 4
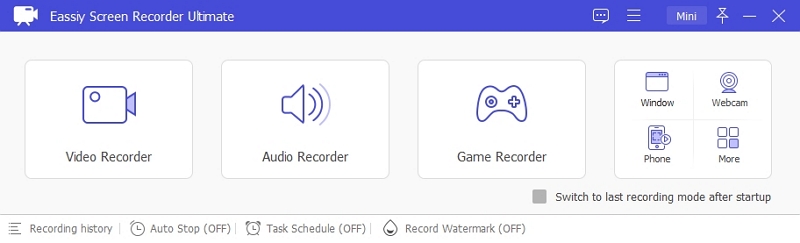
Step 1. Click the installer above to set up Eassiy Screen Recorder Ultimate on your Windows or Mac. Once installed, launch the program.
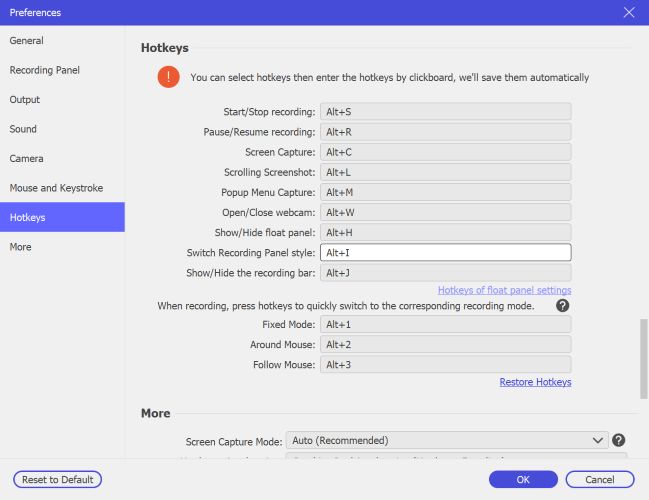
Optional Step. Tap the hamburger menu, select Preferences, and head to the Hotkeys tab. Assign shortcuts for scrolling captures, pop-up menus, or full screen grabs, whatever you’ll need during Sims 4 gameplay.
Step 2. Use the hotkey (Alt + C by default) to capture a regular screenshot, whether you're in live mode, browsing interface menus, or adjusting camera angles. For broader needs, you can try Scrolling Screenshot (Alt + L) or Pop-up Menu Capture (Alt + M) when relevant.
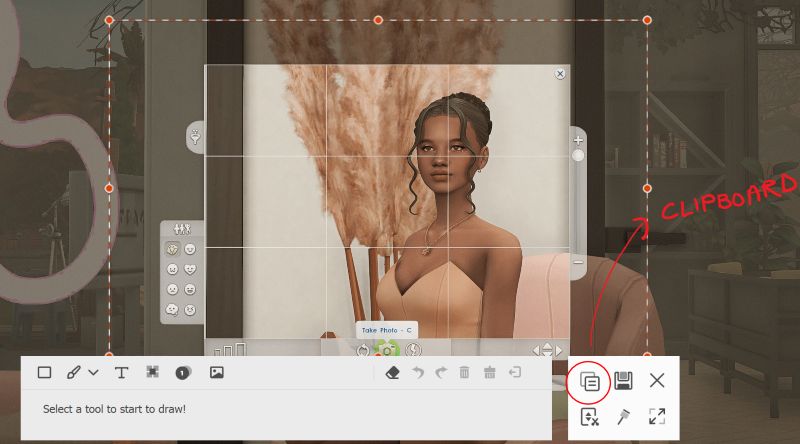
Step 3. Once captured, you can even instantly annotate the image and copy it directly to your clipboard to send it through Discord or any other social platform.
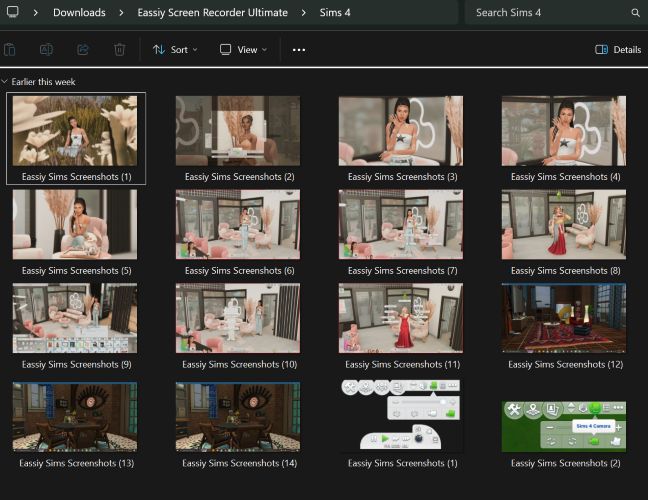
All screenshots are saved automatically in your Downloads directory in your chosen format, such as PNG, JPG, BMP, GIF, or TIFF. Therefore, everything is ready to use without conversion.
Tip: If you are encountering "GeForce Experience Error Code 0x0003" error and can't use it to capture your game screen, Eassiy Screen Recorder Ultimate can also help.
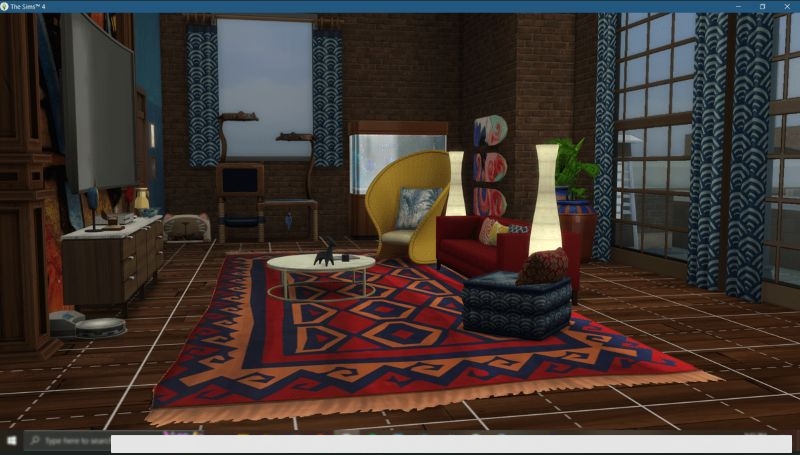
Way 5. Apply System-Inbuilt Screen Capture Tools
Your operating system itself provides built-in screenshot tools, making it easy to capture outside elements, like the game's main menu, map view or CAS (Create-a-Sim) screen. Again, something that the Sims 4 camera does not capture.
Plus, these OS-level tools come in handy when you want to share something via Discord or any messaging platform without digging into folders or the Capture Manager. Here’s how you can use them.
On PC
Windows offers several convenient ways to take screenshots.
The simplest is to press Windows Key + Print Screen (Win + PrtSc) to save a full-screen screenshot automatically. If you prefer more control, press just Print Screen alone to open a selection tool where you can choose the part of the screen to capture.
For gaming specifically, pressing Alt + Print Screen. For using Game bar’s shortcut, press Win + Alt + PrtSc, which will take a quick snapshot of the active game window only without including your desktop or taskbar in the image.
On Mac
Mac also has robust built-in screenshot capabilities. The primary shortcuts are:
- Shift + Command (⌘) + 5: open the Screenshot Toolbar where you can capture the full screen, a selected window, record the screen, and choose where to save your images.
- Shift + ⌘ + 3: capture the entire screen or all screens if you have multiple monitors.
- Shift + Command (⌘) + 4: select a specific area to capture by dragging a rectangle with the crosshair.
How to Screenshot Sims 4 on PS4/PS5

While the Sims 4 on PS4 offers the same core gameplay experience, it misses one frustrating piece, the in-game camera panel.
For some reason, even now, the developers haven’t added it, which means you’ll need to rely on the console’s built-in screenshot tools instead. Thankfully, using the PS4’s controls is simple.
- You can still switch to Free Camera View for a cleaner no-UHD shot.
- Once in that mode, use the Up and X buttons to move the camera vertically and frame your scene just the way you like it.
- Then, press and hold the Share button on your PS4 DualShock controller for about a second to capture exactly what’s on screen.

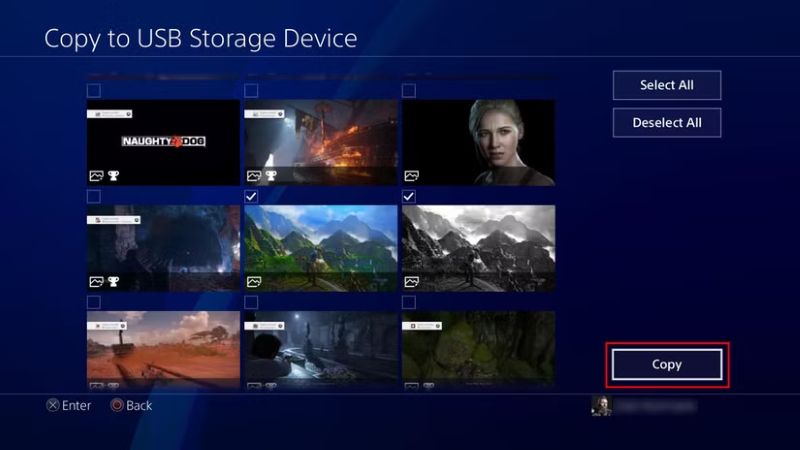
Your screenshot will be saved to the PS4’s Capture Gallery (not the in-game Capture Manager). From there, you can copy it to a USB drive or share it directly through your console.
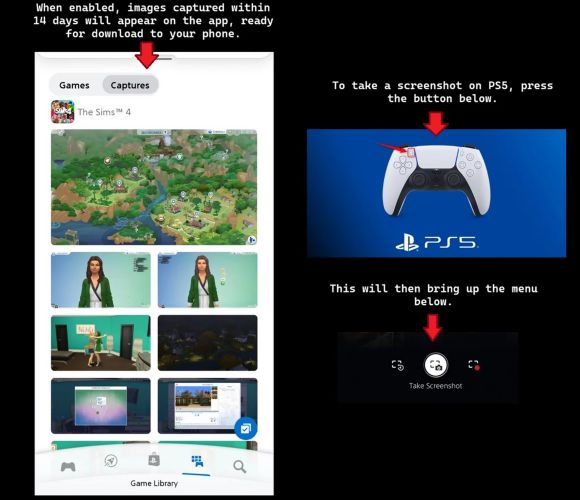
On PS5, the process is similar. Press the Create button and choose Take Screenshot from the on-screen menu. You can also enter Free Cam View if needed. If you have the PlayStation App installed on your phone, you can even enable Capture Sync to send your in-game shots directly to your phone for faster access.
How to Take Screenshots in Sims 4 on Xbox One
Xbox One is no different from PS4 when it comes to taking screenshots in the Sims 4, you’ll need to rely on the console’s built-in capture feature. You can still use the Free Camera View if you want a UI-free capture, but the process itself stays simple.
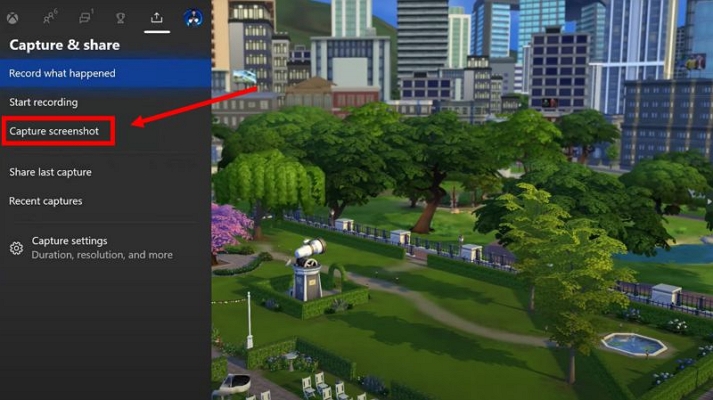
- During gameplay, when you want to capture a moment, press the Xbox button (the big lit-up logo in the center of the controller).
- This will open the Xbox Guide overlay and briefly pause the game.
- Next, press the Y button on the controller to instantly take a screenshot of the last game frame right before the overlay opens.
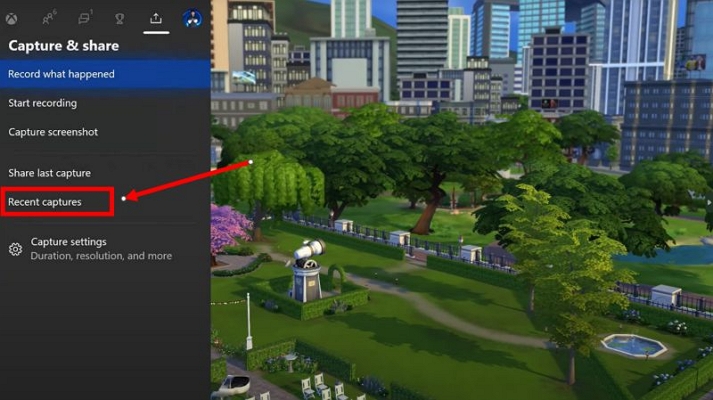
- The image will be saved to your Xbox storage. You can press Xbox button and select Recent Captures to see them. If you are online and have uploads enabled, it will also be automatically uploaded to Xbox Live for easy access across devices.

How to Capture a Video in Sims 4 on Computer
There are also special moments like your Sim’s graduation, a birthday party, or a candlelight dinner, which are better captured as moving action rather than a still image.
There are two main ways to record videos in Sims 4. Let’s look at both options in detail.
Way 1. Use V Button
The V button allows you to capture footage during live mode in the game. You can press V to start as well as stop the recording.
While easy to use, this method has limitations. It only saves files in AVI format and the video resolution is capped at 720p or 1080p. If you play at higher resolutions, the recording won’t match your screen quality.
That said, saved files can be viewed and shared from the Screenshot Manager inside the game or the Documents directory (Mac or Windows).
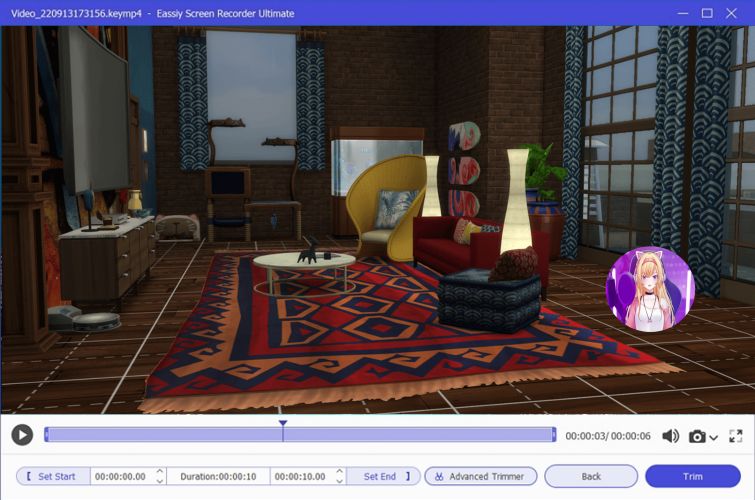
Way 2. Use Eassiy Screen Recorder Ultimate
Eassiy Screen Recorder Ultimate is a full-featured screen recording tool with 10+ recording tools, and screen capture is just one part of it.
Eassiy also has a dedicated Game Recorder mode that lets you record your Sims 4 gameplay in smooth 4K quality, no matter how long you play or what resolution you choose. It’s designed to run at an optimized speed and works well even with heavy yet power-hungry games.
However, Eassiy isn’t just about recording. You can also include your webcam feed and use your built-in mic to create tutorials, reaction videos, or simply share your play on YouTube. And if you only want clean, high-quality gameplay clips, that’s possible too. Whatever style you’re going for, Eassiy gives you everything you need to record Sims 4 exactly the way you want.
Wrap Up
We’ve covered a ton of ground: from built-in one-button snapshots to using advanced cinematic techniques within The Sims 4 itself. Taking screenshots and capturing Sim moments on PlayStation or Xbox will be much easier too, whether it’s a funny glitch, a perfect pose, or a full house tour.
And of course, Eassiy Screen Recorder Ultimate stands out as the best tool if you're a content creator, an aesthetic-loving Simmer, a storyteller, or someone building a massive screenshot library. You can do everything with Eassiy: record footage, capture stills, save in formats like GIF, BMP, or even annotate on the spot.
Happy Simming!