
Updated on 2023-02-07
views
5min read
Windows 10 includes several ways to screen capture that you’ll be surprised at how many options you have for completing such a basic task. And although all these native options to screen capture on Windows 10 are for taking snaps, all of them differ, especially with the end result. For context, the Snipping Tool allows you to annotate after taking a screenshot. At the same time, PrtScn saves the screenshot to the Pictures folder directly. Learn all the best methods to live screen capture on Windows 10. Plus — you will also learn how to take a full-screen or scrolling screen capture on Windows 10 using a third-party program.
Part 1: Screen Capture Windows 10 Using Built-in tools
Windows 10 and 11 provide numerous ways to screen capture on the PC. Plus, these methods will teach you to take different types of screenshots like saving the entire screen, saving the screen with drawing options, and saving a custom screen.
Method 1: Screen Capture Windows 10 with PrtScn Key
The simplest option to capture the PC screen is the “PrintScreen” key on your Windows computer. Generally labeled as “PrtScn” on the keyboard and located at the top amidst the Function keys, a single press will capture the entire screen and copy the image to the clipboard. Note that on some computers, mostly laptops running Windows, you will have to trigger the PrintScreen key using the Function key. This means you will have to press the Function key + PrtScn simultaneously.
There are other PrintScreen variations to screen capture Windows 10:
- Alt+PrtScn: Pressing the Alt and PrtSc keys simultaneously will copy the active window on Windows 10 to the clipboard. You can use the Ctrl+V function to save the image to a program or folder.
- PrtSc (or Fn+PrtScn): This command will capture the entire PC screen and copy the image to the clipboard. You can paste the copied image to a program that supports images, like Word, PowerPoint, or Microsoft Paint.
- Windows key+Shift+S: Pressing these three keys simultaneously will dim the screen and present a cursor. Using the cursor, you can select the desired part on the screen. As soon as you stop dragging the cursor, the picture will be saved to the “Pictures” folder automatically.
- Windows key+PrtScn: This command will capture the entire screen on Windows 10. And the image is saved in the “Screenshot” folder under Pictures automatically.
Method 2: Take PC Screenshot With Snipping Tool
Snipping Tool is a simple utility on Windows that allows you to capture free-form objects on the screen, take rectangular snips, or even capture the entire screen.
Additionally, there are some basic drawing and editing options that allow you to crop, change the format, and draw — using custom colors — on the captured image.
Here’s how to use Snipping Tool to take PC screenshot:
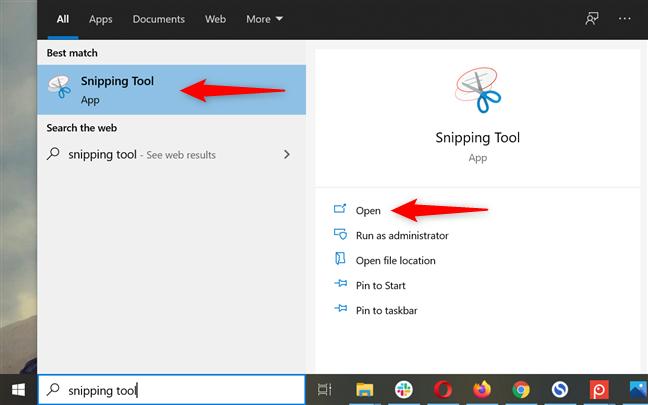
Step 1. Open the Start menu. Search for a Snipping Tool. Then open the application.
Step 2. From the main menu options, choose Mode. And click on the type of screenshot that you want to capture.
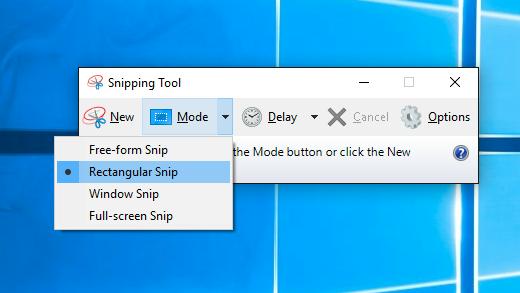
Step 3. After setting the desired mode, choose New.
- Once you select the “New” option, the entire screen will dim, and the cursor will allow you to take a rectangular or free-form screenshot, depending on the selected mode.
- When you draw the desired shape, it’s saved in the Snipping Tool.
- You can make changes, save, or share the captured image from there.
Method 3: Screen Capture Windows 10 using Xbox Game bar
Xbox Game Bar is a gaming overlay, and it is natively present on Windows 10 computers. You can use the tool to capture screenshots and record video clips with or without sound or just audio individually. However, you will have to enable the Game Bar option first in order to use the application.
Here’s how to use Xbox Game Bar to screen capture Windows 10:
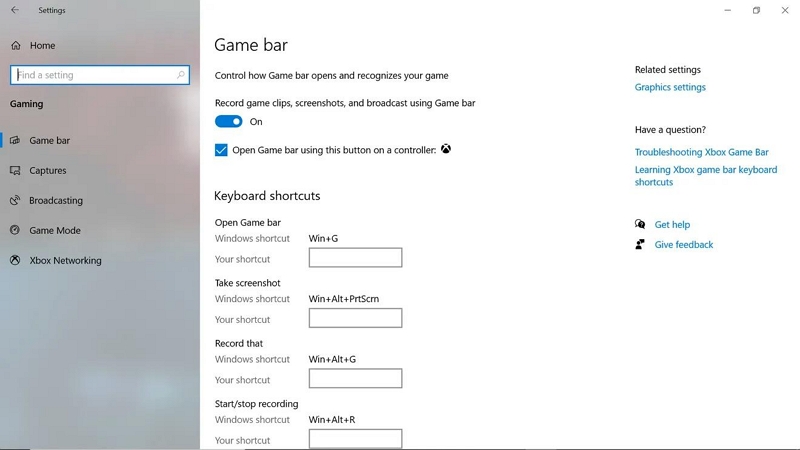
Step 1. Press Win+I to open the Settings. Type in Gaming in the search bar.
- Choose Xbox Game Bar from the right pane.
- And turn on the Game Bar using the controller.
Step 2. Now that Xbox Game Bar is enabled, all you have to do is press Win+G to activate it any time. Click on the Camera option to take a screenshot.

You can find the captured screenshots in the “This PC” >“Pictures” > “Captures.”
Method 4: Take PC Screenshot Using Snip & Sketch
Snip & Sketch is another Windows 10 native application (available by default on older Windows 10 versions). The features and options in the Snip & Sketch are similar to Snipping Tool.
Here’s how to use Snip & Sketch to take PC screenshot:
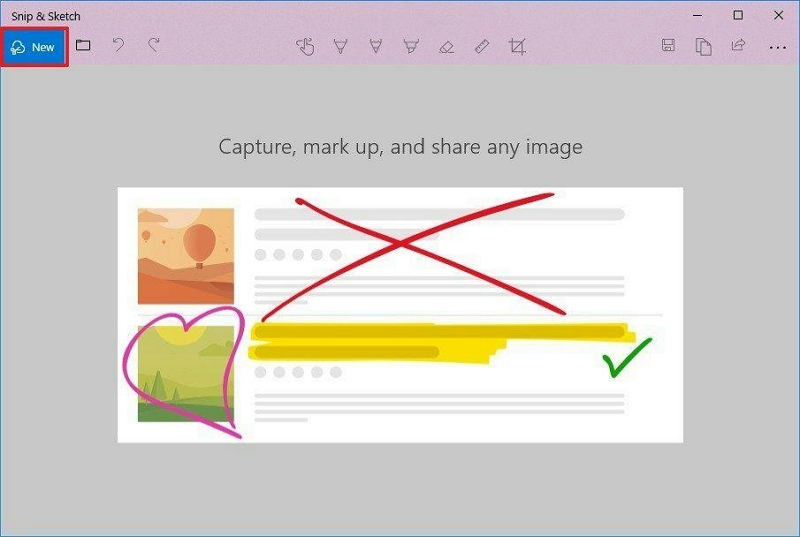
- Search for Snip & Sketch and Open the application.
- Select the type of screenshot you want to take.
- Select New in the top-left corner.
- The image will be saved on the Snip & Sketch window automatically.
- You can save, share, or edit the image, like with the Snipping Tool.
Part 2: Full Screen or Scrolling Screen Capture on Windows 10
So far, we have discussed the native application to screen capture Windows 10. Although these native tools are exceptional for screen capture on PC, they lack advanced functions like full-screen or scrolling screen capture, individual window capture, and custom screen capture.
Needless to say, the editing features available in Snipping Tool and Snip & Sketch are limited. Plus, almost all the options save the files automatically, giving you no control over the format. For instance, Snipping Tool allows you to save in HTML, PNG, GIF, and JPEG formats. Whereas tools like Game Bar and PrtScn save it in PNG format only. To take a full-screen or scrolling screenshot, you must use third-party platforms. One such exceptional all-rounder screen recorder program that comes laden with features is Eassiy Screen Recorder Ultimate.
Eassiy Screen Recorder Ultimate
Eassiy Screen Recorder Ultimate lets you take full-screen or scrolling screenshots, custom screenshots, and free-form screenshots with a click of a button. Plus, there are numerous editing tools to add arrow, rectangle, ellipse, line, text, and brush that allow you to annotate the captured screenshot. Additionally, you can save the files in any format, like PNG, JPG, GIF, and more. But its functionality doesn’t end there; Eassiy Screen Recorder Ultimate also allows you to screen record videos in high-quality, using sound and a webcam.
Key Features:
- You can take partial screenshots, full screenshots, or window or application-specific screenshots.
- Numerous editing functionalities, like you can add arrow, rectangle, ellipse, line, text, and brush and are ready to annotate your screenshot.
- Pin the Screenshot and switch between programs and tab.
- Advanced video recording features to capture screen video. You can screen record the entire screen, custom screen, with webcam and audio presence.
- The user-friendly interface makes it simpler to take a screenshot or record a video using customized hotkeys and self-explanatory options.
- Multiple output formats and GIF maker.
- Add personalized watermarks to the images.
How to Capture the Screen on a PC Using Eassiy?
Eassiy Screen Recorder Ultimate has a self-explanatory interface that lets even the least tech-neophytes use the program like a professional.
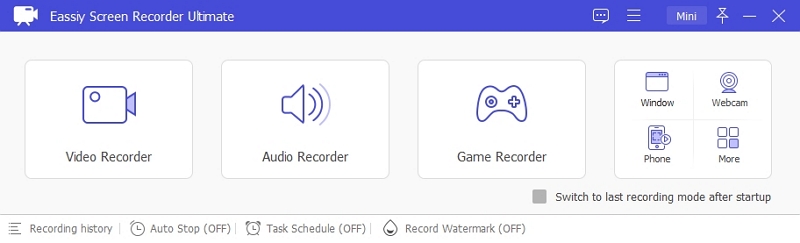
Step 1. Download and Install the Eassiy Screen Recorder Ultimate. Launch the tool.
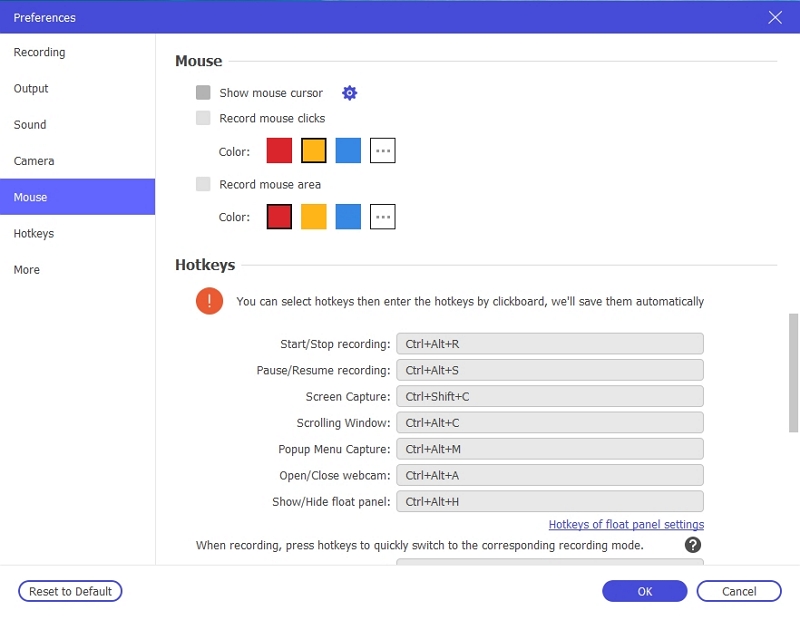
Step 2. Customize the Settings for taking a full screenshot or scrolling screenshot. These changes will be saved, so you do not have to do it ever again.
- Choose the three-bar icon on the top bar.
- And click on the Preference option.
- In the pop-up window, select the interface, mouse tracking, hotkeys, and output format of the snapshot.
- Click OK to save the settings.
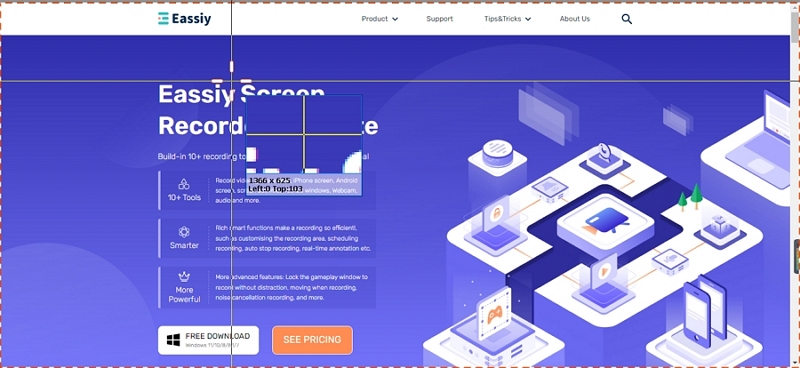
Step 3. Take screenshots.
- Use the hotkey to take a snapshot. It is Ctrl+Alt+C by default, but you can redefine it as you like. Ctrl+Alt+D is for scrolling screenshot.
- Simply Drag the cross cursor to select the area for capturing.
- Leave the cursor when you want to stop the full-screen screen capture.
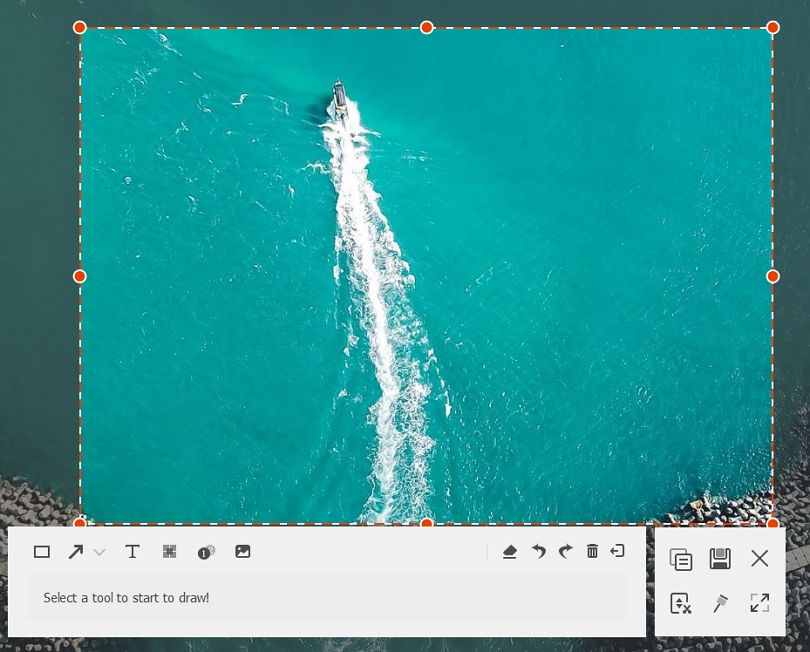
Step 4. Use the toolbar to annotate your screenshot or highlight the important parts. There are also Copy, Pin, Save options at the right pane.
As mentioned, Eassiy Screen Recorder Ultimate is not limited to taking screenshots on Windows 10. You can use the tool for screen recording, game recording, making tutorials, and so on.
Part 3: FAQs
1. Does Windows 10 have a capture tool?
Yes. Windows, by default, includes a Snipping Tool. Some of the older variants might not find Snipping Tool. But all Windows 10 will be located either of Snipping Tool or Snip & Sketch, or both on their computer. As mentioned, both Snipping Tool and Snip & Sketch are the same application under different names.
2. What is the shortcut key to take a screenshot in Windows 10?
- Alt+PrtScn: This will copy the active window on Windows 10.
- PrtSc (or Fn+PrtScn): This command will capture the entire PC screen.
- Windows key+Shift+S: Screenshot the desired part on the screen.
- Windows key+PrtScn: Capture the entire screen on Windows 10.
Conclusion
Windows 10 native tools like Snipping Tools, Snip & Sketch, and Game Bar are exceptional in their rights. They allow you to screen capture Windows 10 within seconds. Plus, some editing tools within Snipping Tools can help you highlight something in the screenshot. Still, these tools are not designed to carry advanced functions like full-screen recording or scrolling screenshots. That is why, understanding that advanced users need advanced options like pro-level editing options, saving in multiple formats, hiding cursor, and more such — we have listed the Eassiy Screen Recorder Ultimate.