
Updated on 2026-07-03
views
5min read
Tired of downloading third-party tools to screen record Android and looking for the ultimate way to screen record on Android without an app? Well, you have come to the right place. This guide will inform you about the three methods to screen record on Android without downloading any third-party apps on the Android device itself. Regardless of the method, you will be able to create online tutorials, video lessons, and business presentations on the Android device itself.
In this guide, we have listed three different ways of recording the Android screen without an app. It means regardless of your need, you will find one method that suits your requests and allows you to record the Android screen as desired.
Part 1: How to Screen Record on Android Without App?
Android 10 and later versions have a built-in utility that allows you to record the Android device seamlessly. You can include both Android’s internal and your voice via a microphone while screen recording on Android using the native tool. Furthermore, you can use the built-in video editing tools to trim, apply filters, and make them look professional.
Here’s How to Screen Record With Sound Without App:
Step 1. Scroll down from the top of the screen to access Quick Settings.
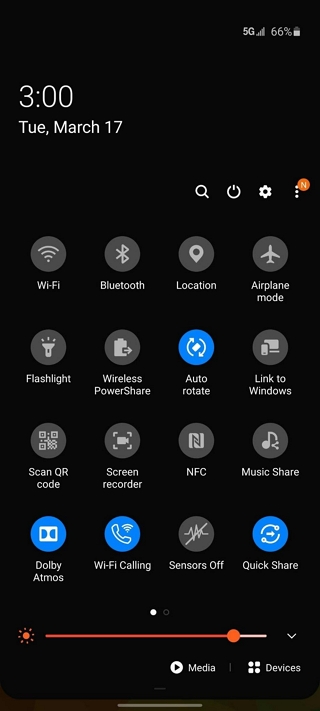
Step 2. Click on the Screen Recorder option.
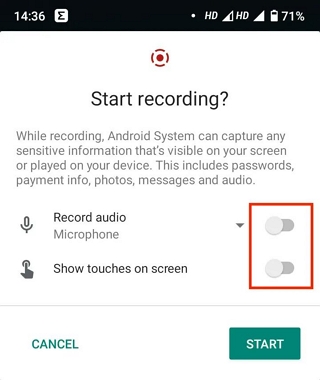
- Once you click on the Screen Recorder option,
- You will see two options: Record Audio. And Show Touches.
- Configure the options as needed for the Android screen recording.
- Click on Start to start recording the on-screen activities on the Android device.
Step 3. Stop the Android Screen Recording with Sound.
To end the screen recording on an Android device, swipe down and click on the “Tap to Stop” option. Once you tap on the Stop icon, the Android screen recording will end and the video will be saved to the Gallery. You can use the built-in tools in Gallery to edit the video as desired.
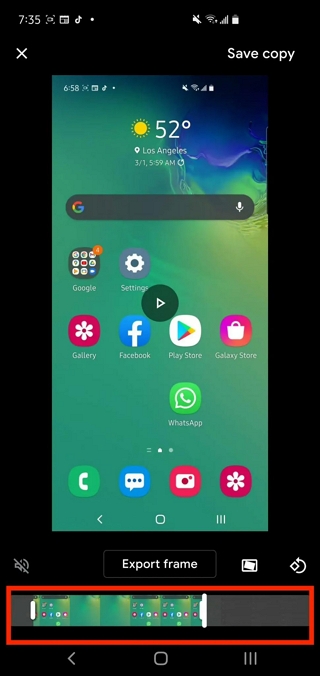
That’s how to screen record on Android without the app. You can record for as long as you want. However, the resolution of the screen recording depends on the available space on the Android device.
Pros of Using Native Tool Screen Record on Android:
- You do not need to install any tool on Android to screen record.
- Show the touches on the screen recording and guide the user clearly when creating a tutorial or app demonstration.
- Record the Android screen in high definition.
- Incorporate your voice via Microphone and internal sound in the screen recording on Android.
Cons of Using Native Tool to Screen Record on Android:
- No option to annotate the live screen recording.
- The native tool on Android does not allow you to manage the sound levels and control your screen recording.
- All the screen recordings are saved on the Android device itself, which means you will have to compromise internal storage space on the phone.
Part 2: How Record Screen on Android Without App from a PC
As mentioned, the native Screen Recorder on Android saves all the recordings on your internal storage. This means you must compromise the space and clear the storage space to record further. Not to forget, the Android device’s performance degrades with decreasing storage space. Furthermore, there aren’t any advanced recording tools, like an audio management system, to manage sound channels while recording the Android screen.
So, it is best to use a third-party tool on the computer that allows you to mirror the Android device and record the on-screen activities in high-definition from the computer. Yes, tools like Eassiy Screen Recorder allow you to do precisely this.
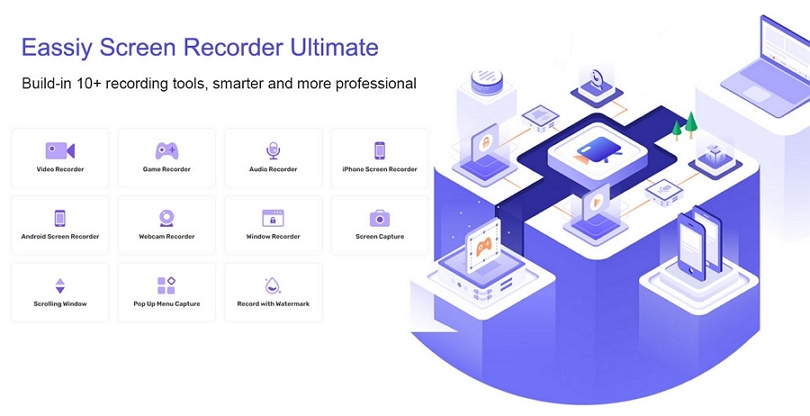
Eassiy Screen Recorder Ultimate
Eassiy Screen Recorder Ultimate is a Windows utility with 10+ recording tools and allows you to record the Android screen in up to 4K quality. The audio management system in Eassiy will enable you to manage the sound channels and allows you to incorporate both internal and microphone sound. You can also choose to include your voice from the computer’s microphone and use advanced options like enhancing microphone sound and limiting background interferences for clear voiceovers in the screen recording.
All the Android screen recordings captured via the Eassiy program are saved onto the computer. And you can use the built-in features in Eassiy to trim, auto-split, and manage sound levels using the built-in video editing tool in Eassiy. Once edited, you can save the Android screen recorder in any format or use the social sharing options to broadcast the screen recording on social media channels like YouTube, Facebook, Vimeo, and more. All in all, Eassiy presents a simple interface and is preferred by both hobbyists and professionals alike.
Key Features of Eassiy Screen Recorder Ultimate:
- Screencast Android screen in 4K. Mirror the Android screen to the Windows computer and cast it in 4K quality, a video quality of 12-24mbps, and a frame rate of up to 60fps.
- Incorporate both Android internal sound and your voice via Android or computer.
- Eassiy includes a dedicated switch to enhance your microphone sound for clear voiceover and limit background interference.
- Trim, auto-split, and more editing features make your Android screen recording suitable for a professional environment.
- Create custom hotkeys and manage the Android screen recording using personalized keyboard shortcuts.
How to Use Eassiy Screen Recorder And Screen Screen on Android With Sound:
Step 1. Download and Install the Eassiy Screen Recorder Ulimate from its official site. Open the Eassiy program on the computer. Click on the three horizontal bars in the top-right corner of the screen. Choose Preferences to customize the sound settings for clear voiceover in your Android screen recordings.
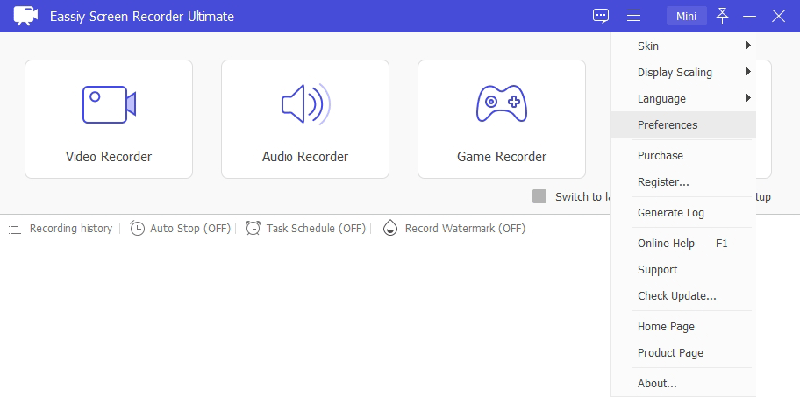
Under Preferences, click on the Sound option from the left pane. Check the box assigned to Microphone enhancement and Microphone noise cancellation. Select OK to save the Sound Settings.

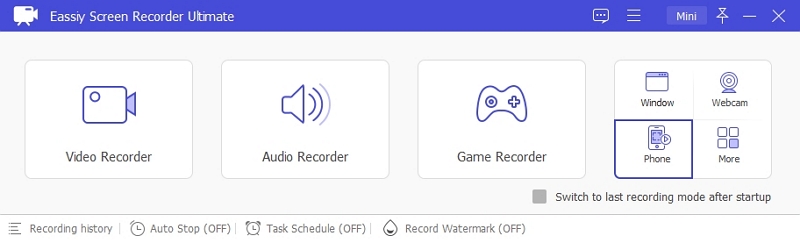
Step 3. Prepare the Android Screen Recording (this is a one-time step only). Next time, you can simply start your Android screen recording with a click of a button. On the program's main interface, click on Phone from the right pane to record an Android screen with sound.
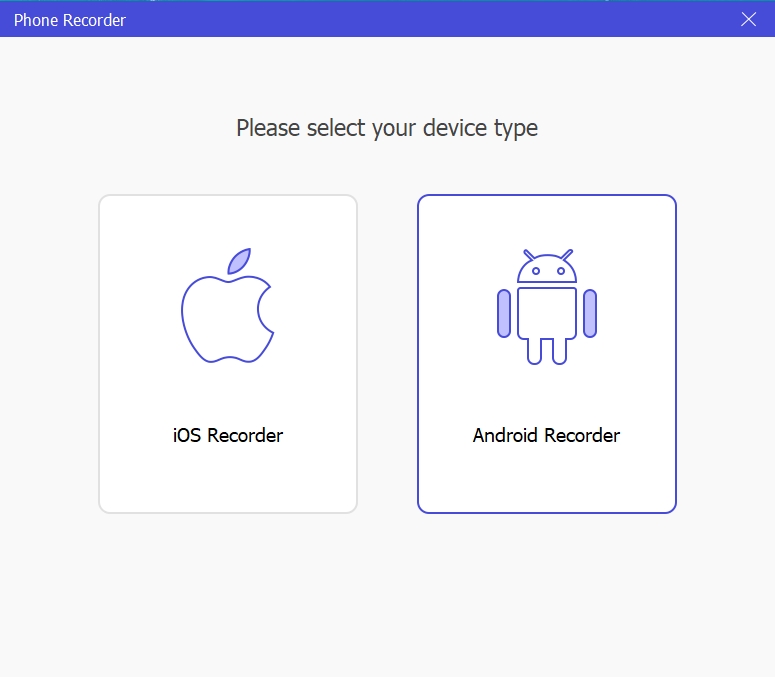
Choose Android Recorder on the next screen to begin.
Mirror the Android Screen to the Computer Screen.
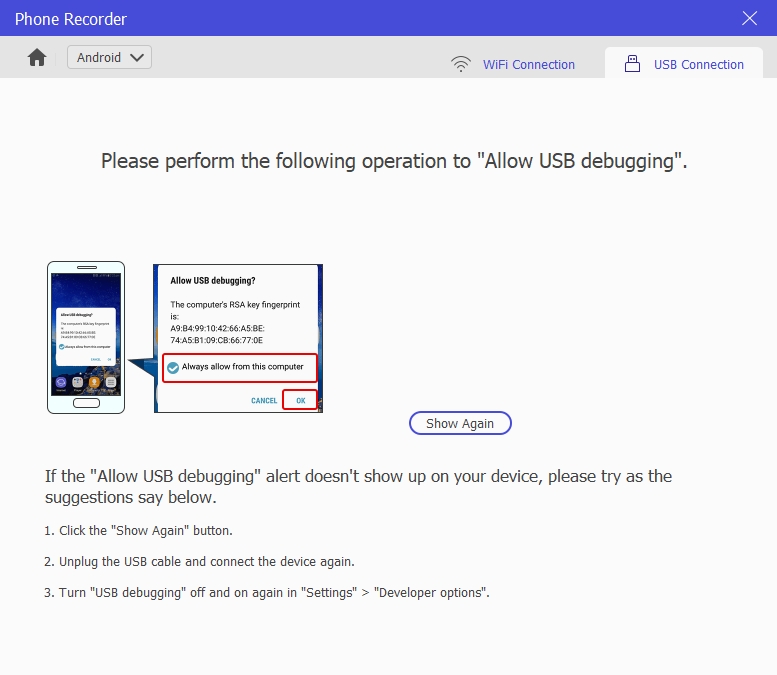
- Connect the Android device to the computer using a USB cable.
- When you see the notification saying, “Allow USB debugging,” click on it to move further.
- Select OK to allow Eassiy to install a small application on your Android device. It does not occupy much storage space on the Android device.
- Once the FoneLab Mirror application is downloaded on the Android device, click on Start Now or Allow to mirror the Android screen to the computer.
Step 5. Record the Android Screen With Sound.
Once you see the Android screen on the Eassiy app, set the resolution. As mentioned, you can customize the resolution up to 4K.
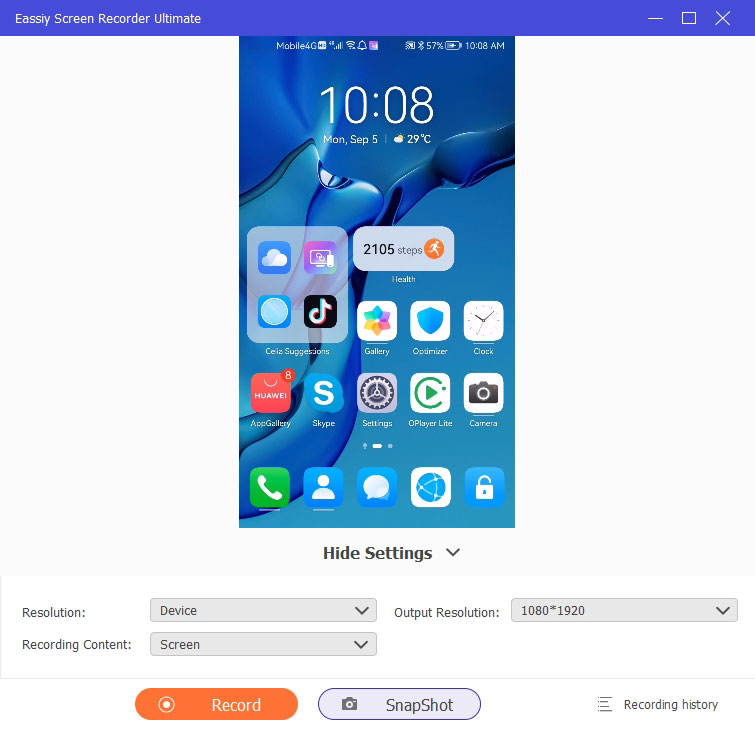
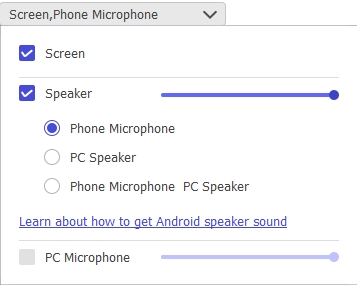
Click on Recording Content to choose the audio channels for Android screen recording. You will see many options to include audio channels in the Android screen recording. Choose one that best suits your needs.
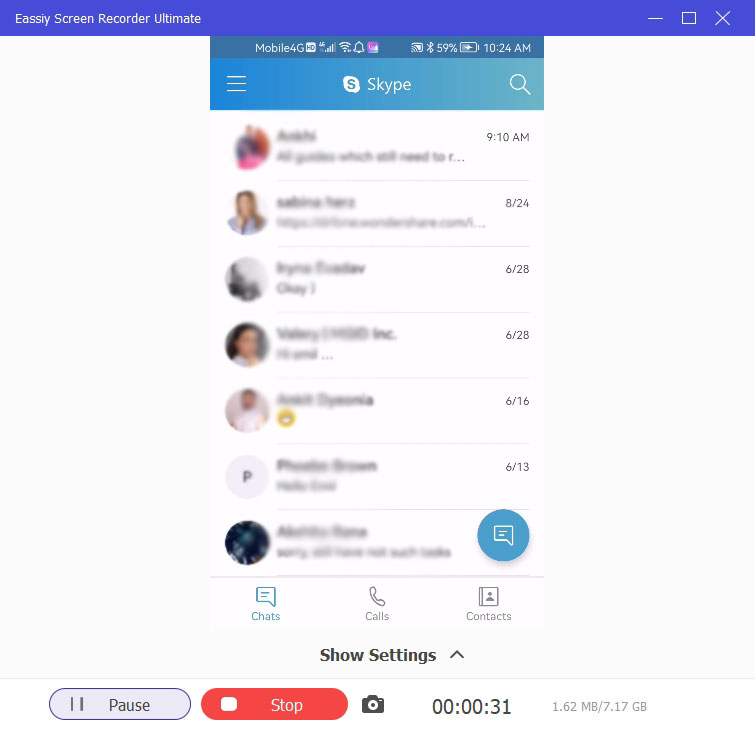
Step 6. Stop the Android Screen Recording. Click on the Stop button to end the Android screen recording.
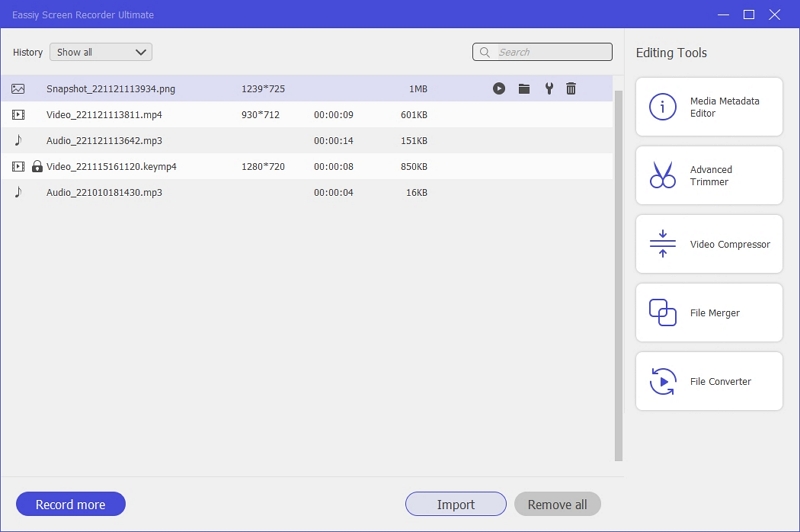
Step 7. Android Screen Recordings are saved to the Recording History menu.
- Go to the Recording History menu in the Eassiy program to access the Android screen recording. You can edit the recordings by clicking on the Pencil icon.
- The share icon allows you to share recorded and edited content on social channels, like YouTube, Facebook, and more.
As mentioned, Eassiy makes it pretty simple to screen record Android with sound.
Pros of Using Eassiy Screen Recorder to Screen Record on Android Sound:
- Eassiy’s self-explanatory user interface allows even beginners to create online tutorials and video lessons that look professional.
- Take screenshots during live screen recording on Android.
- Eassiy is cost-effective and offers several subscription plans to suit your budget.
- All the recordings are saved on the computer, meaning you can save storage space.
- There are other recording tools in Eassiy, like Windows Recorder, iPhone Recorder, Game Recorder, Audio Recorder, and more.
Cons of Using Eassiy Screen Recorder to Screen Record on Android with Sound:
- The free version of Eassiy allows you to record the Android screen for up to 3 minutes.
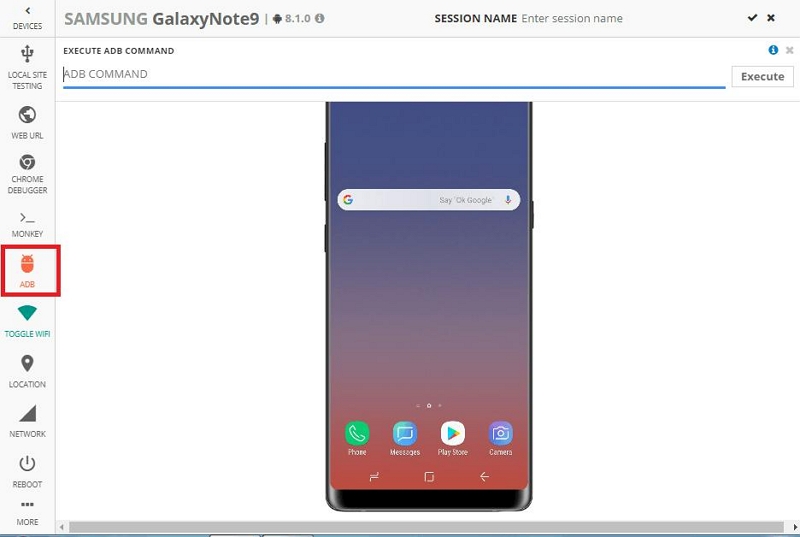
Part 3: How to Screen Record On Android Without App using ADB Command (Technical Knowledge Required).
ADB Command, or Android Debug Bridge, is a terminal utility with Google’s Android software development kit. You can use ADB to control your Android device from the computer for installing or uninstalling apps, accomplishing tasks like screen recording on Android, or even copying and deleting files. All in all, ADB is a geeky trick used by developers to leverage more features from their Android.
However, screen recording with sound on Android via ADB has its own limitations. And for its worth, it is better not to bother with ADB screen recording with sound on Android, given that it allows you to screencast Android for only up to 3 minutes. Moreover, the difficulty of the method is self-explanatory via the subsequent steps.
Here’s How to Screen Record With Sound On Android Without App Using the ADB Command:
Note: You can follow the screen record with the ADB method on Android 4.4 (API level 19).
Step 1. Download Platform Tools
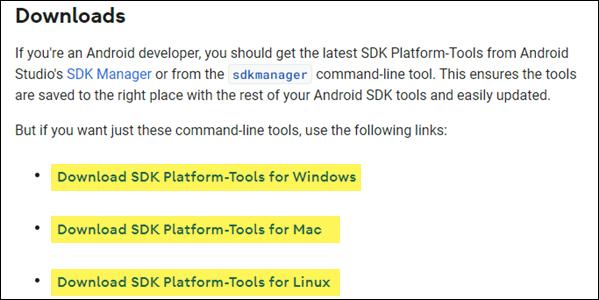
- Open a browser on your Windows computer. Go to the Android Developers page and click on Downloads.
- Click the link assigned to Windows. You will simply see a Yellow-highlighted link saying, “Download SDK Platform Tool for Windows.” Click on the option to download the ZIP file.
- Extract the files in the ZIP files. All Windows versions have a built-in ZIP tool. But you can also use a third-party unzip tool like 7-Zip to extract the downloaded file.
- Double-click on the file and download the SDK Platform Tools on the Windows computer.
- After installing, open the SDK Platform tools with Powershell.
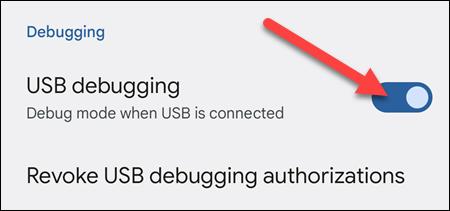
Step 2. Enable USB Debugging on the Android device.
- You have to enable the USB debugging on the Android device to use the ADB command line and screen record Android without the app. To enable the USB debugging,
- Go to the Settings menu. Navigate to the bottom of the page and click on About Phone.
- Under the About Phone menu, click on Build Number (multiple times).
- After you see the notification saying, “You are now a developer,” stop tapping on the Build Number option.
- Under the System menu (the new enabled option), you will find Developer Options.
- And under the Developer Options menu, you will find the option to enable USB Debugging.
Step 3. Start the Android Screen Recording with ADB.
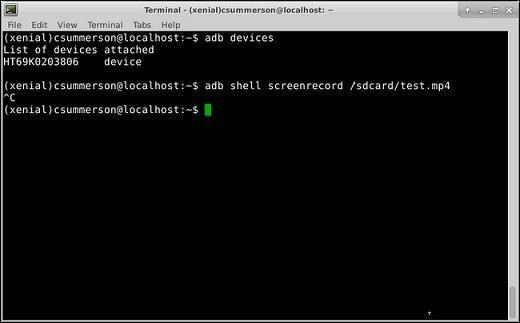
- Navigate to the Opened terminal window on your Windows computer.
- Type in the following command in the terminal : adb shell screenrecord
Step 4: Stop the Android Screen Record with ADB Command.
- Once you type in the above command, the screen record on Android will start.
- It will end automatically after 3-minutes. However, you can do this manually by pressing Ctrl+C.
The screen recording is saved on the SD Card on the Android device itself. Note the command: adb shell screenrecord /sdcard/video.mp4, which means you are saving the screen recording on the Android device itself.
If you want to copy the screen recording to the computer, you have to use another command, i.e.,
adb pull /sdcard/video.mp4
And to delete the screen recording from the SD Card, use the following command:
adb shell rm /sdcard/video.mp4
Pros of Using ADB Command to Screen Record on Android:
- ADB Command allows users with Kitkat version of Android to screen record without a third-party application on the Android device itself.
- You can record the Android device in 1280X720p resolution. You can use the following command to record in 1280X720p resolution: screenrecord --width-height 6000000 /sdcard/demo.mp4
- You can manage the bitrate of the screen recording using the following command: screenrecord --bit-rate 6000000 /sdcard/demo.mp4
Cons of Using ADB Command to Screen Record on Android:
- There is no option to screen record on Android with sound using the ADB command.
- By default, ADB Command will screen record your Android device in its native display resolution. You will have to use a command to increase the resolution to 1280*720p.
- Some of these commands do not work on all Android devices.
- The maximum recording time permitted is 3 minutes.
- Recordings are saved on the Android device's SD Card by default. And you have to use further commands to copy them on the computer and delete them from the Android device.
Part 4: Tips for Screen Recording on Android Without App
While screen recording the Android with sound doesn’t sound like much, it does require some skills and time to master. Here are some screen recording tips to help you this master the art of creating professional online videos, video tutorials, and gameplays on your Android device.
- Lock the screen orientation. Decide portrait or landscape beforehand, as changing screen orientation during screen recording will result in part of the screen not being recorded.
- Turn on the DND. Notifications, ping sounds, messages, and calls can force you to restart the screen recording again. So, it is best to be cautious and turn on Do Not Disturb in advance.
- Close all the other background processes. Screen recording is a resource-consuming process. And it will consume a lot of RAM, so it is better to close all the background processes and only open the apps that you want to record.
Final Words
There are multiple ways to screen record on Android without the app. You can either using your Android device built-in screen recorder, Eassiy Screen Recorder, or ADB command. Regardless of what method you choose to use, the above steps will help you operate smoothly.
However, keep in mind that each method comes with its disadvantages. While using the built-in screen recorder videos will occupy large storage and does not support editing options, the ADB command can only record for 3-minutes. Eassiy Screen Recorder, on the other hand, offers extensive features, but requires a Pc. In all, Eassiy is the better choice as it records videos with high-resolution using the best tools. Plus it does not occupy phone storage.