
Updated on 2026-06-22
views
5min read
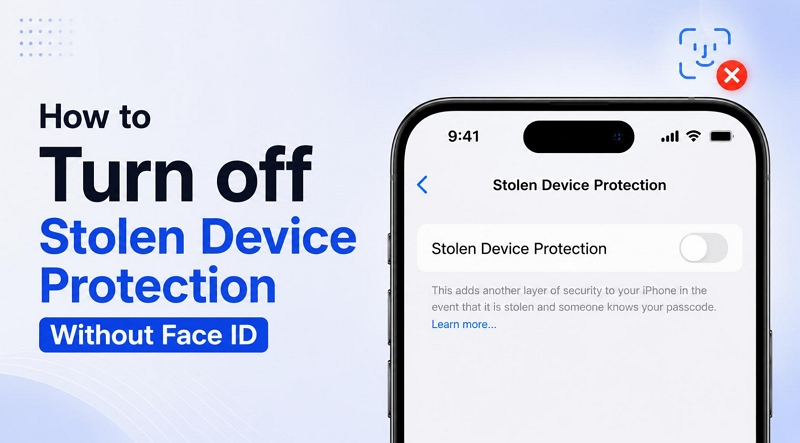
Stolen Device Protection should never be a problem on iPhone. It requires you to verify with Face ID before making sensitive changes and to wait for an hour sometimes. In return, the security it provides is hard to match.
The problem starts when Face ID is unavailable or stops responding. Without it, you can't make sensitive changes to your iPhone. You might think the solution is to disable Face ID. The catch is Face ID and Stolen Device Protection are linked. To reset or turn off Face ID, you need to turn off Stolen Device Protection first. However, turning off Stolen Device Protection requires Face ID verification either. So are you're stuck in a loop? Fortunately, NO. This guide will show you how to turn off Stolen Device Protection without Face ID. We've covered multiple ways to do it.
Fix Unavailable Face ID to Turn Off Stolen Device Protection
Getting struck with the “Try Face ID Again” message doesn’t always mean Face ID hardware is broken. Sometimes, a temporary iOS glitch or even something blocking the TrueDepth camera can prevent it from recognizing you. And this is especially common if Face ID suddenly stops working without any physical damage.
So, before moving on to methods that bypass Face ID altogether, it is best to try a few basic fixes first, which will only take a few minutes. And if Face ID starts working again, you can turn off Stolen Device Protection normally without relying on any workaround.
Fix 1. Clear the TrueDepth Camera Area
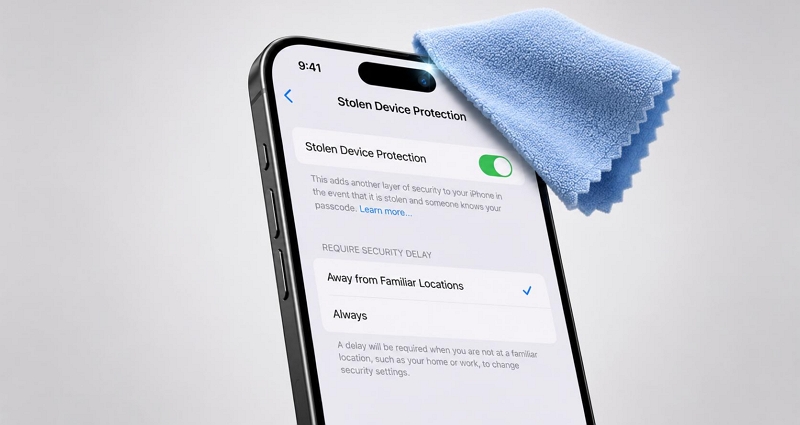
This fix sounds overly simple. But often, cleaning the Dynamic Island area fixes Face ID failures immediately. Keep in mind that Face ID relies on highly sensitive infrared sensors located inside the notch. And even small obstructions, like fingerprint grease, dust, or pocket lint, can prevent the sensors from scanning your face properly and trigger Face ID failures.
So start with the basics:
- Take a clean microfiber cloth. Gently wipe the entire area around the notch or Dynamic Island at the top edge of the screen. That's where the Face ID sensors are located.
- Now try scanning your face again.
- In many cases, Face ID will start working normally after a quick cleanup.
Fix 2. Check Screen Protector Around Face ID Area
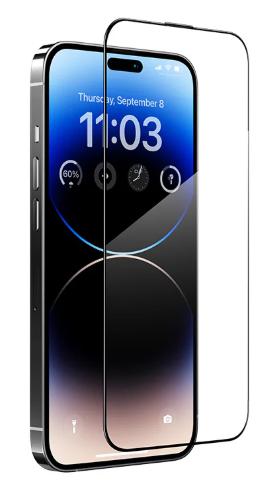
Another common cause is the screen protector. If the protector is cracked, bubbling, or sitting incorrectly around the notch or Dynamic Island, it can block the sensors.
So inspect the protector carefully. If you notice any obstructions covering the sensor area, remove the protector completely and test Face ID again. Once the sensors can read your face properly, you can turn off Stolen Device Protection using Face ID easily.
Fix 3. Restart iPhone
Face ID issues can also be caused by software-related problems. There are times when the background components that handle biometrics on your iPhone freeze. You’ll know this is the cause if you notice that Face ID was working perfectly a moment ago and then suddenly stopped.
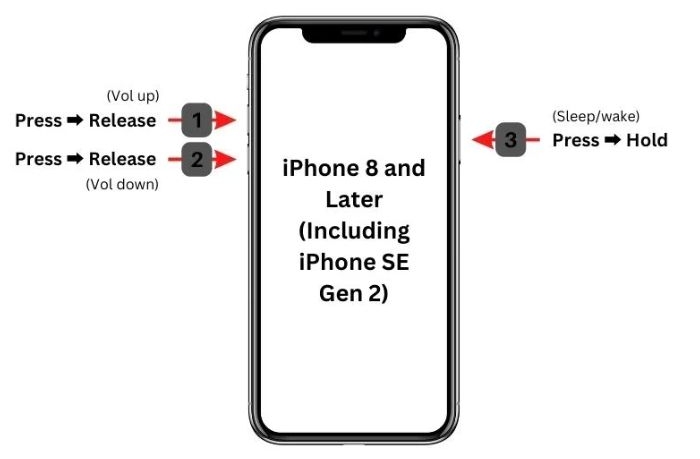
A force restart is often enough to fix it. It clears temporary system issues and restarts the biometric services. So here's how to do it:
- Press and quickly release the Volume Up button.
- Immediately after, press and release the Volume Down button.
- Then press and keep holding the Side button.
- Release the button when the white Apple logo appears.
Now enter your device passcode to get in. After this, the iPhone will reactivate Face ID. So test Face ID again. If it is working properly, you can follow the steps in the Part 3 to turn off Stolen Device Protection using Face ID.
How to Turn off Stolen Device Protection Without Face ID
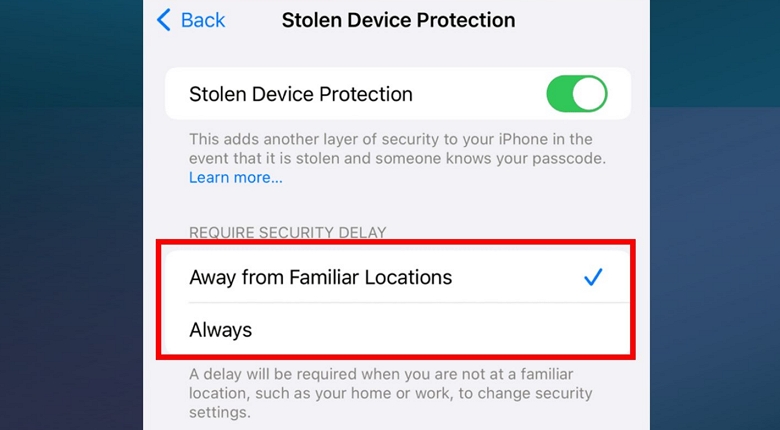
Without Face ID, turning off Stolen Device Protection becomes much more dependent on how the feature is configured on your iPhone. You need to check whether Require Security Delay is set to Always or Away from Familiar Locations. This distinction matters:
If the setting is Always, turning off Stolen Device Protection is difficult. Face ID is mandatory here. So, in that case, you can try restoring Face ID first and then use the method discussed in the previous section. When that isn't possible, you can use account recovery options. We'll cover three possible methods, so you can choose the one that best fits your needs.
But if the setting is Away from Familiar Locations, things are really easier. And in this case, iPhone will allow you to change Stolen Device Protection settings with the device passcode instead. So let's start with this method.
Way 1. Use Screen Passcode
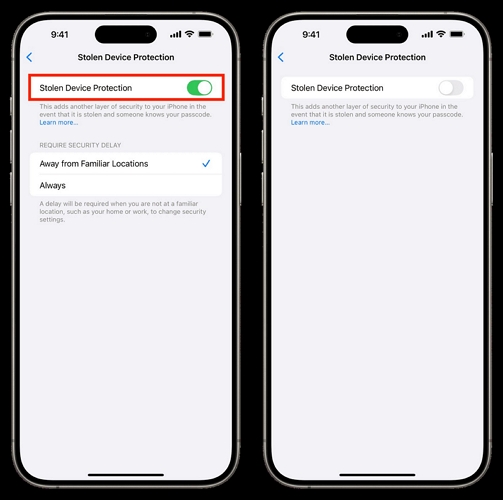
This method only works when Require Security Delay is set to Away from Familiar Locations. So first, open the Stolen Device Protection menu and check the selected option. If Away from Familiar Locations is selected, follow the steps below.
Tip: If you're currently away from a familiar location, return to a place that the iPhone recognizes as familiar, then continue. A familiar location is somewhere you regularly spend time, like home or office.
Step 1. Turn off the Stolen Device Protection toggle.
Step 2. Face ID will attempt to authenticate and fail. When the prompt appears, tap Try Face ID Again.
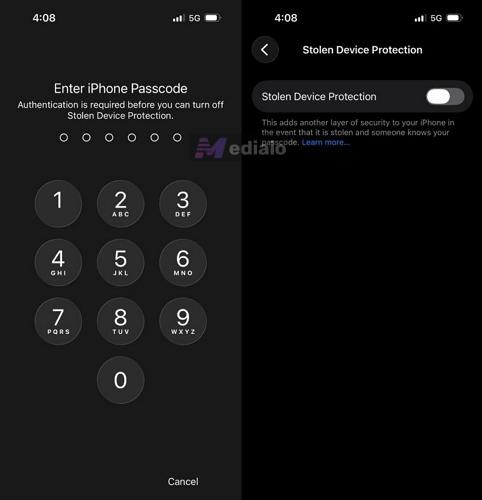
Step 3. On the next screen, tap Enter Passcode.
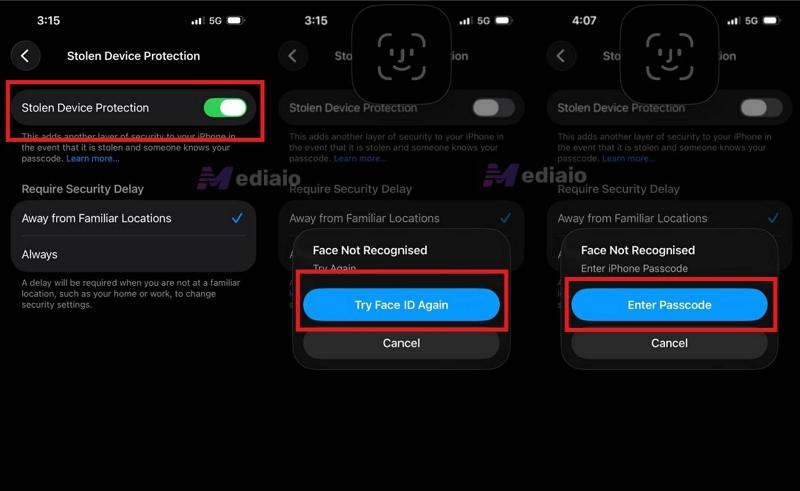
Step 4. Enter your iPhone passcode and Stolen Device Protection will be turned off immediately.
Way 2. Remove iPhone from iCloud Site
If the Require Security Delay setting is configured to Always, or you cannot reach a familiar location, you can try this workaround. That is, removing the Activation Lock through iCloud. Some users have reported that removing the device from Find My also disables Stolen Device Protection on the iPhone, a related security setting.
The idea behind this workaround is simple. When you remotely disable Activation Lock on your iPhone, Stolen Device Protection will be automatically disabled. So you won’t need Face ID to turn it off. And once Stolen Device Protection is turned off, you can keep it that way.
That said, this method is not always reliable. Some users report that it didn’t work for them. Still, it is worth trying when Face ID isn’t available.
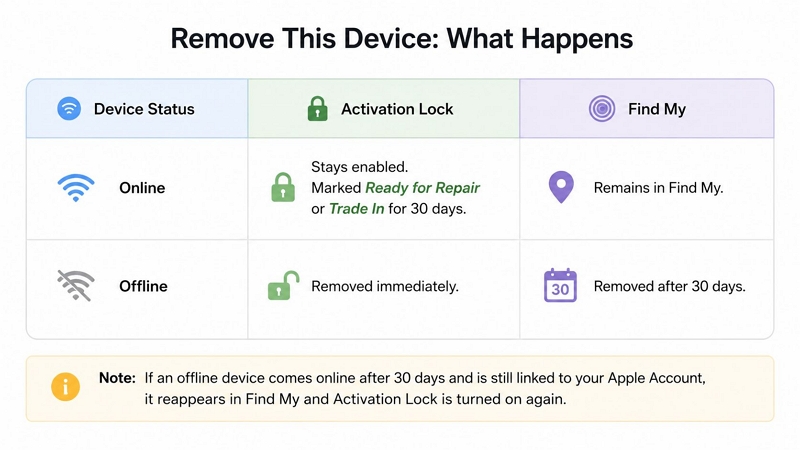
For the best chance of success, make sure the iPhone is offline. For this, turn off both Wi-Fi and mobile data. This will prevent Apple's servers from communicating with the iPhone and Activation Lock will be turned off immediately. And that is an important requirement for the Activation Lock removal process. Keep one thing in mind. If the iPhone is online, Apple won't remove Activation Lock. Instead, the device will just be prepared for trade-in or service.
Note: Don't simply power off the iPhone to make it offline. Remember that Activation Lock (and other security-related settings like Stolen Device Protection) will be re-enabled if the removed iPhone connects to the internet in the next 30 days, which could happen when you turn the device back on. So it is better to leave the device powered on and just disconnect it from all Wi-Fi and mobile data.
Once that is done, follow the steps below.
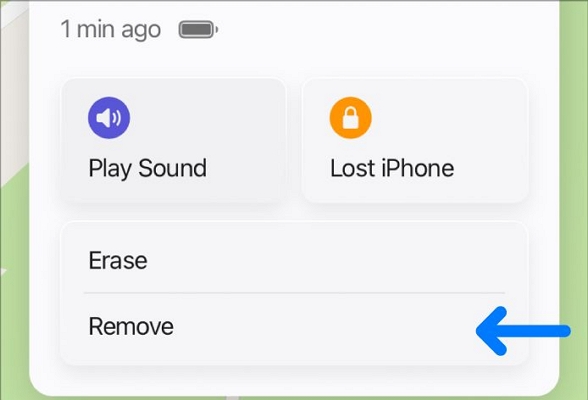
Step 1. Open the iCloud Find Devices page, sign into it with the Apple ID used on your iPhone and select your iPhone (its preview will appear black because it’s offline).
Step 2. Scroll down and click Remove.
Step 3. Confirm the removal request.
Step 4. Wait a few moments and then check whether Stolen Device Protection is still active on the iPhone.
Some users report that Stolen Device Protection is also removed after the device is detached from the account. Others report that nothing changes. So this is not a guaranteed fix. If it doesn't work, move on to the next method.
Tip: This way also works when your iPhone is in lost mode.
Way 3. Erase iPhone
If the previous steps do not resolve the issue, the last resort is to erase the iPhone completely. The idea is simple: Resetting iPhone restores it to its original state, meaning Stolen Device Protection is not enabled. There are several ways to erase an iPhone. The table below summarizes your options.
| Method | Computer Required | Apple ID Credentials Required | Approximate Time | Data Erased |
| Via iCloud Site | No (you can use a mobile browser). | Yes | 5-30 minutes | Yes |
| From Lock Screen | No | Yes | 5-30 minutes | Yes |
| Eassiy iPhone Access | Yes | No during the erase. | 5-15 minutes | Yes |
All the methods below will delete every bit of data on your iPhone. If you have important information, back it up in advance. Once your backups are secure, select the erase method that best fits your situation.
Option 1. Via iCloud Site
As discussed earlier, iCloud Find My lets you interact with the iPhone remotely. You can use it to erase your iPhone and then set up the iPhone as new again.
Steps to Erase iPhone via iCloud:
Step 1. Visit iCloud Find My. Sign in using the Apple ID connected to the iPhone.
Step 2. Select your iPhone from the list of devices. Then choose Erase.
Step 3. Confirm the action and wait for the remote erase process to finish. Keep the iPhone connected to the internet during this time.
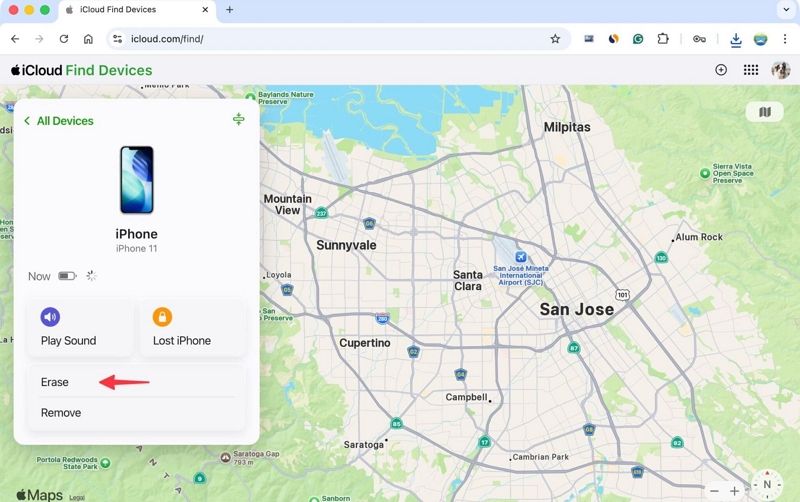
Step 4. Once the erase is complete, return to the device page and click Remove.
Option 2. From Lock Screen
The Forgot Passcode? option on the Lock screen is another way to erase the iPhone and resolve the Stolen Device Protection issue. It’s a lifesaver when you don’t have another device to access http://icloud.com/find. However, you’ll still need your Apple ID credentials and an active internet connection on the iPhone for this to work. Follow these steps:
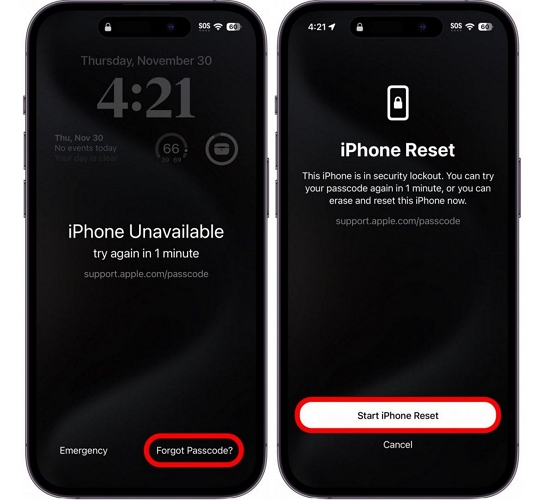
Step 1. Lock the iPhone. Enter incorrect passcodes several times (usually 5–10 attempts) until you reach the "iPhone Unavailable” screen.
At the bottom-right corner, tap Forgot Passcode? Then select iPhone Reset > Start iPhone Reset.
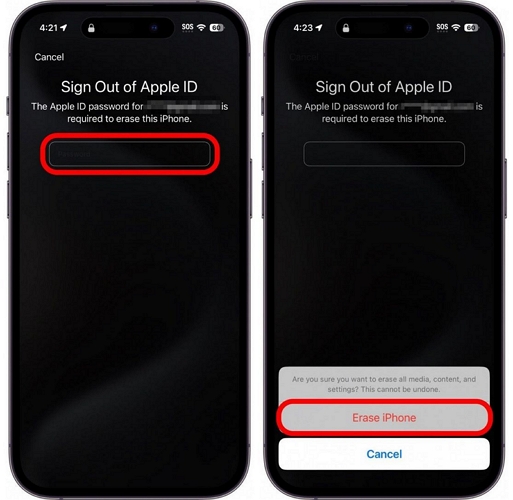
Step 2. Next, enter the Apple ID password associated with your device.
Step 3. Tap Erase iPhone. Choose whether to keep or remove the eSIM information stored on the device.
Step 4. Confirm by tapping Erase iPhone again. The iPhone will start deleting all content, biometric data and Stolen Device Protection settings. Wait for the process to finish.
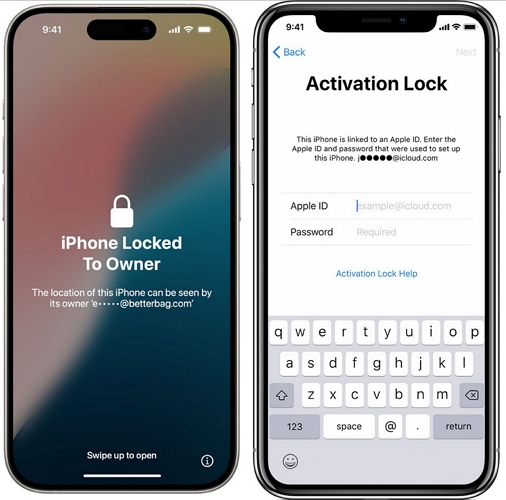
Step 5. The iPhone will restart. It will display the Activation Lock screen. Enter the Apple ID and password previously linked to the device to remove Activation Lock. After that, the iPhone will boot as a new device without SDP restrictions.
Option 3. Use Eassiy iPhone Access
You can also use a dedicated iPhone unlocking tool, such as Eassiy iPhone Access to restore your iDevice. Eassiy’s Unlock iOS Screen feature will be used here, which can remove iPhone screen lock and restore iPhone back to factory settings. Compared with restoring iPhone from iCloud or from the lock screen, Eassiy makes factory resetting your device easier with step-by-step on-screen instructions.
Once the reset is complete, you can set up the iPhone as a new device and turn off iCloud lock with corresponding Apple ID. This time, you can simply skip Face ID and Stolen Device Protection and continue using the iPhone without any problems. And if another restriction is stopping you from making changes to Face ID, such as a forgotten Screen Time passcode or an MDM restriction, Eassiy can help with those situations as well.
Key Features:
- Remove Face ID, Touch ID, 4/6-digit and alphanumeric passcodes.
- Bypass iCloud Activation Lock without requiring the forgotten password.
- Works with iPhones and iPads running up to iOS 26.
- Unlink disabled Apple ID from iPhone without password even when Find My is on.
Steps to Remove Stolen Device Protection Using Eassiy iPhone Unlocker
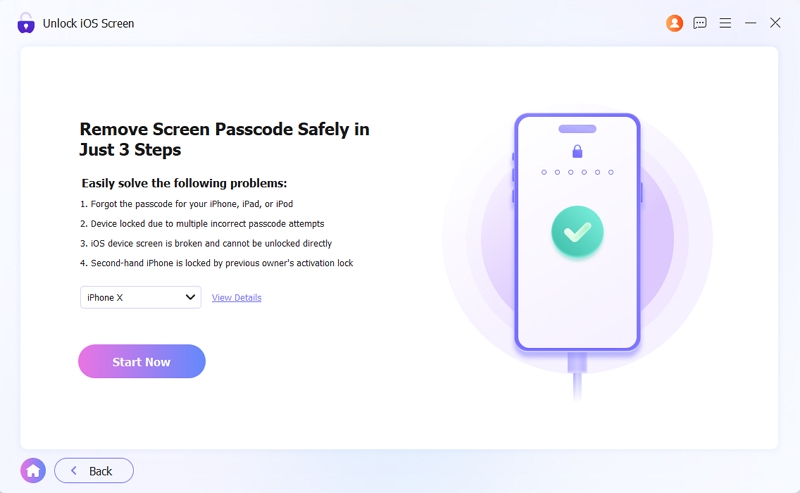
Step 1. Launch Eassiy iPhone Unlocker on your Windows or Mac. Select Unlock iOS Screen from the main screen.

Step 2. Connect the iPhone. Eassiy will automatically identify the device and display its information. Verify it once and click Start Now.
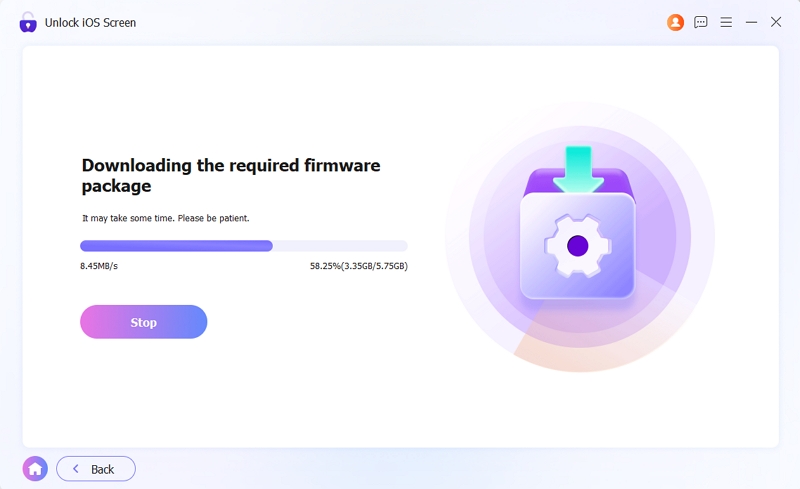
Eassiy will take several minutes to download the required firmware package for your iPhone model.
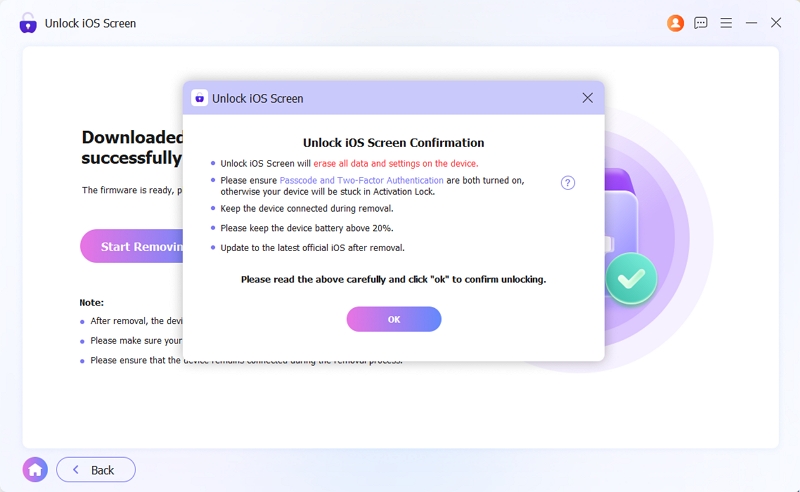
Step 3. Click Start Removing to start the removal process. Read the information shown in the confirmation window. Then click OK > Confirm Again to continue.
Step 4. Wait for the removal process to finish. When Unlocked iOS Screen Successfully appears, click Finish.
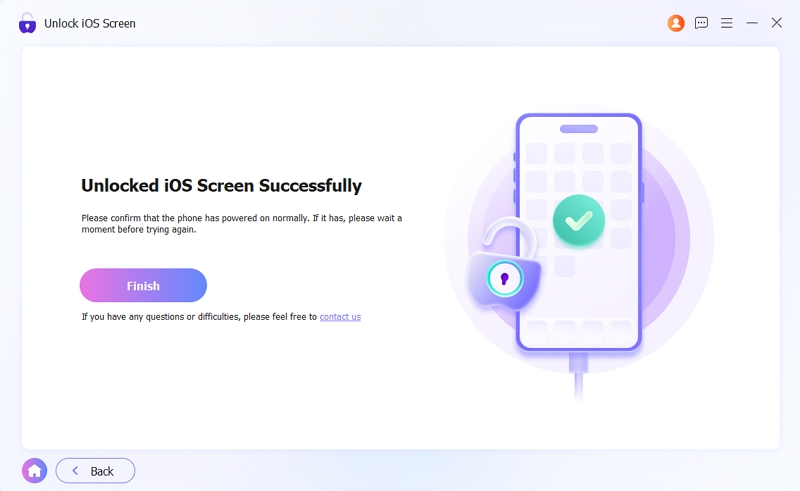
After that, you can set up the iPhone again. This time, you can skip Face ID and continue without turning on Stolen Device Protection.
Steps to Turn off Stolen Device Protection with Face ID
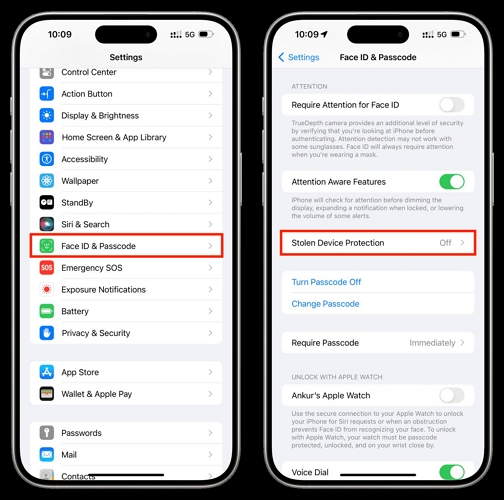
Step 1. Head to Settings and open Face ID & Passcode.
Note: At certain times, the Face ID & Passcode menu will not be visible. Or some options inside it will appear grayed out because of Screen Time restrictions. So make sure those restrictions are removed first. After that, return to this menu.
Step 2. Enter your device passcode when prompted.
Step 3. Scroll down and tap Stolen Device Protection.
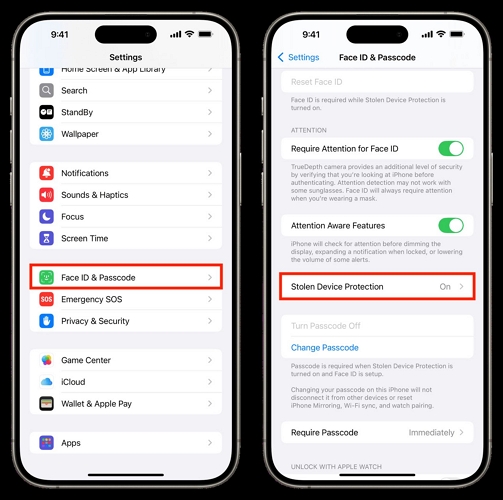
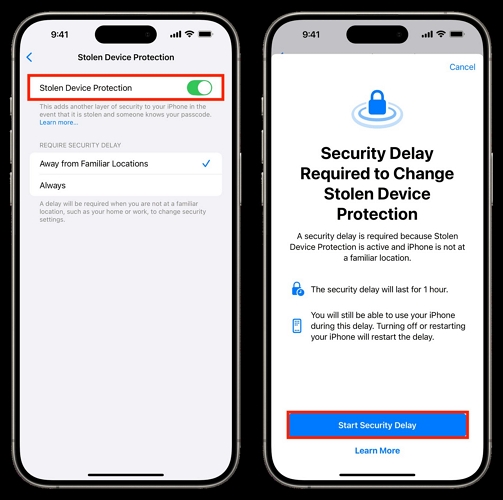
Step 4. Turn off the Stolen Device Protection toggle.
Step 5. iPhone will immediately ask you to verify your identity using Face ID. Complete the Face ID scan and wait a moment for Stolen Device Protection to be off.
If you have set Security Delay as Always or you are away from the familiar places, after successful Face ID authentication, you’ll see a message that says, "Security Delay Required to Change Stolen Device Protection." Tap the Start Security Delay button.
Then, you’ll see a 1-hour countdown screen. You can use your iPhone normally during the countdown. After the hour ends, you’ll get a notification on your lock screen: Security Delay Ended.
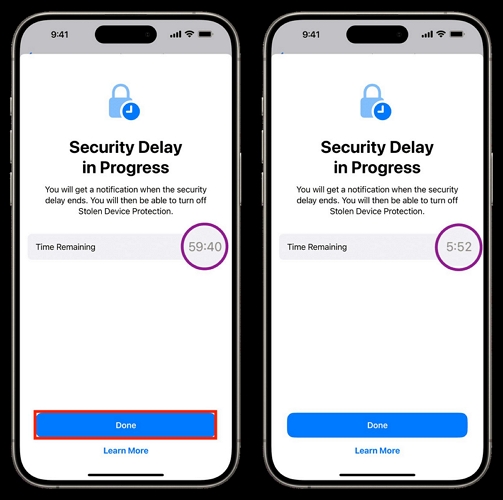
Lastly, return to the Stolen Device Protection menu in the Passcode and Face ID page. Toggle Stolen Device Protection off again.
Conclusion
We've shown you multiple ways to turn off Stolen Device Protection. You can first try to fix Face ID itself or use the passcode workaround to regain full control of your iPhone.
If you’re dealing with several problems at once, like a broken Face ID system, a forgotten passcode, or even Apple ID issues, Eassiy iPhone Access can help you get back into the device. After that, you can set up your iPhone the way you want and use it without restrictions.