






 Help Center
Updated on 2026-07-28
views
5min read
Minecraft has different recording mods and each one is built for a different job. Some capture clean in-game footage, ready to upload for a Let's Play. Others let you build full cinematics, scripted cutscenes, even an entire machinima film. The mod you need will depend on what you're trying to make.
This article walks you through six Minecraft recording mods that cover all of it. As mods can't do everything, we'll also introduce you to Eassiy, an advanced screen recorder that captures your full Minecraft session with Discord audio, webcam, and real-time annotation tools.
6 Best Minecraft Recording Mods: Overview and Features
These six recording mods aren't alternatives to each other. Each one is built for a different need and most creators end up using more than one together.
Some will be useful to record your own gameplay session. Some are made to capture an entire server. And some mods don't record at all — they let you build scenes from scratch.
Each mod also comes with its own requirements, its own learning curve, and its own use case. So here’s a breakdown of all of them. You can pick the ones you need.
1. ReplayMod

ReplayMod has been around since 2014, back in the Minecraft 1.7.10 days. That long history is one reason many users use it — it lets you still capture worlds you built years ago. Plus, it keeps updating itself, so it runs smoothly even with the newer Minecraft releases.
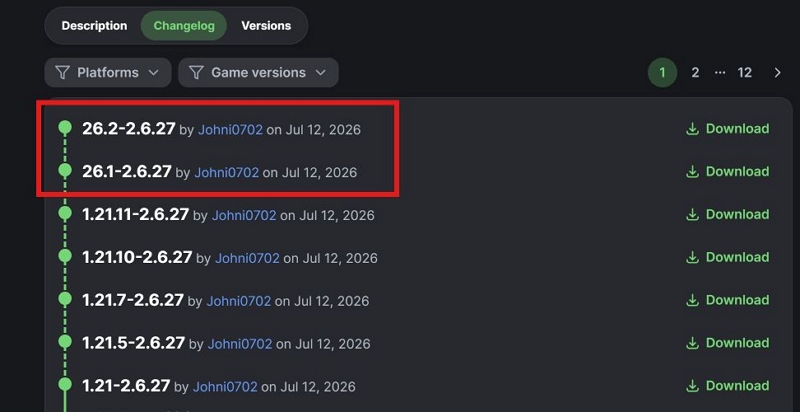
This mod is built to record everything happening inside your world: block updates, entry actions, player movement, all of it. This means you can reopen the replay after you’ve done playing and watch the same session from different angles. This will allow you to capture scenic shots, zoom in on details, or view the action from angles that would have been impossible during gameplay.
Yes, the real advantage of ReplayMod is that it detaches your footage from your in-game character. So during the actual session, you do not have to pause mining, building, exploring, or fighting mobs just to frame a good shot. You can play exactly as you normally would. Once your session ends, you can reopen the replay and look at the same moment from completely different angles.
So if you want full creative control over camera movements after you have finished playing, ReplayMod remains the strongest option.
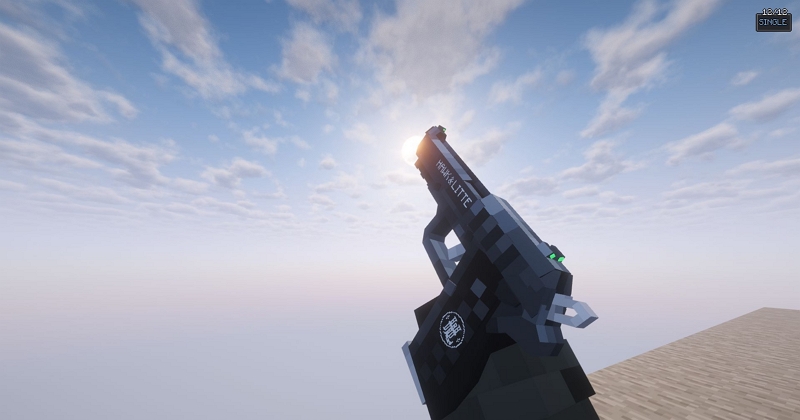
More Details — ReplayMod
| Aspects | Details |
|---|---|
| Where to Get It | Official website, Modrinth, or CurseForge |
| Supported OS | Windows, macOS, and Linux, for Minecraft Java Edition (Bedrock isn't supported). Runs on Fabric for 1.14 and up, or Forge for 1.12.2 and below, including the original 1.7.10 release. |
| Record Content | Neither video or audio, directly. ReplayMod captures replay data like camera positions, block updates and player movement instead of a straight video. However, you can export that to MP4 afterward. It doesn't record microphone or desktop audio at all. So you'll need a separate tool for commentary or voice chat. |
| Pricing | Free and open source |
| Output Location | Raw replay files land in the replay_recordings folder inside .minecraft. Rendered MP4s go to replay_videos, also inside .minecraft. Both are configurable. |
| Editing Features | Free camera, camera paths, timelapse, and slow motion — all applied after you've already finished playing. |
| Performance & Storage | Replay files stay small and you can cap recording length, so they never grow past a set size. Runs smoothly during long sessions, though rendering the final video benefits from a stronger PC. |
2. Flashback
Flashback launched a full decade after ReplayMod in 2024, but it's already as popular as ReplayMod. The later releases also expose its biggest limitation: it only works with Minecraft 1.21 and above. So if you're playing on a server, there's a good chance you can't use it at all.
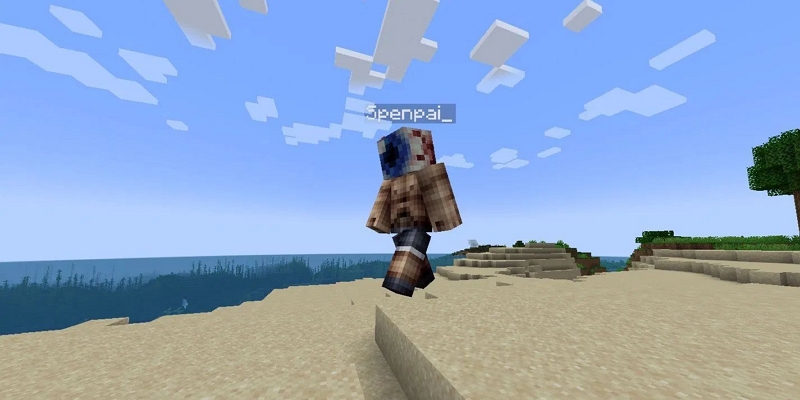
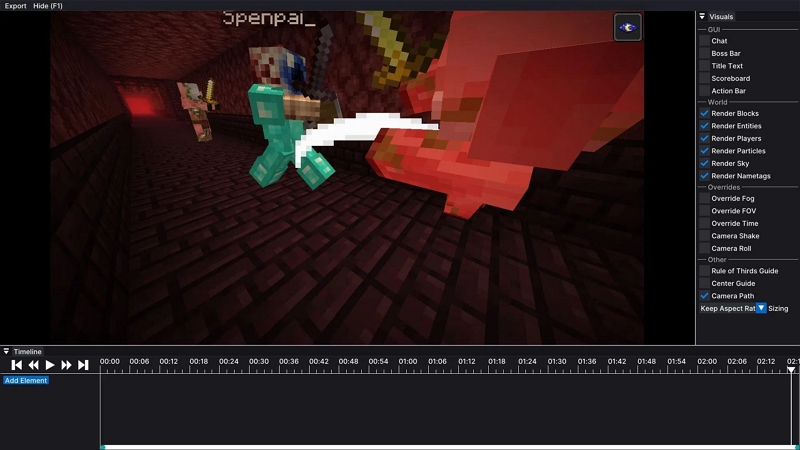
What made it catch on so fast is that it's built to be faster and easier to learn than ReplayMod. Like ReplayMod, Flashback records replay data instead of raw video — every movement, block update, entity, and camera angle is saved so you can come back to the session later. However, the real difference will show up afterward. For instance, Flashback ships with a timeline-based editor, which is actually closer to what you'd find in real video editing software. So you can scrub through the recording, adjust your camera path, preview scenes, and export the finished video in one place.
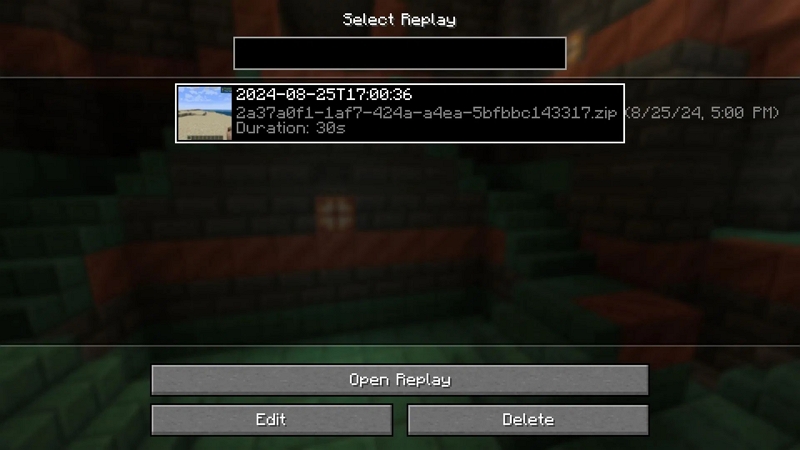
That makes Flashback the better pick if you care more about the finished cut than learning the tool itself — cinematic edits, cutting out awkward angles, or putting together a tutorial or showcase all come easier here.
Overall, if you're already on a newer Minecraft version, it's simpler to just start with Flashback than to pick up ReplayMod.
More Details — Flashback
| Aspects | Details |
|---|---|
| Where to Get It | Modrinth or the project's GitHub releases |
| Supported OS | Windows, macOS, and Linux, for Minecraft Java Edition, but only through Fabric and only for version 1.21 and up. |
| Record Content | Same core approach as ReplayMod — no video or microphone audio recorded directly. Instead, it saves replay data: player movement, entities, block updates and world events, which get rendered into a video afterward. |
| Pricing | Free to use, but not open source like ReplayMod. Flashback's code is all rights reserved. |
| Output Location | Replay files are stored in the mod's own replay folder inside .minecraft — similar structure to ReplayMod. |
| Editing Features | A full timeline editor built into the mod itself. You will get smoother playback scrubbing, camera keyframing, ready-made cinematic camera paths and higher-quality video export. |
| Performance & Storage | It is the same as ReplayMod on file size — replay data stays far smaller than a raw video recording. And rendering will need a fast CPU or GPU. But don’t forget that it runs a heavier video editor underneath. |
3. ServerReplay

When ReplayMod and Flashback record your own session — what your character sees and does, ServerReplay works from the other direction entirely. It runs directly on the Minecraft server and records the whole multiplayer world at once.
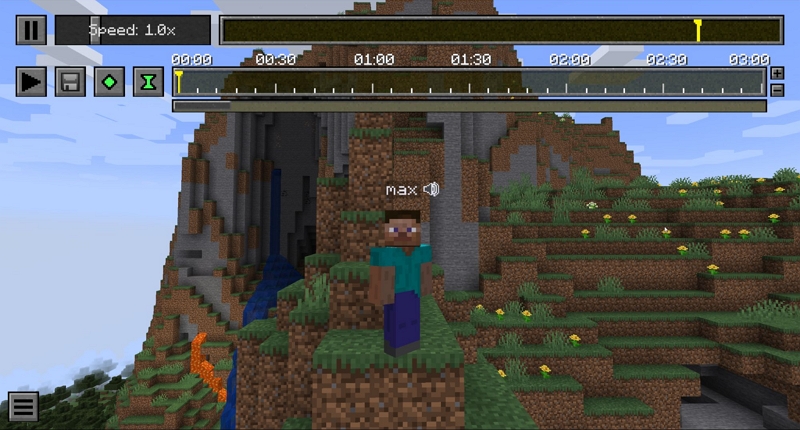
So every player's movements, their interactions, and server events will all land in the same set of replay files. Once the session is over, you can switch between different players' perspectives and piece together cinematic flyovers from any of them.
Moreover, ServerReplay goes just beyond recording players. You can even customize it to document a specific chunk on the map. ServerReplay will then record that area directly, even if no player ever set foot in that area during the gameplay session.
In all, ServerReplay is suitable when you want to document everything that happened across the entire server. This is especially needed when you’re running an SMP, organizing a PvP tournament, or documenting a big community build. Since the recording happens server-side, you can schedule it and capture key events automatically, without anyone needing to hit record themselves.
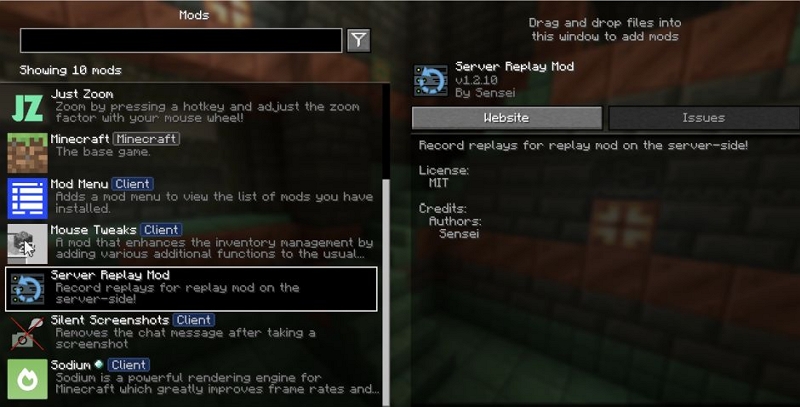
However, ServerReplay is not an alternative to ReplayMod or Flashback — it works alongside them. For instance, ServerReplay can only handle the recording and you'll still need to open the file in one of those two mods to actually edit it.
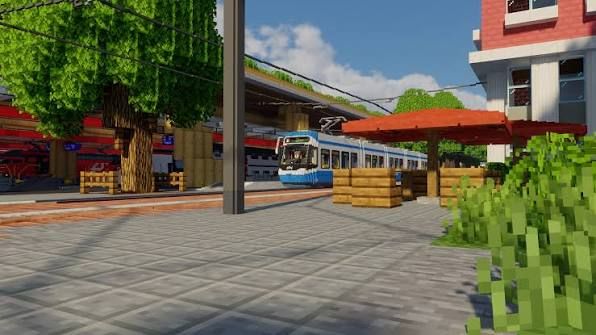
More Details — ServerReplay
| Aspects | Details |
|---|---|
| Where to Get It | Modrinth, built for Fabric servers |
| Supported OS | Minecraft Java Edition, Fabric server-side installation. Players don't need to install anything themselves — the server handles all the recording. |
| Record Content | Records the POV of every online player, world events, or a chosen chunk region automatically, instead of a single player's view. A few things fall outside its reach, though: custom boss bars don't get picked up in chunk recordings, player recordings aren't always 100% consistent with client-side ReplayMod or Flashback, and it isn't really built for heavily modded servers with custom packet implementations. |
| Pricing | Free and open source, same as ReplayMod |
| Output Location | Saves to recording folders on the server side. Admins can manage and transfer the files afterward for editing. |
| Editing Features | None built in — relies on ReplayMod or Flashback for free camera movement, player switching, and cinematic shots. |
| Performance & Storage | Runs almost entirely server-side, so it barely touches individual players' PCs. |
4. Blockbuster
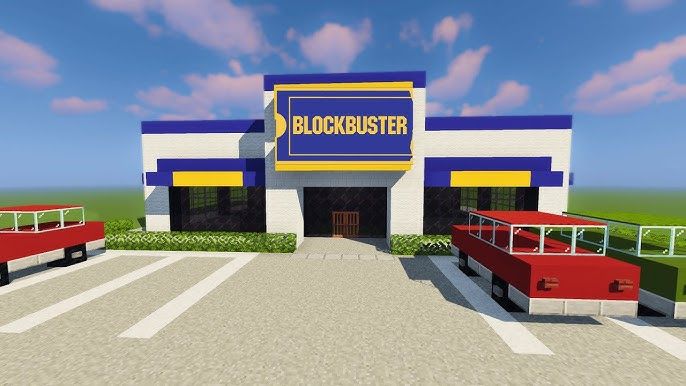
Blockbuster isn't built to record or replay your Minecraft gameplay at all. Instead, it lets you build things that never actually happened in your world. So you can use it to turn Minecraft into a movie set you script and direct yourself. For instance, it lets you spawn actors, record their movements and play them back as many times as needed. This way, you can synchronize multiple actors at once and choreograph entire scenes without asking real people to repeat the same motion over and over.
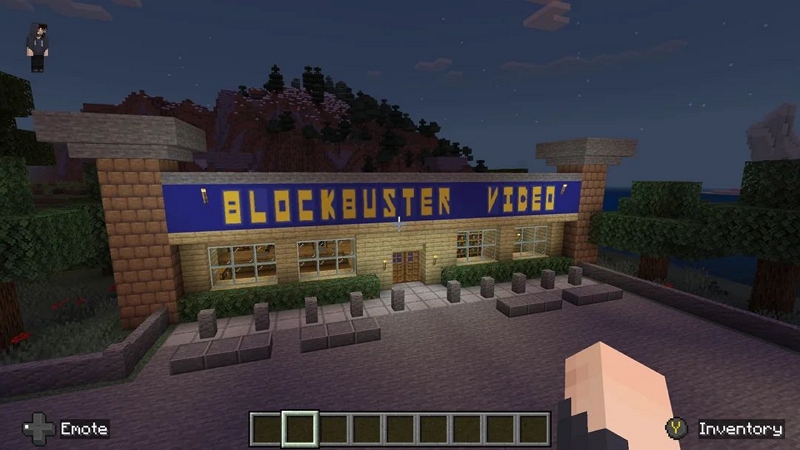
So it is suitable if you are a machinima creator, storyteller and map maker. Or, you simply want to direct and create cinematic videos. It is widely used for making Minecraft films, trailers, roleplay videos, or creating cinematic cutscenes.
That precision comes at a cost, though. Blockbuster carries a real learning curve. So keep that in mind. If you just want to record scenes (not direct them), ReplayMod or Flashback are more suitable.
More Details — Blockbuster
| Aspects | Details |
|---|---|
| Where to Get It | CurseForge, Modrinth (where supported), or the official Minecraft project website |
| Supported OS | Windows, macOS, and Linux, for Minecraft Java Edition. Primarily built for Forge-based Minecraft versions. |
| Record Content | Not a traditional recording. Blockbuster records player actions as reusable actor animations. You can replay them through NPCs, synchronize multiple characters, and build entire scripted scenes. |
| Pricing | Free and open source |
| Output Location | Actor recordings, scene data, and project files save inside your Minecraft world by default, though the Blockbuster folder itself can be configured. |
| Editing Features | Create NPC actors, replay recorded movement, synchronize multiple characters, script camera scenes (often alongside Aperture), repeat actions on command, and produce machinima-style animations. |
| Performance & Storage | Lightweight for short scenes. Larger scripted projects with many actors get resource-intensive fast. |
5. record-able

If you just want a traditional recorder built into Minecraft — where you can press a button, start recording, and get a file ready to upload or edit, use record-able. It doesn’t give you any free camera control or replay timeline.
That makes it the go-to when you want to capture a quick tutorial, bug reports, or casual gameplay clips — anywhere capturing the moment matters more than crafting a cinematic camera move.
More Details — record-able
| Aspects | Details |
|---|---|
| Where to Get It | Available on Modrinth and GitHub releases |
| Supported OS | Windows, macOS, and Linux for Minecraft Java Edition. Built for modern Fabric-based versions. |
| Record Content | Records actual gameplay video, not replay data. Captures both video and audio straight from your screen inside Minecraft, no rendering step needed afterward. |
| Pricing | Free and open source |
| Output Location | Finished video files save directly to your configured recordings folder, ready to play or edit immediately. |
| Editing Features | Minimal by design. record-able focuses on recording, not post-production. Trimming, effects, or annotations need an external video editor. |
| Performance & Storage | Real video takes up far more space than replay data. Performance depends on your resolution, frame rate, and hardware, much like any traditional screen recorder. |
6. Aperture
Aperture is most often paired with Blockbuster, but learning Blockbuster's full workflow takes real time, especially if all you actually want is smooth, professional camera movement without directing an entire scene. So you can also use Aperture on its own.
But unlike ReplayMod or Flashback, it won't let you record or replay a gameplay session at all. What Aperture will give you instead is complete control over the camera itself. You can build complex camera paths, adjust speed and field of view, and apply smooth transitions between shots. You can even preview every angle before you ever take the snapshot.
You can think of it as a virtual camera crane or a drone built right into Minecraft. And you can use it to design your shots first and capture them exactly as planned instead of filming and hoping the angle works.
More Details — Aperture
| Aspects | Details |
|---|---|
| Where to Get It | Official Forge page (CurseForge) |
| Supported OS | Windows, macOS, and Linux for Minecraft Java Edition. Built for Forge, primarily Minecraft 1.12.2, and requires McLib. |
| Record Content | Doesn't record gameplay, replay files, or video on its own. Instead, it lets you build and capture advanced camera paths and camera profiles. |
| Pricing | Free and open source (GPLv3) |
| Output Location | Camera profiles are saved inside your world's data/cameras folder, or the config/aperture/camera directory. |
| Editing Features | Advanced camera editor, keyframes, path fixtures, follow and look-at cameras, FOV animation, easing effects, camera modifiers and reusable camera profiles. |
| Performance & Storage | Camera profiles take up very little storage, as they're movement data but not video or replay files. |
How to Download and Use Minecraft Recording Mod
Every Minecraft recording mod has its own installation requirements. However, most client-side mods follow a similar setup process.
For instance:
- You typically have to install the correct mod loader (Fabric or Forge).
- Place the mod in your .minecraft/mods folder.
- Then launch the matching Minecraft version.
You can find detailed guides on YouTube and in Discord communities for most of them. But as an example, here is how to install ReplayMod when you want to capture your game moments from different angles, analyze your gameplay, or shoot cinematic scenes.
Steps to Install and Use ReplayMod
Step 1. You will need four specific components:
- ReplayMod from its official website
- Fabric mod loader (which hooks the mod into Minecraft)
- Fabric API (a mandatory dependency to prevent crashes)
- FFmpeg (an external encoder required to render and save your final videos)
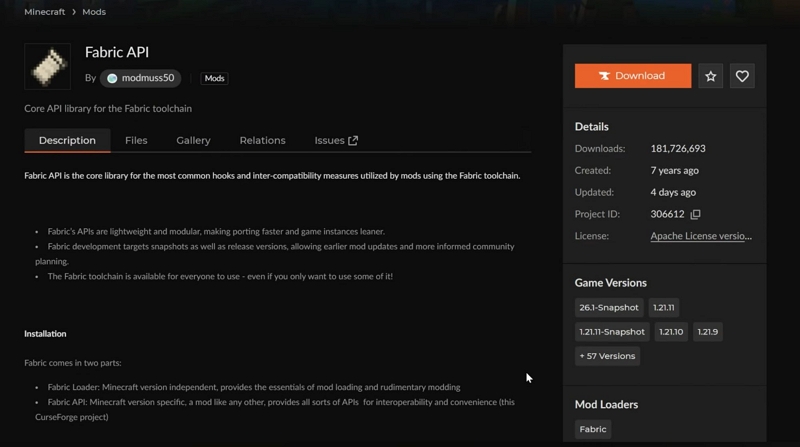
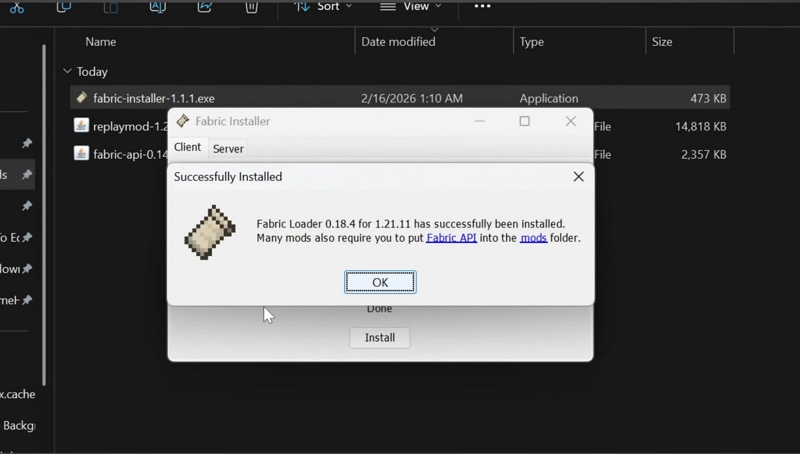
Step 2. Run the Fabric (.exe) installer, select your Minecraft version and click Install to create a new Fabric profile.
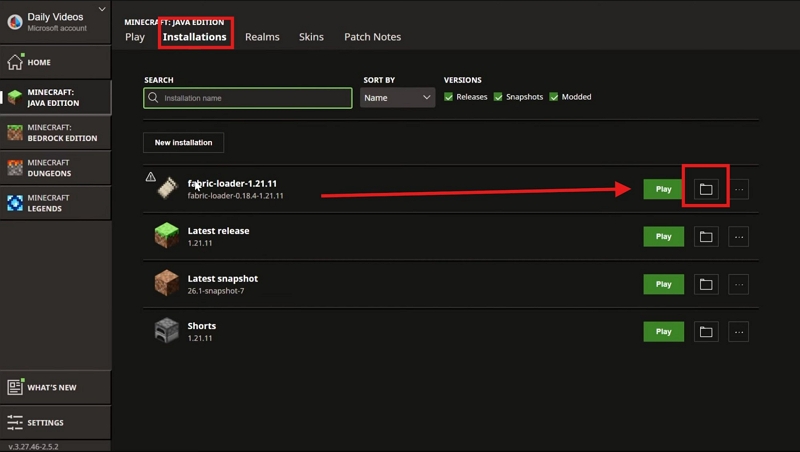
Step 3. Open the Minecraft launcher. Then:
- Navigate to the Installations tab.
- Click the folder icon next to your newly created Fabric profile.
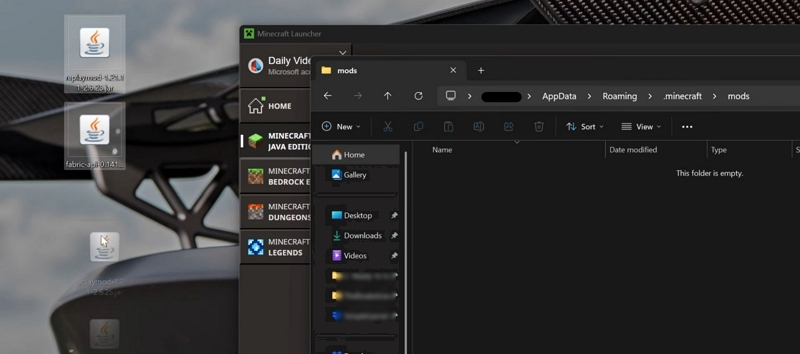
- Drag and drop the ReplayMod .jar file into the mods folder.
Note: If the folder does not exist, simply create one and name it “mods”.
Step 4. In the same root .minecraft folder, drag the downloaded FFmpeg zip file inside, right-click it and select Extract All. Make sure the extracted contents go directly into that folder.
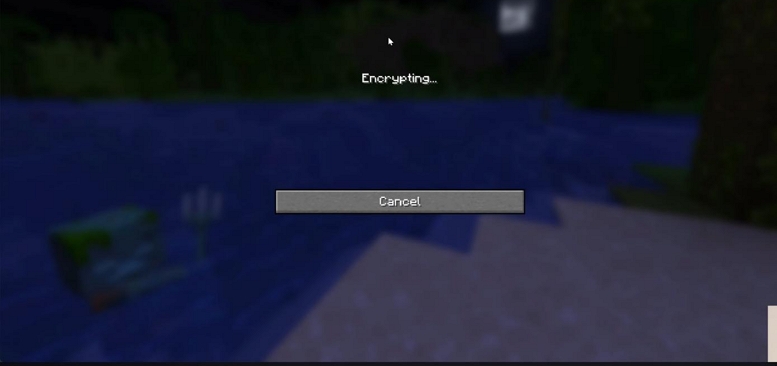
Step 5. Select your Fabric profile in the launcher. Hit Play. The mod UI will step in immediately. From now on, the moment you log into a world or server, the mod will start recording automatically.
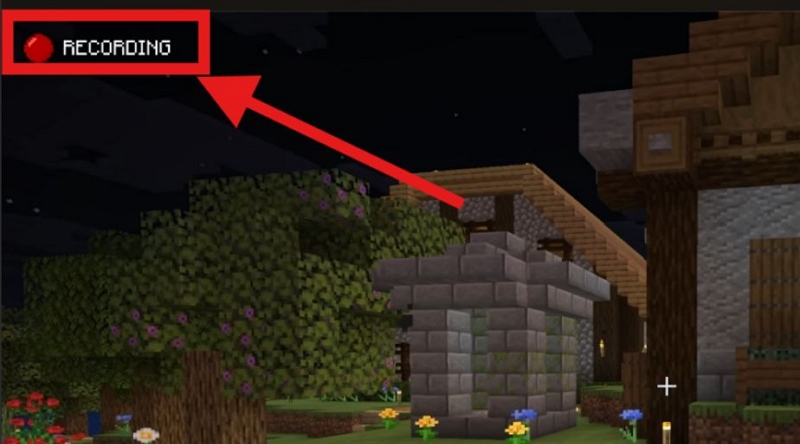
You will see a small red recording dot and a text indicator clearly placed in the top-left corner of the screen.
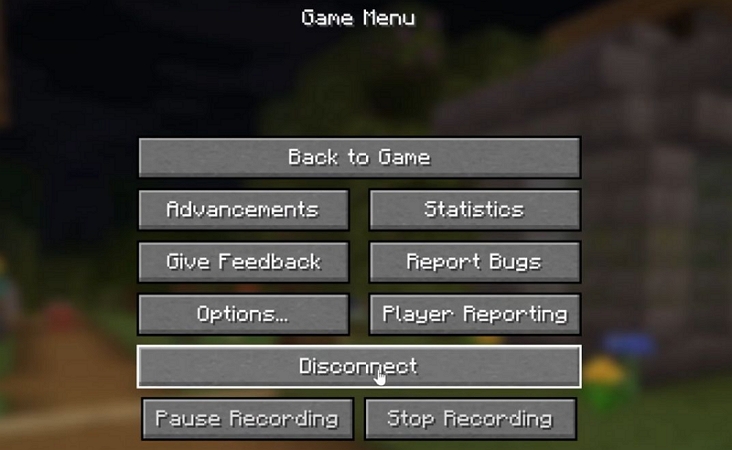
Step 6. Press Escape to open the standard game menu. You will notice two UI buttons seamlessly integrated at the bottom: Pause Recording and Stop Recording.
You can also click the top-left indicator to control recording.
Step 7. Leave the world and return to the main Minecraft menu. You will see a new Replay Viewer button (a film reel icon) next to the Realms button. Click it. It displays all your saved raw replay files, complete with dates, server IPs, and duration.
Step 8. Your screen transforms into a video editor. On the left side you will see utility buttons showing Set Position and Time Keyframes. Use these to detach your camera from the player model and program your own path. This allows you to take cinematic shots.
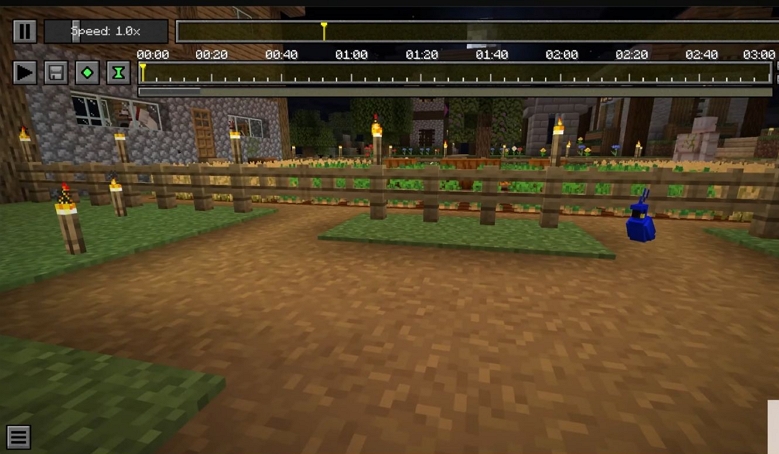
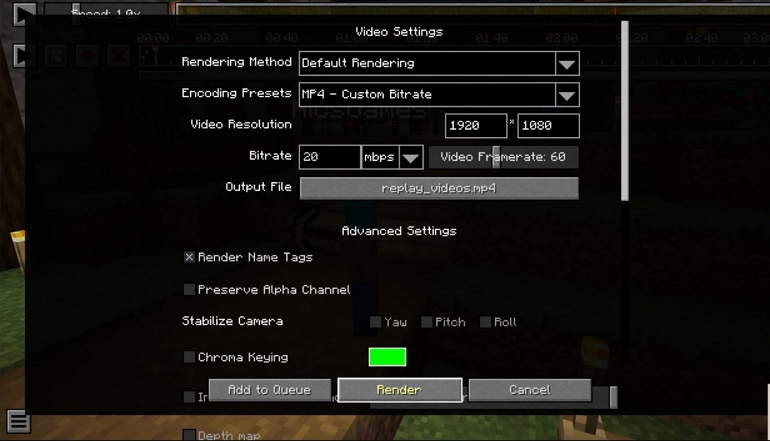
Once you are happy with your camera path, click the render icon (the floppy disk). It will open a detailed video settings pop-up. Here you can choose video resolution, frame rate, bitrate, and more.
Then hit the final Render button. The screen will darken and display a prominent circular loading icon in its center. Wait for the progress to complete.
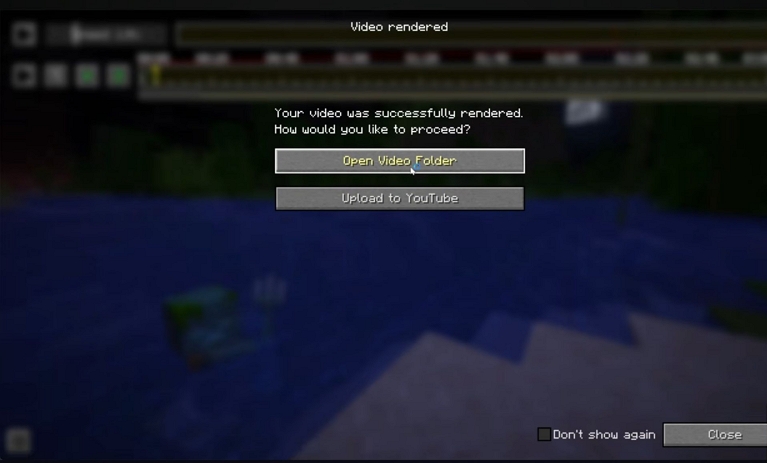
Once finished, a success screen will offer you two options. Pick what you need.
- Open Media Folder (to view your exported MP4).
- Upload to YouTube if you want to send it directly to your channel.
How to Record Minecraft Gameplay with Audio Without Mods
Minecraft recording mods are excellent for creating cinematic videos, replay editing, and machinima. But they aren't built to capture a long-form recording or your entire gameplay. Plus, mods only capture the Minecraft world. They often don’t capture your full experience. For instance, they will exclude HUD, inventory, crosshair, chat, your mic, Discord audio, and in-game audio. So you cannot create a dedicated tutorial or capture a video that shows your actual Minecraft journey. You’ll need a dedicated screen recorder for that and Eassiy Screen Recorder Ultimate is the best tool.
Eassiy lets you capture the Minecraft gameplay exactly as you want. Its dedicated Game Recorder locks onto the Minecraft window. You can use this record mode to record your full survival series or clean HUD footage without any distractions in the game footage.
You can even selectively choose to record system audio, Discord, your microphone, and your webcam all at once. This will let you create ideal Minecraft recordings for Let’s Plays, tutorials, live commentary, or any purpose you need.
As for the output, Eassiy lets you export the screen recording in MP4, MOV, or MKV. You can save the video directly to your computer as a finished video file without any waiting or rendering. You don’t even have to install any mods to run it and record your Minecraft gameplay. Plus, Eassiy runs entirely offline and uses minimal resources.
Key Features:
- Real-time annotation tools let you mark up the video as you record. It is really useful for tutorials, PvP highlight reels, or live commentary.
- You can schedule gameplay recordings.
- You can pause recording mid-session without stopping the whole capture.
- With 20+ recording modes, including mouse-follow and other advanced options. It adapts to whatever kind of content you're capturing.
Steps to Screen Record Minecraft with Audio
Step 1. Install Eassiy Screen Recorder Ultimate on your computer.
Step 2. Open the main interface and select Game Recorder from the drop-down. Choose Minecraft as the window you want captured.
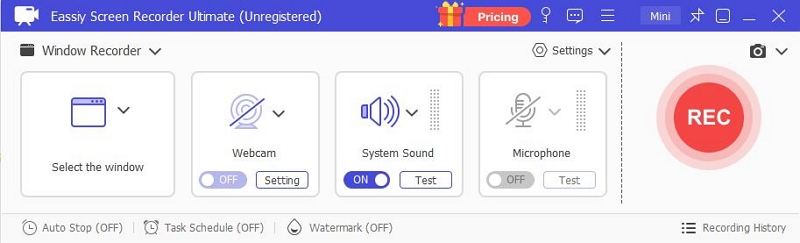
Step 3. Turn on System Volume to pull in audio from Minecraft itself. You can even keep other audio sources like Discord included.
Step 4. Turn on Microphone if you want commentary. You can enable Webcam if you'd like a facecam in the corner.
Step 5. Hit the red REC button to start. A floating control bar will appear below your Minecraft window. This bar will let you use annotations and pause the recording without interrupting your session.
Tip: You can minimize this floating bar. And it won't interfere with your gameplay at all.
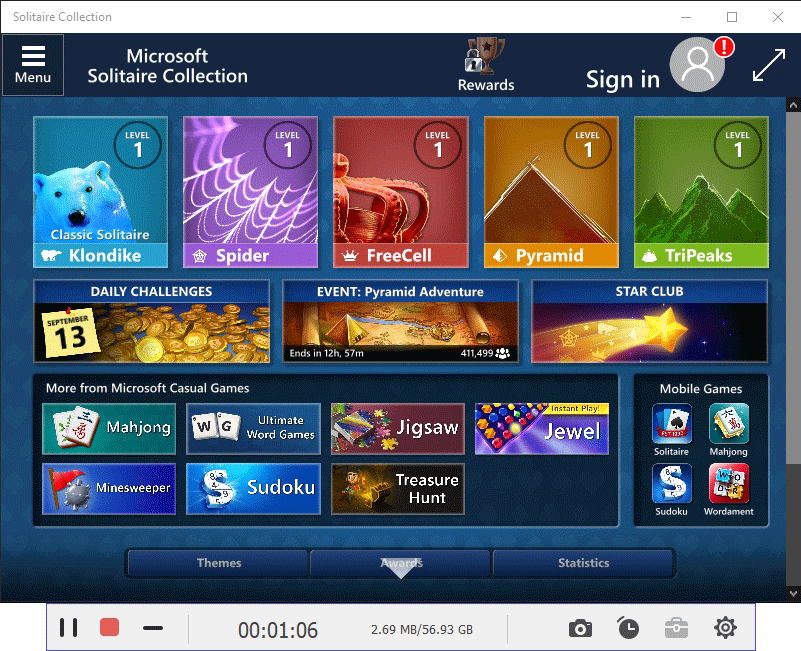
Step 6. Tap the red Stop button to end the gameplay recording.
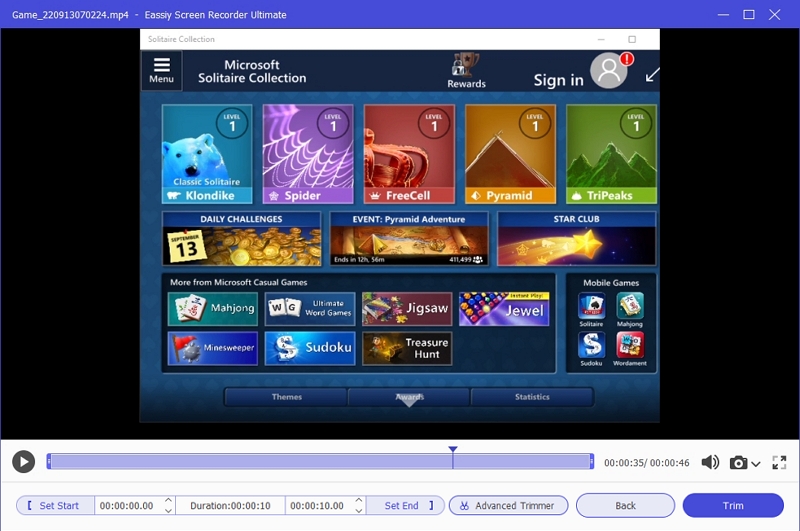
Your recording will open automatically in Eassiy’s preview window. The built-in editor also lets you trim the video and apply basic edits. You can then click Export to get the video in your desired format.
Screen Recorder Mod vs Screen Recorder App: How to Choose Among Them
Now there are two options before you, but screen recorders are not an alternative to Minecraft recording mods. These two things are built for different kinds of creators. If you are unsure which one fits your workflow, here is a quick comparison.
| Aspects | Minecraft Recording Mod | Screen Recorder |
|---|---|---|
| If your goal is to create | Cinematic replays, replay edits, machinima, camera flythroughs | Survival series, tutorials, let's plays, PvPs, live streams, full session recordings, annotations |
| What it captures | Replay data and world events for editing later | Everything exactly as you see on the screen, including HUD and chat |
| After the game ends | You can move the camera anywhere after playing. | It gives you a normal video. |
| Which one should you choose | You want more creative freedom after the game ends — create a movie, cinematic shots, screenshots, or analyze mistakes via key positions. | You want to record your gameplay as-is, share it on social media, stream on YouTube, annotate, and create tutorials. |
FAQ: Are There Minecraft Recording Mod APKs?
For Minecraft Bedrock Edition (Android), there are add-ons. These are not called mods. And they will not offer the same advanced replay system as Java. But a few projects have brought similar recording features.
Note: You typically cannot run mod APKs of Minecraft Java Edition on Android. If you come across such a thing, it may be a scam or a phishing attempt.
Here are two add-ons that bring similar recording features to Bedrock Edition:
- ReplayCraft: It can record and replay gameplay. You will even find camera control inside Bedrock. It is mostly suited for cinematic replays and gameplay analysis.
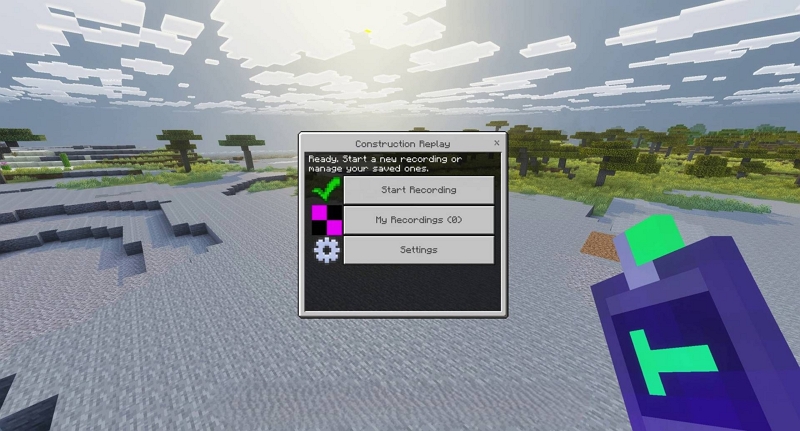
- Construction Replay: It will record building actions and replay them as built timelapses. You can even reconstruct the animations. This is best for building showcases and timelapses.
How to Install Minecraft Recording Add-On on Android
Step 1. Download the add-on as a .mcaddon or .mcpack file.
Step 2. Tap the downloaded file. Minecraft Bedrock will automatically import it.
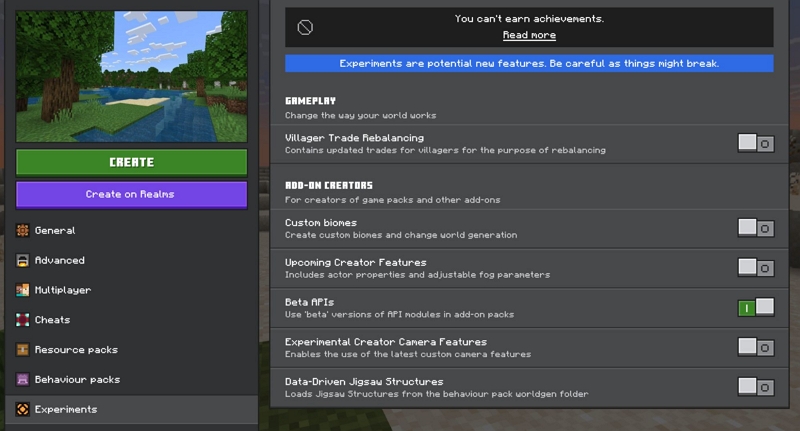
Step 3. Open World Settings and enable the imported Behavior Pack and Resource Pack.
Step 4. Enter your world and use the add-ons menu or commands to start recording. For example, ReplayCraft provides a replay stick and in-game menus to record and replay your gameplay.
To Sum Up
That brings us to the end of the guide. You now know about all the types of recording tools available for Minecraft.
- Minecraft recording mods are only suitable for cinematic shots, movies, and replay analysis. So they are more helpful in creating small cinematic shots.
- Eassiy Screen Recorder Ultimate is suitable for capturing full gameplay recordings. For instance, when you want to upload them to YouTube or social channels. It is also helpful when you want to use annotation tools in your game recordings, webcam capture, Discord audio, and other advanced recording tools. These all help you capture the Minecraft game the way you want.