






 Help Center
Updated on 2026-08-25
views
5min read
You've finished recording your screen, but the Stop button isn't immediately visible when you're ready to end it. New Mac users often run into this while using QuickTime.
Fortunately, QuickTime includes several built-in ways to end a screen recording, from the Stop button to keyboard shortcuts and Voice Control. You can switch to another method whenever the default option isn't available. This guide covers how to end QuickTime screen recording step by step with the available options. You'll also learn where QuickTime saves your recordings and discover an alternative if you need more advanced recording features.
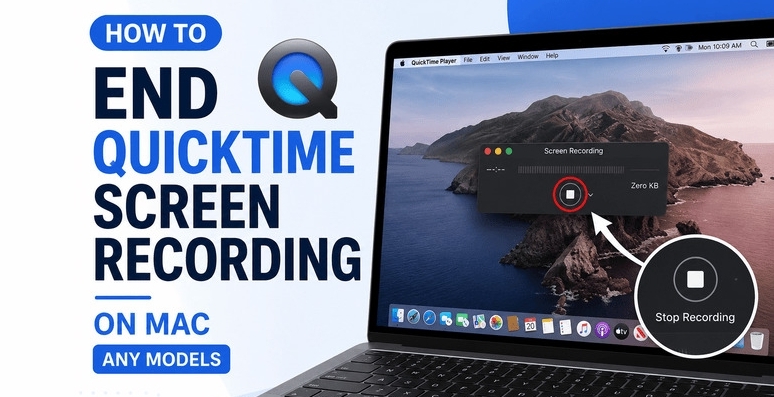
How to End QuickTime Screen Recording on Mac
QuickTime includes several ways to end a screen recording and each has its own advantage. Choosing the right method depends on your recording setup and how you prefer to interact with your Mac.
Way 1. Stop QuickTime Screen Recording with Shortcuts
A keyboard shortcut is a simple way to end a QuickTime screen recording without moving your cursor or searching for hidden controls. It works particularly well in full-screen mode and helps you stop recordings more efficiently while keeping your focus on the task at hand.
Option 1. Use Command + Control + Escape
QuickTime includes built-in keyboard shortcuts for ending a screen recording. The shortcut for ending a QuickTime screen recording is changed based on the macOS. macOS Ventura, Sonoma, Sequoia, and later use “Command + Control + Escape” by default. Some older versions instead use “Command + Shift + Escape”.
Steps to Stop QuickTime Recording Using Inbuilt Shortcuts
1. Make sure the QuickTime screen recording is in progress.
2. Hold Command + Control + Escape.
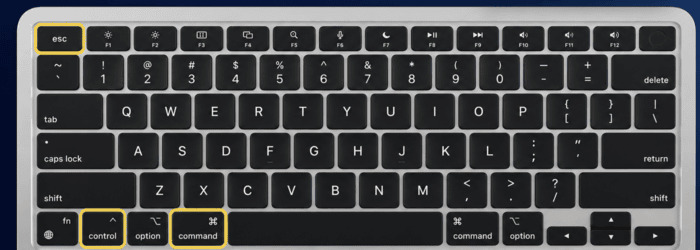
3. Wait for a few moments while QuickTime stops the recording.
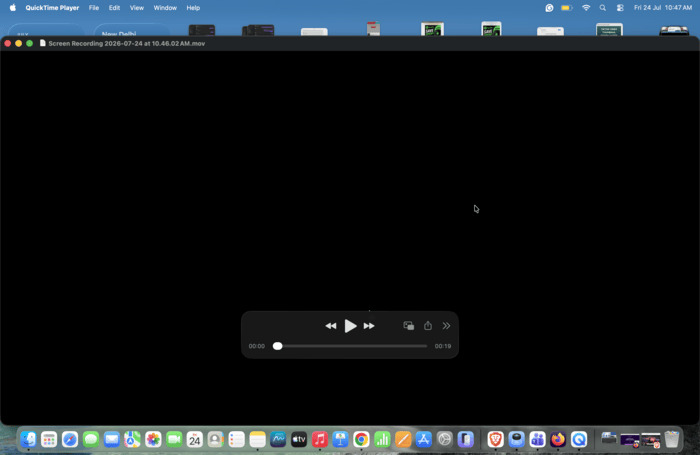
4. Preview the recording and save it.
Option 2. Use Custom Shortcuts
QuickTime also lets you create a custom keyboard shortcut for stopping a screen recording. This lets you assign a different key combination for the Stop Recording command that matches your existing custom shortcuts or keyboard preferences.
Steps to Create a Custom Ending Shortcut for QuickTime
1. Visit Apple menu > System Settings > Keyboard.
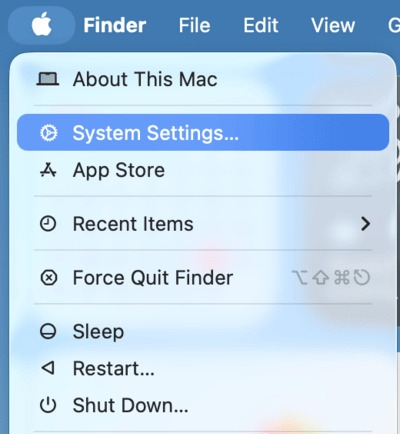
2. Tap Keyboard Shortcuts... on the right side.
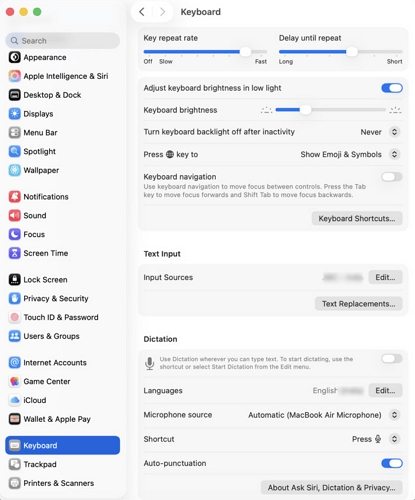
3. Click App Shortcuts from the left sidebar and press +(Add).
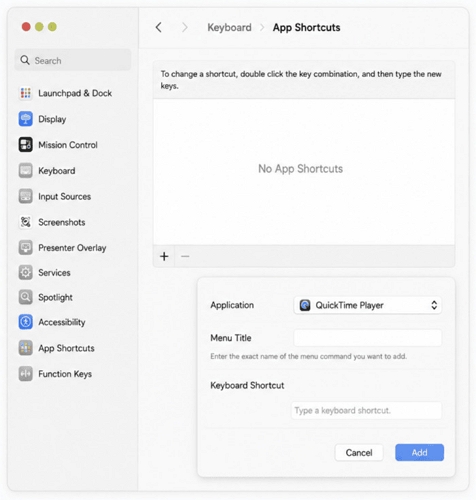
4. Pick QuickTime Player from the Application drop-down menu.
5. In the Menu Title field, type the menu command exactly as it appears in QuickTime: Stop Recording.
- Click the Keyboard Shortcut field. Press the key combination you want to use and hit Done.
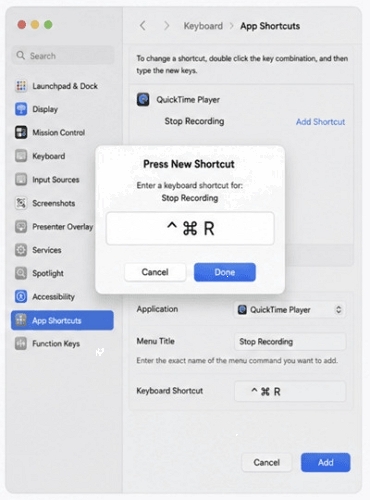
Open QuickTime Player and press your new shortcut to perform the assigned menu command.
Tip: If the recording opens automatically after you stop it, tap File > Save or File > Move To to choose a different location before closing the preview window.
Way 2. End QuickTime Screen Recording via Menu Bar
The menu bar method is ideal for users who prefer clicking over using keyboard shortcuts. When QuickTime is recording your screen, a Stop button appears in the menu bar for easy access. This method requires just one click and works across supported macOS versions.
Steps to Stop QuickTime Recording from the Menu Bar
1. Hover your cursor to the top of recording to display the hidden menu bar.

2. Press the Stop button in the menu bar.
3. After QuickTime opens the recording, preview it and save the file.
Tip: Before recording with the Screenshot toolbar (Command + Shift + 5), click Options to view or update the Save To location used for future recordings.
Way 3. Stop QuickTime Screen Recording Using Voice Control
Voice Control provides another way to stop a QuickTime screen recording when the keyboard or mouse is inconvenient to use or they aren’t working. You can control your Mac with voice commands, making the recording process more flexible.
Steps to Stop QuickTime Recording with Voice Control
1. Open Apple menu > System Settings > Accessibility.
2. Tap Voice Control and turn it on. If prompted, complete the initial setup process.
- Keep your Mac online until the Voice Control files finish downloading.
- Complete the on-screen setup and grant any required permissions.
- Once the Voice Control microphone icon appears and displays Listening, Voice Control is ready to use.
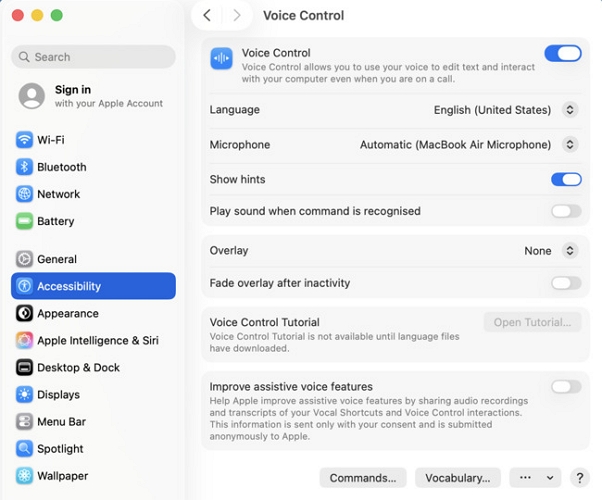
3. Start your QuickTime screen recording as usual.
4. Once ready to end the recording, say "Click Stop Recording" or "Click Stop."
5. QuickTime will stop the recording. Open the recorded video and let you review or save it.
Tip: Where Is the QuickTime Screen Recording Save Location
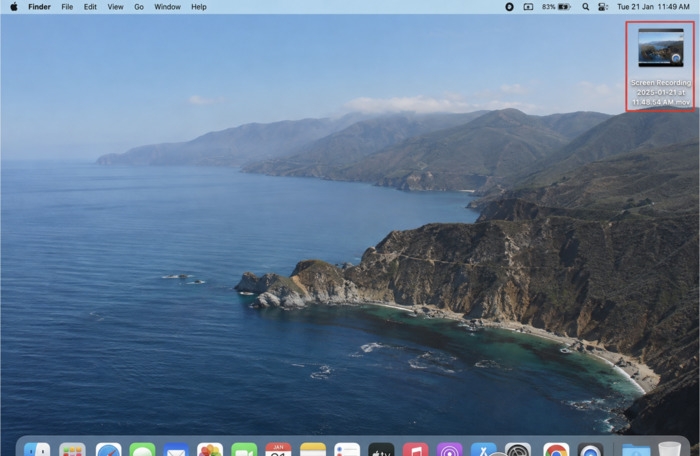
Your recording doesn't disappear after you stop it, but it may not always be saved where you expect. The default save location is the Desktop on most Macs. If it's missing, another folder may have been selected in the Screenshot app before recording.
Here’s how to find your QuickTime recording location:
1. Check your Desktop first. By default, QuickTime saves screen recordings with filenames like "Screen Recording [Date] at [Time].mov".
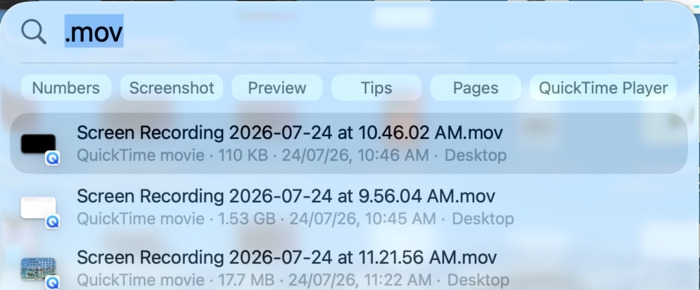
2. Press Command + Space to open Spotlight, then search for .mov if you can't find the recording. Then, sort by recent files and open the matching result.
How to Screen Record on Mac Without QuickTime
QuickTime handles basic screen recording well, but it isn't designed for more advanced recording tasks. Features like flexible recording modes, audio controls, annotations, and multiple export options can make content creation much easier. For these needs, a more advanced screen recorder is an ideal option.
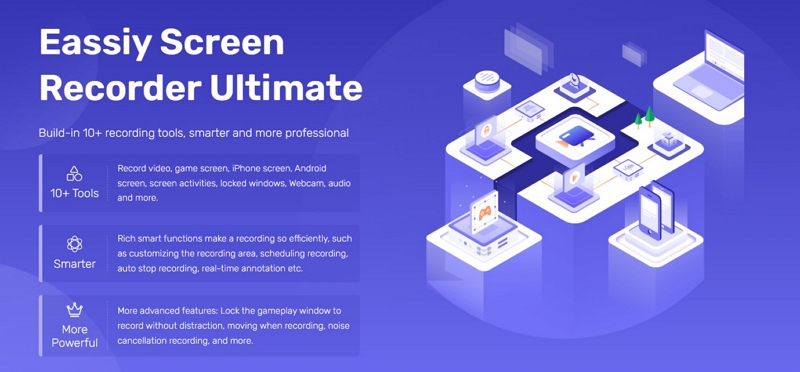
Eassiy Screen Recorder Ultimate expands on QuickTime's basic recording capabilities with more flexible recording tools. It supports high-quality screen recording with system audio, microphone input and webcam capture, all in an easy-to-use interface. Beyond recording, it includes productivity tools, such as scheduled recording, automatic recording stop, and customizable shortcuts to make screen capture more efficient.
Key Features
- Capture the full display, an individual application window, or a custom-selected area.
- Mark important content with live annotations as you record.
- Record and export videos in multiple formats with up to 4K quality for broad compatibility with editing software and online platforms.
- Screen record Teams meetings, WhatsApp calls, Snapchat videos and Instagram Stories without notifications or black screen.
How to Record Screen on Mac with Audio Using Eassiy
1. Download and launch Eassiy Screen Recorder Ultimate.
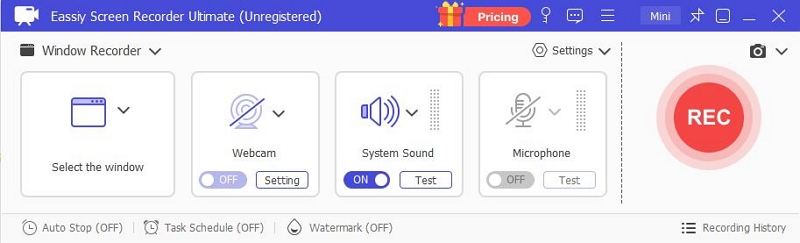
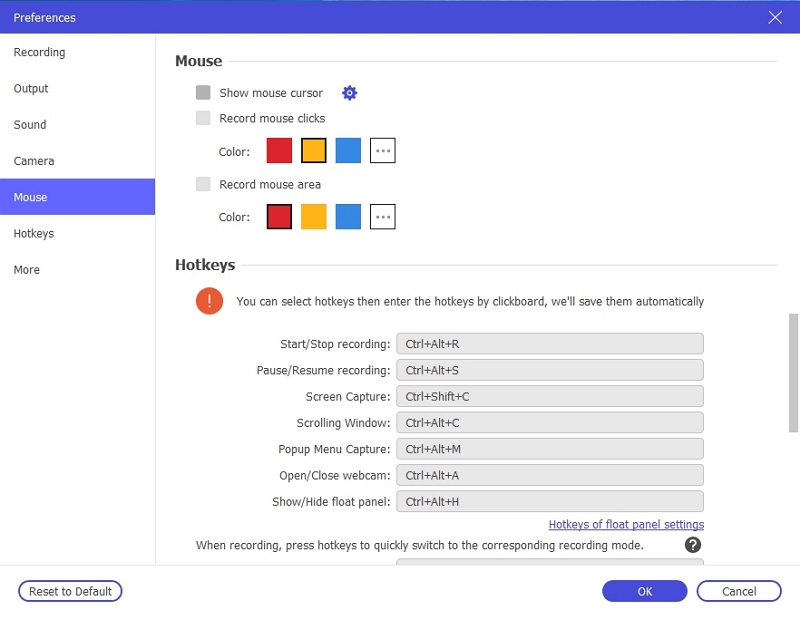
2(optional). Click the three-dot icon and select Preferences. Here, you can customize recording quality, output format, hotkeys, mouse effects, and other settings before recording.
3. From the main screen, choose Screen Recorder to configure your recording.
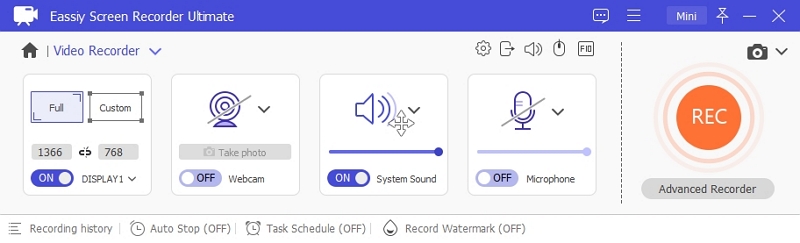
4. Configure your recording preferences:
- Mark the recording area (full screen or a custom region).
- Turn on System Sound and Microphone to record internal audio, your voice, or both.
- Adjust the audio level as required.
- Turn on the Webcam to include your face in the recording if needed.
- Click REC to start recording.
5. Mark important details with real-time annotations, so your recordings are ready to share with minimal editing.
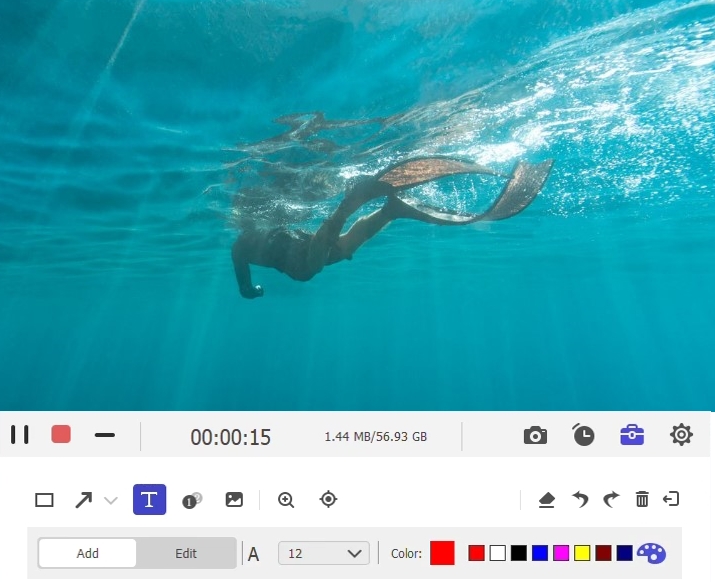
6. Once the recording completes, press Stop or use the assigned hotkey.
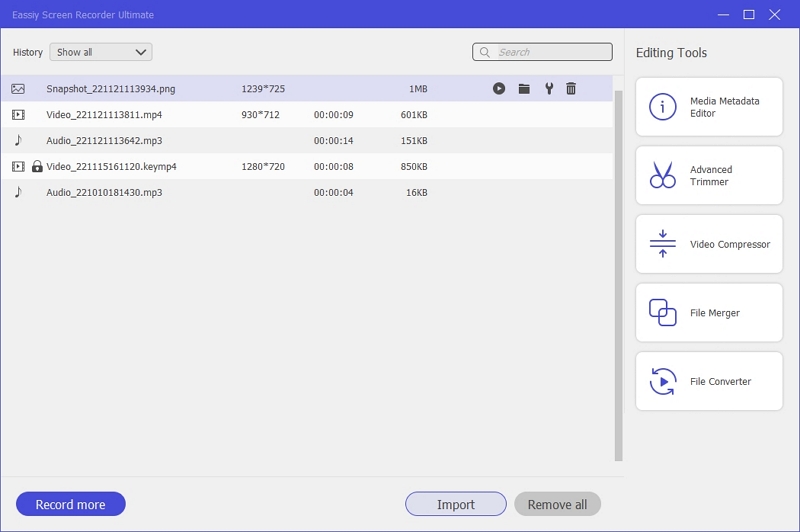
7. Preview and edit your recording before saving it to your Mac. Once saved, your recording is available in Recording History. Here, you can review, manage, or share it with just a few clicks.
Conclusion
Now that you know how to end QuickTime screen recording, you can stop and save your recordings without worrying about losing your work. Each method offers a practical solution for different recording scenarios, giving you more flexibility while using QuickTime. If you need more advanced recording capabilities, Eassiy Screen Recorder Ultimate offers additional tools to streamline the entire recording process.