





 Help Center
Updated on 2026-07-27
views
5min read
Most people think that Apple only allows Mac unlocking with an Apple Watch. While that's true, it's far from the only option. Your iPhone can do the job too, which skips the repeated password typing that interrupts your workflow every time your Mac wakes up.
In this guide, we'll focus mainly on the auto-unlock feature, where your Mac automatically locks and unlocks based on how close your iPhone is. We'll also cover how to access a locked iPhone using your Mac, in case you ever forget your passcode.
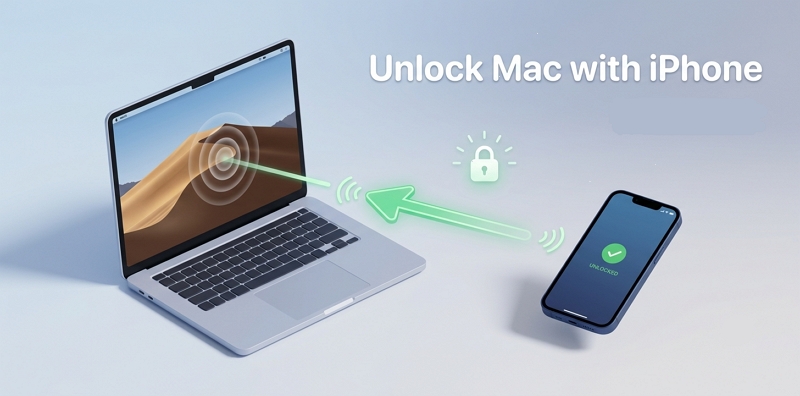
How to Unlock Mac with iPhone for Faster Access
There's more than one way to pair your iPhone with your Mac for faster access. Below is a quick comparison of the main methods, followed by step-by-step instructions for each.
FAQ: Can You Unlock Mac with iPhone Face ID?
No. iPhone Face ID is specific to iPhones and does not unlock a Mac. However, your iPhone can still wake and unlock your Mac via Bluetooth proximity, third-party utilities or shortcuts automation. Here are more details.
| Method | Supported Mac | Supported iPhone | Best For |
|---|---|---|---|
| Near Lock App | Mac with Bluetooth, macOS 10.12+ | iPhone 6 or later, iOS 12+ | Everyday convenience, minimal setup |
| iPhone Shortcuts | Mac running macOS Monterey+ | iPhone with iOS 15+ | Apple ecosystem users, no third-party apps |
| BLEUnlock (GitHub) | Mac with Bluetooth, macOS 10.12+ | Any iPhone with Bluetooth | Power users, free open-source option |
Way 1. Use Third-Party App
Near Lock is the simplest way to unlock your Mac with an iPhone. It has been around for years and the developer has maintained it via regular updates. Near Lock app uses Bluetooth Low Energy technology to constantly monitor the distance between your Mac and iPhone.
Upon configuration, your Mac automatically unlocks when your iPhone is close and locks when your iPhone is far. You can customise the lock and unlock distance, giving you full control over the sensitivity of the detection.
Out of the third-party options, Near Lock balances between simplicity and reliability. Its BLE technology protects it from being fooled by nearby devices. It consistently unlocks the Mac faster and with fewer false triggers as compared to other Bluetooth proximity apps.
Preps
- Your Mac and iPhone should be Bluetooth-enabled.
- Both devices should be signed in with the same account.
- Near Lock should be installed on both devices.
Steps to Unlock Mac with iPhone — Near Lock
- Download and install the Near Lock app on your iPhone and Mac.
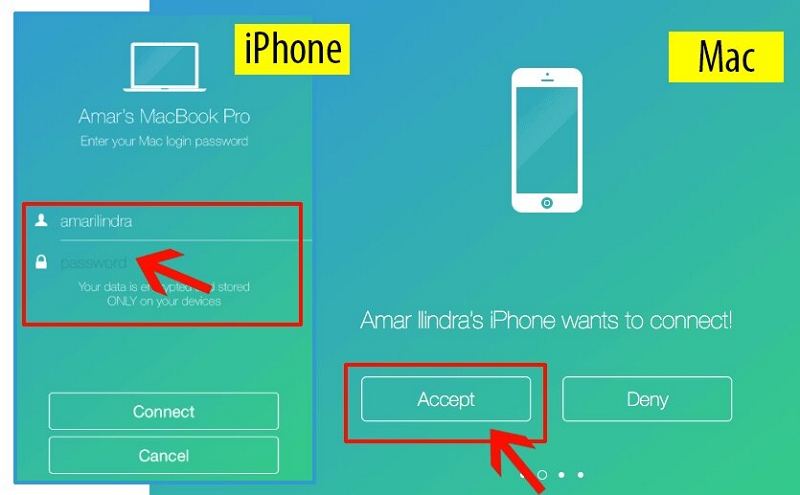
- Launch Near Lock on your iPhone and scan nearby Bluetooth devices. Tap on your Mac on the Bluetooth list to pair both devices.
- Enter your Mac’s password on your iPhone to establish the connection with your Mac and tap Connect. Then, click Accept on your Mac.
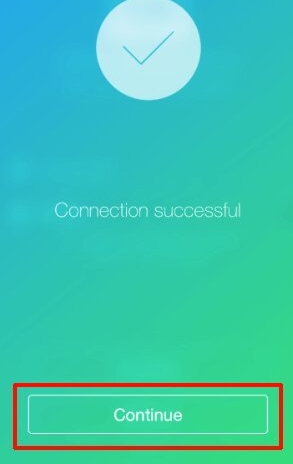
- Click on Continue to enter the main screen.
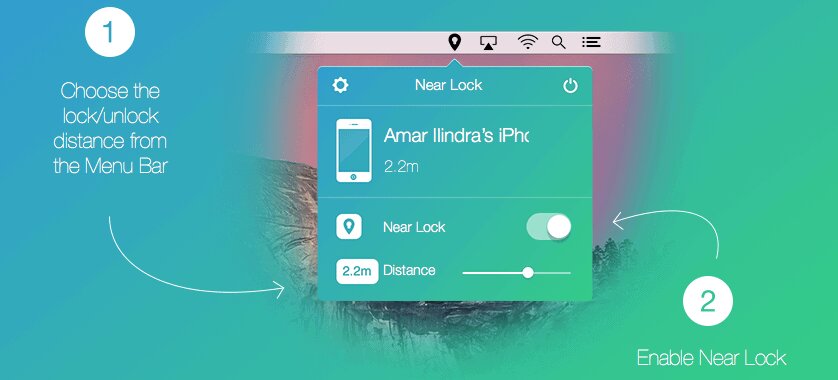
- Tap on your iPhone name and enable Near Lock.
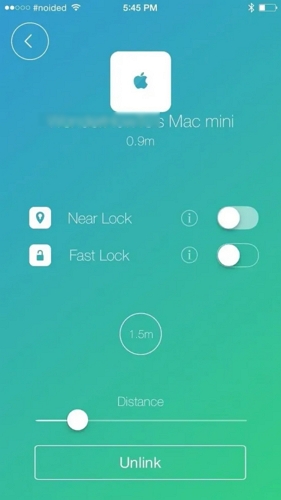
- Upon pairing the devices, set your lock and unlock distance under the Lock/Unlock tab. A distance of 1-2 meters is best for desktop setups. Note that setting the Bluetooth range too high can cause unexpected unlocks, and setting it too low may hamper reliable detection.
- Toggle on the Auto Unlock. Test the connectivity by walking away from your Mac with your iPhone to see if the screen locks. Then walk back towards your Mac and check if it unlocks immediately without entering your login password.
Way 2. Use Shortcuts
You can build custom automations via Apple’s Shortcuts app on your iPhone and Mac. Although it doesn’t provide true proximity-based unlocking and bypass your Mac password, Shortcuts still can automate various actions that speed up login and desktop access. You can make automations that wake your Mac, run scripts, launch apps remotely or trigger remote login workflows when your iPhone connects to a specific WiFi network.
This method comes in handy if you want to operate within Apple’s functionality and not third-party apps. However, the disadvantage is that your iPhone and Mac need to share the same Apple ID and be on the same WiFi network or within Bluetooth range for Handoff to function.
Preps
- Update your iPhone and Mac to the latest versions.
- Enable Bluetooth and WiFi on both devices.
- Turn on Handoff in Apple ID settings.
- Enable Remote Login or Screen Sharing on your Mac if required.
- Install the Shortcuts app if it’s missing on both devices.
Steps to Use iPhone Shortcuts to Open Mac
- Enable Remote Login on Mac. Go to System Preferences > Sharing. Then, toggle on Remote Login and ensure your user account is selected.
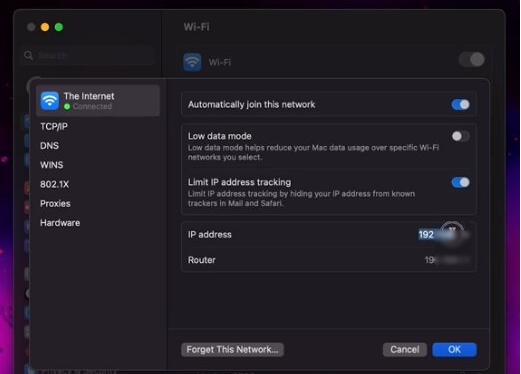
- Find Your Mac's IP Address. Open Wi-Fi settings, tap your network's Details and note the IP address.
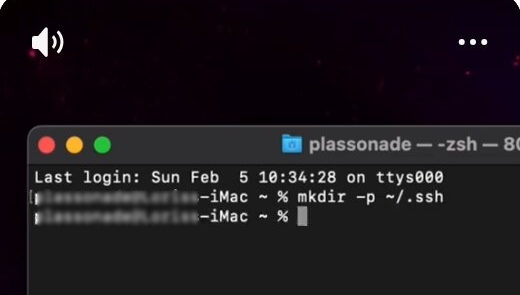
- Create the SSH Directory. Open Terminal and run mkdir -p ~/.ssh to set up the required SSH folder.
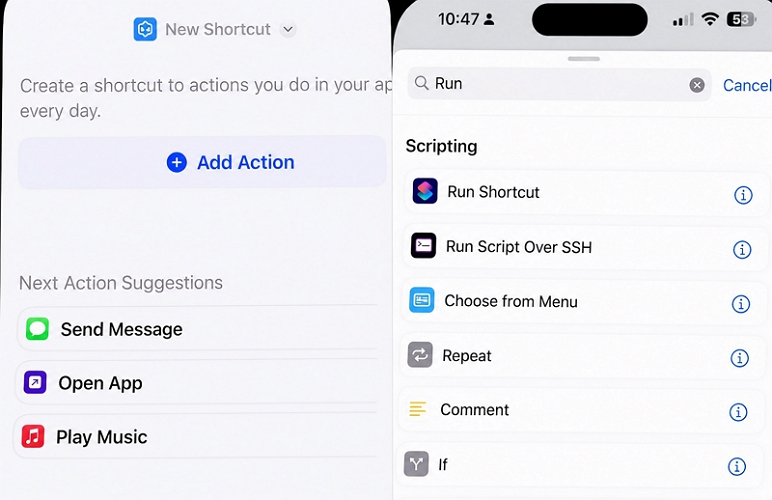
- Create a New Shortcut. Open the Shortcuts app on iPhone, tap the + icon, then add the Run Script Over SSH action.
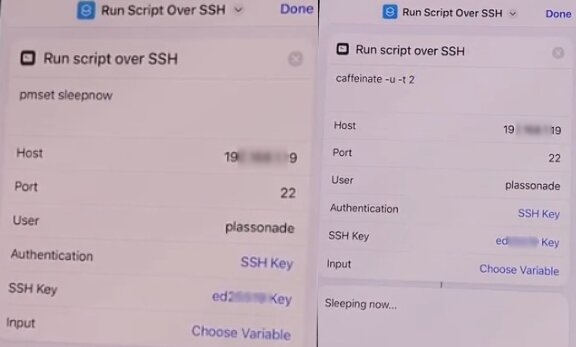
- Enter Connection Details. Fill in your Mac's IP address (Host), leave Port as 22, and enter your username.
- Add Sleep/Wake Commands. Use pmset sleepnow to sleep your Mac or caffeinate -u -t 2 to wake it.
- Set Up Authentication. Choose SSH Key (more secure) over Password. Hit Done to finish the setup.
- Tap the key field. Then Copy Public Key.
- Add the Key to Your Mac. On your Mac, paste the copied key by running "pbpaste >> ~/.ssh/authorized_keys" in Terminal. Verify with "cat ~/.ssh/authorized_keys".
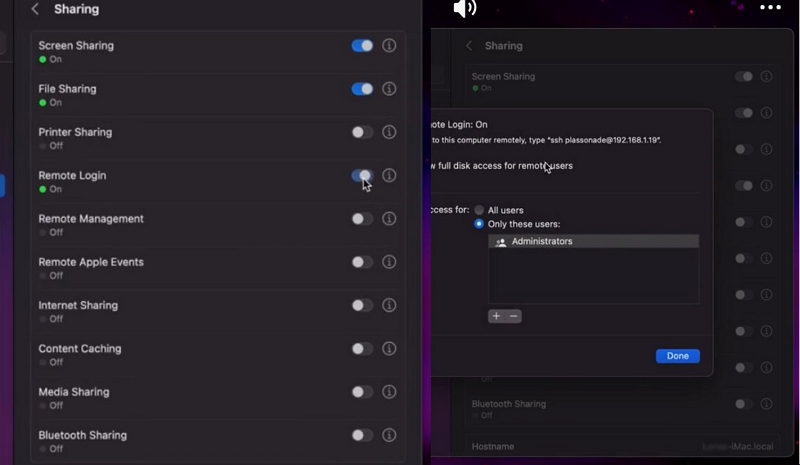
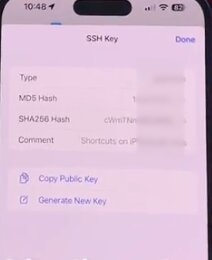
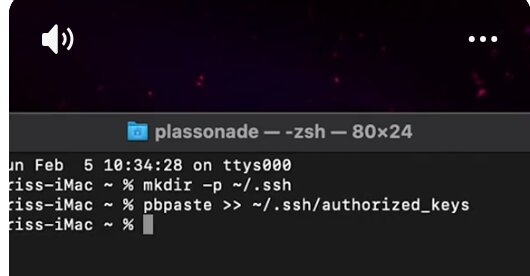
To unlock your Mac with the created iPhone shortcuts, you can tap the shortcut or ask Siri to run it.
Automation chains work especially well for home offices. For example, connecting your iPhone to home WiFi can automatically wake your Mac, open communication apps, and prepare your workspace before you even sit down.
Although Shortcuts cannot replace your Mac password entirely, it significantly reduces the number of manual actions required before starting work. If your automation fails, check whether SSH permissions, firewall settings or network discovery options are blocking communication between devices.
Way 3. Use GitHub Tool
If you don’t mind the command line, consider using the BLEUnlock tool that is a free open-source GitHub project. It uses a BLE signal to lock and unlock your Mac, depending on signal proximity. It functions on the system level without any App Store dependencies. You can customise notifications, signal thresholds, login scripts, and device behaviour. Because of this, it is popular among developers and power users.
Since BLEUnlock is open-source, you can personally inspect the code, which is great if you are security conscious. The setup takes more time as compared to Near Lock, but upon configuration, it seamlessly runs in the background without any updates or subscription fees to worry about.
Preps
- A Mac running macOS 10.12 or later with Terminal access and Bluetooth on.
- An iPhone with Bluetooth enabled.
- Basic familiarity with Terminal commands.
- Homebrew is installed on your Mac.
- Administrator privileges on the Mac.
Steps to Auto Unlock Mac Using iPhone via BLEUnlock
- Open Terminal on your Mac.
- If you do not have Homebrew installed, install it first by pasting the command from brew.sh into Terminal and pressing Return.
- Once Homebrew is ready, install BLEUnlock by running: "brew install ts1/blueutil/bleunlock". This downloads and installs the tool along with any dependencies.
- Next, you need to find your iPhone's Bluetooth UUID. With Bluetooth enabled on your iPhone, run the following in Terminal: "bleunlock scan", which will list nearby BLE devices with their identifiers.
- Locate your iPhone in the list. The UUID will look something like 12345678-ABCD-1234-EFGH-000000000001. Copy it carefully.
- Set BLEUnlock to monitor your iPhone by running: bleunlock set
. Replace the angle bracket portion with your actual UUID from the previous step. - Configure the RSSI (signal strength) threshold to control how close your phone needs to be before the Mac unlocks. Run: bleunlock set-rssi -70 : a value around 70 to -75 works well for a standard desk distance of 1-2 metres.
- Start the BLEUnlock daemon by running: bleunlock start, to have it launch automatically at login, run: bleunlock enable. Your Mac will now lock when your iPhone moves out of range and unlock when it returns.
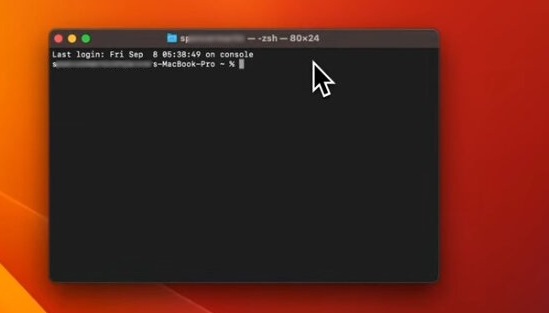

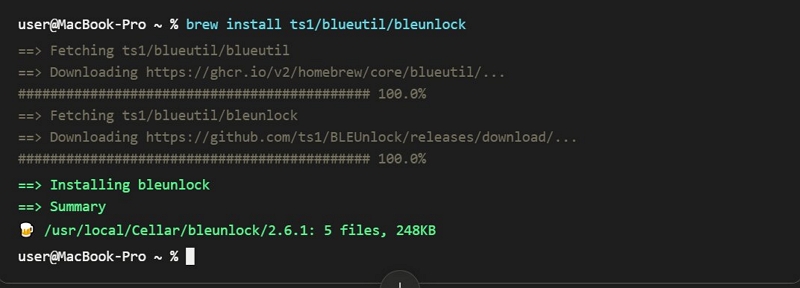
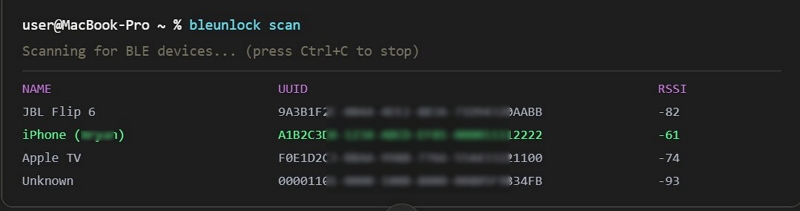
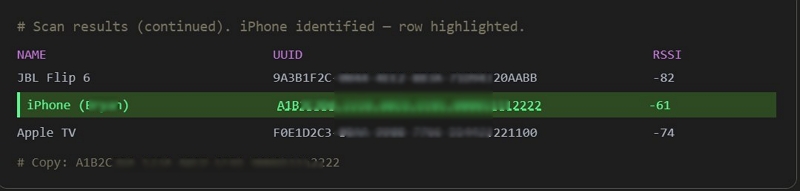


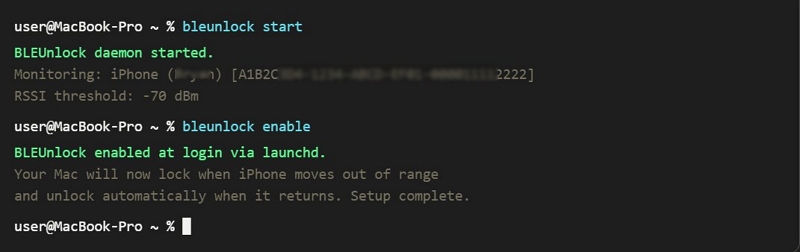
BLEUnlock's customization goes well beyond basic lock and unlock distances. You can configure notifications, automatic screen-locking delays, and custom scripts that trigger whenever your Mac locks or unlocks. That flexibility comes with a trade-off, though: Bluetooth environments aren't always stable, especially in crowded offices or apartments with lots of wireless devices nearby, which can affect detection accuracy.
Since BLEUnlock is community-developed rather than officially supported, it may also need updates after major macOS releases to keep working smoothly. Given these variables, it's worth running it for a few days before relying on it as your primary unlock method.
Alternative Ways to Quickly Access Mac
If BLEUnlock, Near Lock, or Shortcuts aren't quite the right fit, there are a couple of built-in Apple options worth considering. No third-party apps required.
Unlock Mac with Apple Watch
If you have an Apple Watch, its built-in auto unlock feature can unlock your Mac without typing a password. Once your Mac detects your nearby unlocked Apple Watch via Bluetooth, it will immediately log you in.
Preps
- Ensure you have an Apple Watch with WatchOS 3 or newer.
- A Mac running macOS Sierra or newer.
- Your Mac needs macOS Sierra or newer to use the Auto Unlock feature.
- If you're using an Apple Watch Series 3, you'll need macOS High Sierra or newer instead. Sierra alone isn't enough for that specific model.
- Both devices should be signed to the same iCloud account.
- Both devices should have a passcode set up.
To Unlock Mac with iPhone:
- Open System Settings on your Mac.
- Select Touch ID and Password. In an older macOS, choose Security and Privacy.
- Under Apple Watch, enable the Apple Watch you want to use to unlock your Mac.
- Confirm your Apple ID password if requested.
- Now unlock your Mac with your Apple Watch.
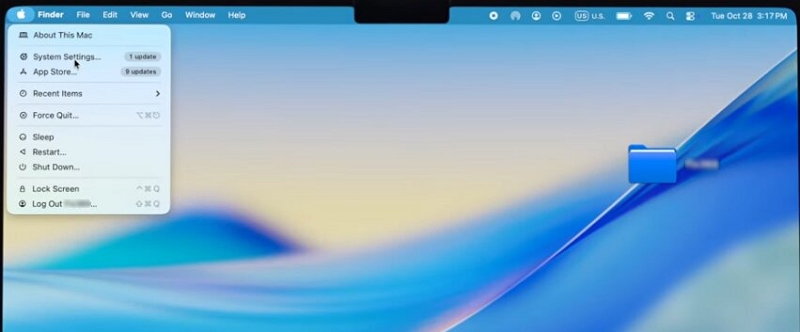
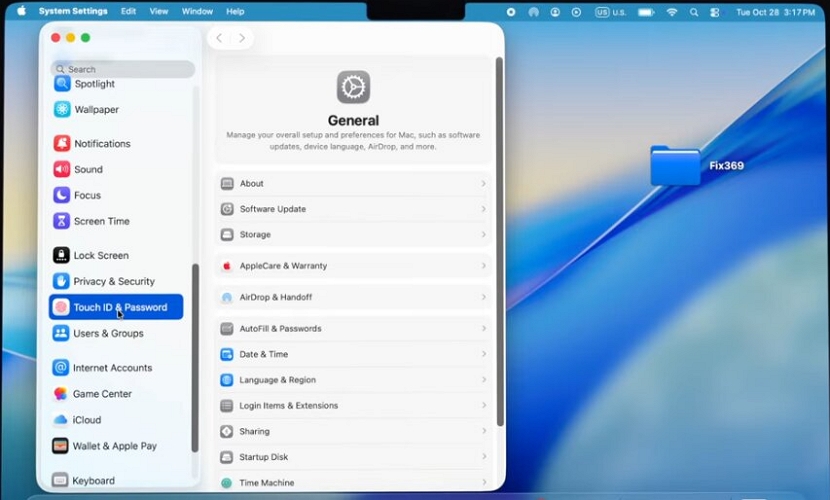
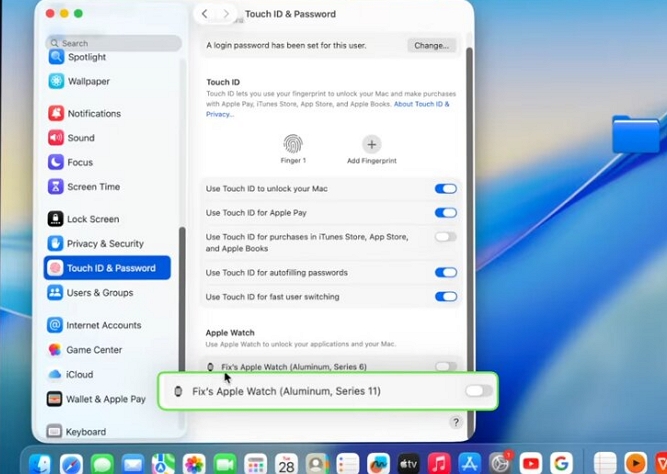
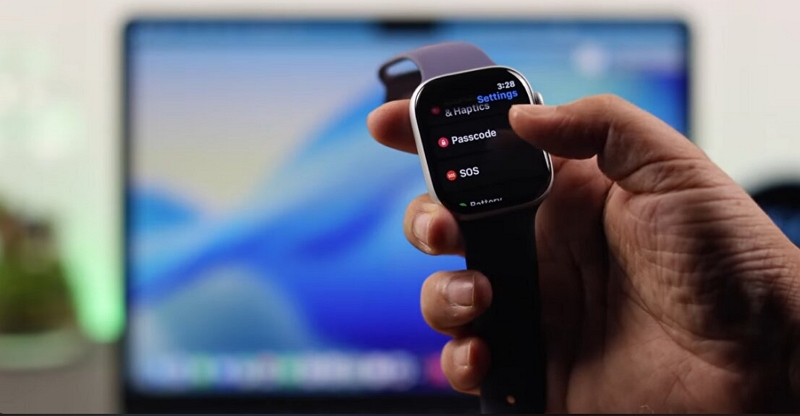
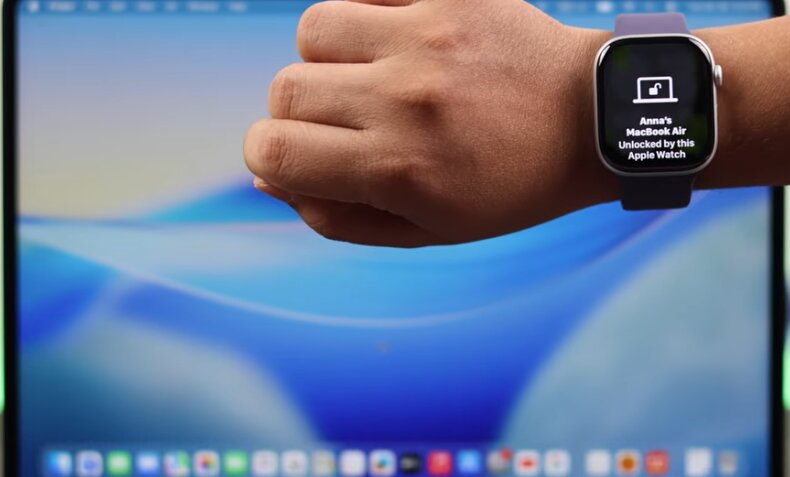
This is the best method if you wear your Apple Watch daily. It has Apple’s full security backing and is built into macOS security systems. The only disadvantage is that it needs an Apple Watch, making it less accessible to those who have not invested in one.
Access Mac via Touch ID
Most newer MacBooks like MacBook Air (M1 and later), MacBook Pro (2016 and later) and Magic Keyboard offer fingerprint authentication for instant access without any companion device. You simply place your finger on the sensor and your Mac unlocks. You can also use the Touch ID to approve payments and autofill saved passwords.
To Configure Touch ID to Unlock Mac:
- Open System Settings and select Touch ID and Password.
- Add your fingerprint by following the on-screen scanning instructions. You can add up to three fingerprints per user account.
- Test the sensor several times for accuracy.
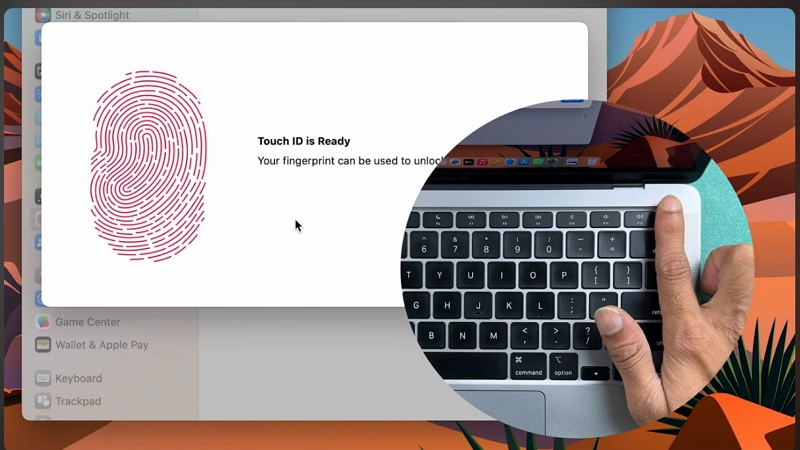
If fingerprint recognition becomes inconsistent, clean the sensor and register your fingerprint again. Touch ID is the preferred option for quick Mac access since it blends convenience with strong security without depending on wireless signals or third party software.
How to Unlock iPhone with Mac to Regain Access
If your iPhone has been locked due to a forgotten passcode or many incorrect and unintended passcode attempts, you can use your Mac to help remove the screen lock and restore device access.
To unlock an iPhone with a Mac, you can use Finder. However, if Finder fails to detect your iPhone, don't worry, Eassiy iPhone Access offers a reliable alternative.
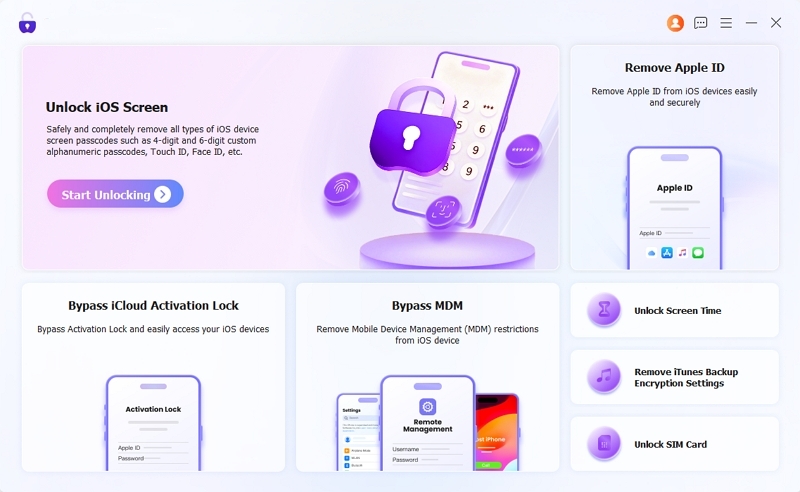
Eassiy iPhone Access is a powerful iOS unlocking tool designed to help you regain access to your iPhone when you've forgotten the screen passcode, the device is locked by iCloud Activation Lock, or it's restricted by Screen Time or MDM. Its Unlock iOS Screen feature can remove various screen locks, including passcodes and Face ID, making it an ideal solution for unlocking an unavailable iPhone, a second-hand iPhone, or an iPhone with a broken screen.
Features:
- Whether you've forgotten your own passcode or purchased a second-hand iPhone that still has the previous owner's lock screen active, Eassiy can strip the passcode so you can access the device again.
- Remove the Face ID or Touch ID lock so you're not stuck behind a sensor that won't recognize you.
- Useful when a device is still tied to someone else's Apple ID, such as a phone bought secondhand or inherited, letting you sign in with your own account instead.
- If a Screen Time passcode was set by a previous user, a family member, or simply forgotten, Eassiy clears it so you can use the device without restrictions.
- The tool is kept up to date with current iOS releases, so you're not left without a recovery option after upgrading your iPhone's software.
Steps to Unlock iPhone Passcode with Mac
- Download, install and run Eassiy iPhone Access on your Mac.
- On the home screen, select the Unlock iOS Screen option. Then, connect your iPhone to your Mac using an original or MFi-certified Lightning or USB-C cable.
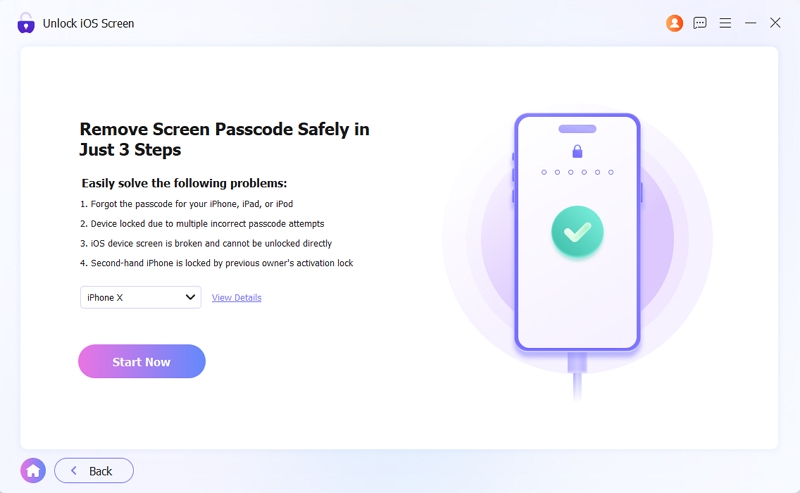
- Eassiy will automatically detect your connected device and display the model and iOS version. Confirm the details are correct, then click Start Now to download the required firmware.
- Once the firmware is ready, click Start Removing. Confirm the unlocking by clicking OK > Confirm Again.
- After completion, your iPhone will boot up without the previous passcode. You can now set it up as new for use.
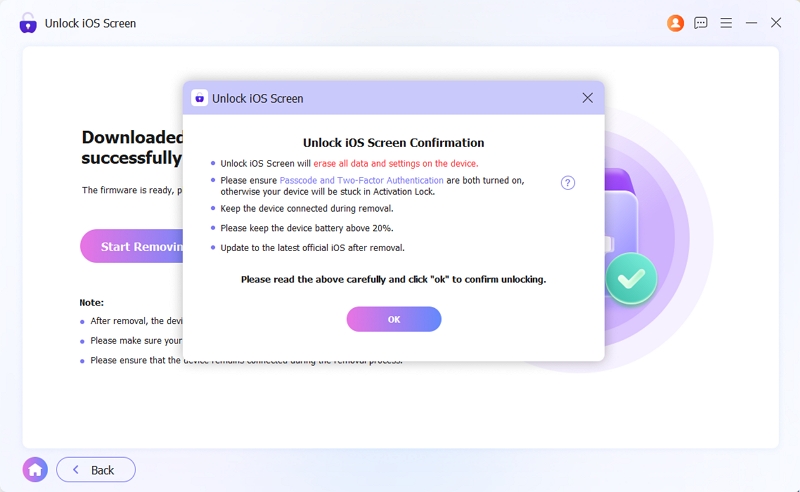
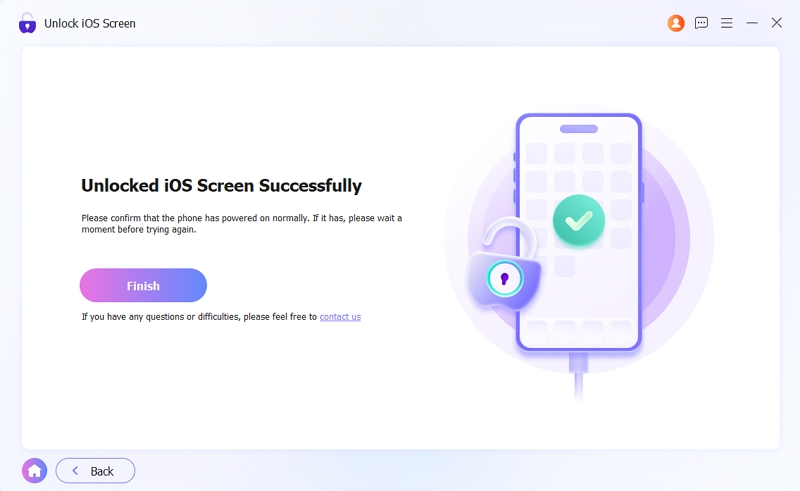
Note that the unlock process resets the device to factory settings, so ensure you have a recent iCloud or iTunes backup to restore your data afterwards. Also, if Find My iPhone is enabled, you need the Apple ID signed in with the iPhone to remove iCloud Activation Lock.
Conclusion
It should be easy to unlock Mac with iPhone. Whether you choose Near Lock, Shortcuts or BLEUnlock, each method comes in handy over typing your password each time your screen wakes. On the other hand, if you want to regain access to your locked iPhone via a Mac, Eassiy iPhone Access can help restore your device’s usability if you forgot the passcode.