
Updated on 2026-07-01
views
5min read
Apple introduced Security Delay with Stolen Device Protection in iOS 17.3, forcing a one-hour wait before certain critical changes could be made. If you do not want to wait an hour every time to make a small setting change, this article is helpful. It walks you through how to turn off Security Delay on iPhone without waiting and how to make sure Security Delay does not show up again in the future.
What Is Security Delay on iPhone
Security Delay is part of Stolen Device Protection, introduced by Apple in iOS 17.3.
This feature was introduced because there were repeated theft cases where thieves would peek at someone's iPhone passcode, steal the device, and then use that passcode to lock the owner out completely. With the device passcode, the thief can change the Apple ID, drain Apple Pay, use saved credit cards, and take full control of the device.
To prevent this, Apple introduced Stolen Device Protection. It adds two layers of defense:
- Biometric authentication (Face ID or Touch ID) for certain sensitive actions, such as accessing your iCloud account, viewing saved passwords, or seeing your Apple Card details.
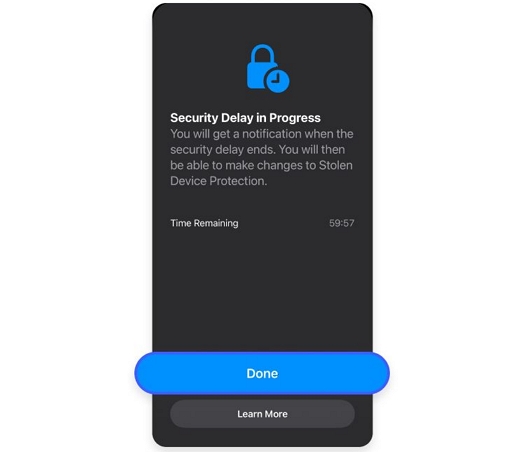
- A one-hour security delay is required before you can make important security changes, such as changing your Apple ID password, updating recovery contacts, adding a new Face ID, or even turning off Stolen Device Protection itself.
However, Security Delay will not always trigger. For instance, you may be able to change your Apple ID password at home without ever seeing the delay, but the moment you try to change the same setting from an unfamiliar location, the delay will kick in. This is because it depends entirely on how your Stolen Device Protection is configured.
- If it is set to Away from Familiar Locations, the delay will not appear when you are making security changes at home, your office, or any other place Apple already recognizes as familiar (where you probably spend most of your time). You’ll just need to authenticate with Face ID or Touch ID.
- If it is set to Always, it will first ask for biometric authentication and then trigger a security delay. After the one-hour wait, it will ask for biometric authentication again to confirm. So, in this case, the security delay will apply regardless of where you are.
How to Turn Off Security Delay on iPhone Without Waiting an Hour
Whether you need to hand your iPhone to someone urgently or prepare it for repair, waiting an hour is not always an option. The good news is there are ways to turn off Security Delay without sitting through the full wait, though which method works for you depends on your situation and your Stolen Device Protectionsettings.
Way 1. Head Back to a Familiar Location
Before trying this, first confirm your Stolen Device Protection setting:
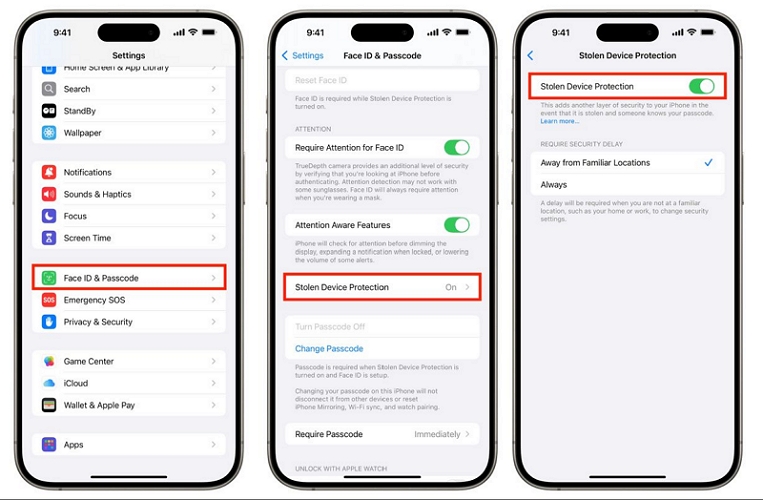
- Go to Settings and tap Face ID & Passcode.
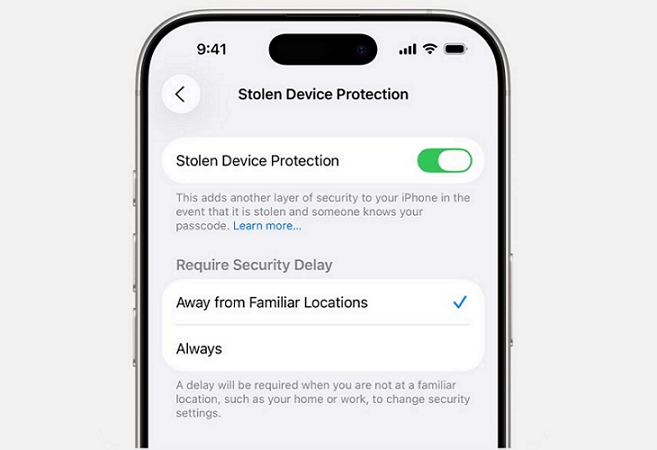
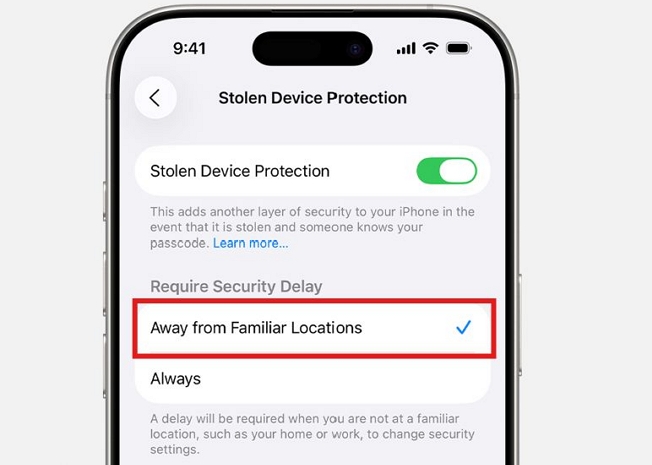
- Scroll down to Stolen Device Protection. You will see two options. If it is set to Away from Familiar Locations, this method will work for you.
Since Security Delay is configured to trigger only when you are away from a familiar location, the fix is straightforward — simply return to a familiar location. The moment iOS recognizes the same Wi-Fi network and GPS coordinates, it will drop the timer instantly. And you can complete your security changes with just a biometric confirmation.
Note: A familiar location is typically your home or workplace or anywhere iOS knows you spend significant time. It tracks this through a hidden system called Significant Locations to decide whether to apply Security Delay in the first place.
| Pros | Cons |
|---|---|
| Official Apple-recommended method | Only works if set to “Away from Familiar Locations” |
| Keeps all your data completely intact | Success not guaranteed as GPS or Wi-Fi confusion can prevent the timer from dropping |
| No third-party tools needed | Locations are learned naturally by iOS, meaning that you cannot add them manually |
| Free, requires no extra steps | If set to “Always”, even returning home will not help |
Way 2. Erase iPhone with Find My
This method remotely wipes all content and settings from your iPhone, as a result, Stolen Device Protection and Security Delay are disabled. However, note that this way will cause data loss. It’s suggested to back up your iPhone first.
Option 1. Via iCloud Find My
If you can access any browser on your Mac, another phone, or any device, simply head to iCloud.com/find and follow these steps:
- Sign in with the same Apple ID and password used on the iPhone with Security Delay.
- Click All Devices at the top and select the affected iPhone.
- Click Erase or Erase This Device.
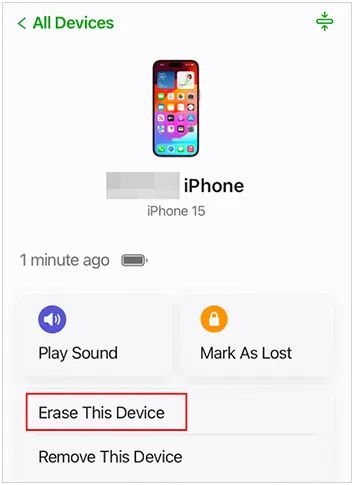
As long as your iPhone is turned on and connected to the internet, the Erase process will complete within 10–15 minutes.
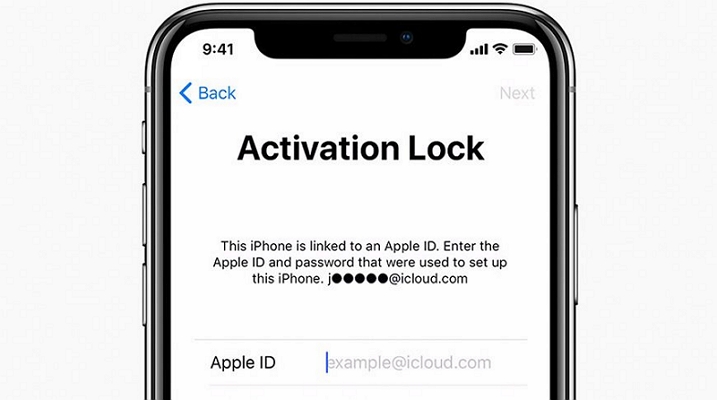
Once done, you will receive a confirmation email and can set up the iPhone as new after passing through the Activation Lock screen.
Note: Don't restore your iPhone from a backup during setup if you want to remove the Security Delay. Restoring a backup also restores your previous Stolen Device Protection settings, bringing the delay back.
Option 2. Through the Find My App
If you have another Apple device, such as an iPad or a second iPhone linked to the same Apple ID, you can do the same thing directly through the Find My app:
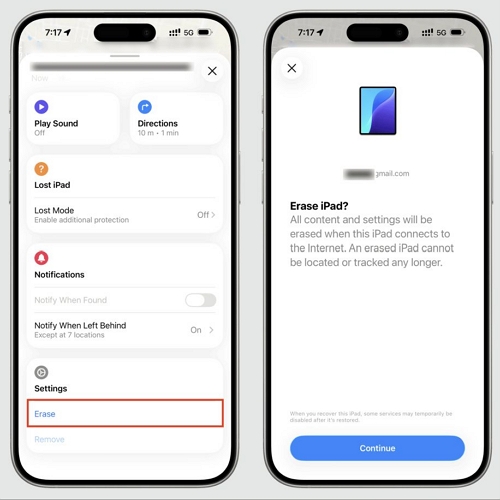
- Open the Find My app.
- Tap the Devices tab at the bottom.
- Select the iPhone stuck on Security Delay.
- Scroll down and tap Erase or Erase This iPhone.
Once the erase completes, go through the initial setup, select your region and preferences and remove the Activation Lock with your Apple ID.
| Pros | Cons |
|---|---|
| Free to use | Completely erases all data on the iPhone |
| Bypasses the local lock and drops the delay immediately | iPhone must be on and connected to the internet |
| Works regardless of the Stolen Device Protection setting | Activation Lock must be cleared after the erase |
| Can be done from any browser or Apple device | Not recommended unless waiting is genuinely not an option |
Way 3. Restore iPhone Using Eassiy Software
Eassiy iPhone Access is the quickest tool that can help you restore the iPhone when you have a computer nearby, which will also turn off the Security Delay instantly. Its Unlock iOS Screen feature works on online or offline iPhone and doesn’t even need the iPhone to be unlocked. You just have to connect the iPhone with ongoing Security Delay to the computer. Eassiy will automatically detect the device, wipe the entire iOS environment, and reinstall a fresh copy of iOS, taking Security Delay, Stolen Device Protection settings, and any local security restrictions like screen lock along with it.
Eassiy will also help when you can’t verify your authentication with Face ID, you cannot initiate the security delay at all or the familiar locations can’t be detected.
Key Features:
- Remove the Face ID requirement that blocks you from turning off Stolen Device Protection.
- Turn off four-digit, six-digit, and alphanumeric passcode if you have forgotten them.
- Delete Apple ID from the device entirely.
- Bypass iCloud Activation Lock to use iPhone as an entertainment device.
Steps to Turn Off Security Delay Using Eassiy
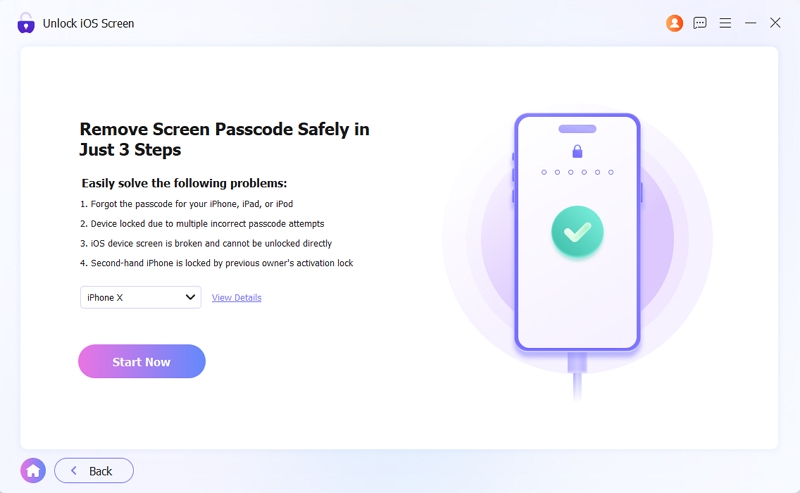
Step 1. Open Eassiy. Select Unlock iOS Screen from the main interface.

Step 2. Connect your iPhone to the computer via a USB cable. Eassiy will automatically detect your iPhone and display its type and model. Verify the information and click Start Now.
Eassiy will download the required firmware package for your iPhone model.
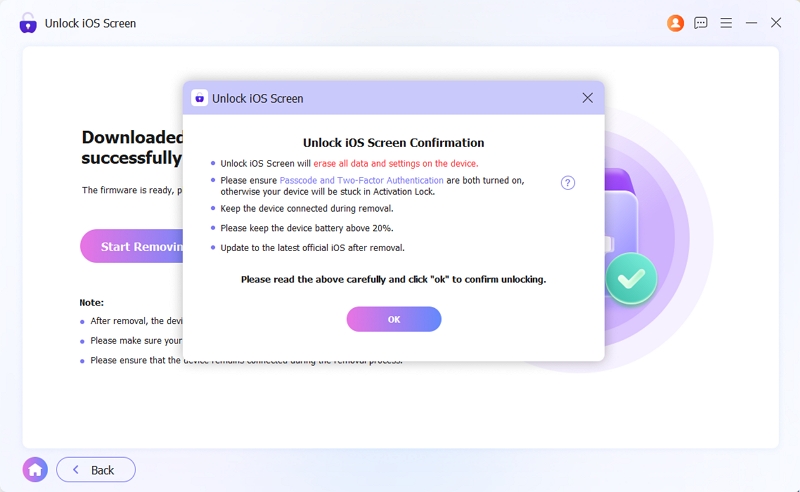
Step 3. Once the firmware is ready, Eassiy will show you an Unlock Confirmation prompt. Review the details and click OK > Confirm Again.
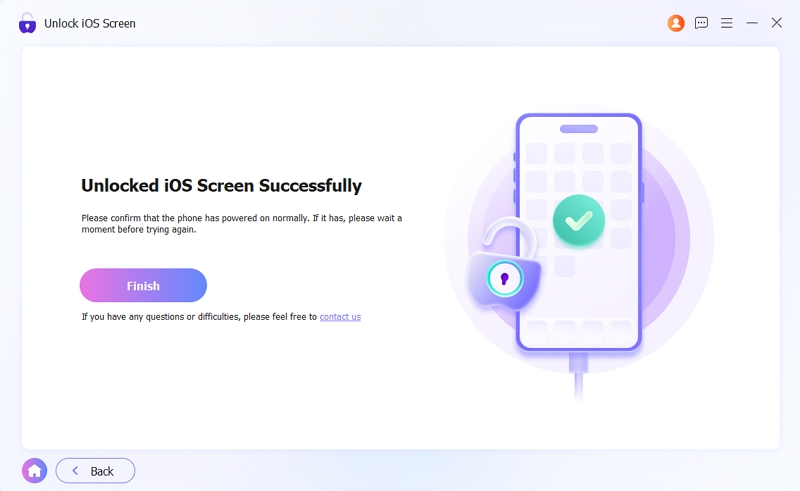
Once completed, you will see an Unlock iOS Screen Successfully message. Meanwhile, your iPhone will restart. You can now enter Apple ID to turn off Activation Lock and set up iPhone as new.
| Pros | Cons |
|---|---|
| High success rate, up to 99% | Erase all personal data on the device |
| Work even when iPhone is locked and offline. | Require a Mac or PC |
| No need to rely on iTunes or Finder | — |
| Work without screen passcode or functioning Face ID | — |
Way 4. Reset iPhone via Apple Devices App or Finder
You can also reset the iPhone using Apple’s own desktop tools — Finder on Mac or the Apple Devices app/iTunes on Windows. Here is how:
Step 1. Plug your iPhone into the computer.
Step 2. Tap Trust on your iPhone if prompted, then enter your passcode to make the device visible in Finder’s or Apple Devices’ sidebar.
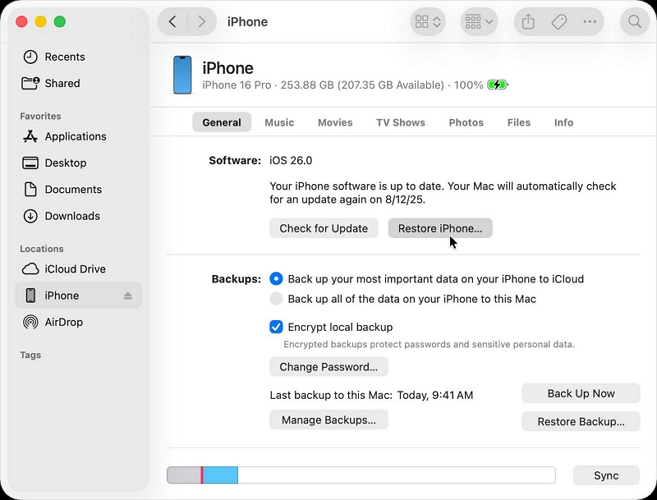
Step 3. Click on your iPhone in the sidebar.
Step 4. Under the General tab, click Restore iPhone.
Note: You do not need to enter Recovery Mode for this if your iPhone is unlocked. However, if you are completely locked out at the lock screen, you will need to put the device into Recovery Mode first before Finder or Apple Devices can detect it.
Step 5. The tool will download a fresh copy of iOS and reinstall it. After restoring, remove Activation Lock with your Apple ID and sign into iPhone for use.
| Pros | Cons |
|---|---|
| Use Apple’s native ecosystem — no third-party tools | Trigger data loss |
| Completely free to use | Errors like 4013 are relatively common and can interrupt the process |
| — | Low efficiency: It may fail or require over an hour to restore. |
How to Avoid Security Delay on iPhone
As explained, Security Delay is triggered by Stolen Device Protection settings. Thankfully, it comes with granular controls that let you decide exactly when it kicks in. Besides, you can turn this feature off entirely. Here is how to do both.
Way 1. Set Security Delay as Away from Familiar Locations
Stolen Device Protection offers two settings:
- Always
- Away from Familiar Locations
Choosing the latter means the security delay will never bother you at places like your home, office, or anywhere else you regularly use your iPhone. You only see it when you are somewhere unfamiliar.
Here is how to set it:
- Go to Settings and tap Face ID & Passcode.
- Scroll down and tap Stolen Device Protection.
- If it is currently set to Always, tap it and authenticate with Face ID to change it. You will have to wait for the one-hour Security Delay to be over.
- Select Away from Familiar Locations.
From now on, Security Delay will not appear when making crucial changes on the iPhone in a familiar place.
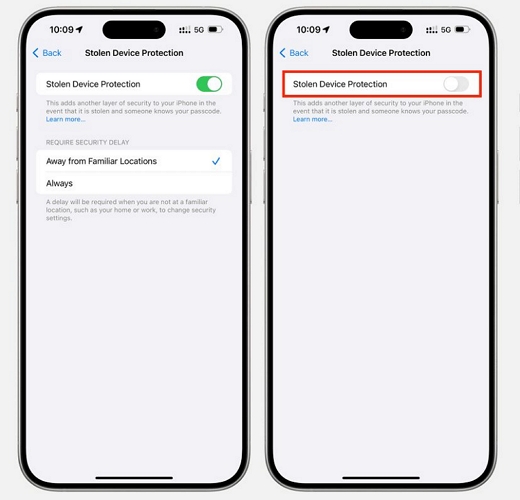
Way 2. Turn Off Stolen Device Protection
If you would rather not deal with Security Delay at all, you can turn off Stolen Device Protection entirely. Your iPhone will still be secure, as nobody can access it without your Face ID or passcode. Yes, Stolen Device Protection simply adds an extra layer on top of that, which is useful but not essential if you are cautious with your device. Here is how to turn it off:
- Go to Settings and tap Face ID & Passcode.
- Scroll down and tap Stolen Device Protection.
- Turn off the main toggle. This will immediately start Security Delay if you have set is as Always.
- Wait for the one-hour security delay to complete.
- Return to the menu and turn off the main toggle.
That is it. Stolen Device Protection will be disabled and Security Delay will no longer trigger.
However, sometimes things are not that straightforward. If your Face ID is not working, turning off Stolen Device Protection the usual way is not possible. In that case, read this guide on how to turn off Stolen Device Protection without Face ID for alternative ways to handle it. And if you find that Stolen Device Protection won't turn off even after following the steps, that guide covers the common reasons and fixes in detail.
Conclusion
Stolen Device Protection and Security Delay are genuinely brilliant at keeping thieves from hijacking your iPhone. Honestly, they are not much of a bother in everyday life. But if the one-hour security delay has been showing up unnecessarily or your Face ID is not working, it can become an annoyance.
If you need to turn off Security Delay without waiting an hour, we have shown you the effective ways. We’ve also shown you how to adjust your Stolen Device Protection settings to avoid the delay altogether. You can even disable the feature if necessary. And if Face ID isn't working or you cannot turn it off, advanced tools like Eassiy iPhone Access can help you bypass the delay entirely.