
An Overview of Eassiy Video Converter Ultimate
Eassiy Video Converter Ultimate is an in-house tool for all your video editing needs. It can handle compressing, editing, merging, GIF making, converting DVD files, etc., to almost all audio and video formats. Since Eassiy Video Converter Ultimate is compatible with both Windows and Mac operating systems, it can be your go-to tool for professional and personal needs.
Let us see how to use Eassiy's Video Converter Ultimate by walking you through downloading and installing Eassiy Video Converter Ultimate. Let's get started.
Download And Install
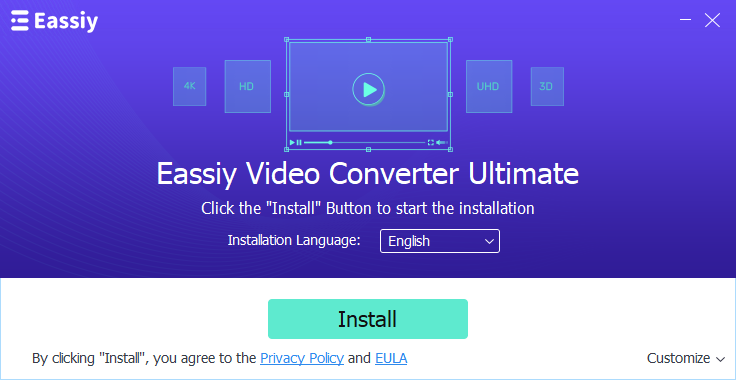
Visit the official website, download the right version for your Windows computer or Mac, then double-click on the downloaded file.
Choose the language and click on the Install button. Or click on "Customize Installation" to customize the installation path or other options, then click "Install" button.
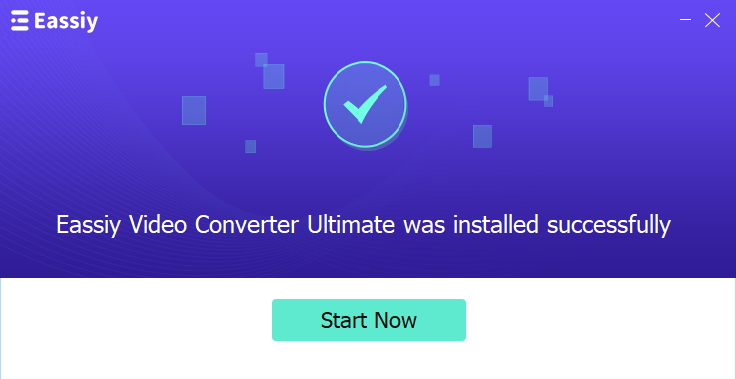
Once you click on Install, the installation will take multiple seconds. Wait until the installation progress bar completes, following the installation, you will see the following window.
Registration
If you are new, you will get the option to begin using the free version. To get started with the free version, click "Order Later." However, if you are already registered, enter the email address and license code you entered on the purchase form.
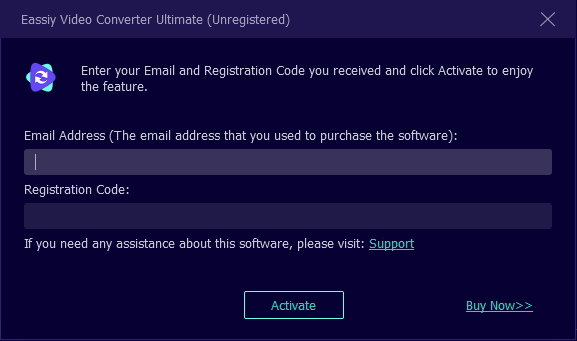
However, if you are already registered, enter the email address and license code you entered on the purchase form.
Now, you can convert, edit, compress, and make videos with Eassiy Video Converter Ultimage easily and efficiently.
Video files are available in various formats, including AVI, MOV, and MP4 files, among others. Although most of these files are compatible with a wide range of video-playing software, there are always devices that can't play them and apps that do not support them. Thanks to video file converters, you can convert your videos into any format you like.
In this guide, we'll learn how to convert video files into various formats, such as MP4 files using Eassiy Video Converter Ultimate. Many converters are available online, but this is one of the most reliable. As a result of the recommendations from most users, this tool proves helpful to its users.
How to Convert Video to Any Video Format You Want
Here are a few steps you need to follow:
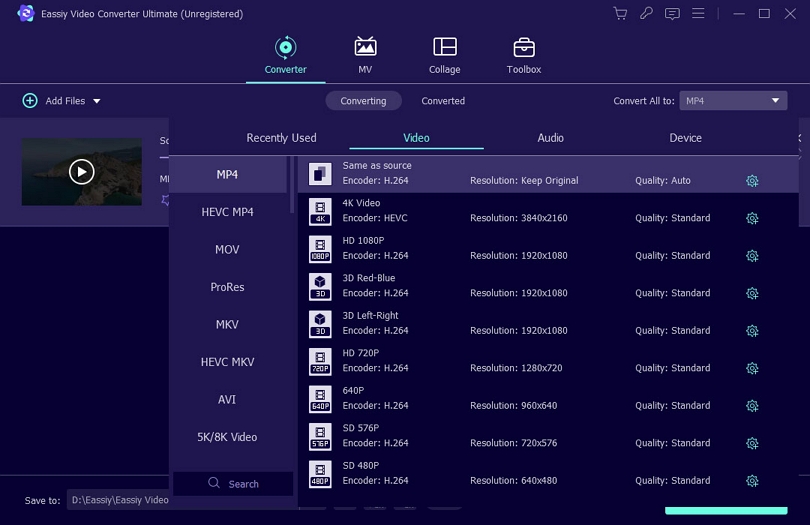
To begin, launch Eassiy Video Converter Ultimate on your device. Upon launching, you will see the following interface where you can choose video files to convert.
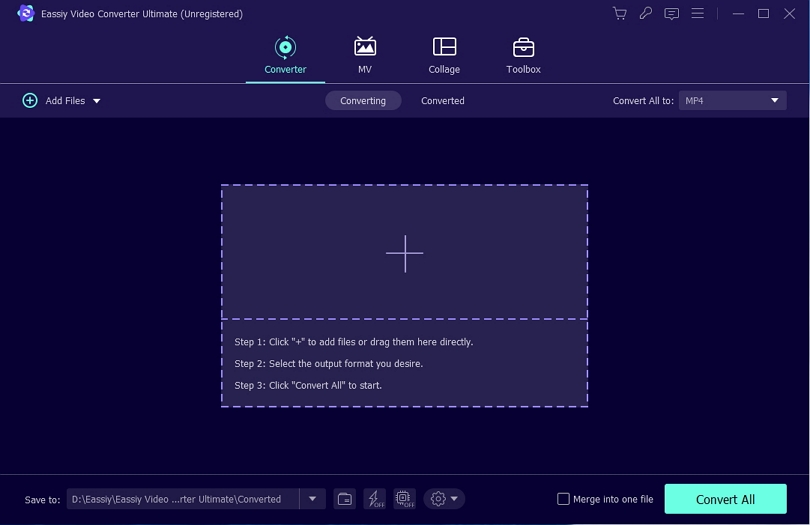
Drag and drop video files from your device or browse for them by clicking on the "+" button.
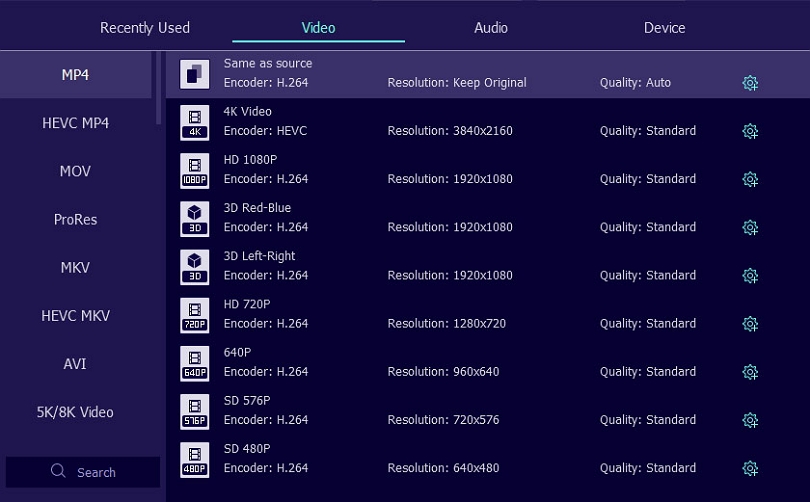
Once the Video is uploaded, click on the Convert All to tab's drop-down menu and select any of the video formats for your final converted Video. Or click the format icon on the right and select the video format you want one by one. Here, we chose the HEVC format for conversion.
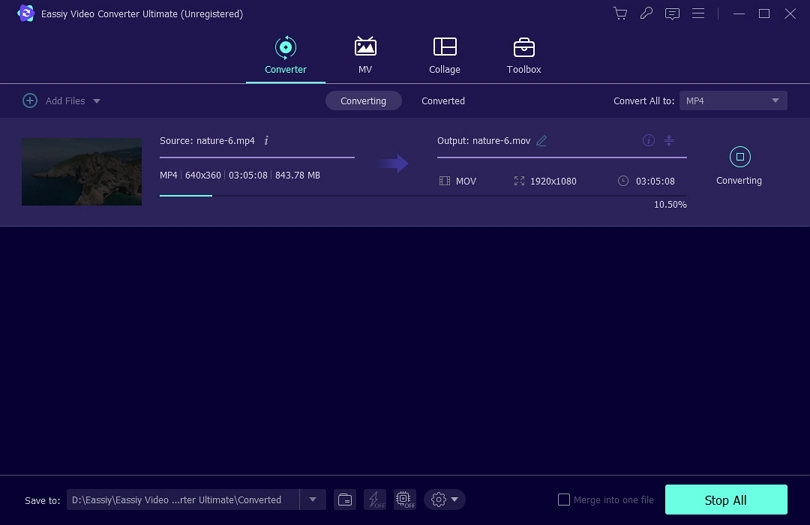
Now, convert your videos by clicking the "Convert all" button and begin the process.
Edit the Save to path by tapping the arrow key on the bottom if you want.
You will see the progress bar of conversion. After finishing, the interface will show "Success," and Converted will have a red mark on its right once the process completes. Besides, the software will automatically popup the folder where the final Video is saved.

You can now watch videos in a new format. The primary benefit of using this program is that it supports a wide variety of video formats and works on over 150 different devices, including the iPhone and iPad. Additionally, you can convert your videos into 2D or 3D video formats.
Many videos to MP3 converters are available online, but only a few can create high-quality Audio, so you must be selective. If you're in this situation, we advise Eassiy Video Converter Ultimate. With the free trial version, you can use this program even if you have not yet purchased it. Here, we will use it to convert a video file to MP3.
How to Convert Video to MP3 with High Quality
Now Let's get started converting our MP4 file to MP3 while making sure it's of good quality.
First, launch your Eassiy Video Converter Ultimate to start. Click on the "+" on your homepage to add video files or drag them directly. Your selected video file takes a few seconds to upload.
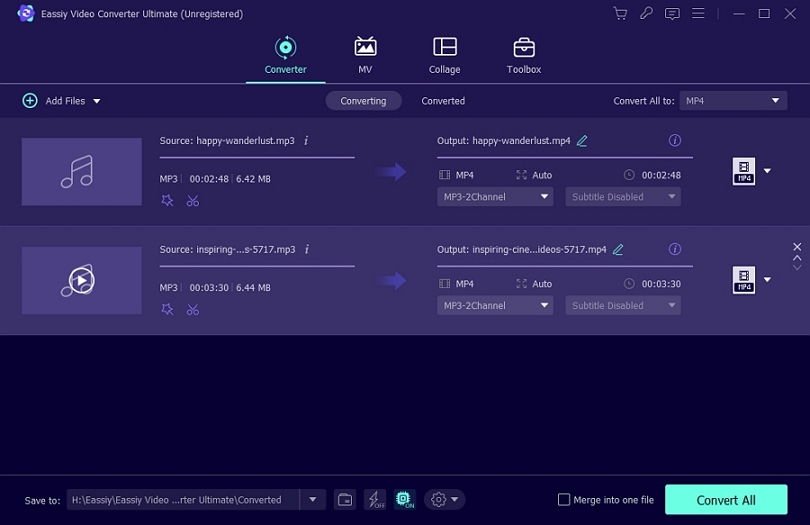
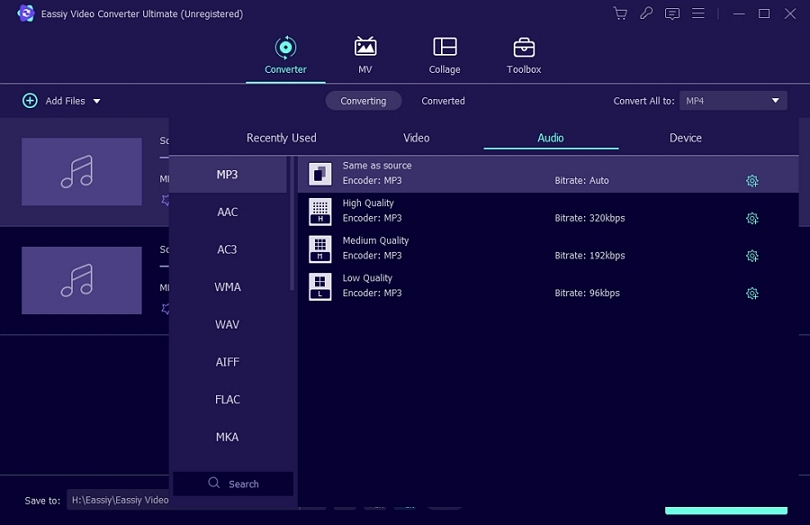
Select Audio from the drop-down menu next to "Convert All to:" and then choose MP3 for batch conversion. Or click the format icon to select MP3 one by one. There are various quality and Bitrate options also visible.

In this case, we have the selected “High Quality” to ensure we have converted to a high-quality audio file.
Then, click on “Convert all” to start the conversion process. Now, wait until the conversion process completes, the converted video files will be saved in the location you selected. When you click "converted," you'll see your MP3 file and the options to access the saved location and share it.
It's that simple to convert your video file to MP3 without compromising quality. Eassiy Video Converter Ultimate allows you to select where you want your audio file to be. You can now listen to the converted Audio in the chosen location folder or even share it with others. In addition to being convenient to listen to, audio files can be stored in various media storage devices, such as flash drives, very quickly.
When you have a lot of videos to convert, batch conversion can help you finish them on time. Eassiy Video Converter Ultimate supports the simultaneous conversion of many videos, making it an ideal video converter. Using this tool, you can convert any number of videos and save them on your device. Now, let's see how you can convert videos in batch in the Eassiy Video Converter Ultimate.
How to Convert Videos in Batch
Follow these simple steps to convert videos in batch with the Eassiy Video Converter Ultimate.
First of all, Launch your Eassiy Video Converter Ultimate on your device. Once you launch your application, the following homepage will be on your screen.

Now click on the "Add file" dropdown menu and select "Add Folder" to select the folder with the video files that you would like to convert. Alternatively, you can use the ‘+’ sign in the middle or drag and drop the file to the interface.
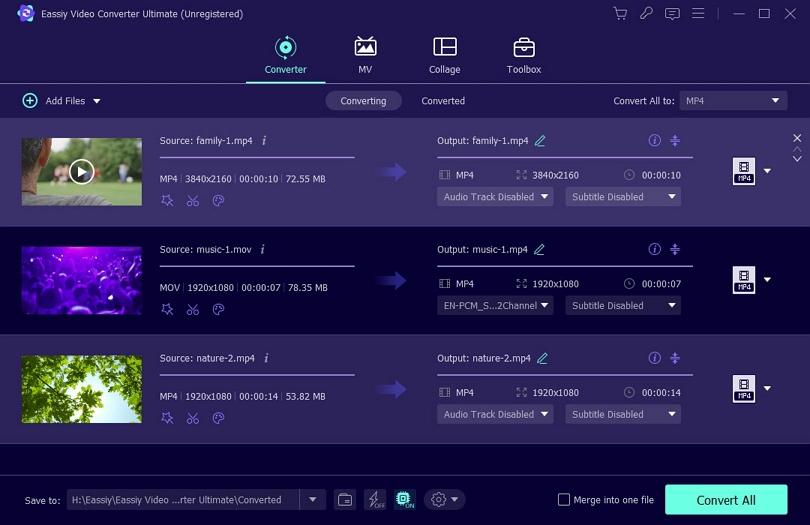
After uploading your video files, select the conversion format. To do so:
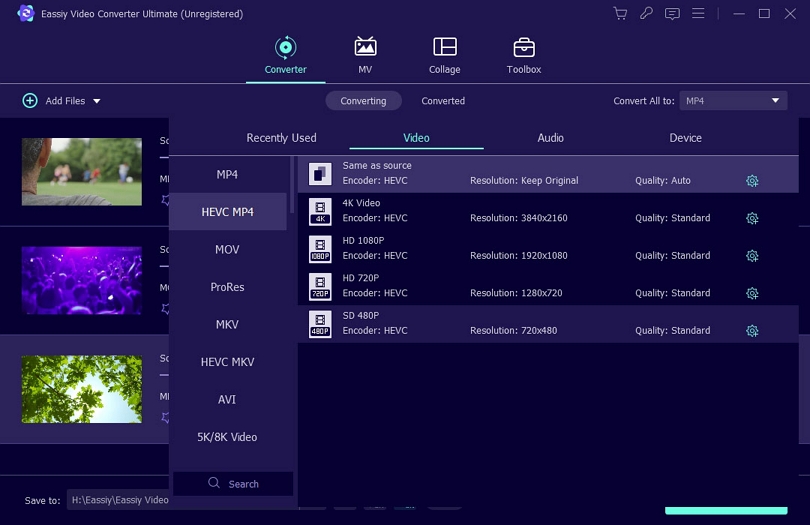
- Click "Convert All to" and choose your output format if you want to convert many videos to one format.
- If you want to convert many videos to different formats, you can customize different format one by one.
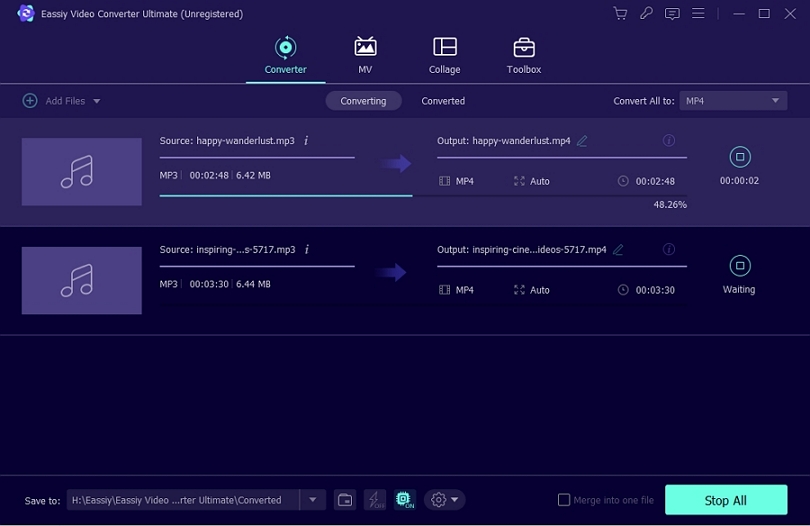
To begin the conversion process, click on "Convert all." A video in conversion will have a mark as "converting," a video in waiting will as "waiting," and a video in success as "success." Wait until the conversion completes; however, if you want to exit the conversion, you can click on "Stop All."
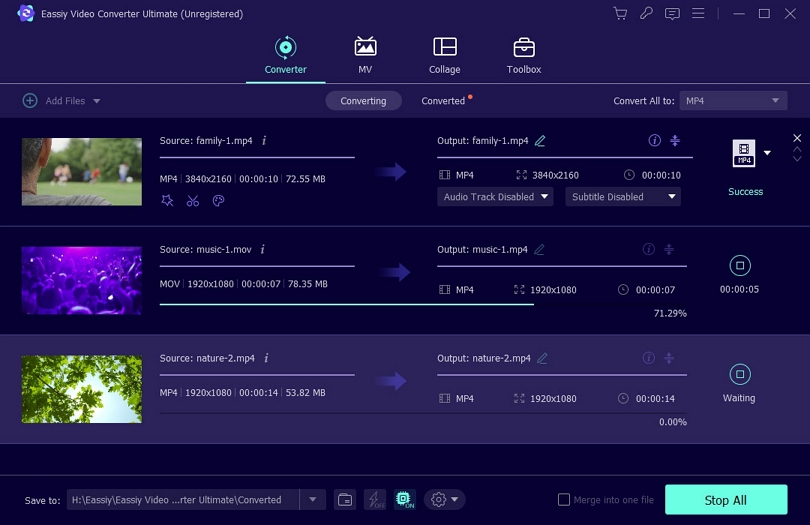
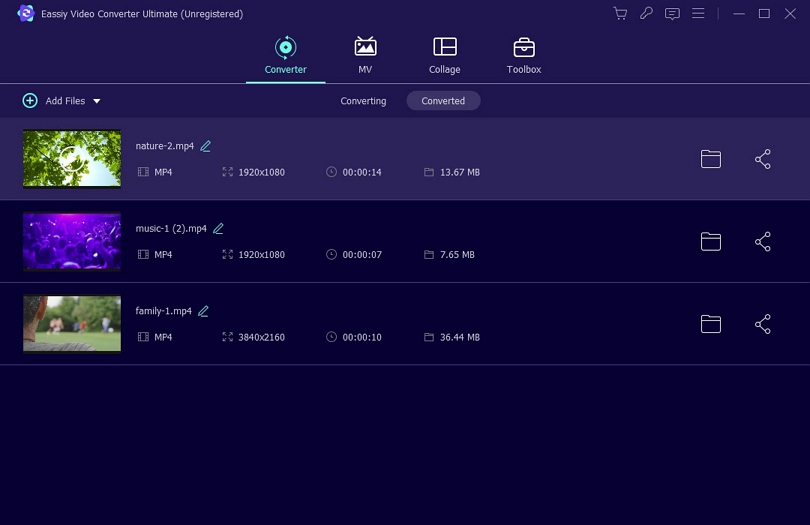
Once the videos convert, a window will pop up and your converted files will also show under the Converted tab (next to converting). You can now view your converted videos and use the Share option to share them on your social media accounts.
So, we learned how to convert videos in batch using the Eassiy Video Converter Ultimate. This tool allows users to easily handle their video files since it includes all video features in one package. Besides being compatible with all popular video formats, it offers four different options for converting videos simultaneously. You can convert any number of videos, but the size and number of selected videos will affect the process.
Enhancing your video resolution and boosting quality are just two of the many perks of modifying your screen's resolution. You have a good chance of enjoying SD videos on larger screens at superb quality by using video resolution converters. While adjusting the video resolution is not a complex process, we will go through how to convert our regular video into HD using Eassiy Video Converter Ultimate. Let's get going.
How to Convert Video to HD, 4K, And Up to 8K Ultra HD
Changing the resolution of your video is relatively easy; follow the simple steps below to get started.
First of all, launch your Eassiy Video Converter Ultimate to get started. Add the video files to convert. To do so, clock on “+” or drag the videos here and wait until they upload.
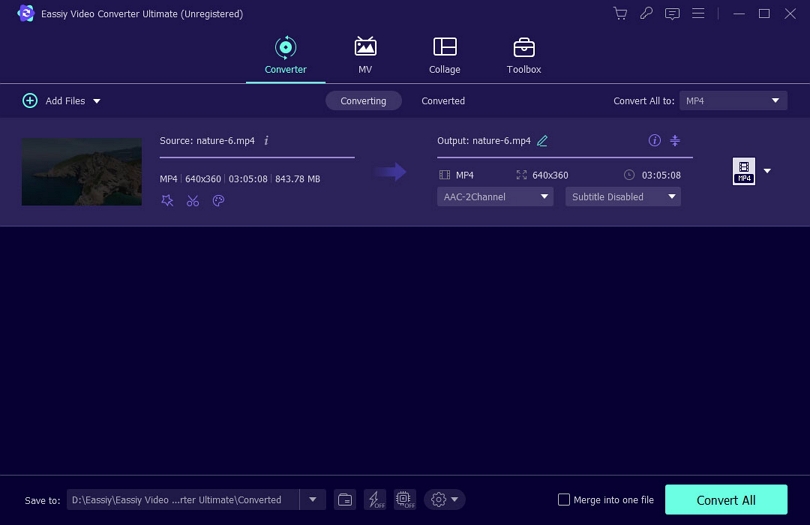
Now, to choose the video quality you want to convert, click the format icon or the drop-down menu next to Convert All to. And select the preferred HD video format.
Then, choose the HD or 4K video option. You can also click the Settings icon to customize the output format.
You will receive a warning that the increased resolution will take up more space on your screen. To continue, click "Ok". To begin the conversion process, click "Convert all." Please wait until the conversion is complete.
Finally, once your file successfully converts to HD, 4K or 8K Ultra HD as you selected (4K in this case), you can view the file under the Converted tab. Your converted files will get stored in the folder you specify on your device.
We enhanced the resolution of our video in this article by converting it to 8K quality. On the other side, increasing the resolution makes the video file significant, which means it uses up a lot of memory on your device. The advantage of utilizing Eassiy Video Converter Ultimate is that it offers a wide range of alternatives from which you may choose following your needs.
Most likely, you have a lot of audio files on your PC, and to play them, you have to set MP3 as the output format. However, if you want to listen to your audio file in MP3 format on your phone, you'll need to convert it first. In this guide, we will learn how to convert audio files to MP3 or any other audio format and make them compatible with your mobile devices.
How to Convert Audio Files to MP3 Or Other Audio Format
With the Eassiy video converter ultimate, you can convert any audio file into the format that best suits your needs. It is simple to convert your audio file to MP3 format. Follow the easy steps outlined below to get going.
Download and install Eassiy Video Converter Ultimate on your computer, then open it.
To add files to Eassiy Video Converter Ultimate, click "+" or drag and drop them. Here, we uploaded the WAV file for demonstration.
Click on “Convert all to” to access conversion options and choose "MP3" under Audio. Or click the format icon on the right to choose MP3 format.
Now click "Convert All" to convert to MP3, and please wait a few minutes until your audio file converts to MP3. After converting, the MP3 file will be found on a pop-up window. You can now enjoy listening to your MP3 file and sharing it with other devices or platforms.
You will realize that some portions are unwanted when editing your videos, and you need to cut and trim your video. Video cutting and trimming involve removing the front or the tail portions of a clip or a part of the video that you feel is unsuitable for the audience. To edit your videos more professionally, you need high-quality software, and in this article, we recommend Eassiy Video Converter Ultimate.
We will learn how to edit your video using Eassiy Video Converter Ultimate. Let's get started.
How to Cut and Trim video Using Eassiy Video Converter Ultimate
With the Eassiy video converter ultimate, you can convert any audio file into the format that best suits your needs. It is simple to convert your audio file to MP3 format. Follow the easy steps outlined below to get going.
Start Eassiy Video Converter Ultimate on your device. Once After Eassiy Video Converter launches, the following homepage will display on your device.
Upload your video now. Click "+" to enter the video editor, or drag and drop the video files into the window. Uploading a video takes time based on its size.
Once your video is fully loaded, click on the "Cut" icon and you will see four main Cut and Trim options.
- 3 cut or trim ways, it can help you cut video exactly by selecting a Start and End.
- Add video fade in/out effect
- Cut multiple segments you want in same video and export. Not cut one by one.
- Fast Split video to multiple segments automatically.
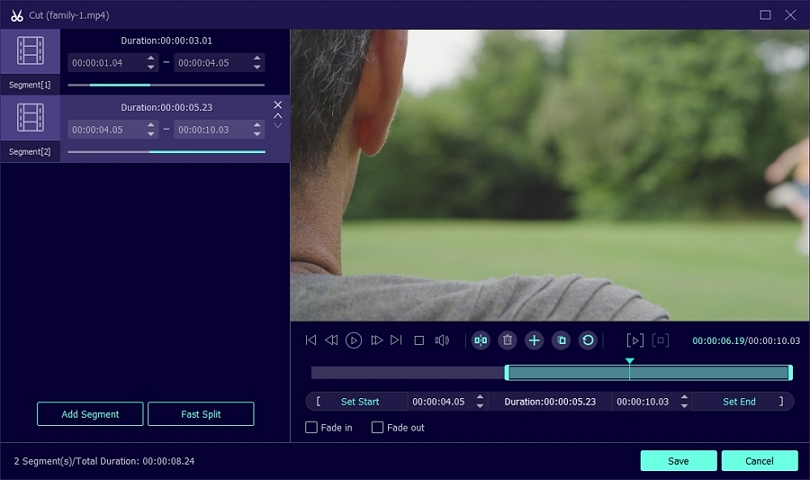
We are using Fast Split option in this guide.
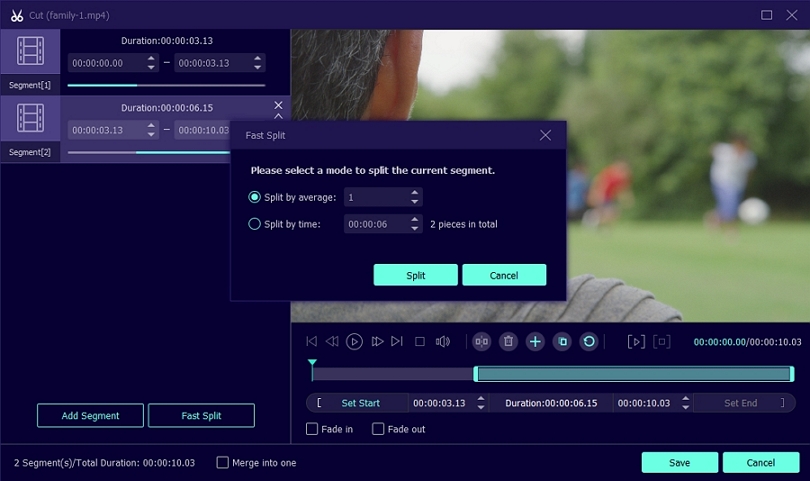
After clicking "fast split," you can specify how you want the current segment to split. For instance, you can specify "Split by average" or "Split by time." Click Split to start the process.
Once you have completed cutting and trimming your video, click on “Save” to save your changes.
Choose the location for your file, and click on "Convert All", you have trimmed and cut your videos now.
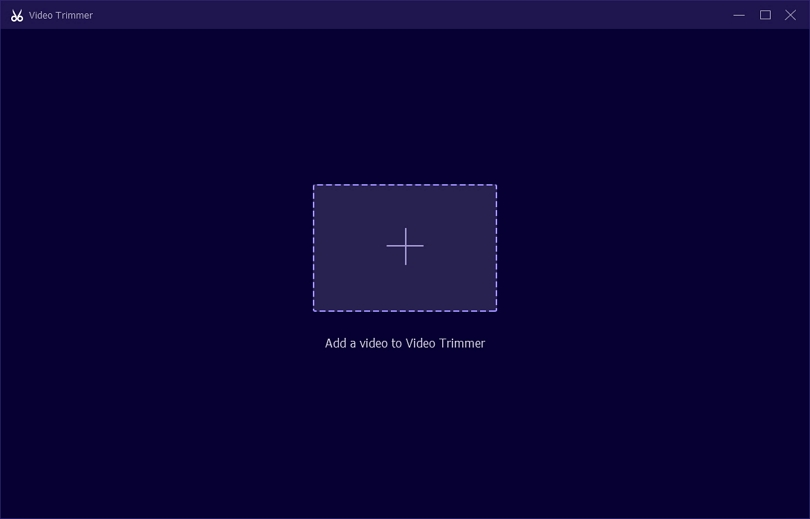
Alternatively, you can visit Toolbox and use the Video Trimmer option to trim or cut your videos.
So, now you know two ways to cut and trim your videos using Eassiy Video Converter Ultimate. There are several cut and trim features available to help you edit your videos and create an entirely new copy of a video or copies of recordings. Once you've saved your altered movies on your device, you can view and share them with other devices such as your phone and tablet.
Integrating or combining numerous video clips into a single video is known as video merging. Combing two or more videos into one cohesive save yours and your employees time and energy.
To connect your videos effectively, you'll need to pick a software solution to handle several video formats with identical frame sizes, frame rates, and audio rates. Eassiy Video Converter Ultimate is one of the dependable software programs you can use. We'll walk you through the simple steps of merging one or more video files into a single clip.
How to Merge Multiple Videos into One
Merging two or more videos in the Eassiy Video Converter Ultimate is relatively easy; follow the following simple steps:
On your device, launch the Eassiy Video Converter Ultimate ultimate. Click "Toolbox" on your main menu, select "Video Merger" to open your video merger.
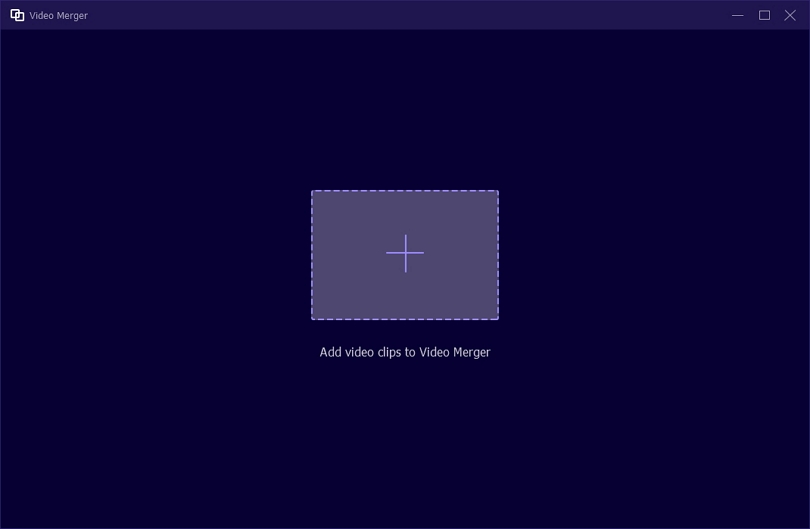
Now click "+" to add video clips or drag and drop videos one by one on the interface. You can add as many video clips as possible to the Merge.
Eassiy Video Converter Ultimate provides a list of features to make changes to your videos before the merge, like:
- Edit – add more effects to the video, text, etc.
- Trim – cut the video in between and stitch to next segment.
- Ahead/Behind – add a video before/after the current one, respectively.
- Forward - forward or backward the video to select a portion as you need
- Add background music as you wish
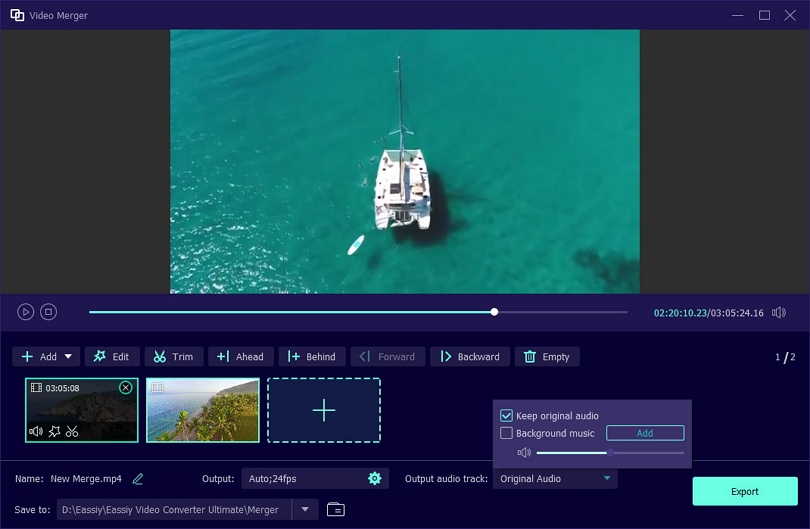
Once you have merged your videos based on your needs, it's time to give your new piece a name. To do so, click on “Name” and enter the name of your new merge.
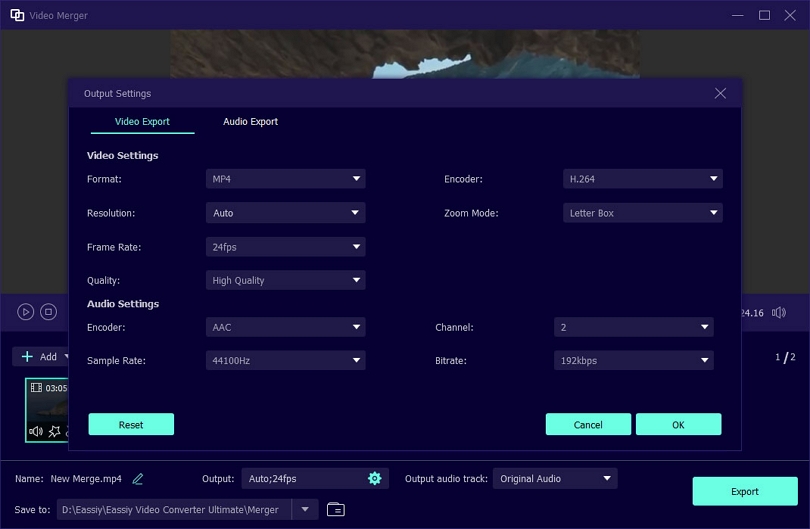
Now, adjust video setting, then click on “Export” button to export your merged video. Wait until "Export" is complete. A notification will appear on your screen. Click OK or Merge Again.
Eassiy Video Converter Ultimate can merge two or more video files and as you saw this tool has many options for merging and editing your new work. You can combine an unlimited number of videos using this tool to create one great piece.
The resolution and compatibility of your video file are critical. Nobody wants to strain their eyes to view a low-quality video. Additionally, some of your videos on your pc may not play on mobile devices. Furthermore, specific sites, such as Facebook, Instagram, or Twitter, will need you to crop your videos before uploading them. Although trimming a video fixes its compatibility concerns, cropping a video removes its unnecessary portions and makes its dimensions fit right where you need it.
How to Crop the Size of A Video
First, launch your Eassiy Video Converter Ultimate on your device, and the following screen will display on your screen
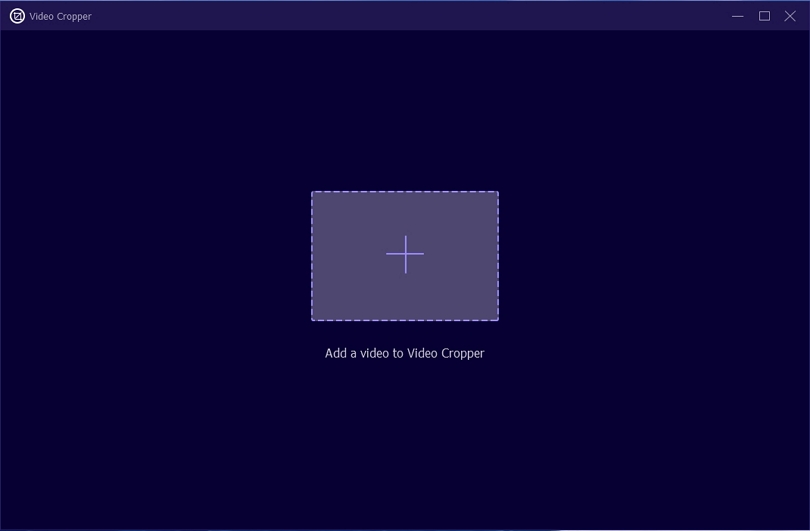
Now, add the video to the crop. To do so, click on the “+” or directly drag and drop your video from your PC.
Once you have added the video, click on the “edit” icon to begin editing the video.
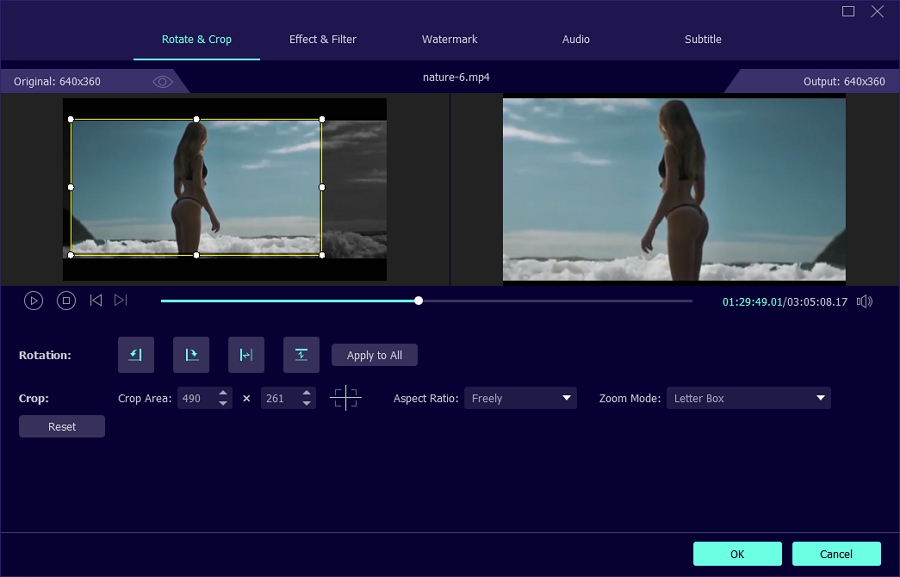
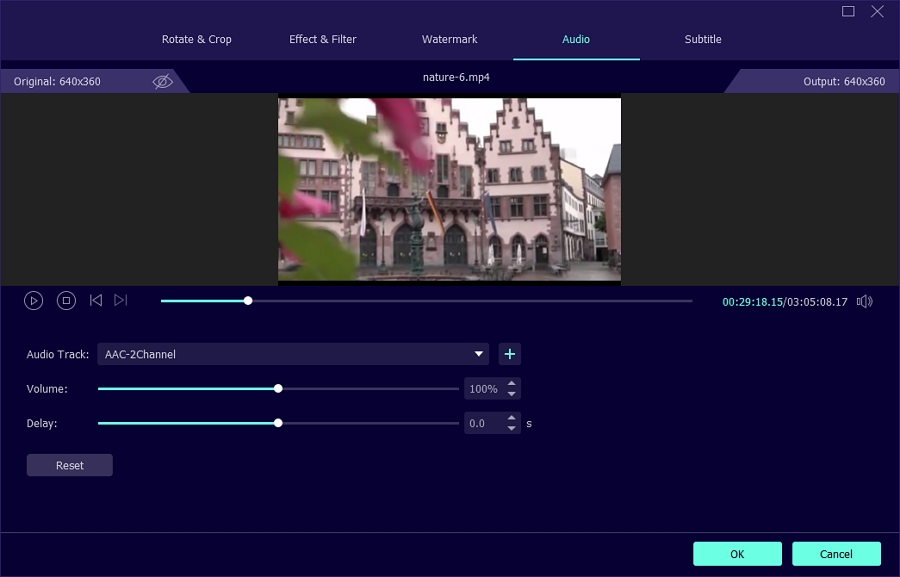
The video edit files will now show on your screen. Here you will see 5 options: Rotate & Crop, Effect & Filter, Watermark, Audio, and Subtitle. Select the first option – Rotate & Crop
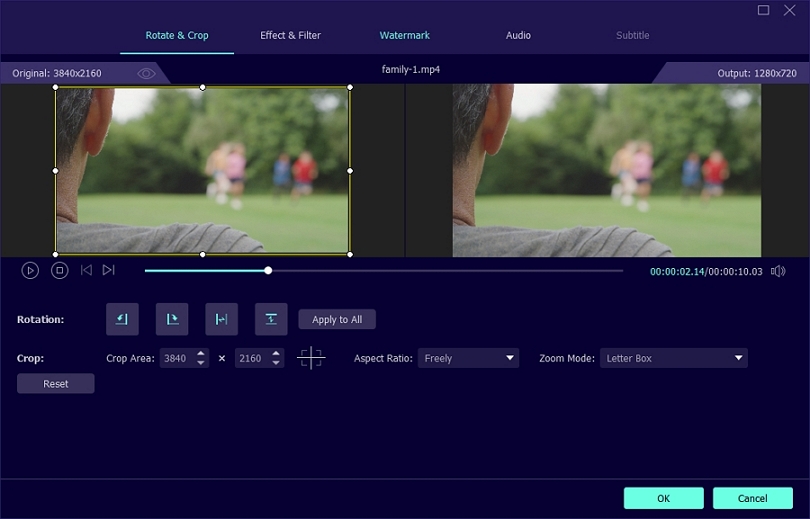
Now, go to “Crop Area” and resize the dimensions of your video. In addition, you can select the aspect ratio and the zoom mode. Once you have cropped the size of your video, click “OK”
Now, click on “Convert All” to complete the cropping.
Your video is now successfully cropped to the size you want. You can now enjoy watching your video in the new aspect ratio. The main benefit of working with Eassiy Video Converter Ultimate is that it offers many features you can use to edit and crop the size of your video.
Alternatively, you can choose to Crop the video directly from Toolbox > Video Cropper
Eassiy Video Converter Ultimate offers the capability of speeding or slowing down the actual speed of video content. For instance, many students prefer viewing educational lessons faster than the actual speed to bypass what they already know but revert to normal playback to grab unknown information.
Research has proved that watching asynchronous lectures at a higher speed may be a valuable and efficient study strategy if it results in similar or better comprehension than watching lectures at an average rate. Speeding and slowing down have their merits and demerits. Nonetheless, we are going to teach you how to do it perfectly.
How to Change the Playback Speed of A Video
After downloading Eassiy Video Converter Ultimate, open the software and choose Toolbox from the home page and then Video Speed Controller from the available options.
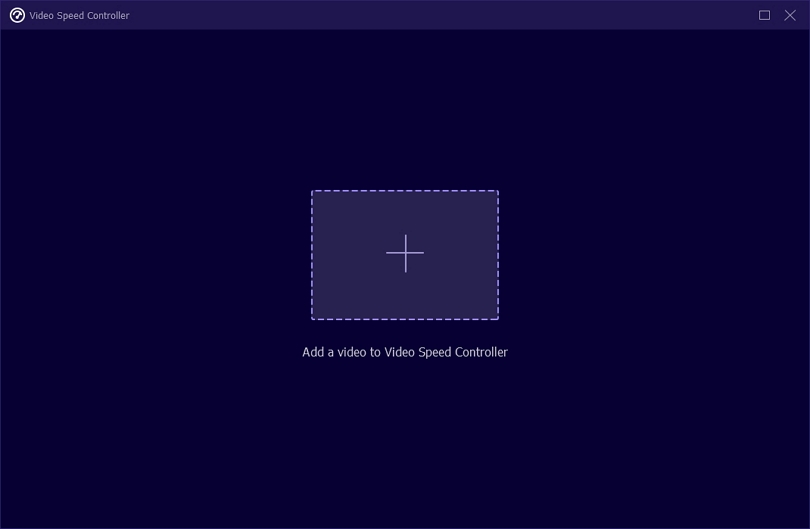
After clicking on the Video Speed Controller, another window will open. Click on the plus (+) to select your favorite video or drag and drop the file.
Here you can speed up or slow down the speed of the video. You'll see several speed options starting from; 0.125x, the slowest to 8x, the fastest. Select the apt option and proceed.

After changing the playback of the video, export it by clicking on “Export” at the bottom page. You can also rename the file and change the Output Settings if needed.
As you may have noticed most of the free video editing tools leave a watermark on the videos. Also, there are many online videos which have watermark specifically added by the uploader to avoid anyone else use it without due credit. However, what if you need a personalized video with no watermark on it? Don’t worry, as we have a solution.
Eassiy Video Converter Ultimate has many functions that may help you erase video watermarks without impacting video quality. This guide will walk you through the process of editing and removing video watermarks so that you may share or use the video for personal purposes. Let's get this party started.
How to Remove Video Watermark
Follow these simple steps to remove a video watermark using Eassiy Video Converter Ultimate.
On your PC, launch and run Eassiy Video Converter Ultimate. Go to the Toolbox option and select "Video watermark remover" from the toolbox's list of tools.
Add the video you wish the watermark erased from by clicking the "+" button or a simple drag and drop.
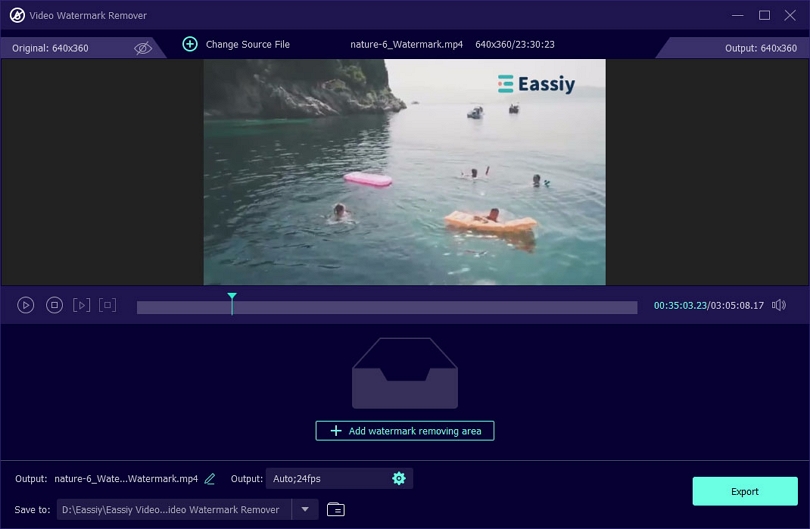
After your video has fully uploaded, edit it and remove the watermark. Select the area where you want to remove your watermark by clicking the "+ Add watermark removing area" button. Now, use the mouse to change the area selected on the video (see the dotted selection)
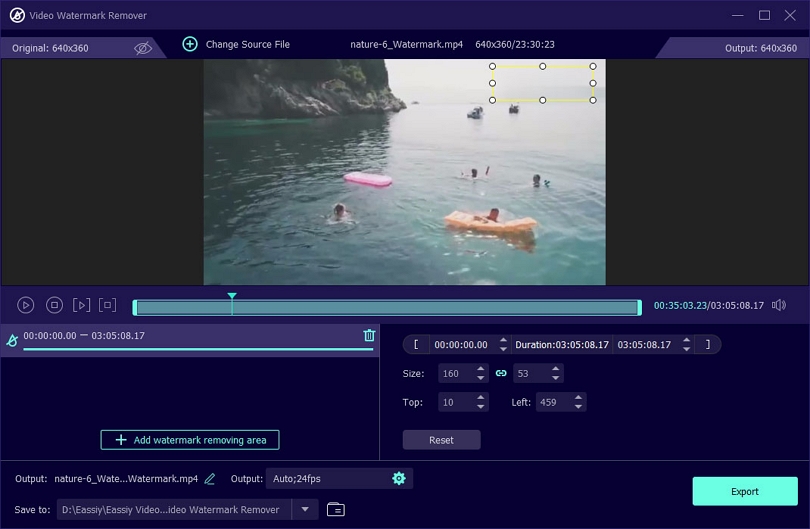
You can keep adding multiple areas to remove watermark by using the + Add watermark removing area. Select the duration or timestamp, size, or Top and Left area.
Finally, click the "Export" button to export your video. Once the export process is complete, an alert box will pop up on your screen displaying the message "The watermark of the video has been removed!". Click OK to close the alert box.
Thus, we learned how to use Eassiy Screen Ultimate Ultimate to erase a video watermark. This software tool has many videos editing options that make it simple to erase video watermarks quickly without affecting the overall quality of your video.
Wow!!! This unique feature will surely make you fall in love with Eassiy Video Converter Ultimate. There are various video quality enhancers (i.e., tools that enable you to improve a video's resolution), but this software's video enhancer is outstanding.
This software allows you to easily change the saturation, brightness, and contrast of clips. It helps you to crop, rotate, edit, and zoom clips. It also allows you to edit a 360 video with minimal effort. Much software offers video enhancer features, but we will teach you how to do it on Eassiy Video Converter Ultimate.
How To Enhance Video Including Reducing Video Shaking and Removing Video Noise
Download and install Eassiy Video Converter Ultimate, go to the homepage of your PC, click on the Toolbox, and then the Video Enhancer option.
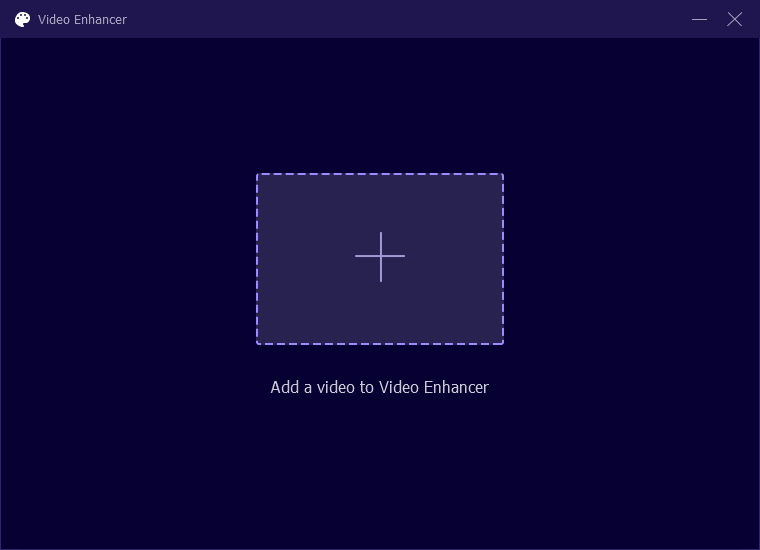
After clicking on the Video Enhancer, a blank page with a plus (+) sign will open, click on the plus sign to add your favorite video or drag and drop, as usual.
After clicking the video, another page of four options will display.
- Upscale resolution.
- Optimize brightness and contrast.
- Remove video noise.
- Reduce video shaking.
Check the Remove Video Noise and Reduce Video Shaking boxes to activate those functions.
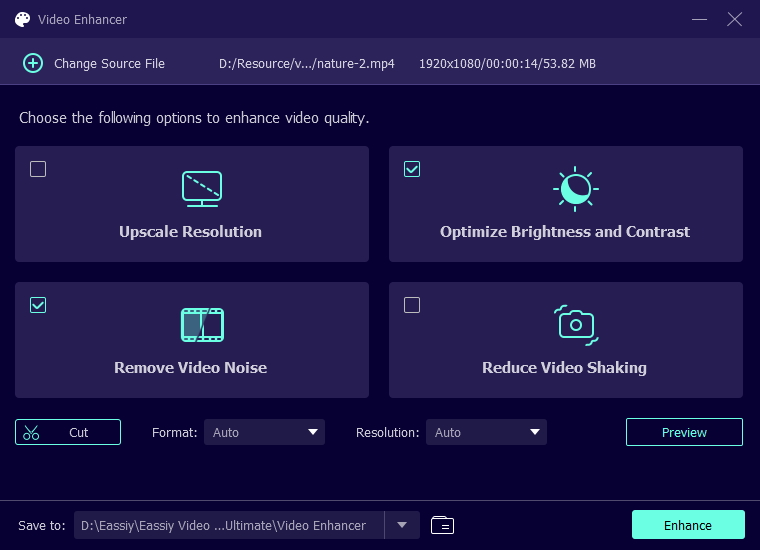
Finally, after you've done and undone the necessary and unnecessary things, click on Preview to foresee the changes once again. Once satisfied, click on Enhance and save the video at your specified location.
The addition of well-designed video watermarks enhances the appeal of your video's appeal and personalizes it. Poor watermarks are disruptive, and a complete turnoff signifies a non-professional video editor. Eassiy Video Converter Ultimate can help you fix this problem and keep your documents safe. Here, this tool will explain how to add a video watermark. Let's get started.
How to Add Video Watermark
Follow these simple steps to add a video watermark using Eassiy Video Converter Ultimate.
On your PC, launch your Eassiy Video Converter Ultimate ultimate, go to ToolBox and then Video Watermark option.
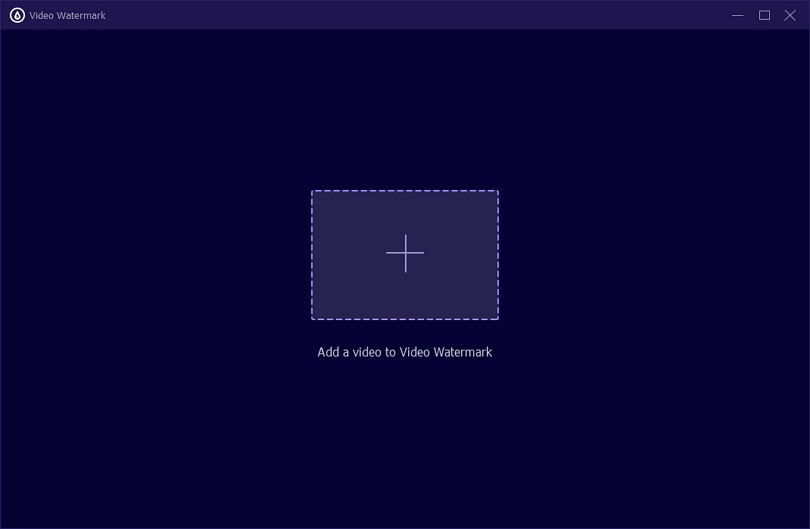
Now click on “+” to add the videos to add watermarks from your PC or drag and drop the videos on the interface below.

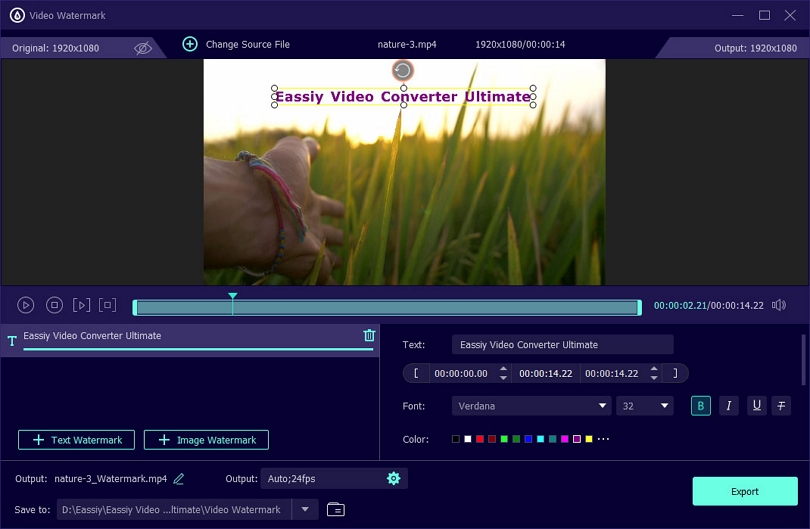
After your video fully uploads, you can add a "Text Watermark" or an "Image Watermark" or both.
For Text Watermark
You will see a window on the video saying, “Please enter text content”. Either directly add text to the video or type in the window next to Text below. Also, you will get options to change Font, Color, etc.
On the left side, you will see option to add more "Text Watermark" or add "Image Watermark" in the same video.
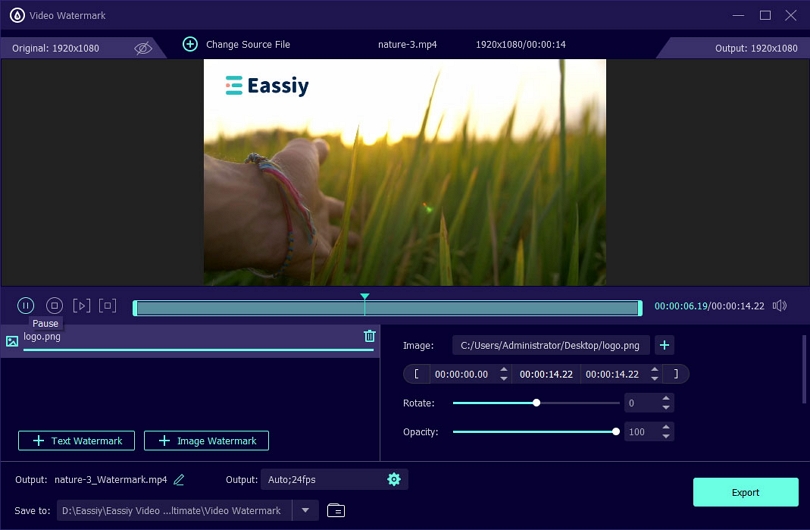
For Image Watermark
When you click on "Image Watermark" the software will allow you to choose an image file from your PC and place it on the video. You can resize or drag it anywhere on the video with the mouse.
Also, you can use the Rotate and Opacity option to make changes to the "Image Watermark" on your video.
You can rename the new piece once you add your watermark in the Output window.
Finally, click "Export" to export your work and close the "video watermark" window. You will see a box with the message "Adding watermark to the video is completed!" Click "OK" to continue or choose Edit Again.
Now, you can use Eassiy Video Converter Ultimate to create a video watermark, add your text or picture watermark and edit it to make it stand out more.
To expertly add subtitles to your videos, you'll need a robust video editing program that enables you to edit your videos while retaining quality. Eassiy Video Converter Ultimate is highly recommended and is considered one of the best software solutions for video editing. This program has extensive capabilities that enable you to modify your videos. We will look at how you can use this tool to edit your videos and add subtitles to your videos.
How to Add Subtitles to Video
Here are the simple steps for adding subtitles to a video using Eassiy Video Converter Ultimate.
First, launch your Eassiy Video Converter Ultimate application to start. When your application launches, you will see the following homepage screen.
Now, add your video to add subtitles. There are two ways that you can use to upload your video; first, you can click "+" to add them or drag and drop them directly.
Once your video completely uploads, you will see an edit option beneath the video title. Now click on the edit button, and instantly you will be redirected to a video editing screen where you can edit your video.
This editing screen has a menu with five items, namely, Rotate & Crop, Effect & Filter, Watermark, Audio, and Subtitle. Click on the "Subtitle."
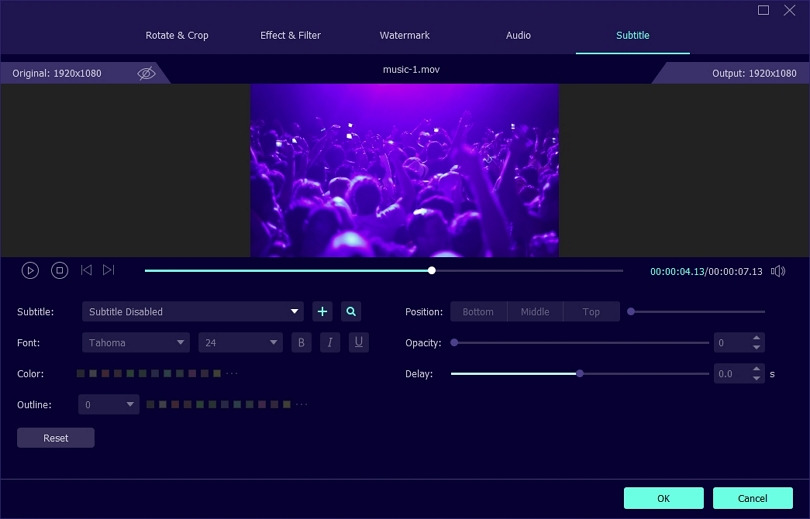
Now, add your subtitle. On the subtitle, click on "+" to upload the subtitle from your PC files or click on the search icon to search for subtitles online.
In the font, edit the font of the subtitle; in color, choose the color for your subtitle; in position, select the position for the subtitle, opacity, and delay.
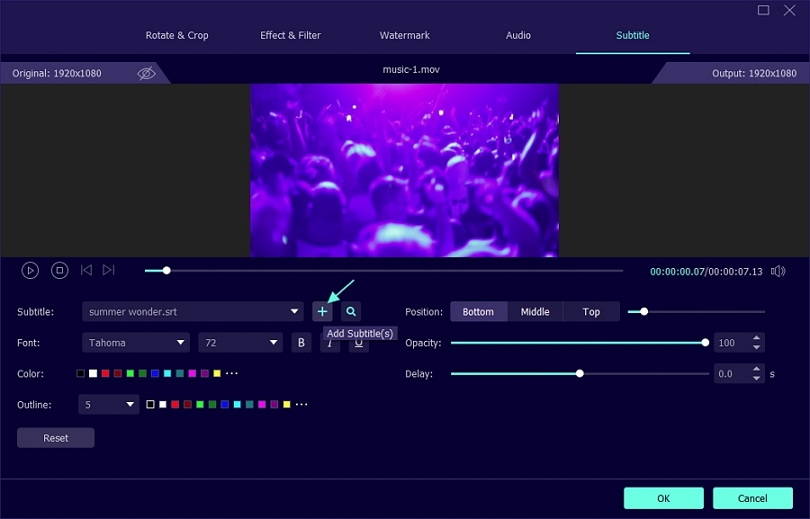
Once you have entered and formatted your subtitle, click "OK" to save your subtitle and exit the editing mode.
We learned how to use Eassiy Video Converter Ultimate to add subtitles to videos. The advantage of this application is that allow you to add and format subtitles professionally according to your needs. Using this tool, you can select different fonts and choose the position, opacity, color, delay, and outline of your subtitles.
Did you know that altering your video color saturation and filters may assist in improving the quality of your video and keeping your audience engaged? Eassiy Video Converter Ultimate can help you produce high-quality films with variety of filters and adjust the video colour easily.
How to Adjust Video Color and Filters
With Eassiy Video Converter Ultimate, you can easily adjust video color and filters on your PC by following the steps below.
On your PC, launch Eassiy Video Converter Ultimate. You can drag and drop your video files or click on "+" to add them. Wait until the video is fully uploaded.
Click on the "edit" symbol below your video file title to access the video file editing screen. On this screen, you can make various edits to your video.
Click on the "Effect & Filter" option on the video editing page menu.
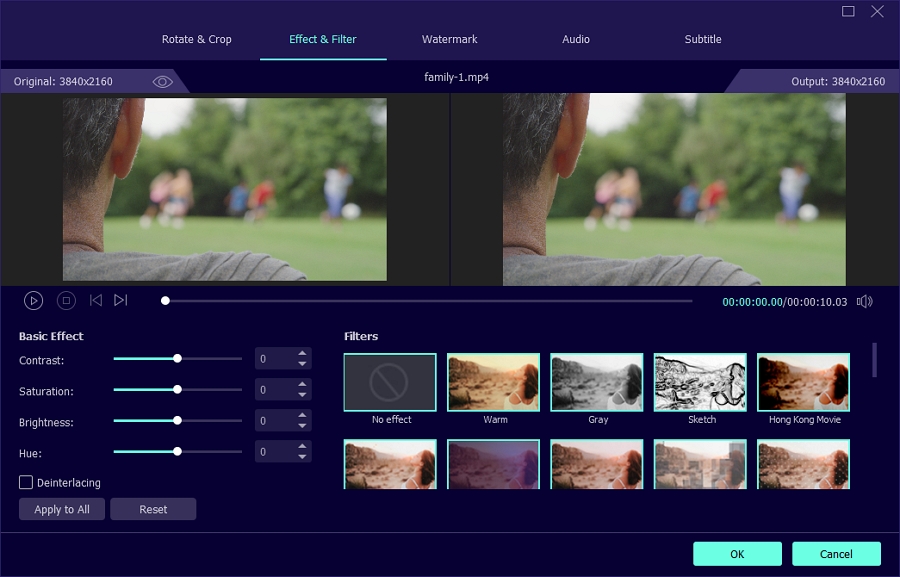
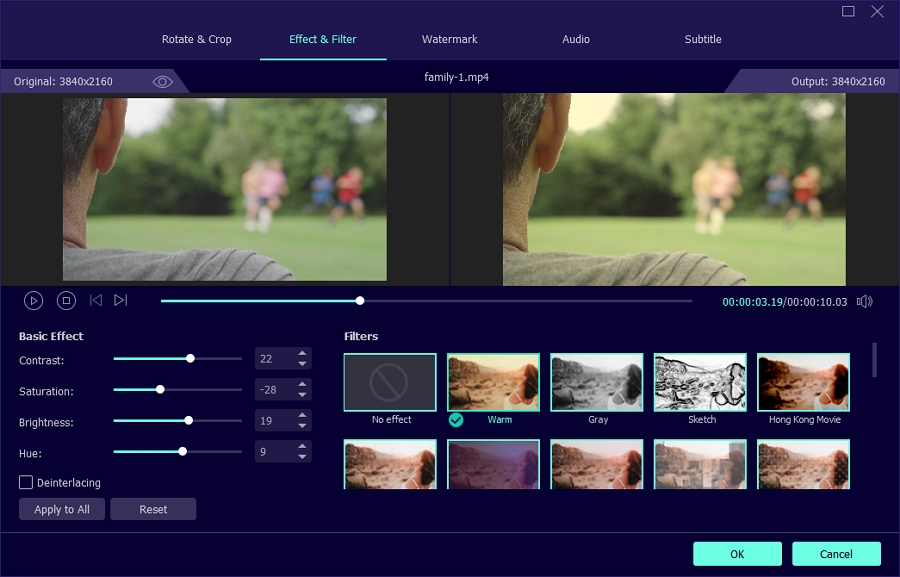
Adjust the video filters and color depending on your needs. Adjust your video's contrast, saturation, brightness, and hue. You can also select the video filter you want from the list provided.
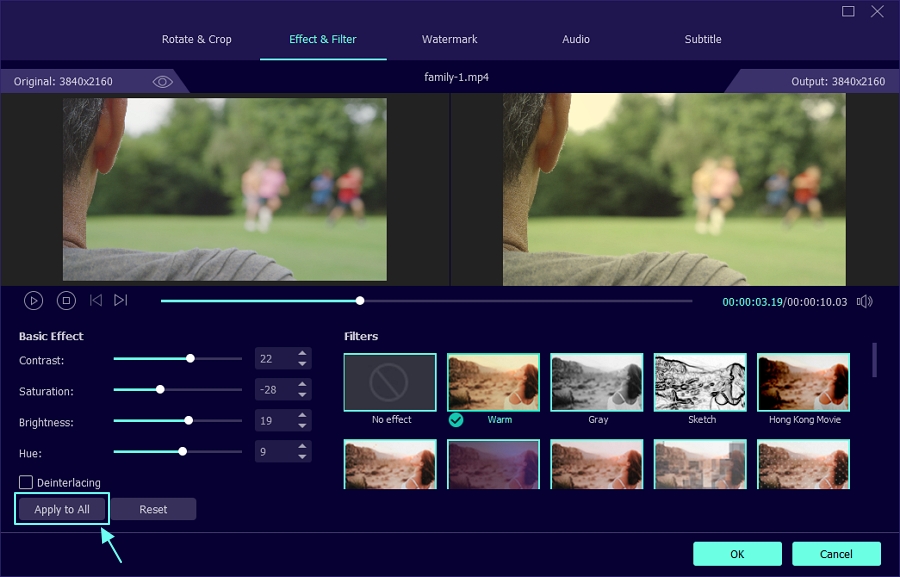
Now click "Apply to All" for multiple changes. Click “OK” to save your changes and exit “Effect & Filter”.
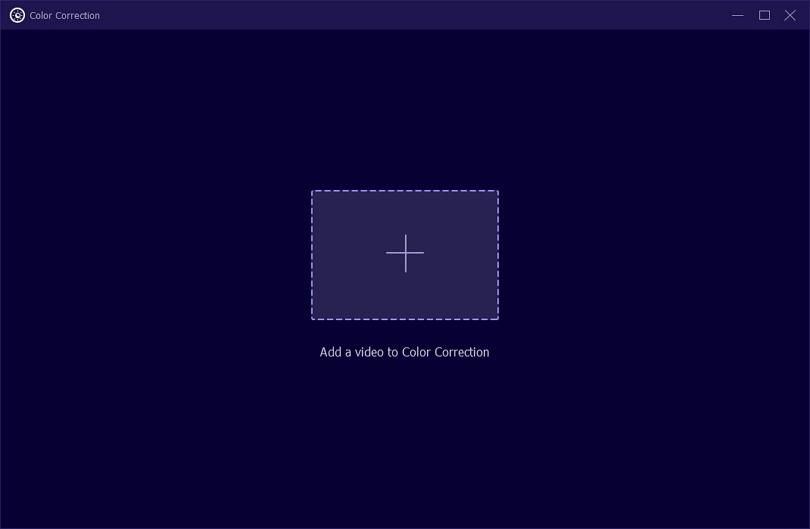
Alternatively, you can also choose the Color Correction option under Toolbox to adjust video color and filter.
We've learned how to edit videos, adjust video color, and use filters in this post. You can easily adjust video color and filter with Eassiy Video Converter Ultimate because it offers a wide range of editing options and filters.
For various reasons, you may want to play a video backward. It can be for demonstration, lecture, fun, or anything. With Eassiy Video Converter Ultimate, we can easily make a video play backward.
Here are some detailed steps for playing video clips backward or in reverse mode on your personal computer. You can playback video with just one click as well as carry out some editing on the video. Let's start.
How To Play Video Backwards
After installation, open Eassiy Video Converter Ultimate, select the Toolbox and then locate Video Reverser and click on it.
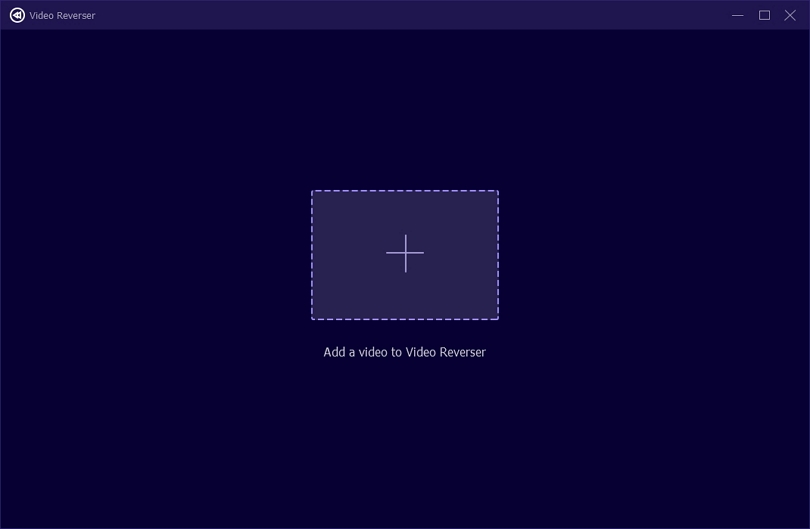
A blank page with plus (+) will display on your screen. Click on the plus to add your favorite video or drag and drop one by one.
Now, beneath the video, you'll see something like a measuring ruler with a small arrow-like shape. Click on any space of the ruler depending on where you want to reverse it or forward it.
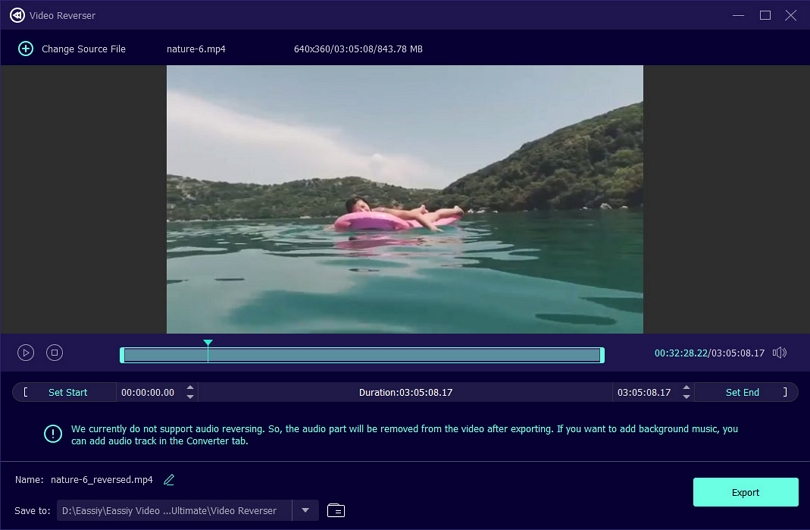
After finishing the process, navigate to the bottom of the page and click on Export. Your video will get saved to C drive, the default path, or you can edit the location to suit your needs.
Whether using a Windows or a Mac, you can easily rotate a video on your computer using Eassiy Video Converter Ultimate. Eassiy Video Converter Ultimate is a powerful software tool that enables you to edit and turn your video based on your needs. With this tool, you can rotate your video 90 degrees to the right or 90 degrees to the left and flip it vertically or horizontally without compromising video quality. Below, we will go through how to rotate a video on a PC using a Eassiy Video Converter Ultimate.
How to Rotate a Video on a Computer
With Eassiy Video Converter Ultimate, it is pretty easy to rotate a video on a PC. Just follow the steps below to get started.
On your PC, launch Eassiy Video Converter Ultimate. From the below menu, select "Toolbox." Scroll down and select the "Video Rotator" tool. We are going to use this tool to rotate our videos.

Once you open the video rotator, you will be prompted to upload the videos to rotate. To do so, click on the "+" and select the videos you would like to add to the video rotator or choose to drag and drop.
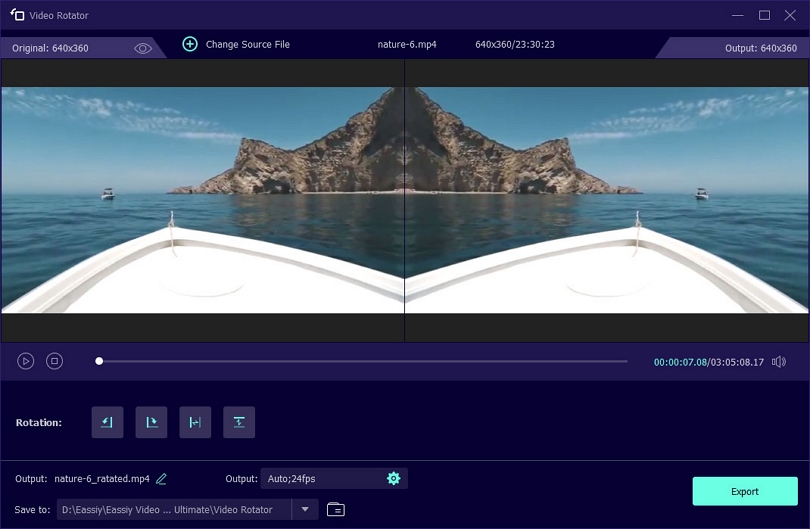
Rotate your video according to your needs by clicking "Rotate". Depending on your specifications, you can rotate 90 degrees to the right or 90 degrees to the left and flip vertically or horizontally. The screen will preview your video once rotated.
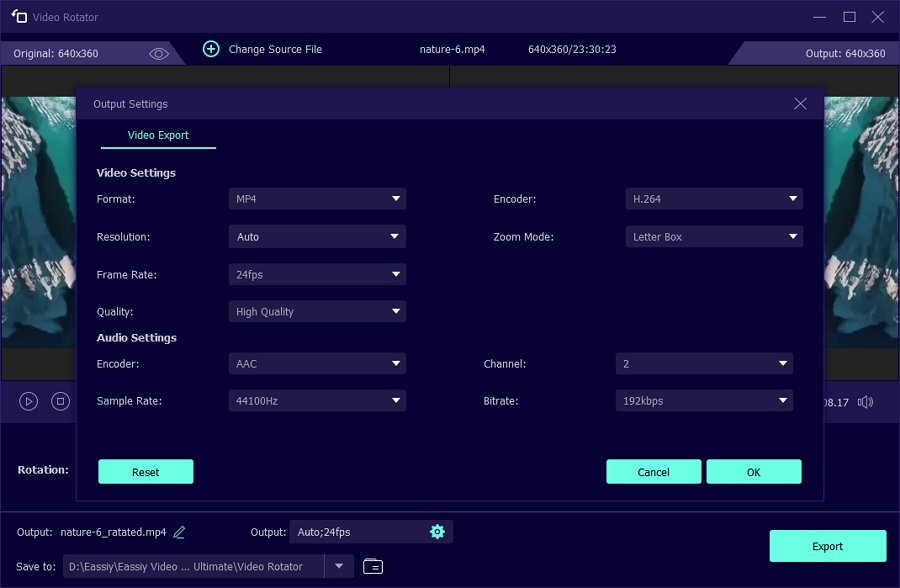
Now, click the Edit icon to rename the file, and make changes to the Output settings. As you see in the image below, you get multiple options in Video and Audio settings for your final video file. Finally, click on “Export” to export and close your video rotator.
Alternatively, you can Rotate the video under the Converter option in the home page.
In this guide, we've gone through how to rotate your video using your Eassiy Video Converter Ultimate. This tool enables you to rotate 90 degrees to the right or 90 degrees to the left and flip vertically or horizontally without compromising video quality.
You need to adjust the video's volume whenever the audio is too loud or too high. The sound of a video is an important feature and, in most cases, depends on the user's requirements. We will learn how to adjust the volume of our video using Eassiy Video Conveter Ultimate to our requirements.
How to Adjust Video Volume
Using Eassiy Video Conveter Ultimate, you can easily adjust the video volume. Check out the simple steps below.
Launch Eassiy Video Conveter Ultimate ultimate on your PC. From the list of video editing tools listed in the Toolbox, select Volume Booster. A volume booster is an essential tool that helps you adjust the volume of your video.
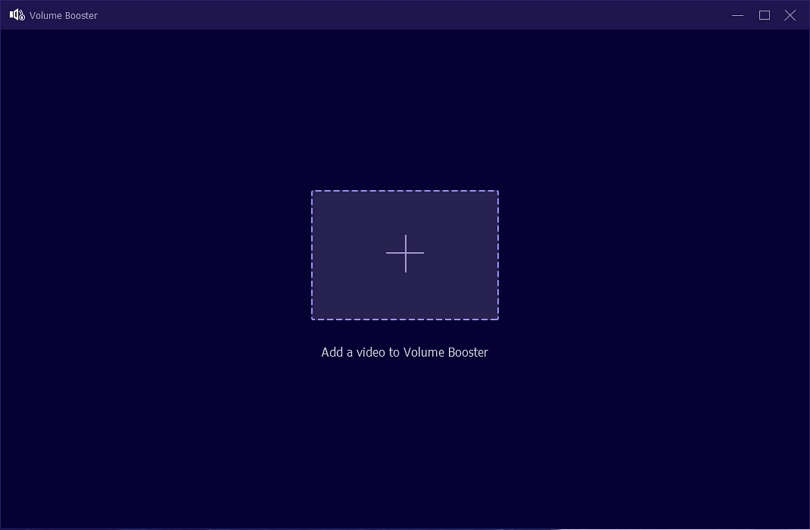
When you click "Volume Booster," you will be asked to upload your video. Now Click on "+" and upload a video from your PC or drag and drop.
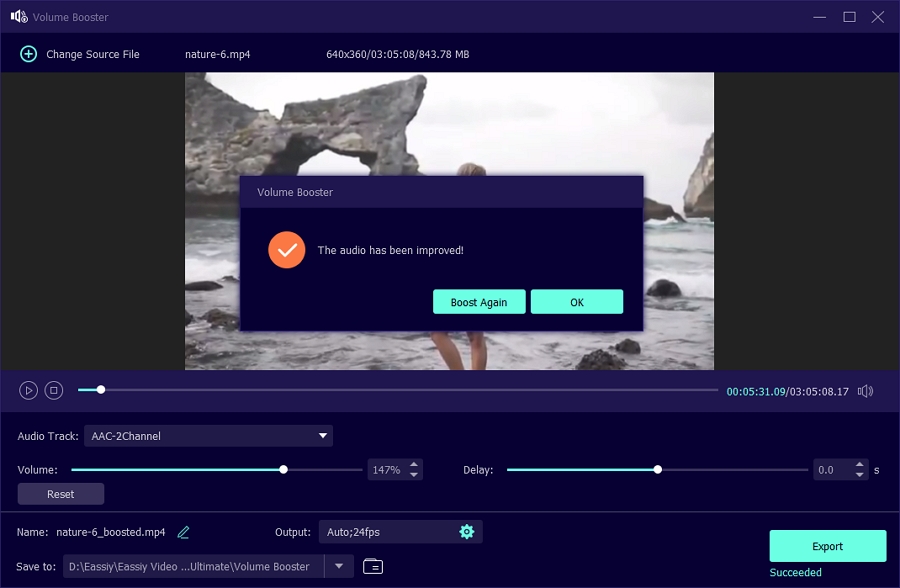
Click on volume and adjust it to fit your needs. You can adjust the volume up to 200% with Eassiy Video Conveter Ultimate.
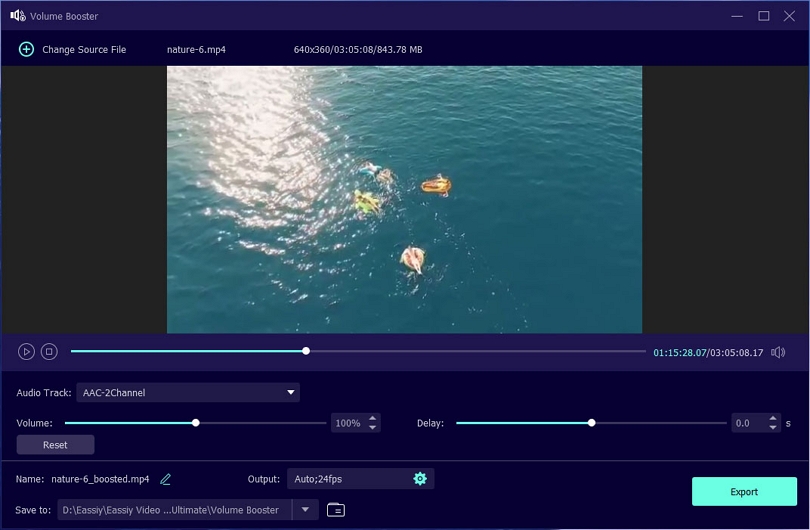
To differentiate the new video from the original file, you can rename it. Select your destination folder to save your edited video on your PC. Or click on Export to export your video in the default location of your PC. As soon as the export process is complete, you will see a message alerting you that your audio has been adjusted. To close the message box, click “OK" or choose Boost Again.
Alternatively, visit the Converting option in Home page and select the edit icon to adjust video volume under Audio tab.
Finally, we have learned how to adjust your video volume using Eassiy Video Conveter Ultimate. In this tool, you can adjust the volume of your video to 200%.
A film that doesn't sync up leaves a filmed character moving their mouth when there's no spoken speech to support it. Therefore, the term "lip flap" the resulting audio video sync error can be annoying to the viewers and may also decrease the effectiveness of the program on the part of the viewer.
Below, we are going to teach you how to sync audio with Eassiy Video Converter Ultimate software. Let's begin the procedure.
How To Sync Audio and Video Sources
Using Eassiy Video Conveter Ultimate, you can easily adjust the video volume. Check out the simple steps below.
Download and install Eassiy Video Converter Ultimate, go to the homepage of the software, select Toolbox, locate Audio Sync and click on it.
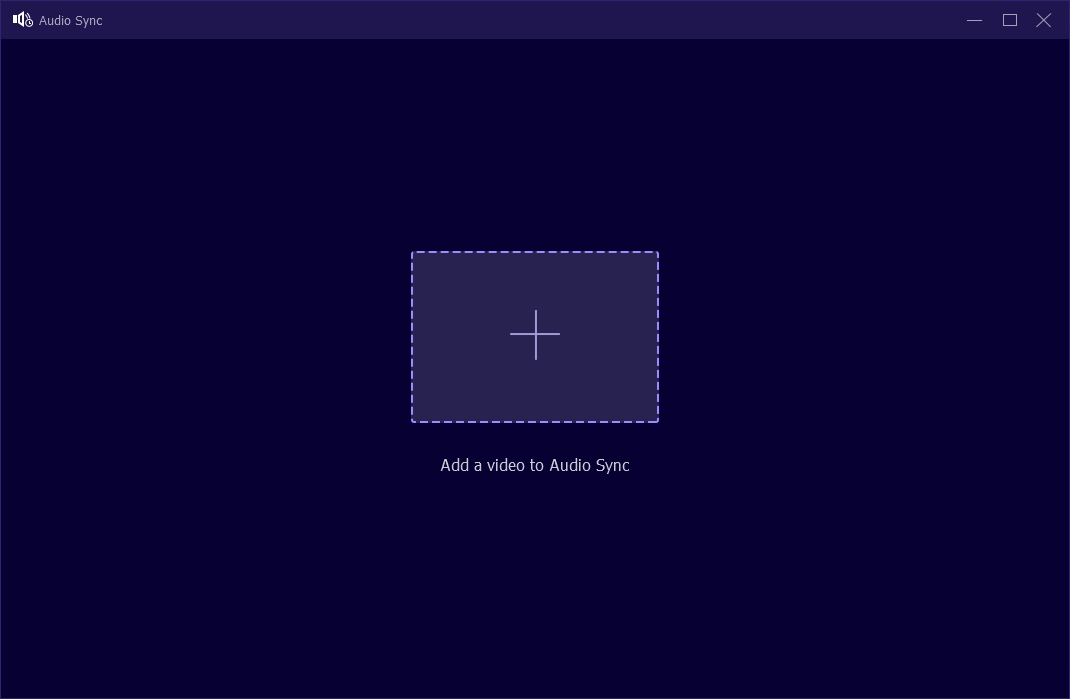
On the blank page that displays, click on the plus (+) sign to add your favorite video, and then proceed with syncing and other settings.
First, in the audio track option, you can select AAC-2Channel or audio track disable (mute), and under it is the delay option. Slow down or speed up the video audio, adjust the volume as you wish. Then click on settings underneath, where you can edit the format, resolution, frame rate, quality, encoder, sample rate, etc. Lastly, click OK to complete the setting.
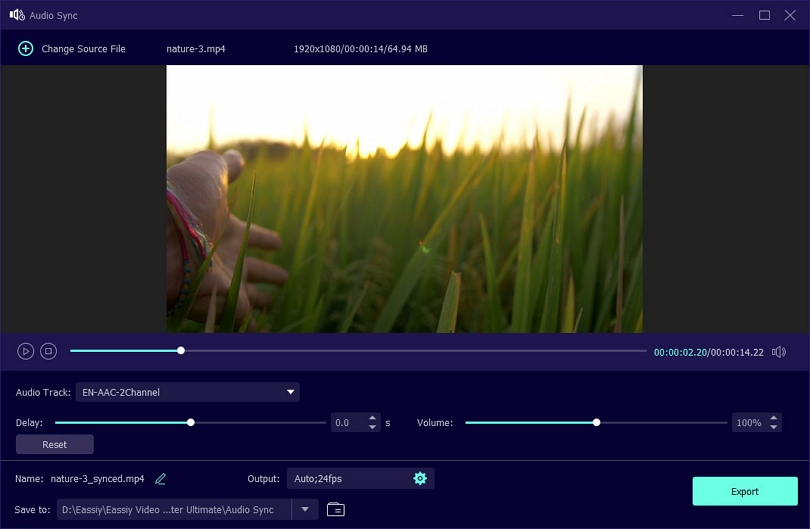
Finally, click Export to save the file to your PC's default location.
Eassiy Video Converter Ultimate offers too many brand-new features for users. Meanwhile, the one we are dealing with is the "MV Maker". MV maker, which encompasses several themes, enables users to add background music, effect, transition, trimming, etc., to videos, helping them make extraordinary and stunning films, vlogs, or other videos by themselves. This content will detail how to make MV available for all devices. Here's how to do it.
How to Make MV or Music Videos Available for all Devices
Download and install Eassiy Video Converter Ultimate on your MacOS or Windows PC
After successfully installing Eassiy Video Converter Ultimate, go to the home screen and Select MV, the third option.
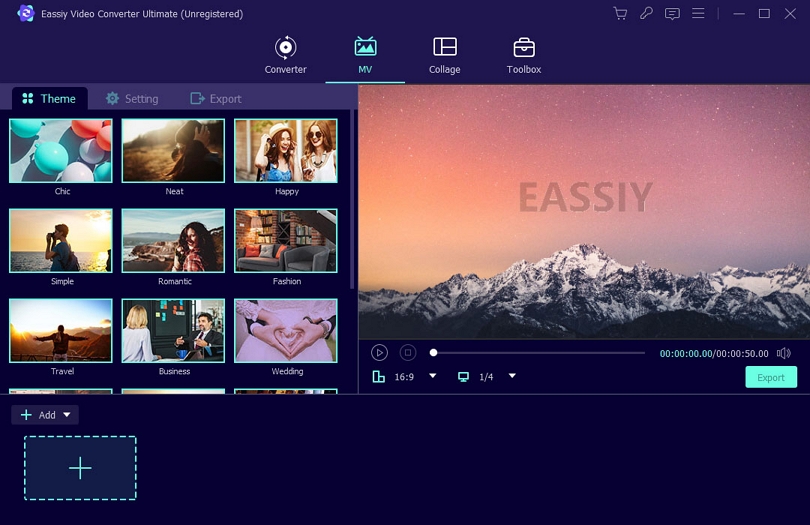
Click on add ‘+’ to add videos to the editing field. You can change the video order by clicking “forward" or "backward." Click on the video clip one by one for editing.
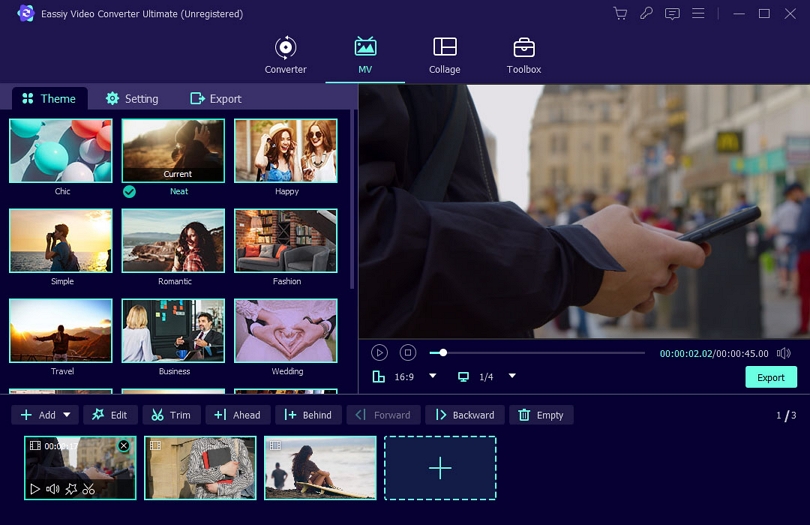
Now, choose any theme from the in-built library of Eassiy Video Converter Ultimate.
Under Theme
You can choose various effects from below like, edit, trim, ahead, and behind. For example: edit will open the below options, Rotate & Crop, Effect & Filter, Watermark, Audio, and Subtitle for you
Trim will enable you to cut the length of the video and split it with added Fade in and Fade out options.
The last two options, Ahead and Behind, will allow you to add more videos before or after the upload.
Under Setting
In the Settings option, you can enable Start and End titles, adjust volume and delay, and decide to keep the original audio track or even upload the music you like.

Under Export
Here you can check and make changes for format, frame rate, resolution, quality, the save to location and Complete (what you want to software to do once the process is complete).
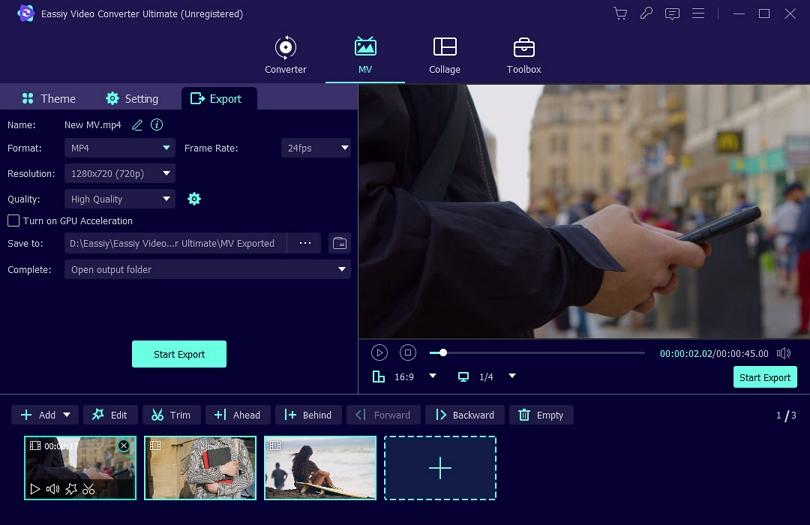
When you are sure everything is perfect, click the play icon to preview the video, click on Start Export, and wait until it finishes. It takes about 2-3 minutes.
Is it possible to make a video collage on a PC? Well, it is possible and straightforward. As a college student, you can create impressive video clips to save and share some incredible moments in the film or its remarkable moments of life in a video.
What's a video collage?
Before you even attempt to make a video clip as a collage, you must understand what it is. Video collage means creating or combining two or more video clips in one. You can also include music in video collages. But how can you do this on your own without stress? Yes, go and download Eassiy Video Converter Ultimate.
This software offers endless opportunities to create eye-catching videos, and you can edit them how you want. It provides unique features in which you can include music and pictures in your video clips. Follow these steps to carry out the task.
How To Make Collages on Computer
Download Eassiy Video Converter Ultimate free here, there's a Windows version and a Mac version. Download the one that's suitable for your system.
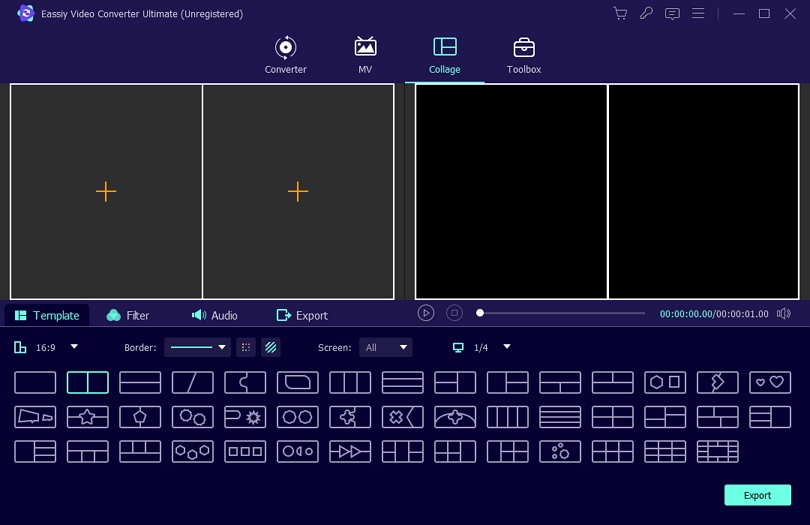
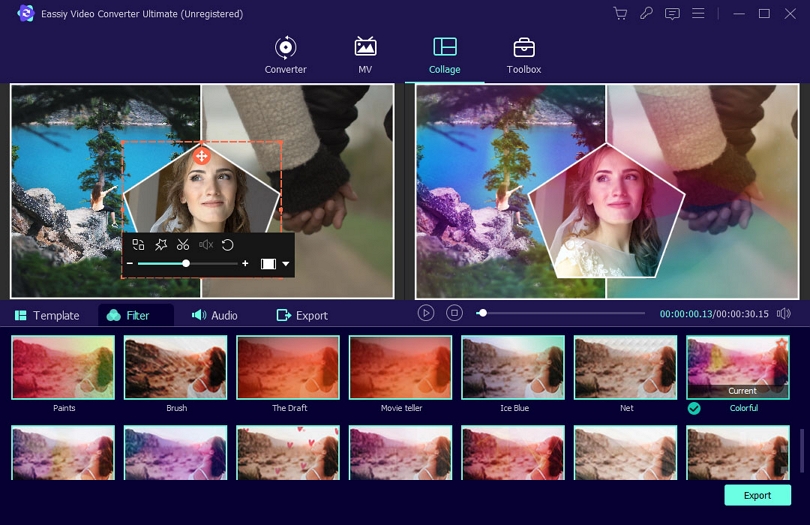
After the installation, enable it and click on Collage at the top of the screen. Then select the desired template (there are various templates available). This software can allow you to upload up to 13 videos. Click on the plus (+) to add your favorite videos.
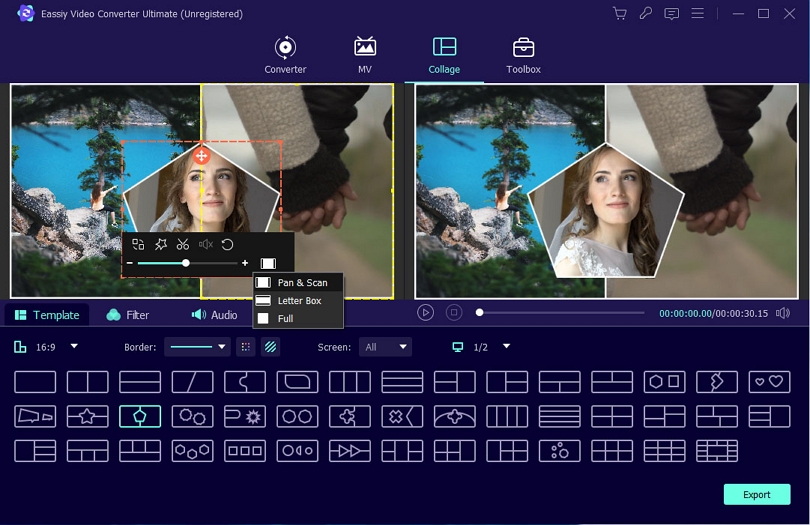
Now, edit the video collage by adapting different side conditions. This software enables you to define aspect relationships yourself, set frame and colour, or select an image to use as a frame.
After you're through with editing, adjust the Filter function. Eassiy Video Converter Ultimate offers more than 40 filter options you can choose from, select one and click on it.
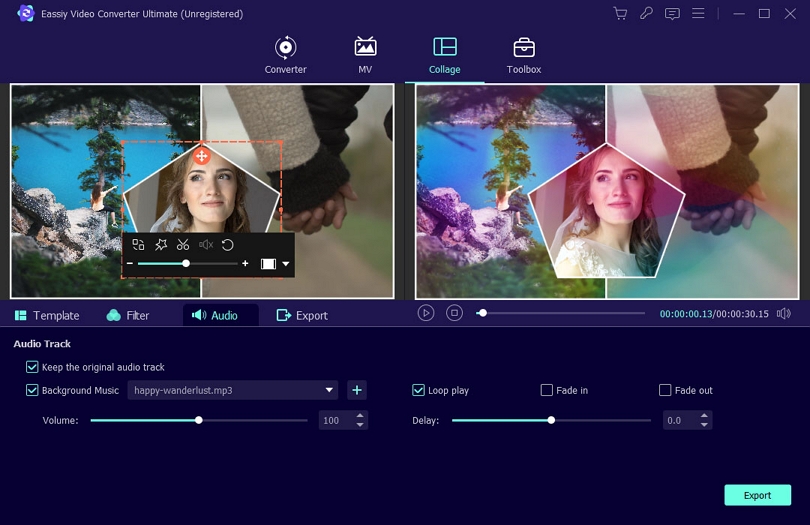
After filtering, set the audio of the video collage or keep the original audio track, although not advisable.
Hence, you can embed background music by checking the background music box and selecting your favorite music. Besides, also adjust the volume and playback mode.
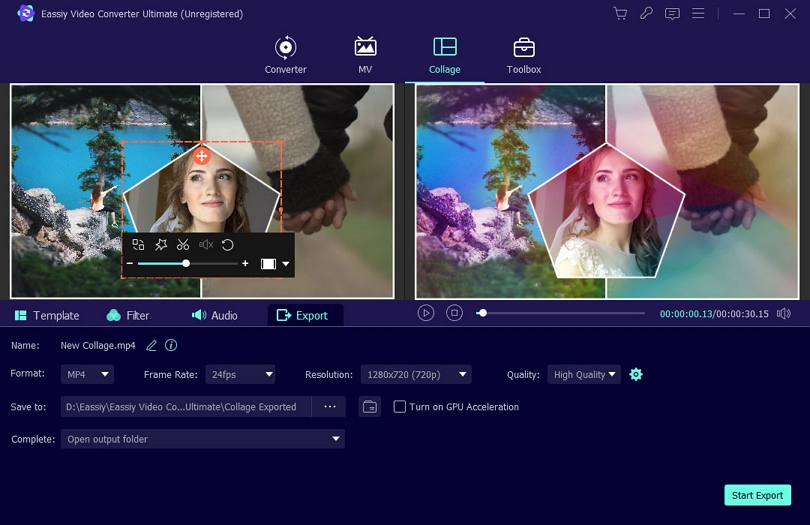
Finally, move to the Export function, where you will have to enter the name of your video clip. Moreso, you can make amendments to the frame, format, quality, and resolution. Click "Start Export," and the created video collage will get saved to your selected path.
Since the movie Avatar, shot and played in 3D, came into the spotlight in 2009, 3D technology has been more popular in the movie-making industry. It improves audience visual improvement compared to 2D videos. However, to watch 3D videos, there must be 3D glasses, 3D players, old 2D tv, mobile phone, or any 3D support players. Hence you might need to convert to 2D or 3D to 2D. In this guide, we will be considering the latter option.
Eassiy Video Converter Ultimate converts 2D videos to 3D with the following characteristics.
- It can convert 3D videos into many formats, including HEVC MP4, MP4, MOV, ProRes, MKV, AVI, HEVC MKV, and many more.
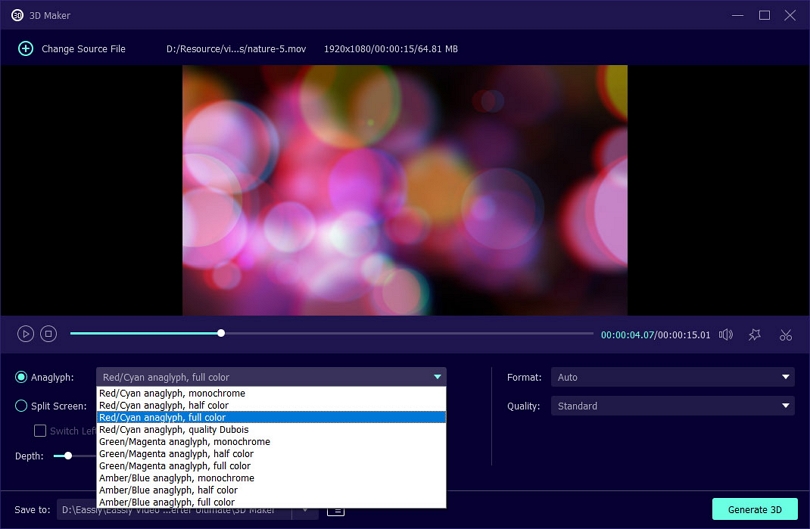
- The software favors 14 3D modes like the top and bottom 3D, side-by-side 3D, and red/cyan anaglyph 3D video format to enjoy the effect of 3D on a standard 2D tv.
- Finally, it enables you to adjust the level of 3D depth ranging from 0 to 50 to discover the comfortable view and preview the 3D effect in real-time to ensure the 3D effects are reasonable.
How to Convert 3D Video From 2D
Method 1: Select 3D and Click Convert
Open Eassiy Video Converter Ultimate, import video files on the software by clicking on the Add Files option or dragging and dropping the videos on the '+' sign. This software enables batch conversion (i.e., you can convert several 2D videos to 3D at once).
Set your preferred 3D format by clicking on the program's drop-down arrow at the top right. There are many options to consider. We chose "MOV," 3D right-left.
Once selected, click “Convert All” at the bottom right to convert 2D videos to 3D videos.
Method 2: Using 3D Maker Tool
Click on Toolbox and select 3D maker to make 3D from a 2D video.
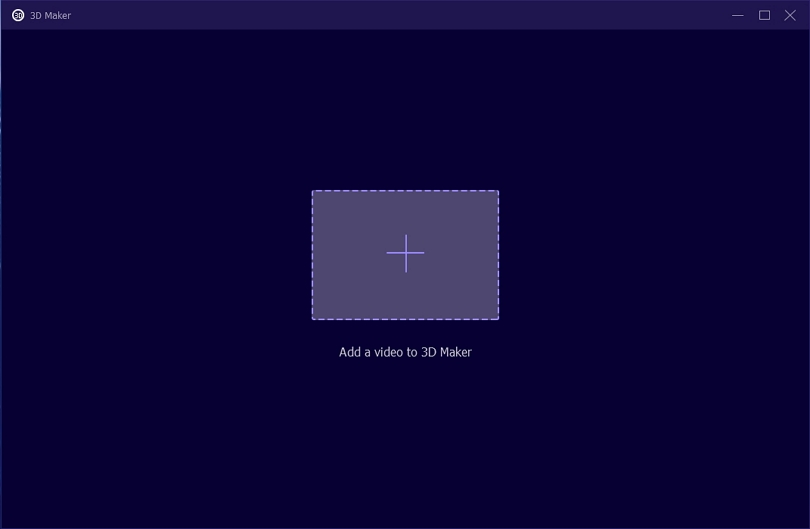
Now, add a 2D video to the program. The tool will process your 2D video to 3D and let you preview it on the screen.

After adjusting of anaglyph, depth, video format and video quality, click "Generate 3D" to start the converting.
If you want to convert any video into a GIF file, we need to precisely understand the GIF file. GIF stands for Graphics Interchange Format, a raster file format designed for relatively basic images that appear primarily on the Internet. GIF files also allow you to combine images or frames to create basic animations.
For converting any video to GIF format directly, Eassiy Video Converter Ultimate is excellent software if you follow the few graphically mentioned steps below on Windows or your Mac PC.
How to Convert Videos or Images to a GIF Directly
Launch Eassiy Video Converter Ultimate, click on Toolbox to view multiple options, and choose GIF Maker
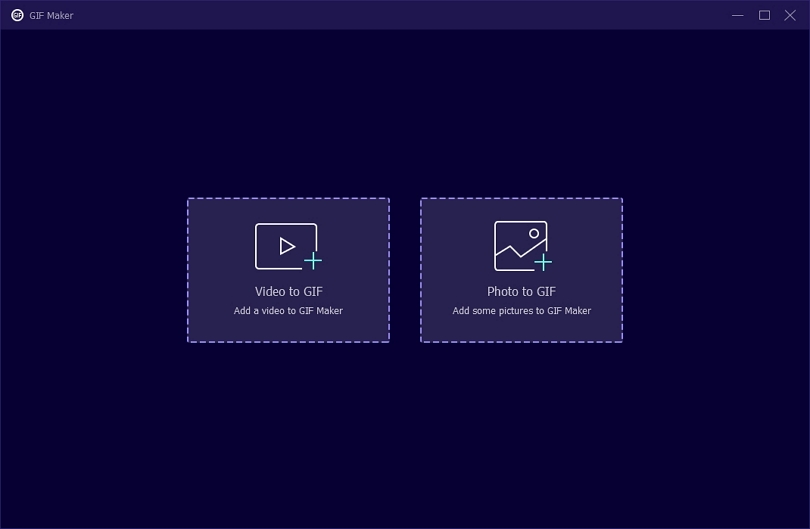
After clicking GIF maker, one box will open. Here, you will see two options, a) Videos to GIF, b) Photos to GIF. Click on ‘Video to GIF’ or Photo to GIF for image files.
Clicking on the Videos to GIF or Photos to GIF box will allow you to add a video or image from your computer to the video converter.
For Video to GIF
After importing the video, you can select the option loop animation as per choice. That means:
- Loop on: Video will continue to play until and unless it’s being stopped manually.
- Loop off: Video will stop playing automatically after playing once.
You can edit video before making GIF or adjust output size and frame rate as you wish.

For Photos to GIF
After uploading the image, choose or change the Output Settings for your Photo to GIF file. You can change the GIF Settings: Resolution, Frame Rate, Zoom Mode, and check Loop Animation. Once you have made your selection, press OK.
Note: If you want to keep your selection by default, check the box next to Apply previous setting automatically. This will ensure the Output Settings stays the same for all GIF conversions.
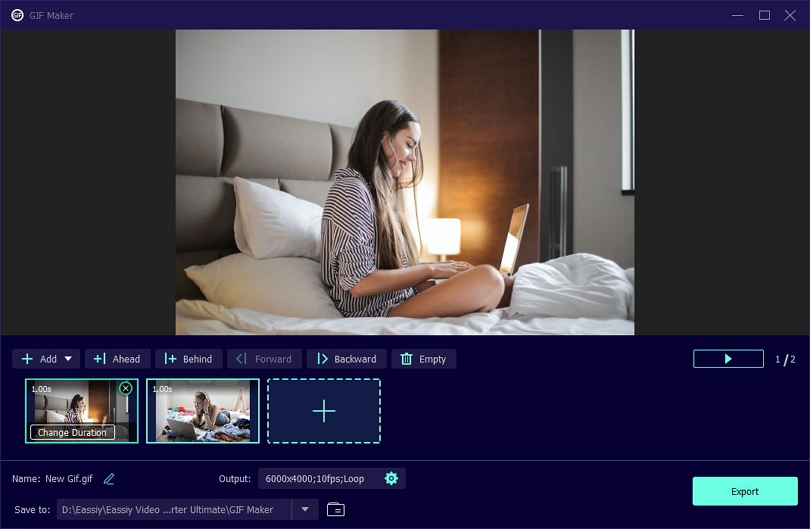
Now, adjust the order of the pictures by dragging as you wish and set the duration of each picture.
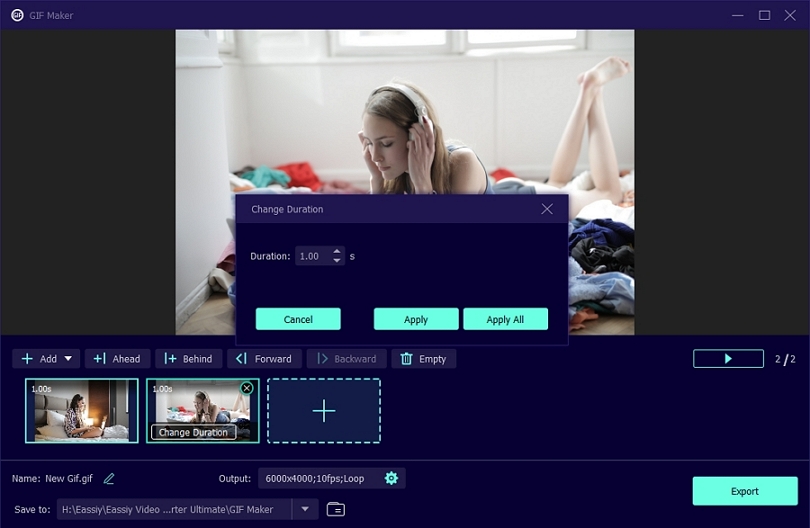
Once you have completed all settings. Click Generate GIF/Export button to make your GIF.
Do you have a new video but cannot share it since the file is too big? Well, what you can do is video compression. Are you worried that the video quality may be low after reducing its size?
We have an excellent all-around video converter that will help compress your videos, saving you time and space without losing quality. Since the video converter ultimate from Eassiy supports various formats, you will never have issues watching, editing, sharing, or exporting your videos. Eassiy Video Converter Ultimate will ultimately give the best results on your Mac and Windows PC.
How to Compress Videos Without Loss Quality
Open Eassiy Video Converter Ultimate, reach the Toolbox option at the top. Then click on the Video Compressor.
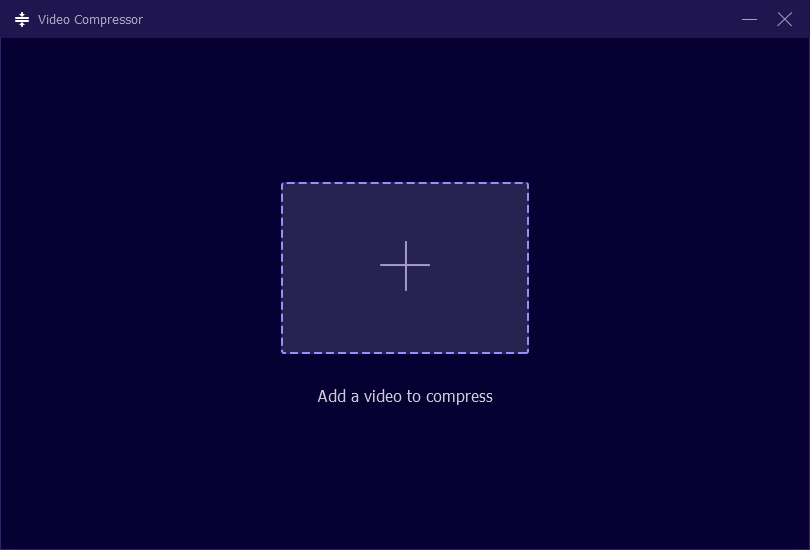
A pop-up window will be seen. You can either click the ‘+’ sign or drag and drop videos to add a video to program.
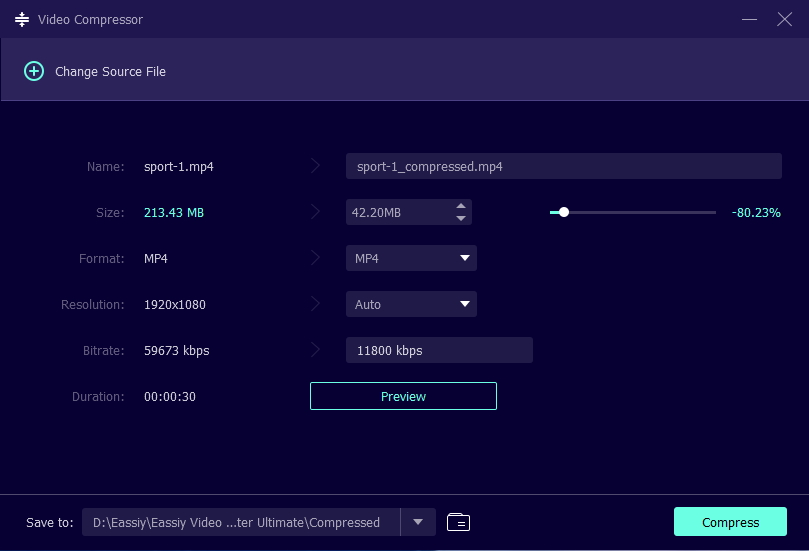
Adjust the name, size, resolution, format, bitrate, and the export location for your final video. You can resize the video file by sliding the dot. The file can be compressed up to 90%.
After setting, click on the Preview button to check the video quality. Finally, press the Compress button to compress the video to your desired size.
Eassiy Video Converter Ultimate is an excellent option for everyone who wants to create high-quality videos without loss. The best feature is the Preview and Video Settings option within Video Compressor which gives you the freedom to choose the type of video you need and to revisit the settings if something is not ok.
Now, what is metadata? Well, in layman’s terms, metadata consists of file information, like size, title, date, bitrate, resolution, etc., for media files like videos, audio, and pictures. For audio and video professional with large amount of data, metadata tags are extremely important as it helps them to find and use the required files quickly.
So, let us know how do you edit metadata tags? With Eassiy Video Converter Ultimate, you can edit, share, convert, and create videos, including their metadata tags. This highly sophisticated software helps video and audio editors better their creations in no time.
How to Fix or Edit Video Metadata Tag
Open Eassiy Video Converter Ultimate, click on Toolbox and then select Media Metadata Editor.
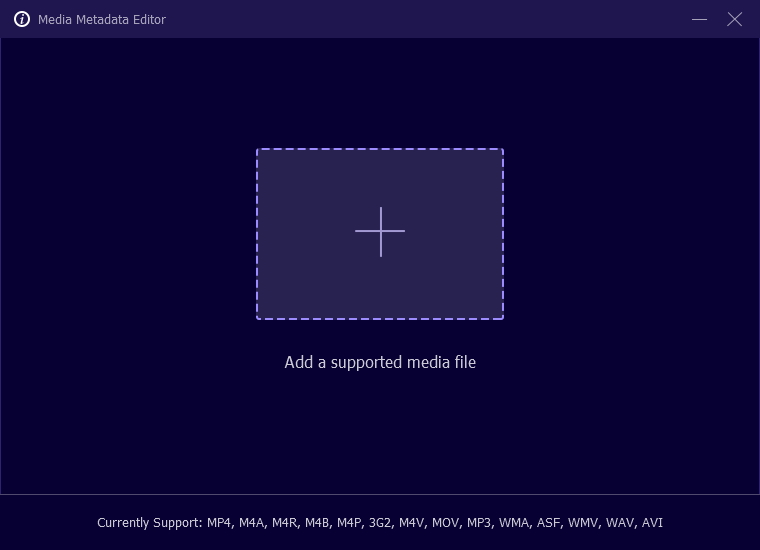
Either click the ‘+’ sign or drag and drop a video/audio file where you want to edit the metadata tag.
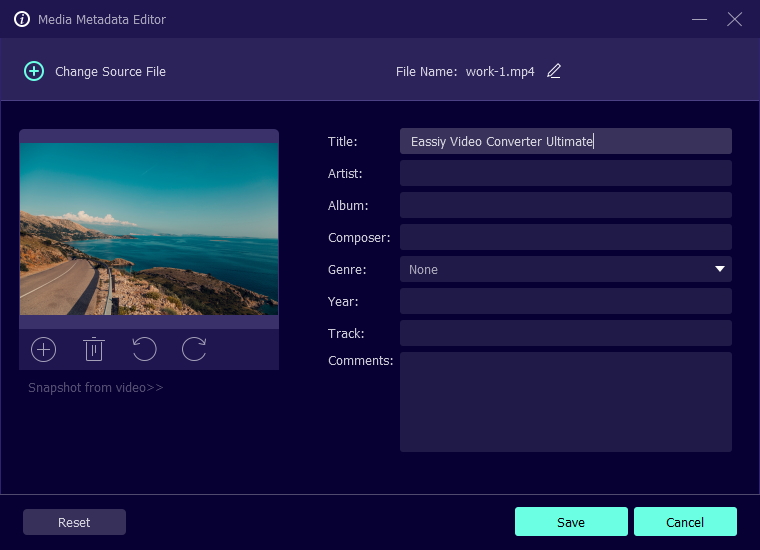
Add or change information, like the cover image, title, artist, album, composer, genre, year, and track, and add some comments.
After updating the metadata tags, click Save or choose Reset to edit or change again. You can see the changes in metadata by right-clicking on your uploaded video and then visiting Properties and Details.
That’s it. With Eassiy Video Converter Ultimate, you can easily edit and fix your video file metadata tags in your Windows and Mac PC without losing quality.