
An Overview of Eassiy Screen Recorder Ultimate
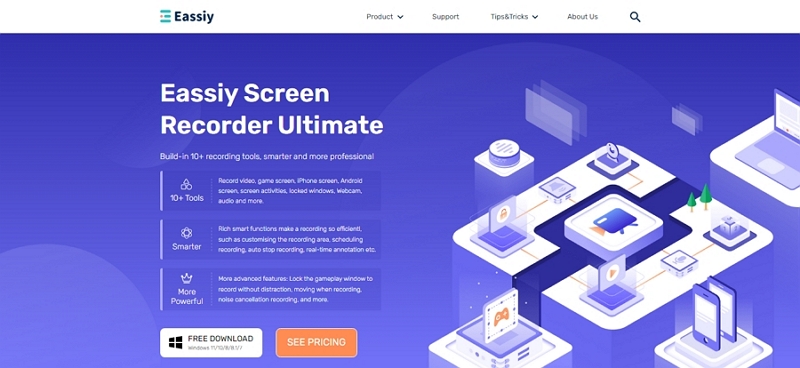
Eassiy Screen Recorder Ultimate is a Multifunctional Screen Recording Program that works for both versions - Windows and macOS. Here are some of its outstanding features:
- Record screen and webcam activities hassle-free and simultaneously record microphone and system sounds with real-time annotation.
- Record anything on your screen with customized settings and high quality.
- Ultimate Screen Recorder for your videos, games, audios, iPhone/Android Screens, Webcam, Window, recording with watermark, scrolling window, pop-up menu, and screen capture.
- Customize, schedule, edit, auto stop, auto split, set hot keys, for your recordings.
Download And Install
Visit the official website and download the installation package. There are two different options for Windows and Mac, so download the version according to your system. Reach out your folder and click on "Downloads". Now double-click on the downloaded file.
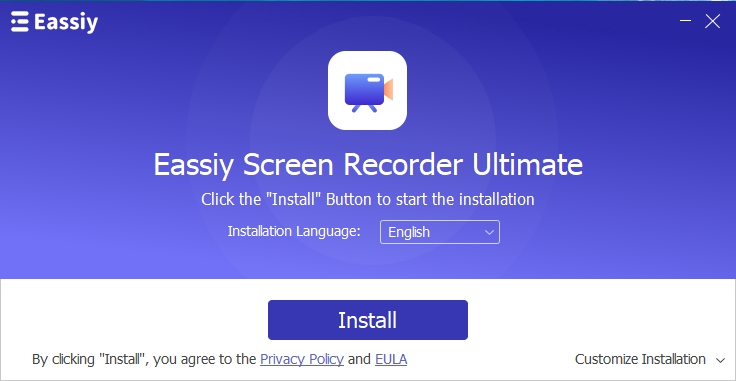
Choose the language and click on the Install button. Or click on "Customize Installation" to customize the installation path or other options, then click "Install" button.
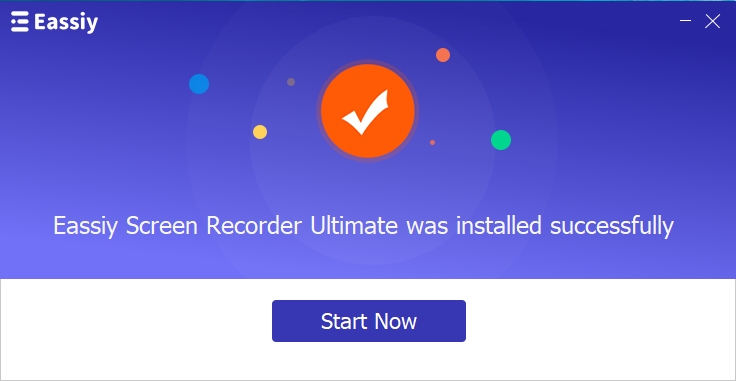
Once you click on Install, the installation will take multiple seconds. A small window popup again will notify you when the installation is over. Once the installation is complete, click on Start Now.
Registration
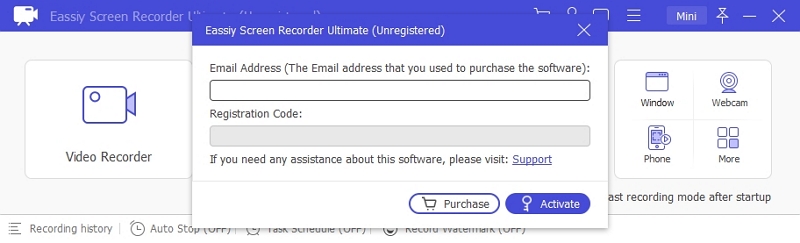
A new popup window will be visible with the registration process. Click on "Free Trial " to test the program, or you can "Purchase" the program as per your needs.
After purchasing, the registration code will be sent to your licensed email. Enter your email address and registration code. If you need help with the process, software assistance is available, which you can opt for. Once the details are filled in, click "Registar" to activate the program.
Now you are ready to use Eassiy Screen Recorder Ultimate to create interesting videos.
There is no shortage of online screen recorders on the Internet. You look for one but end up with a long list. However, in our experience, online screen recorders have fewer features and more security concerns than desktop recorders.
Here is a screen recorder that can help you record any video in real-time from streaming sites and live to stream.
Yes, we are talking about Eassiy Screen Recorder Ultimate. Let us move to the step-by-step guide to help you record your desktop screen.
How to Record Any Videos from Streaming Sites or Live Streaming
Eassiy Android Data Recovery is a fantastic software you can use to recover your deleted files on your Android. You can recover deleted data easily following these steps.
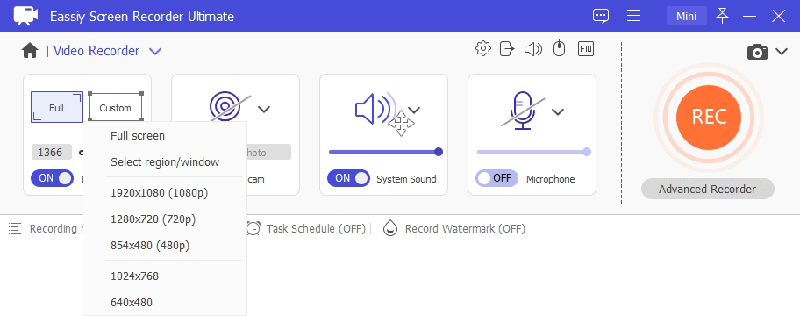
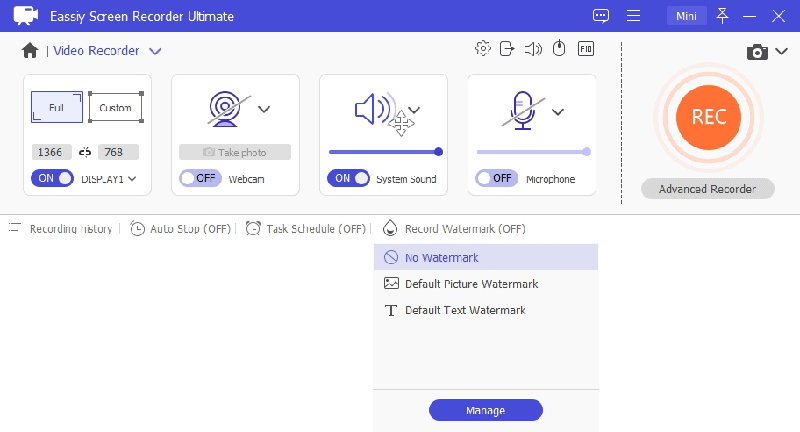
Under Video Recorder, you will see various options for recording Full Screen, Select region/window, plus the quality of recording in pixels. Select your preferred choice. Alternatively, you can click the checkbox in the Recording tab in preference settings to move with your mouse cursor.
If you wish to enable the webcam for live recording, you may turn on the webcam button.
Switch on System Sound and Microphone to activate the audio recording of the live streaming on your desktop. You can use the slider under the Volume and Microphone icon to adjust the volume.
Go to More Settings and Preferences to add mouse cursor effects, hotkeys, the format of the screen recording, etc.
Once you set all the preferred effects, click on REC on the main screen to begin the recording of your desktop screen. You can also add annotations or schedule recordings using multiple options on the panel.

Finally, tap the Stop button to finish the video recording and save the live stream video on your PC.
Screen lagging can be very disturbing, especially on critical occasions. Having to record gameplay videos with a screen record app that causes the video to lag or even have the tendency to crash during recording is one of the most excruciating experiences. People who record live streams find it challenging and annoying when their recorded videos are not in order or must deal with lagging screen record apps.
Here’s some good news for you. You can now record gameplay video without lag using a simple-to-use –Eassiy Screen Recorder Ultimate software. But first, let’s get to understand why the lags.
Why The Lags
Lagging happens when the device is low on memory and gets overpowered, or the CPU is powerless and incompatible with the settings. Another important reason your gameplay video lags is that your video recording app does not eliminate lagging.
But you no longer must worry about this because the Eassiy Screen Recorder Ultimate tool can record gameplay videos successfully without lag. Eassiy Screen Recorder Ultimate can do this because of its excellent benefits, which include.
- Built-in Game recorder: This newly updated feature gives it the complexity to record game sessions. Users can focus on the games while the Eassiy recognizes the running game program and records automatically from start to finish.
- Schedule recording: You can select this feature and start automatically for live streaming videos or other videos that are not downloadable online.
- Adjustable frame rates to ensure high-quality footage: Eassiy can select frame rates from 20fps -60fps. However, if your system hardware has low performance, you can choose a suitable frame rate.
How to Record Gameplay Videos Without Lag
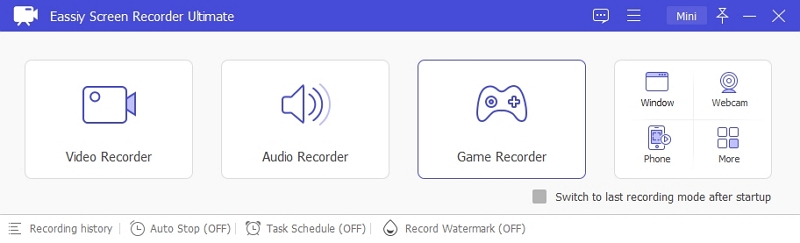
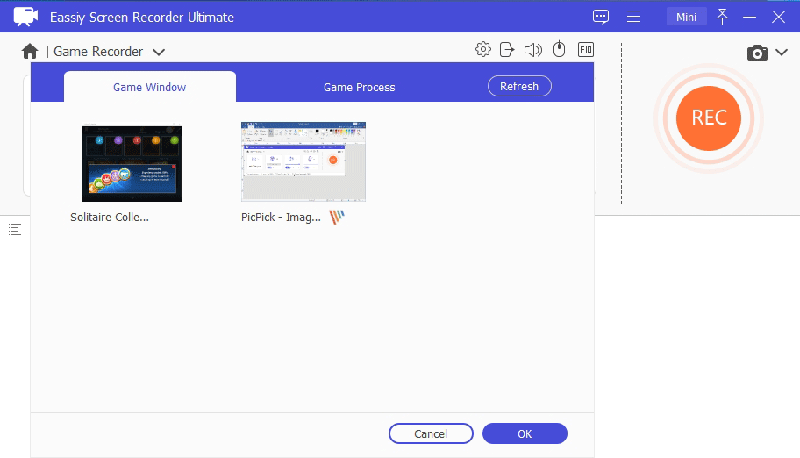
Download and install Eassiy Screen Recorder Ultimate on your computer. After launching, click the Eassiy Game Recorder icon to begin the process. On the pop-up that comes up, click OK.
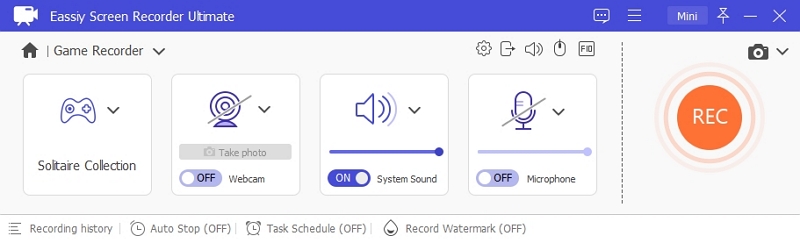
On the Game Recoder interface, select the game program to record by clicking the drop-down arrow beside the game recorder icon. Ensure that you have changed your settings, including sound, before you start recording.
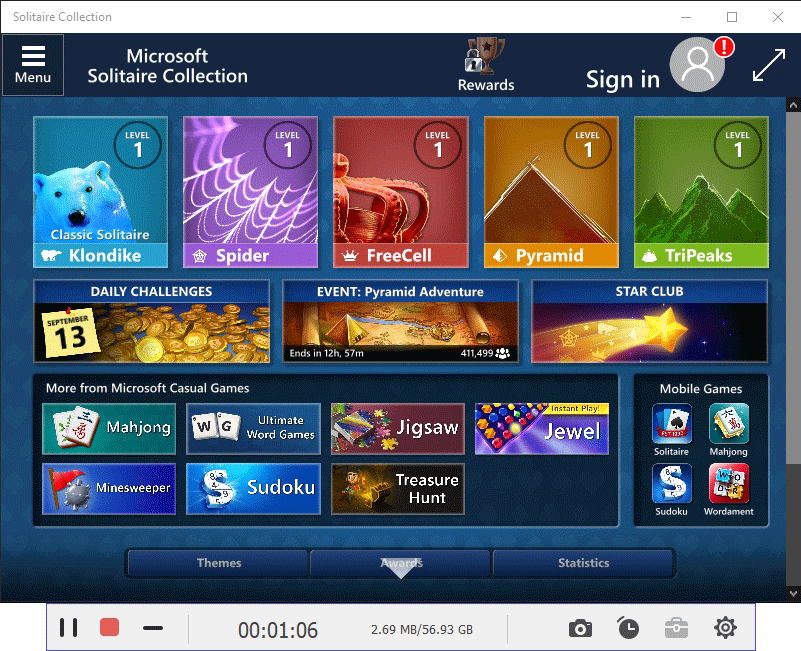
After adjusting the settings and selecting the game, click the REC button, and the program will automatically identify the game and start recording.
If you minimize the game window, exit the game window or click on the “x” icon on the top right side of your screen, the recording will automatically stop. You can also use the shortcut key to end it yourself.
After closing the recording, you can make changes such as trimming or cutting the video. Finally, click Done to save the recording.
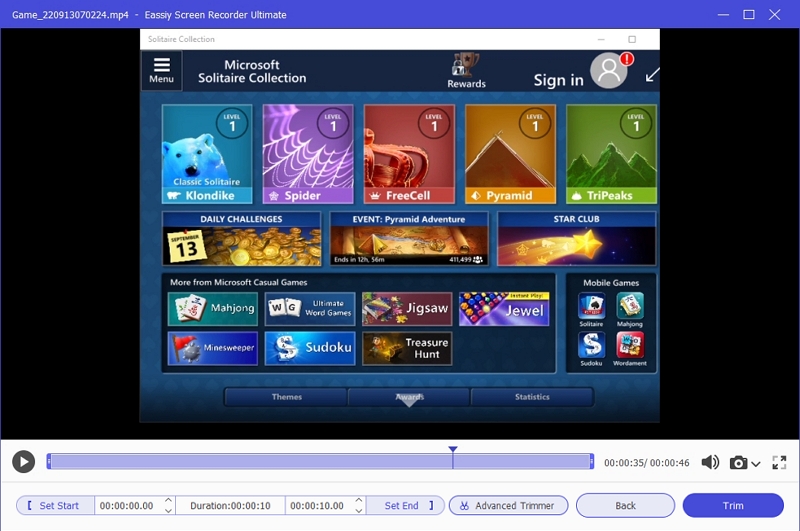
Your recorded gameplay video will be automatically saved, and you can choose to record more videos.
Thus, with Eassiy Screen Recorder Ultimate, you can record your game videos without worrying about lagging, courtesy of its highly rated features, and edit real-time to get the best gaming videos.
iPhone users can be happy with the neat features Eassiy Screen Recorder Ultimate has to offer. If you are wondering if you can record your iPhone screen using your computer, you can.
In this guide, we will show you how to do so. With Eassiy Screen Recorder Ultimate, you can seamlessly mirror your iOS screen on your computer.
How To Record iPhone Screen On Computer
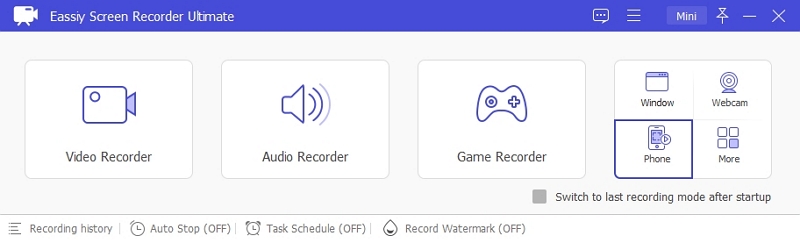
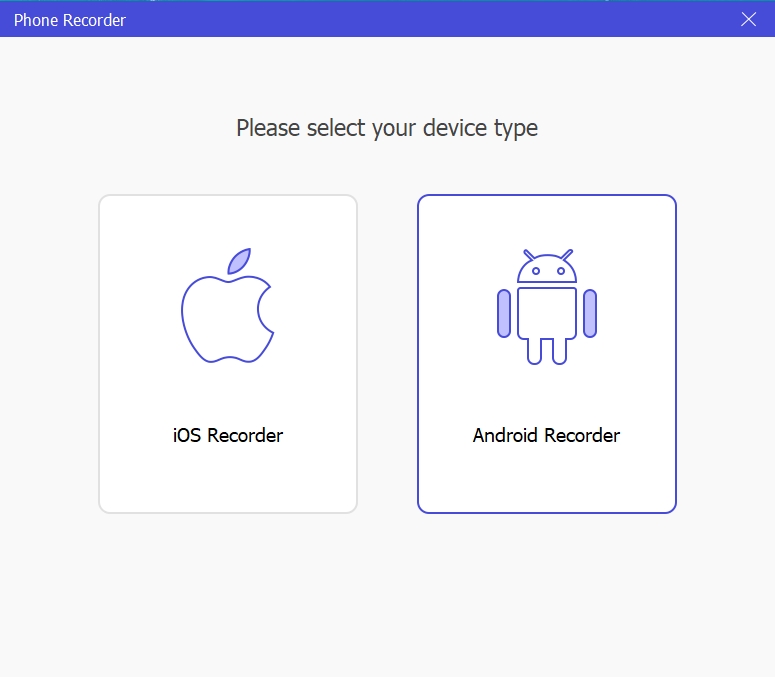
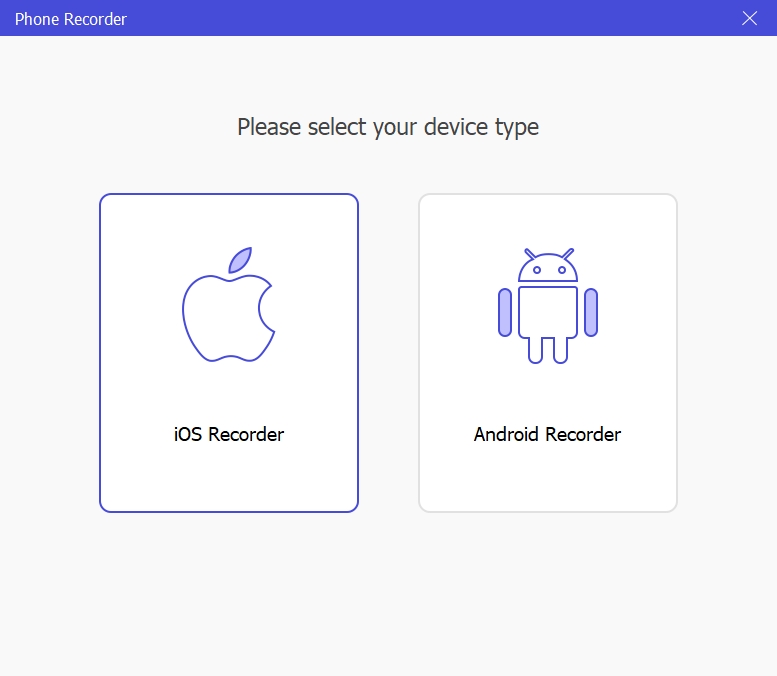
Launch Eassiy Screen Recorder Ultimate, click the phone icon to open Phone Recorder, select then the iOS Recorder.
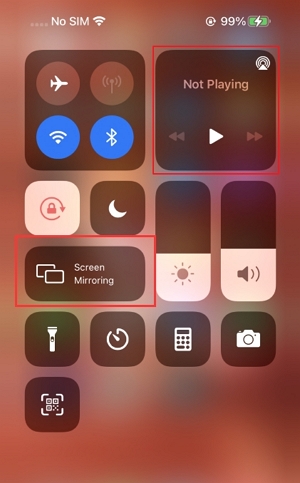
You must connect your iOS and PC with the same wifi network. Then connect your iPhone device to your PC. On your iPhone, open the control center by swiping up, then choose Screen Mirror for screen mirroring or AirDrop for audio mirroring.
Tap Screen Mirror or AirDrop on your phone and find Eassiy Screen Recorder Ultimate.
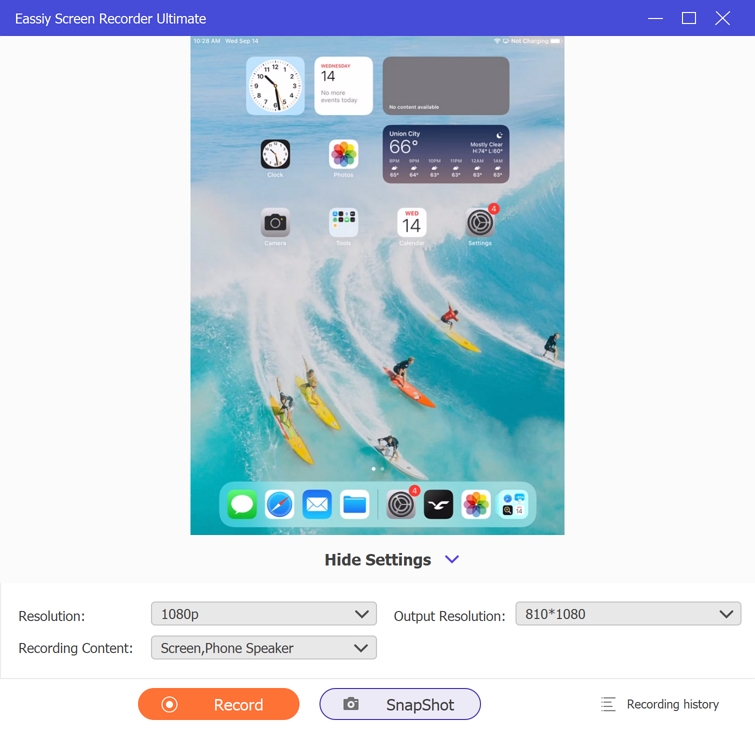
If you have successfully connected your iPhone device, you can now view your iPhone device on your PC. Click the Record button to start the recording.
Using your computer to record your Android screen may seem complex, but it is effortless and requires little technical know-how.
It's easy to record your Android screen using third-party apps, but sometimes, they do not always give us the best results. However, using your desktop or laptop, you can easily record your Android screen using your computer.
Eassiy Screen Recorder Ultimate is a fantastic tool that enables you to perform this function.
How to Record Your Android Screen On Computer
Launch Eassiy Screen Recorder Ultimate, click Phone Recorder, then select Android Recorder.
Method 1. WiFi Connection
1. Install “FoneLab Mirror” on your Android phone, download the APP here.
2. Set up your Android device and PC by connecting them to the same wireless network.
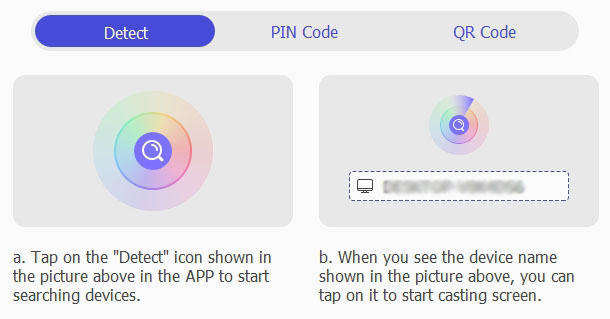
3. Open the APP, you have 3 different ways to cast the screen.
Detect Device to Cast the Screen.
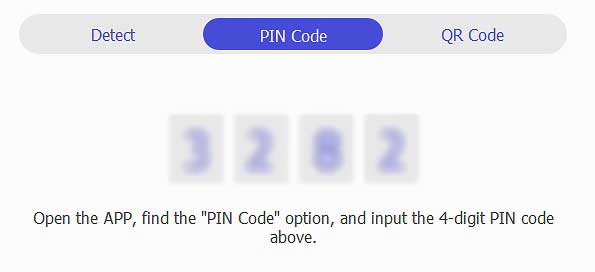
Using PIN Code to Cast the Screen.
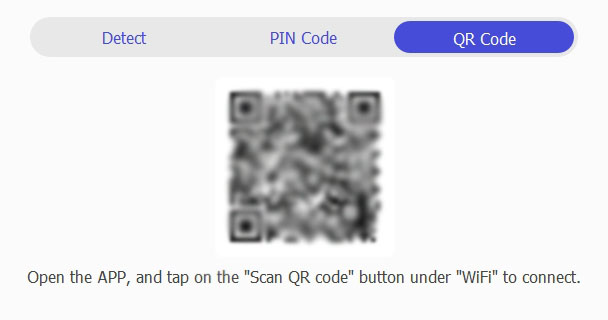
Using QR Code to Cast the Screen.
Method 2. USB Connection
If you want to record a long-time video, we suggest you choose this way to connect, it is more stable.
1. Connect your Android device to computer with an USB cable.
2. The “Allow USB debugging” alert will show up on your device, click on “OK”.
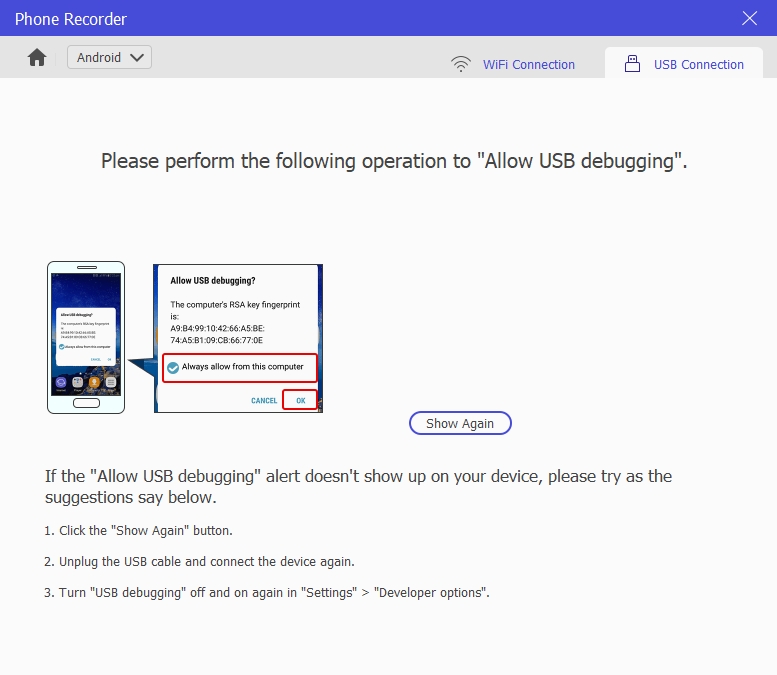
3. FoneLab Mirror APP will be installed on your Android device automatically. After installation, the App needs to get the authorization from the phone before starting casting screen.
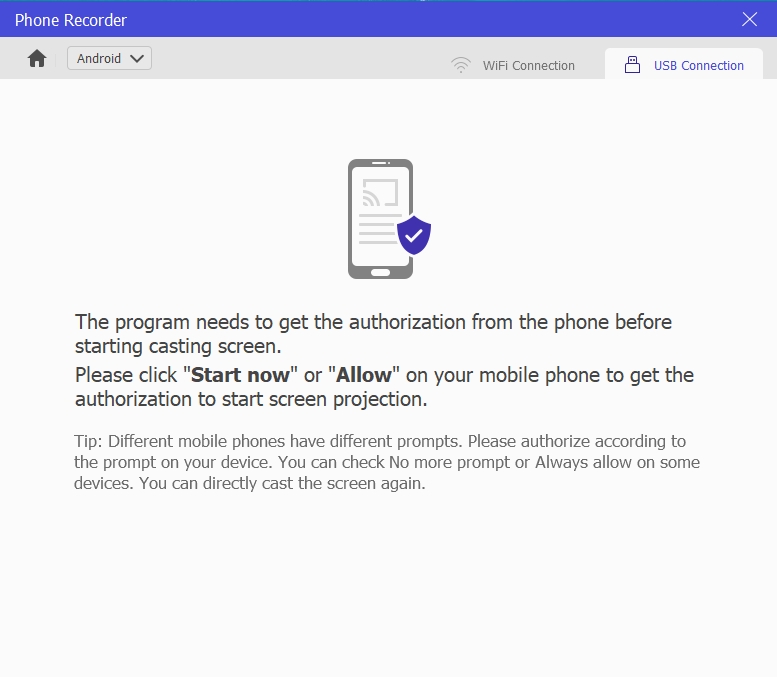
4. Click “ALLOW”, your phone screen will display on your computer.
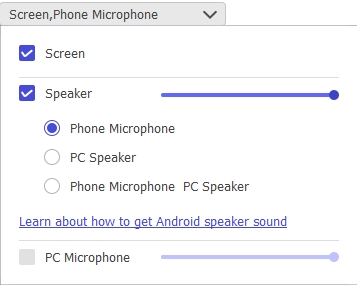
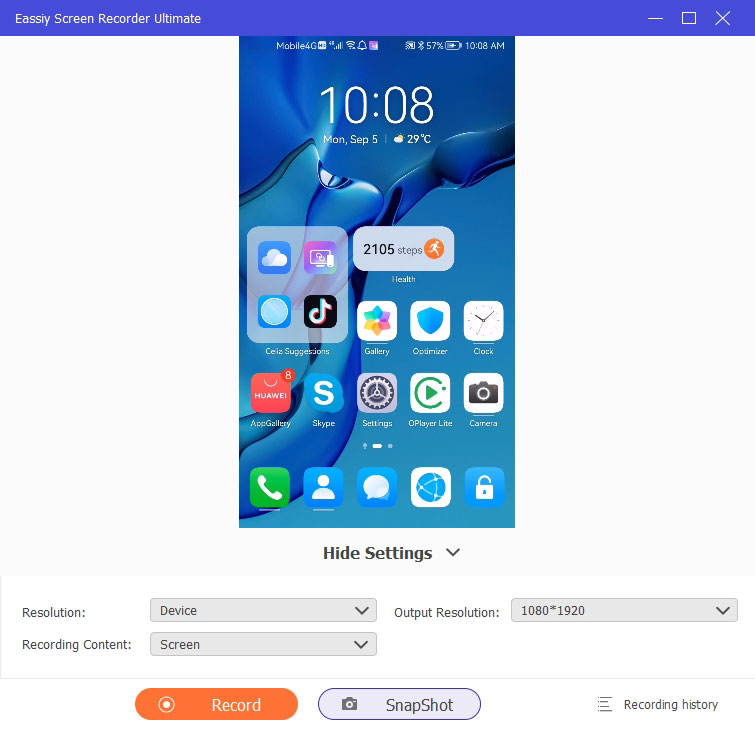
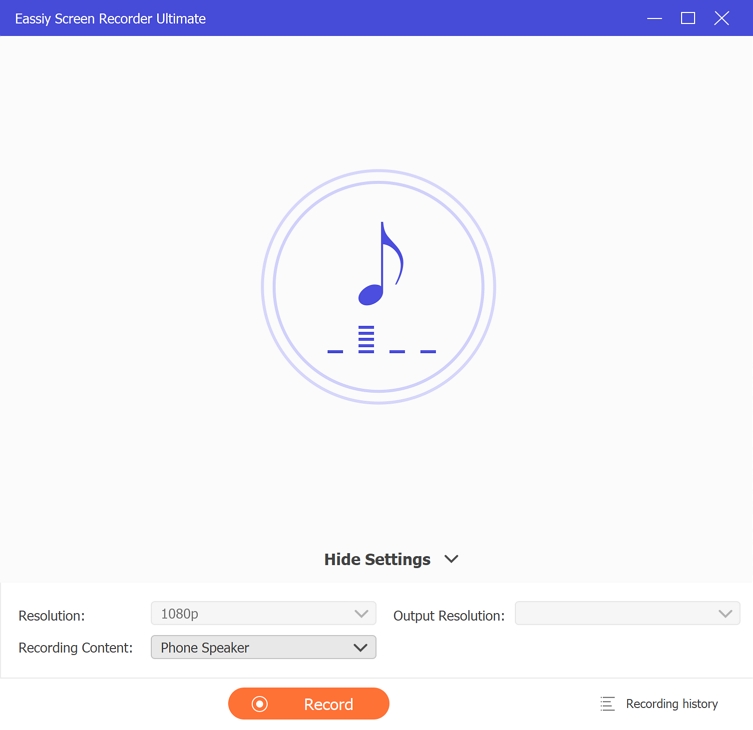
Choose a resolution (Up to 4K) and the recording contents, you can record internal phone sound, phone microphone, and PC microphone as you wish.
After setting, click “Record” button to start phone screen recording. You can also click the camera icon to take screenshots, no matter whether it is recording or not.
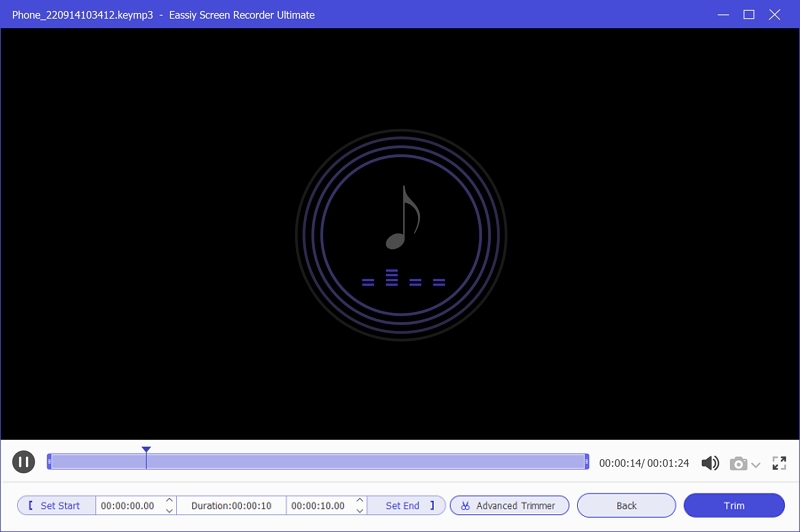
Click “Stop” button to end the recording. The editing window will pop up. Cut the part you want to save, then tap Done. You recorded video will be saved in your computer.
Are you recording videos or tutorial videos and thinking about how to make your videos more engaging and interactive? Using a webcam to record your video is the most efficient.
Most laptops or computer's inbuilt webcams, but if you wish to record the screen video and webcam, you may need high-resolution software such as the Eassiy Screen Recorder Ultimate. It has 2 ways to record your screen video with a webcam on your computer.
How to Record Video with Webcam Overlay on Your Computer
Eassiy Screen Recorder Ultimate is software that seamlessly records your computer screen and Facecam. The software works on any version, either Windows or Mac. So, if you want to record a tutorial, gaming video, or a video for YouTube with a webcam overlay, here is how to do it.
Launch Eassiy Screen Recorder Ultimate and click on the Video Recorder.
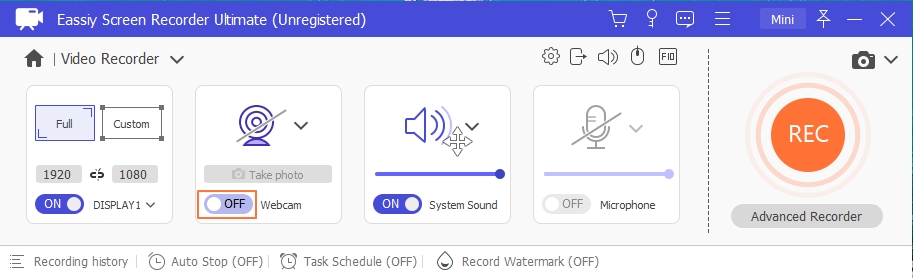
Select full screen or a particular dimension as you wish. Also, remember to turn on the system and microphone sounds.
To record video with webcam overlay, click “ON” to open the webcam feature.
Click on the drop-down menu next to the camera icon. Three types of cameras are available: Microsoft Camera Front, Microsoft Camera Rear, and Screen Capture Recorder.
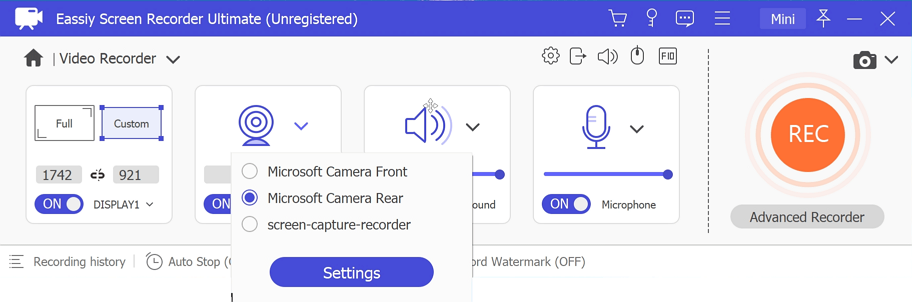
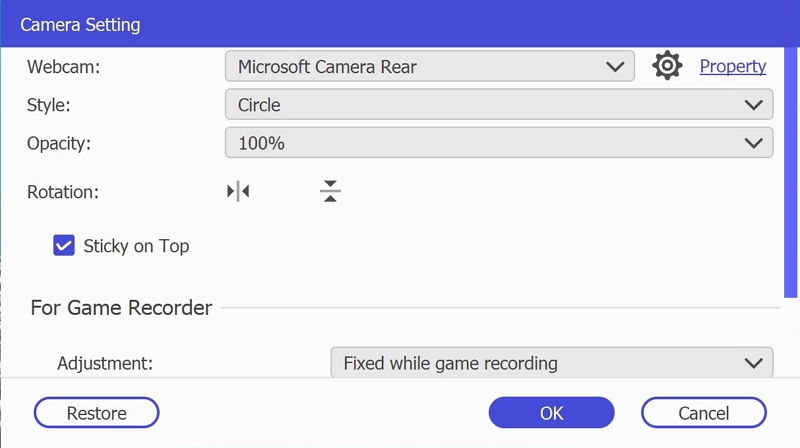
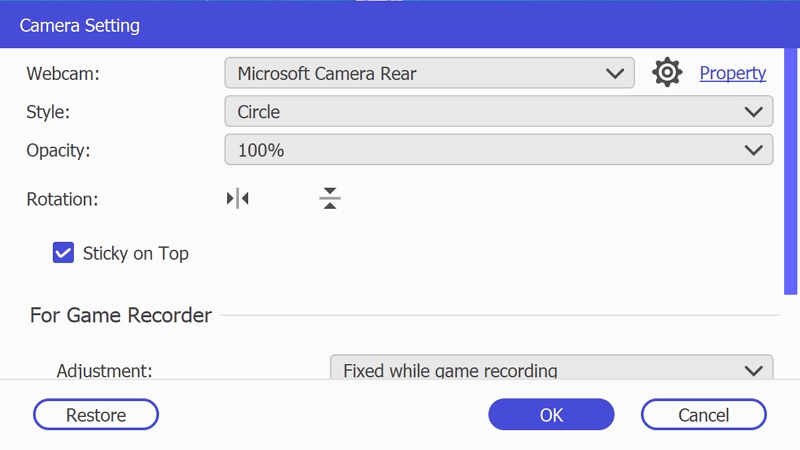
You can do more settings of camera including camera style, opacity, fixed or not while recording and more by clicking on Settings button under Screen Capture Recorder.
After setting, drag the camera to the part of your computer screen you want it to stay.
Now, click REC to start the recording with the webcam overlay. When you finish recording, click stop button to end the recording.
Then you can view the webcam video you have recorded and save or share it with your network on social media.
How to Record Video Using Webcam Recorder
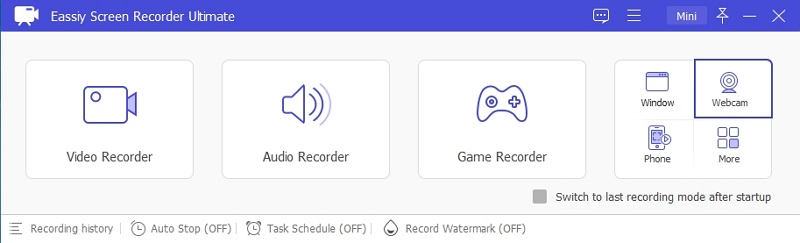
Launch Eassiy Recorder Ultimate and click on Webcam Recorder icon at the top right of your program.
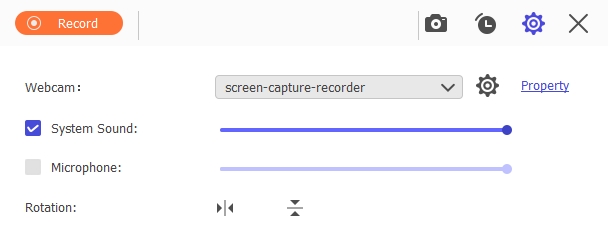
Clicking the webcam recorder would open the settings pane where you must select and customize your webcam recording.
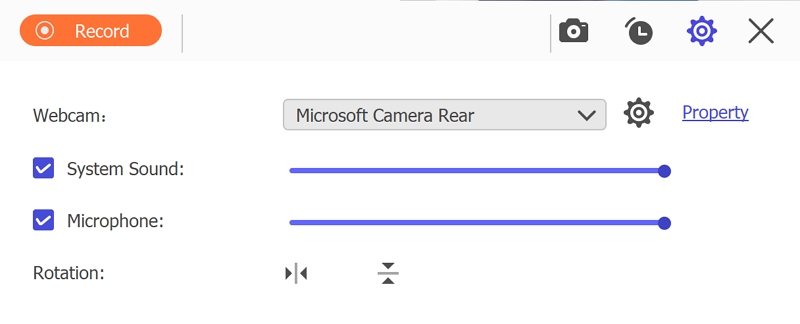
- At the webcam option, select the webcam you will work with. On the Property option, you can change settings like brightness, saturation, etc.
- You change the direction of your webcam video as you wish.
- Adjust system and microphone sound.
When done with all the settings, you can now click on the orange Record button to start webcam recording.
To stop the recording, click on the red square button or using shortcut. After which, the video will appear in Recording history.
Selecting a recording area to record video can satisfy many of our scenarios. But if we only want to record a window, which may move, zoom in or out, and may be disturbed by other operations, this recording method of selecting a fixed area is not suitable.
Eassiy Screen Recorder Ultimate has a very useful built-in Window Recorder. With the Window Recorder, you can record only the window content you want without any interference from other operations on computer. Let’s see how the guide is.
How to Record Video Content Only on A Specific Window Without Any Interference
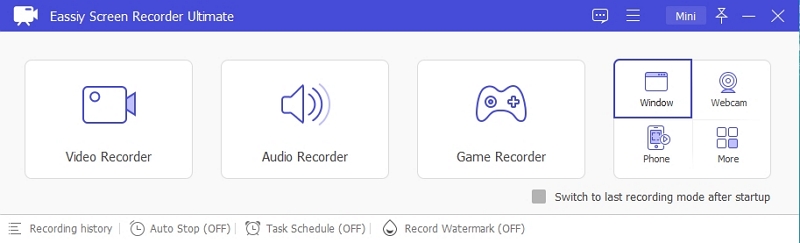
Launch Eassiy Screen Recorder Ultimate, click on the window icon at the upper right to open Window Recorder.
Open the window or App you want to record, select the window to record from the dropdown list.
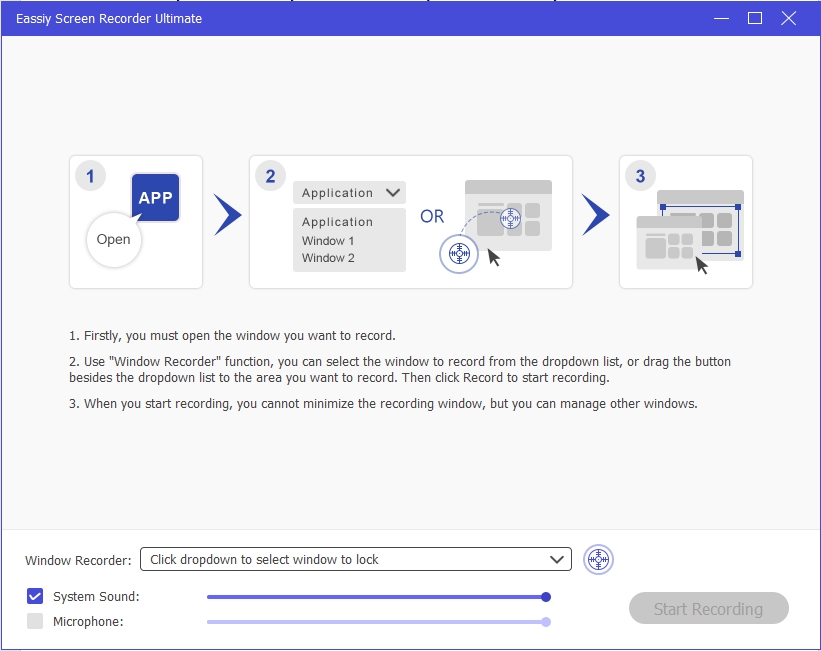
Or drag the button to the window area you want to record. The content in this window will be locked in Eassiy Screen Recorder Ultimate, you can also adjust the record area in the locked window if you want.
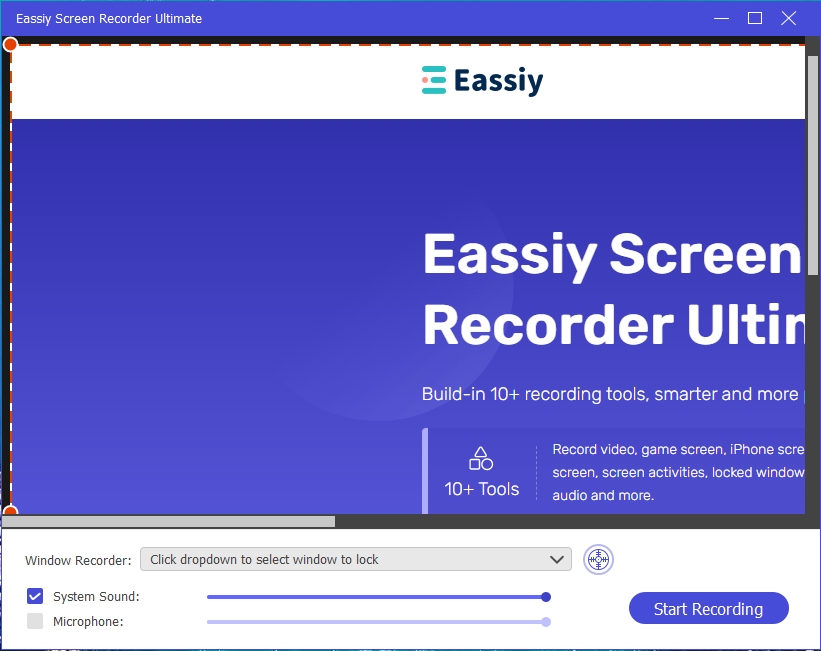
After selecting, then click Start Recording to only record the locked window without any interaction. Whether the window is moved, zoomed in or out, or covered by other windows, it will only record the contents and activities in the locked window.
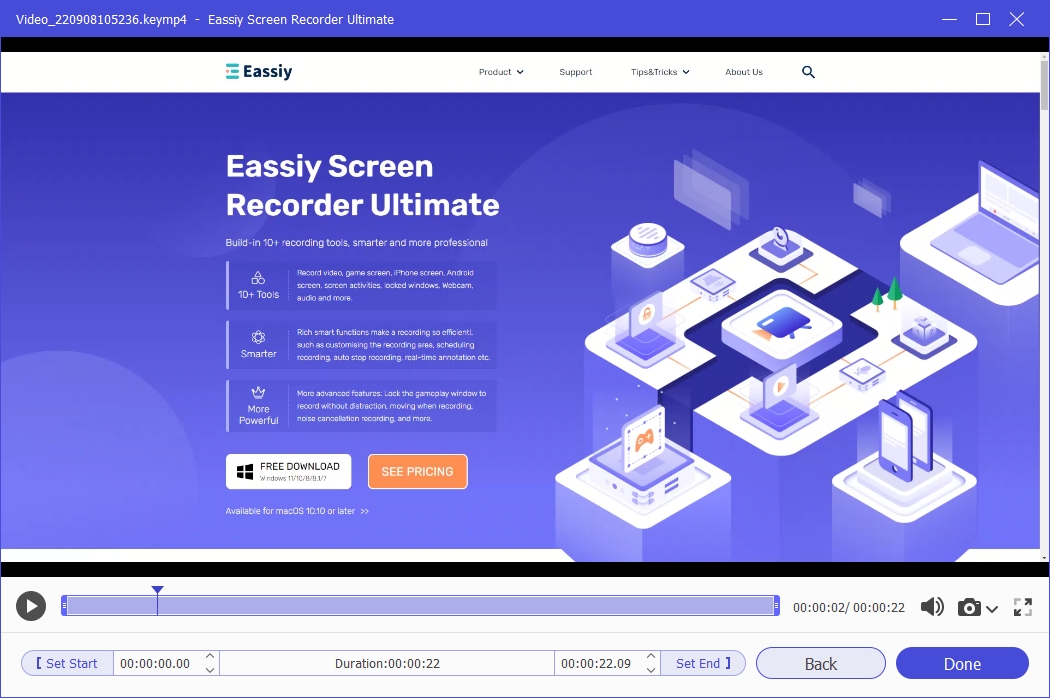
After recording, click the Stop button to stop recording. Now, preview your video and adjust it before saving it to your computer or sharing it on YouTube.
Coming across good music or insightful audio while streaming online may prompt you to want to come back to it some other time.
Have you always wondered how you can record your regular podcast from streaming online? We have a solution for you. While listening to your radio streams on iTunes, Spotify, or windows media player, you can record them to listen to later or share with your peers using Eassiy Screen Recorder Ultimate.
We will show you how to record audio/music streams online on your windows or mac using the Eassiy Screen Recorder Ultimate.
How to Record Any Audio from Streaming Online
Eassiy Screen Recorder Ultimate is software built to suit both windows and mac versions of PC with 10+ additional tools, including a video recorder, audio recorder, and game recorder.
To record music while streaming live, you will use the audio recorder of this fantastic software. Download and install the software that suits your PC version. Here are the steps to use the tool.
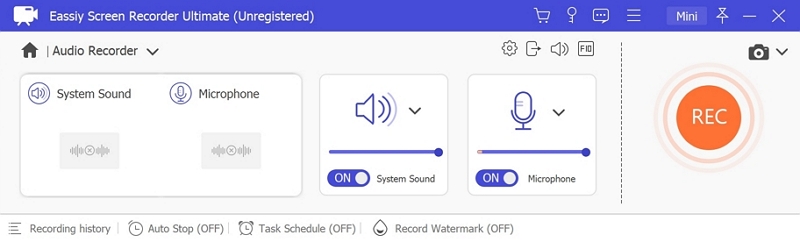
Launch Eassiy Screen Recorder Ultimate on your PC and select Audio Recorder feature.

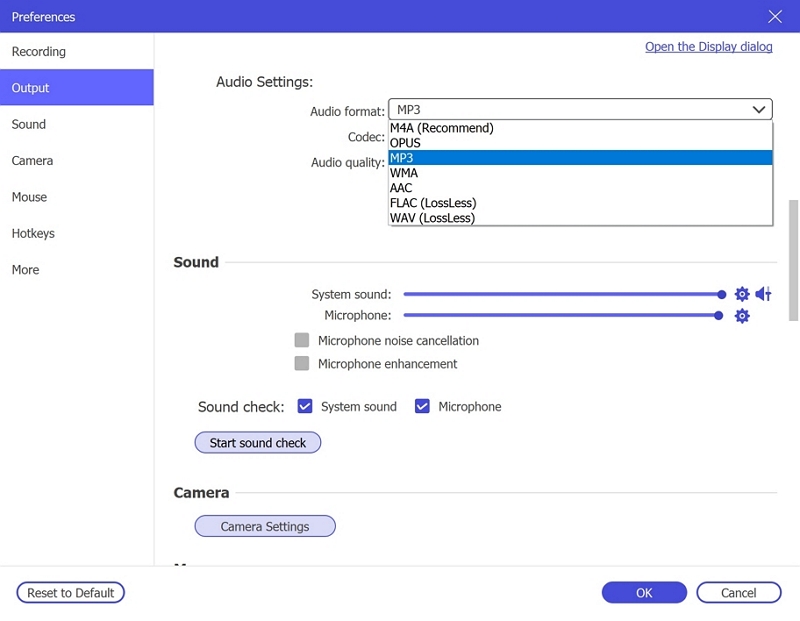
This step will help you enable System Sound for recording a live stream. Also, allow the microphone and then proceed to set the audio format.
Click the Settings above on the Microphone icon, choose Preferences and click Output to decide the quality of your streaming audio. Select the Audio format of the output, like MP3, AAC, etc. And the Audio quality as High for better quality. Click OK to save the changes.
Open and run the audio or music you want to run, then click on REC to start recording. Next, in the window with a toolbar adjust the volume, pause or stop the recording. You can also time the recording by clicking the clock icon and setting the duration of the audio stream.

When you end the recording, you can now save it in MP3 format, AAC, etc. You can also listen to it before saving.
Many audio recording tools for PC exist on the Internet, but it can be a hassle to find the right one for you. Recording audio on your PC without enabling the noise cancellation feature will cause your recording to have background noise which degrades the quality of your recording.
With Eassiy audio recording feature, you can record audio more clearly without any background noise or damage to your recording.
Eassiy Screen Recorder Ultimate can record internal sounds on the computer and external audio sources. This tool is available for both versions of your Windows or Mac. It is an easy-to-use tool with many other features to make your audio recording a seamless experience. Here is how to record audio with the noise cancellation feature.
How to Record Audio More Clearly Using the Noise Cancellation Feature
Among the many features of the Eassiy Screen Recorder Ultimate, noise cancellation is one of them. It helps record audios that are clearer and have no form of background noise. Here are the steps.
Download and install Eassiy Screen Recorder on your PC. Click Audio Recorder.
If you want to capture your voice while recording, turn on the microphone button but turn on the system sound if you use the system's internal sound. Click on the dropdown menu of the microphone button to turn on Microphone noise cancellation.
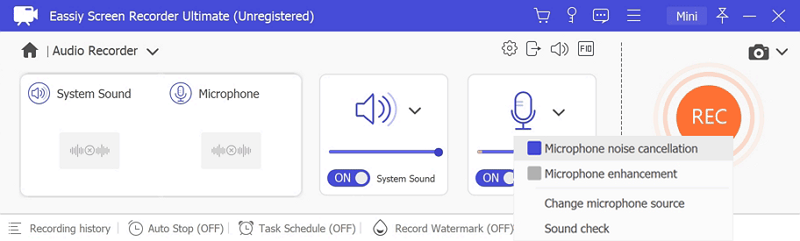
Click on REC to start the recording. You can end the recording by clicking on the rectangular icon.
Bonus:
This feature can be used not only in audio recording, but also in video recording. You can turn on Microphone noise cancellation on the dropdown menu of the microphone button in Video Recorder.
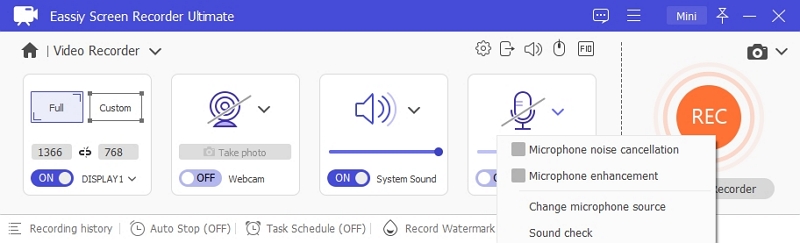
Or go to Preferences > Sound to turn on this feature

Are you wondering how to record your phone chats on a computer? Here is a guide to put you through. You can record your phone chats, whether an Android or iPhone, third-party software like Eassiy Screen Recorder Ultimate will give you the best results.
Let us see how to record your Android/iPhone phone chats on your computer.
How to Record Your Android/iPhone Phone Chats On A Computer
Here is a step-by-step process of recording your phone chats on a computer.
Record iPhone Phone Chats.
Download and install the program, then launch Eassiy Screen Recorder Ultimate. Click the phone icon to open the build-in phone recorder tool.
There are recorders for iOS device and Android Phone. Select iOS Recorder.
Connect your iPhone and PC with the same wifi network and then connect your iPhone to the computer. Tap Screen Mirror on your iPhone and find Eassiy Screen Recorder Ultimate to start recording.
Now, click Record button to start your iPhone phone chats recording. After recording, cut the part of audio you want.
Record Android Phone Chats.
Select Android Recorder, then connect your Android phone to your computer
Cast your Android screen to the computer according to this guide, your Android screen will appear in the Eassiy Screen Recorder Ultimate window.
Click the pull-down menu of Recording Content, check Phone Microphone. Then click on Record button to start the recording.
While recording sound using your system's built-in feature, you are likely to encounter some problems regarding background noise. Apart from this, you may find that your voice is too low or not clear enough.
For some computers, it's not usually that bad, but you can enhance your record without stress by recording your sound once. Yes, without reviewing the script to get the perfect recording.
With Eassiy Screen Recorder Ultimate, you can expertly enhance microphone sound recording on your computer to get the best results.
How to Enhance Microphone to Record Sound Better
You can enhance microphone sound better using its microphone enhancement features.
Method 1: Open the Microphone Enhancement Feature in Build-in Recorder
Launch Eassiy Screen Recorder Ultimate and click Video Recorder, Audio Recorder or any other recorder.
Go to the microphone icon on the audio recorder window and click the drop-down. Enable the microphone enhancement and the microphone noise cancellation.
This will ensure that the recorded sound is clear, loud, and without background noise.
Method 2: Open the Microphone Enhancement Feature in Setting
Click the menu icon at the top of the software, select Preferences > Sound, the Microphone enhancement feature can be turned on here easily.
Recording a quality video has a lot to do with audience interaction and how well you can communicate.
If your video is filled with many background noises or incoherent sounds, then the quality of your video will be too poor. Nobody finds it fulfilling watching a video with a noisy background that blocks its message.
Background sound is the same as external sound, and you can observe it during the recording of video tutorials, live sessions, etc. We will show you how to adjust microphone sound and background noise using Eassiy Screen Recorder Ultimate.
How to Adjust Background Sound And Microphone Sound
Method 1: Preset Background And Microphone Sound In Setting
Reach the Preferences and then Sound Tab. You will see two options: System sound and Microphone along with two check boxes for Microphone noise cancellation and enhancement.
Method 2: Adjust Background and Microphone Sound in Build-in Recorders
Run any one of recorders such as Video Recorder, Audio Recorder, Game Recorder etc.
Click System Sound or Microphone to turn on background sound or microphone sound. Slide to the dot adjust the sound volume of system or microphone.
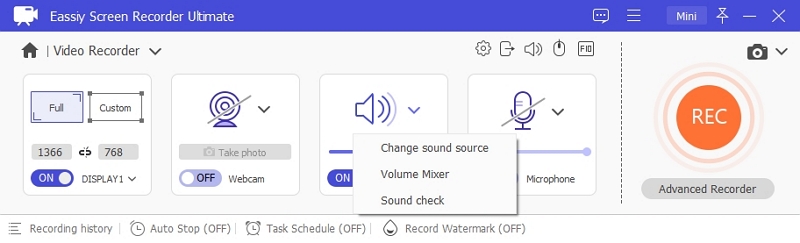
You can also change more audio settings of system or microphone by clicking on the drop-down menu.

If you are recording YouTube videos or tutorial videos and thinking about how to make your videos more engaging and interactive, using a webcam to record your video is the most efficient.
Most laptops or computer's inbuilt webcam, but if you wish to record the screen video and webcam, you may need high-resolution software such as Eassiy Screen Recorder Ultimate. It allows you to record your screen video with a webcam on your computer.
How to Record Screen Video with A Webcam Overlay On A Computer
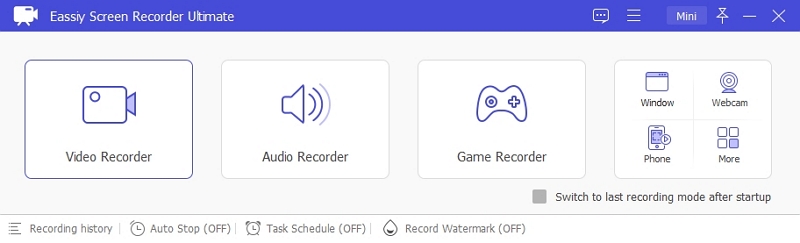
Run Eassiy Screen Recorder Ultimate, you will see the below interface with several features.
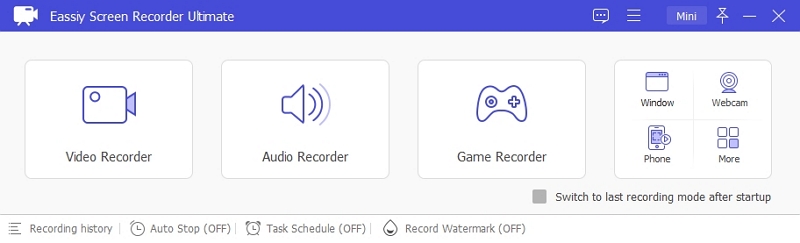
Select the video recorder icon and enable the webcam feature.
Click the arrow down button to select a webcam. Then click Settings to change the webcam settings. Here you can adjust the transparency of the webcam, style, display or no display while recording, position, etc. Click Ok when you are satisfied with the settings.
Turn on the system sound and microphone sound if you need sound in your video. We advise that you do a sound check before the recording starts fully.
Click the REC (orange) button to begin recording your screen and the webcam. When you want to finish the recording, you can click the Stop button to end the recording.
Then you can view the video you have recorded and either save or share it with your network on social media.
How to Record Videos Using the Webcam on the Computer.
After launching the software, click the webcam as shown in the image.
The webcam settings pane will open as soon as you click the webcam video recorder. Adjust the settings to suit your specifications.
Then click on the Record button in Orange to start. You can then click the red rectangular button on the recording window to stop the recording and save or share it with your network.
In order to protect the copyright of videos, we add Text/Photo Watermark to the video. You can add a watermark use an editing tool after the video is recorded. Or you can add a Text/Photo watermark directly during recording to let you make videos more efficient.
How to Record Video with Text/Photo Watermark During Recording
As we initially mentioned, recording video with text or photo watermark is a feature that applies to advanced recording options. Eassiy Screen Recorder Ultimate allows you to perform such action on your video.
Here are a few steps to add text or photo watermark to your video.
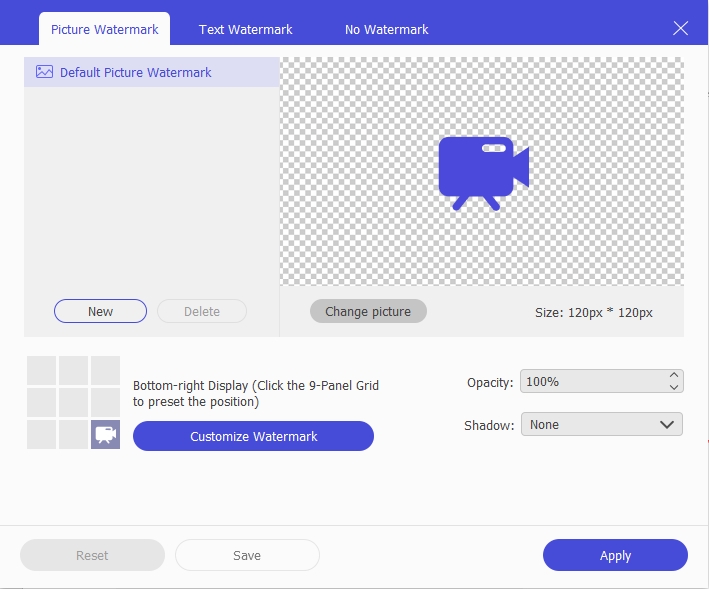
Launch Eassiy Screen Recorder Ultimate and click Record Watermark to choose a watermark. If you don't create any watermark, click on Manage button to create one.
Create Picture Watermark
Click New button to add a picture from your computer, adjust the position, opacity and shadow as you wish, then click Apply.
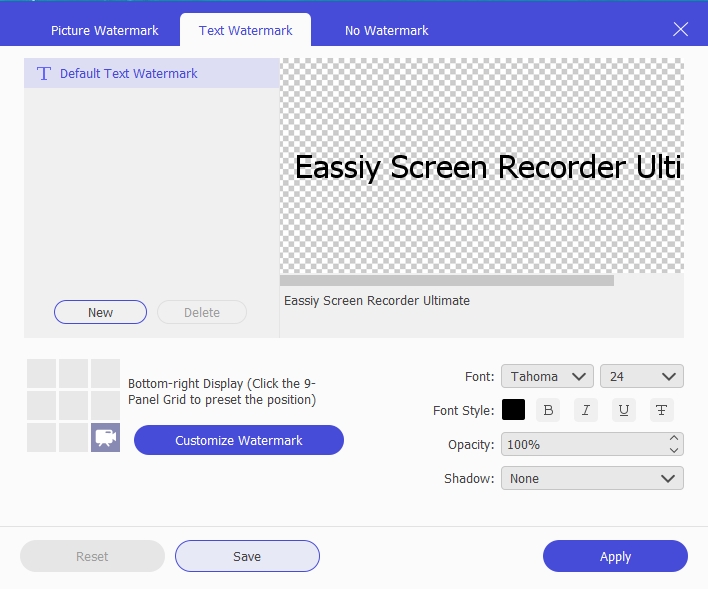
Create Text Watermark
Tap Text Watermark on the top, customize the text, position, font, font style, opacity, and shadow you like. Then click on Apply.
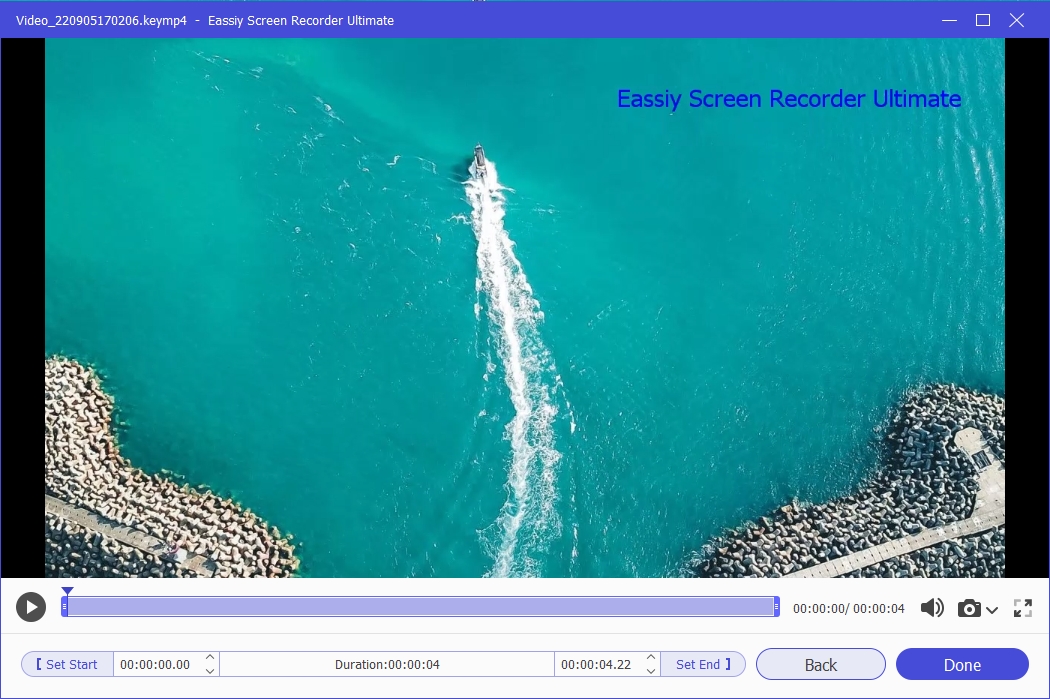
Now, click Record Watermark again to choose a created watermark. Then click REC to start the recording.

After ending the recording, the watermark will be added in the video automatically.
In case you are asking if you would need to schedule recording tasks or what it means. Scheduled recording means your audio or video recorder automatically starts and stops when you want it.
For someone who practically lives online or has many things to tune into online with so little time, scheduled recording tasks are for you. If you have a couple of online events or programs you want to tune into, you may not have the time for all of them, especially if two of the programs are happening simultaneously.
With a scheduled recording task feature, this problem minimizes. Meanwhile, not all screen recorders have this feature, but we will introduce to Eassiy Screen Recorder Ultimate.
How to Create Scheduled Video Recording Tasks
Follow these steps to schedule recoding tasks for video recording.
Once you have launched the Eassiy Screen Recorder Ultimate, go to Video Recorder.
On the video/audio recording interface, click the task schedule. Also, turn off the microphone sound and enable system sound.
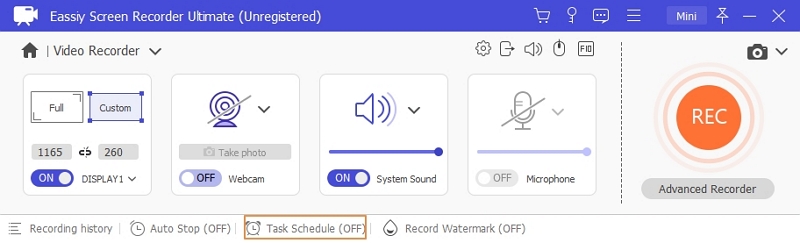
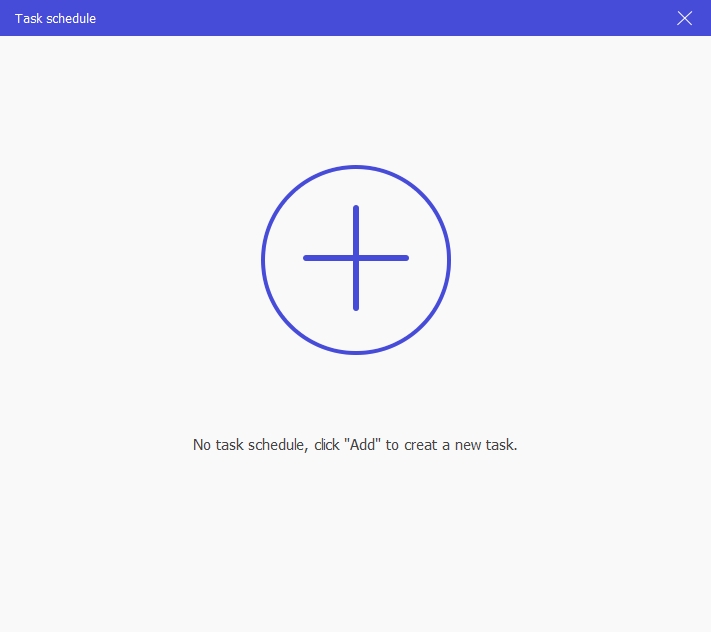
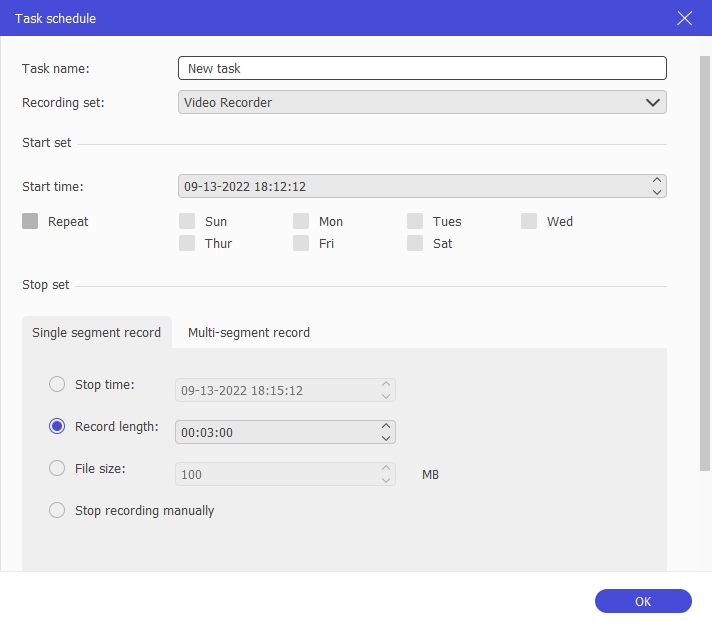
Click "+" to add a new task. Enter the name of the new task and select OK. Note that your computer must be on during the recording time to record successfully.
Set the start time and the stop time, you can also set the stop time according to the length of the recording.
The in-built repeat feature can also help if you have a favorite weekly program. So, you click repeat and choose the day you want the scheduled task to repeat. After entering the important details, click Ok.
How to create a scheduled audio recording task
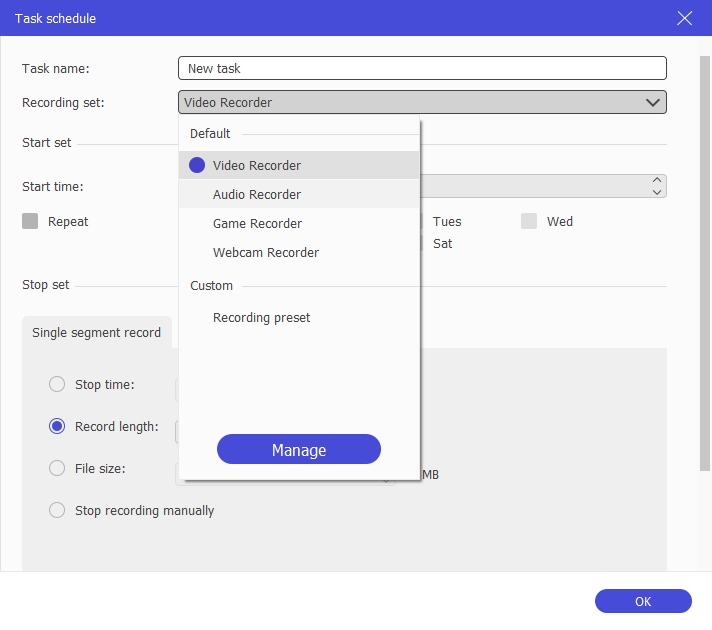
If you want to create a task schedule for audio, just select Audio Recorder in the Recording set
When you are watching a wonderful live sport event or an important live course on your computer, and you must leave because of something. How can you not miss the great video, but also get away from the computer screen to do other things?
The Auto-stop recording feature will help you to record the video automatically, and you don't need to wait up for it at the computer screen. The guide is below.
How To Automatically Stop Your Recording
Eassiy Screen Recorder Ultimate allows you to stop recording once you automatically set the ending timer.
After downloading and installing Eassiy Screen Recorder Ultimate suited for your computer, launch it to access the homepage. click on the Video Recorder.
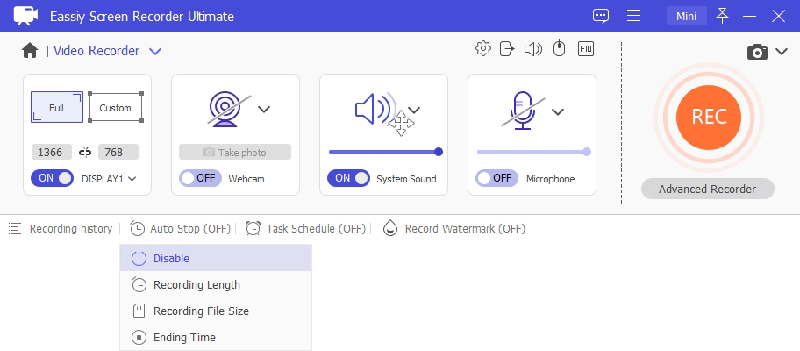
Click the first clock icon on the video recorder interface, there are 3 options available: auto stop according to Recording Length, File Size and Ending Time. By selecting and enabling the option you want, your video recording will automatically stop according to your requirement.
Recording Length
Mark Record Length and enter the length of time of the video you are recording. When finish recording, you can customize the action: Shut down computer, make computer sleep, exit program or do nothing.
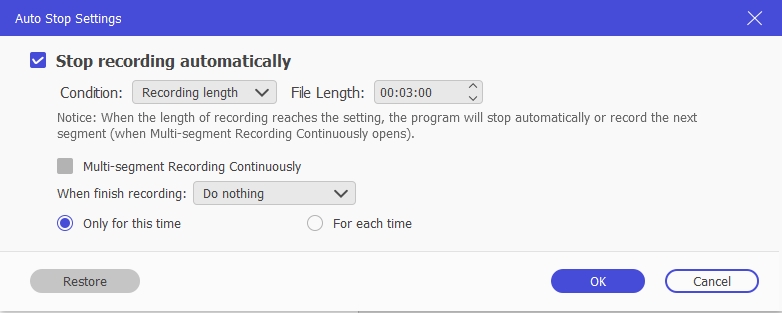
If you check Multi-segment Recording Continuously, it will record the next segment according to your setting when the setting is reached.
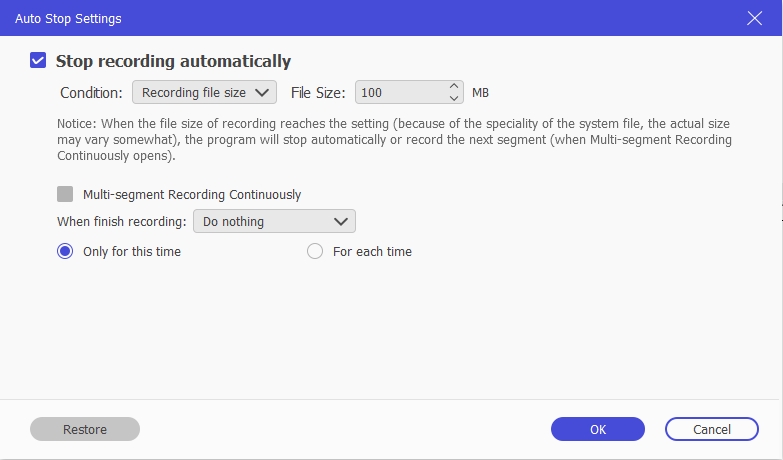
Recording File Size
Set a file size, when the file size of recording reaches the setting, the recording will be stopped automatically.
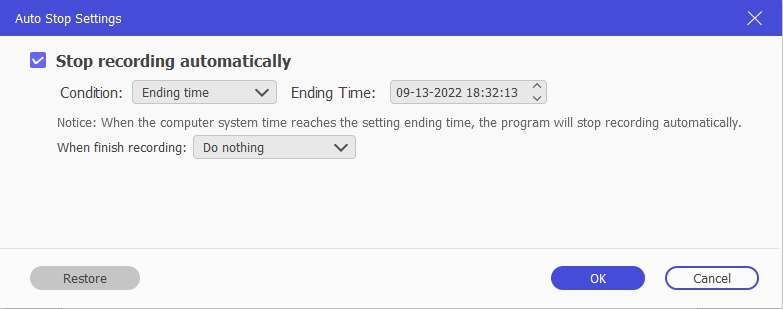
Ending Time
Set the ending time, the recording will be stopped automatically when the computer system time reaches the setting ending time.
Finally, click the REC to start the recording. Now you can go about your business with peace of mind.
It's not difficult to set the recording area on your computer around the mouse. But then, you may not find this feature with your PC's inbuilt recorder. This feature is available on advanced screen recording software and depending on the version of the computer you are using; you can always find a screen recorder suitable for it.
We will show you how to set your recording area to the specific areas around the mouse.
How to Set the Recording Area to Be Only Where the Mouse Goes
This option is available on advanced screen recording software. One of those includes a Eassy Screen Recorder Ultimate. It is a screen recorder software that solves almost all of your screen recording problems.
One of the features of this software's advanced recorder options includes setting your recording area Around Mouse. Here's how to put it.
After downloading the version of Eassiy Screen Recorder Ultimate suitable for your PC, launch the software and click the Video Recorder.
On the video recorder interface, select the advanced recorder option below the yellow REC button.
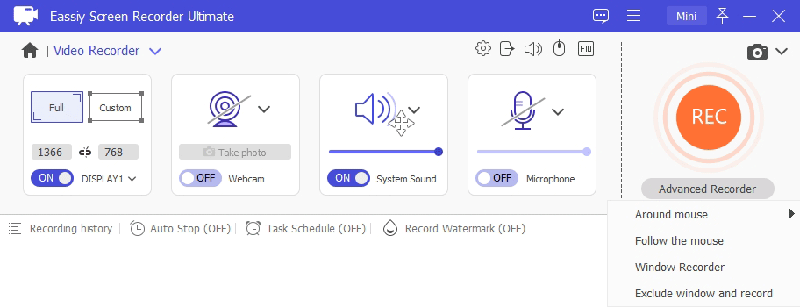
As you select Advanced recorder, a drop-down menu will follow. Select around the Mouse to enable the function. This option allows the software to record only the specific area around where the Mouse goes.
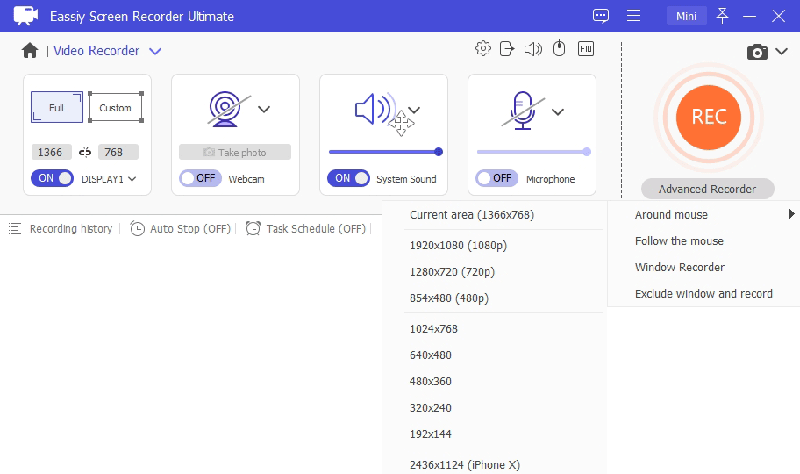
On the drop-down options that come up, select the area from the list of options. The area can be customized as you wish.
After selecting the area, click REC to start recording. You can also use the hotkey to start the recording.
As the recording is ongoing, you can click the Red rectangular button to stop it. You can also click to Pause or add annotation while recording.
Loads of software are available for screen recording on PC, but not all can provide unique features such as setting your recording area to follow the mouse.
Trying to perform this action with your computer's built-in recorder is tricky. However, with advanced software such as Eassiy Screen Recorder Ultimate, this becomes relatively easy.
How To Set Recording Area to Follow Mouse
Eassiy Screen Recorder Ultimate is a multi-feature software used for screen recording purposes. It is easy to use and does not require higher technical know-how. Some of its features include recording video from a webcam, taking screenshots of your screen with one click, exporting your records to multiple formats scheduling a recording, adding annotations, and customizing the recording format.
Here are steps to make you set the recording area to follow the mouse.
Launch Eassiy Screen Recorder Ultimate, click on Video Recorder to view the video recorder interface. On the interface, you will see the advanced recorder button on the right-hand side below the REC button
Customize a video recording area. Click on the advanced recorder, select Follow Mouse from the drop-down menu, the recording will start simultaneously.
Other options on the drop-down menu include, around mouse, lock and record window, and exclude a window/windows and record. All of this is to give you a stress-free and excellent recording experience.
When you move the mouse, the recorded area also moves following the mouse.
Click the red rectangle to stop the recording. Trim the recorded video, then click Done to save it or click on Back to make another video.
Modern computers allow us to multitask our work to email our productivity. This is why you can record a live stream video to watch it later while you focus on other things. For most screen recorders, it's hardly possible to record just a particular section of your screen. Very few screen recorders allow you to record some part of your screen instead of the whole window.
Imagine if you had some other to work on your laptop and a video to screen record. With the help of screen recording software, you can record this video. But sometimes, it comes with you dedicating your PC to just recording the program because it will record the entire window, and you do not want any other content in the video.
With some high-level third-party software such as Eassiy, you can record only the window you want in your video or only exclude the window you don't want. To learn how to do this, keep reading.
How To Record Videos Excluding the Window You Don't Want
Eassiy Screen Recorder Ultimate is recording software with multiple features that make screen recording easy and perfect.
You can record videos using this software while focusing on other things. Here's how to record screen videos, excluding the window you don't want.
Ensure that you already have the software downloaded to your PC, then launch the Eassiy Screen Recorder Ultimate. Then click Video Recorder.
Select the Exclude window and record on the drop-down menu after you have clicked Advanced Recorder.
Click the drop-down to check the windows you want to exclude. You can select multiple windows you don't want to appear in your recording area.
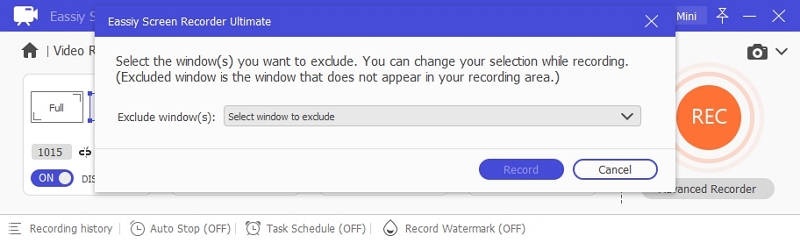
After setting, then click REC to start the recording.
Eassiy Screen Recorder Ultimate is an all-in-one tool that helps you record audio and video, make notes, modify the recording area, and much more, in contrast to other recorders that present challenges at every turn. The annotations feature in Eassiy Screen Recorder Ultimate is also very useful; you can insert pictures, comments, and arrows between the actual recordings. We will show you a simple way to make real-time annotations while recording.
How to Make Real-time Annotation While Recording
Install Eassiy Screen Recorder Ultimate on your computer, Launch the program.
Select "Video Recorder" from the menu of Eassiy Screen Recorder Ultimate. Turn on the display by pushing the button. To choose a specific area on the device, click the down arrow button in the screen box. Press the "REC" button in orange to start recording.
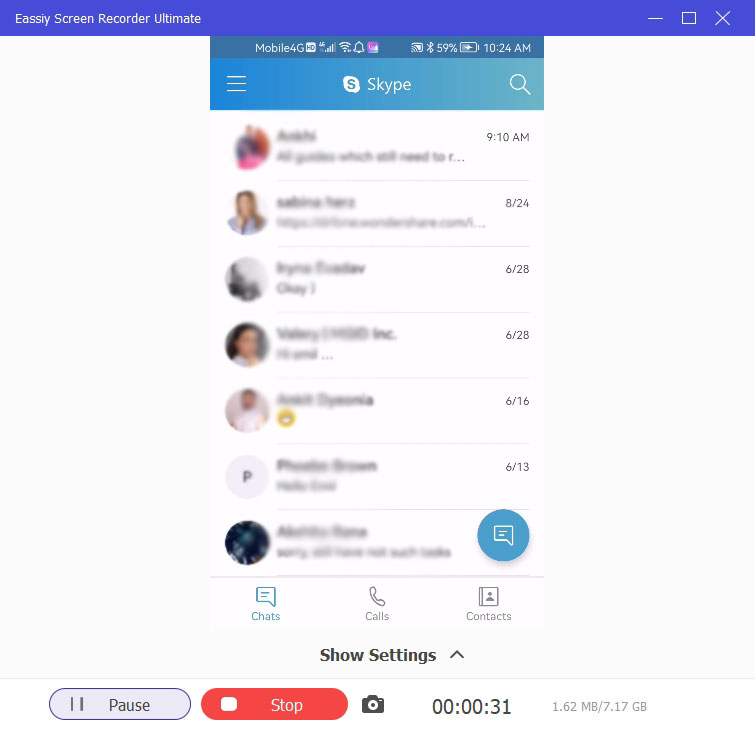
You can simultaneously record screen activity using your webcam, system sound, and microphone. Turn each setting in the Eassiy menu to the same position.
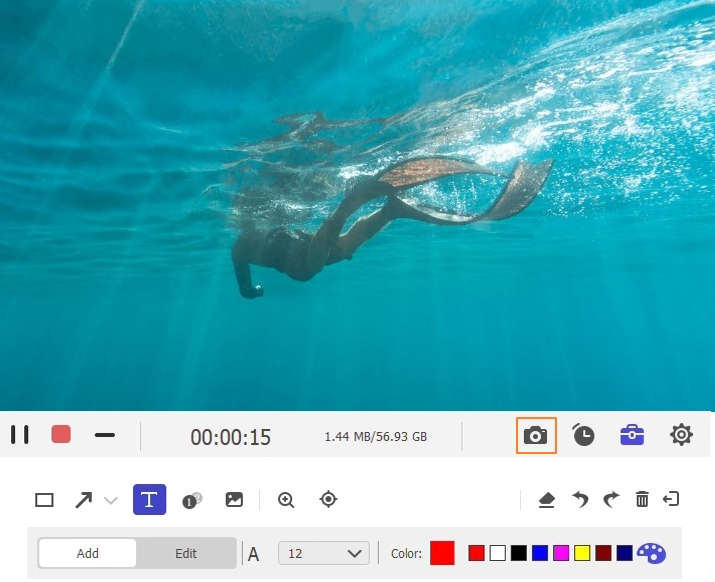
Click on the toolbox in your screen's bottom right corner while recording the screen activity. The toolbox contains a variety of choices, such as the ability to take pictures by clicking the camera symbol. Additionally, you can limit the recording's duration by using the clock icon.
Click on the edit note icon on the toolbar to add text, arrows, or color stamps to the screen. Toggle to Text. Put your cursor where it says, "begin to type," to add annotations.
Note: Tap the eraser icon, choose the size, place the cursor over the text, and then click and hold to rub the text away.
Eassiy Screen Recorder Ultimate is unquestionably essential if you record video games or create tutorials as it performs professionally for video creators.
After the video is recorded, we often need to cut the length of video and adjust video volume. You can do it with another video editor tool, but with Eassiy Screen Recorder Ultimate, you can cut the length of video and video volume before you save the video. Very efficient and simple! we're going to share with you about the steps here.
How to Trim the Length of the Recording
To perform the said functions, please download and install Eassiy Screen Recorder Ultimate on your computer and open it.
Select Video Recorder, click the orange REC button on the video recorder interface to start recording.
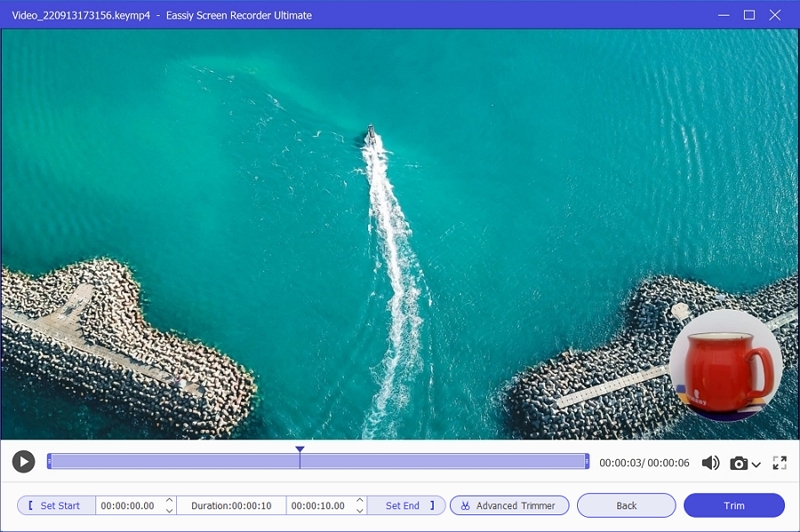
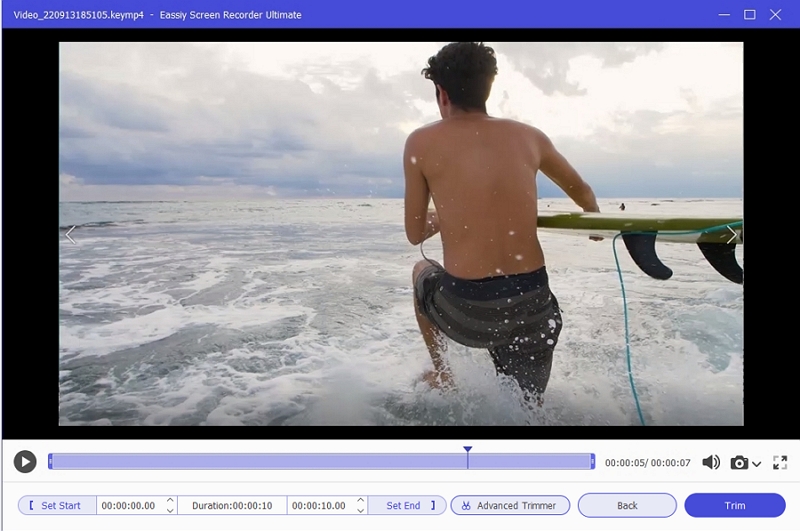
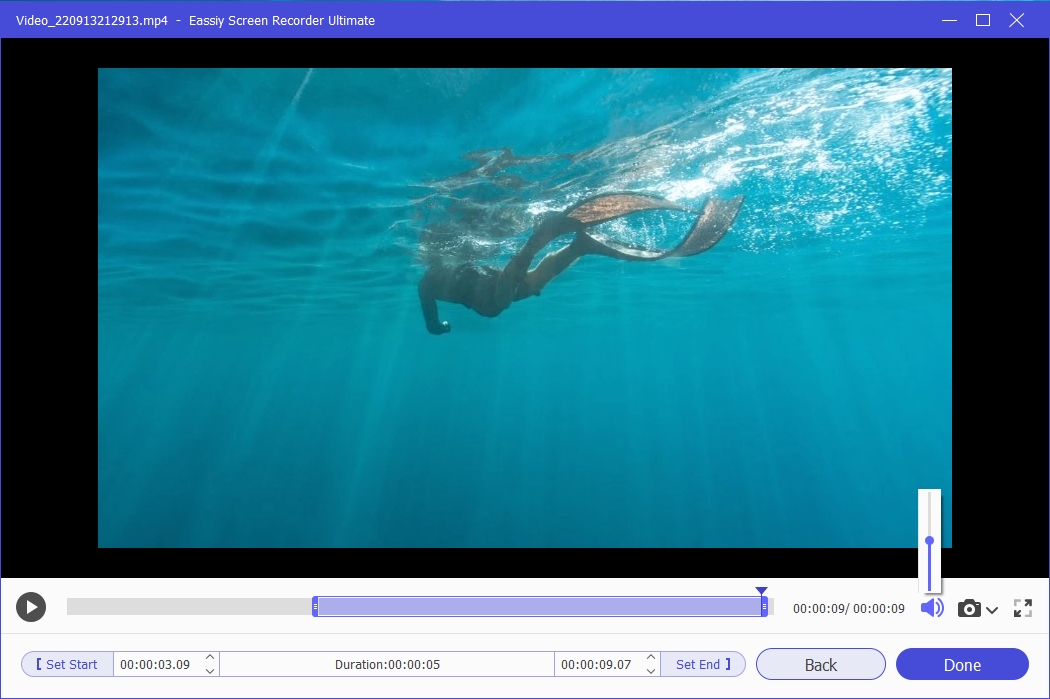
After recording, click the RED stop button to stop the recording. Once the recording ends, you will be redirected to preview your recording.
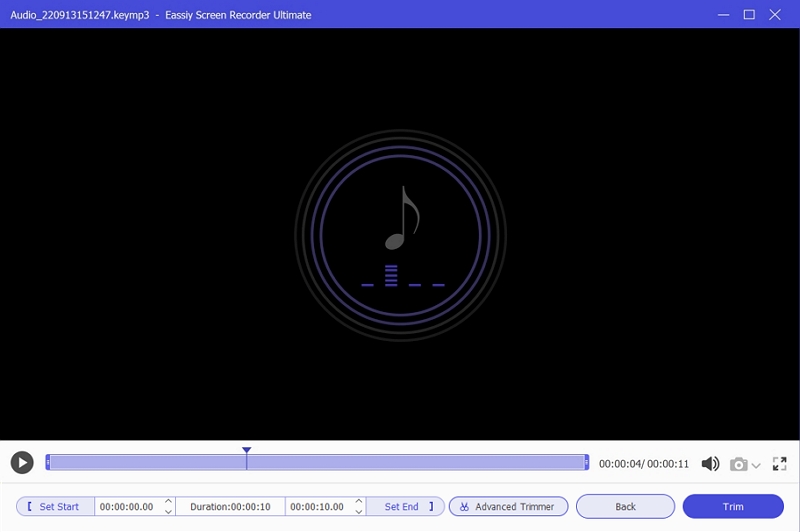
To trim the recording, drag the funnel-like cursor on the record length to the required length you wish it to be. After trimming, you can now save your video by clicking Done.
How to Adjust the Volume
To adjust the volume, click on the Setting icon, and the volume range will appear. Adjust it according to your wish.
When uploading and sharing videos to the popular video platforms, we often encounter such problems: the recorded videos are too large to be uploaded, or the video duration is limited and cannot be uploaded. In this case, we must trim or compress videos, it will waste a lot of time.
How to continuously record videos according to the set video length or file size automatically? The auto-slit feature of Eassiy Screen Recorder Ultimate will help you to split the whole recording task to multiple files efficiently.
How to Auto Split the Whole Recording Video to Multiple Files?
Launch Eassiy Screen Recorder Ultimate, then run Video Recorder. Click "Auto Stop" at the bottom of the program to turn on auto-stop recording feature. Select Recording Length or Recording File Size from the drop-down menu.
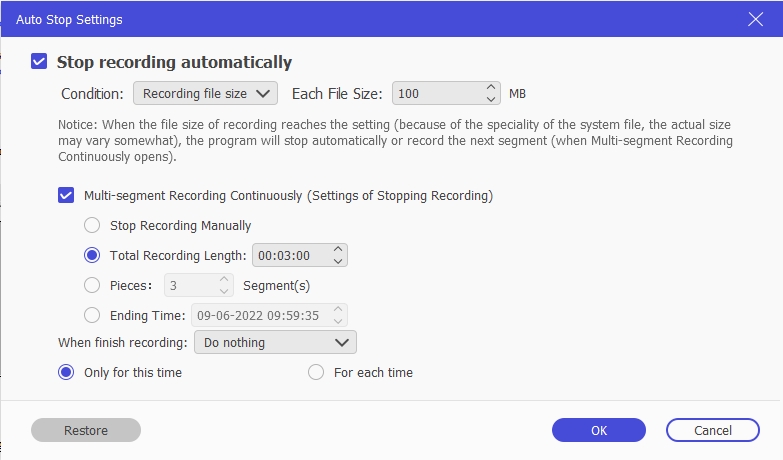
In the pop-up window, check Multi-segment Recording Continuously, more settings will be expanded. There are 4 options.
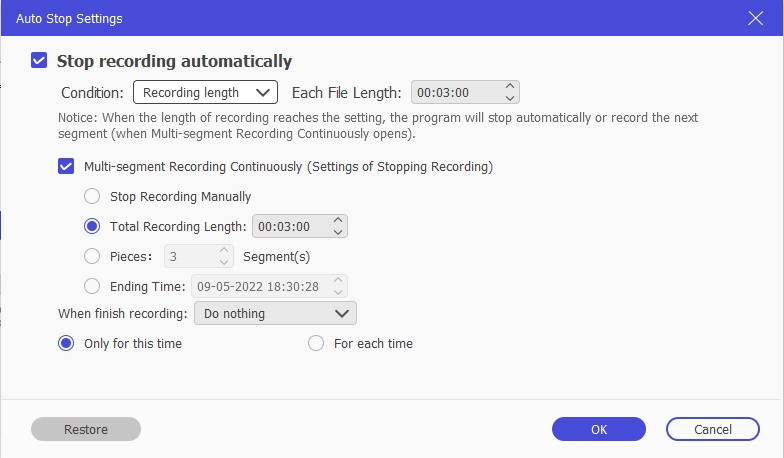
Recording Length
If you choose "Recording Length", the program will automatically stop according to the setting recording length. Set each file length first.
Stop Recording Manually: When the length of recording reaches the setting each file length, the program will record the next segment, until you stop the recording manually.
Total Recording Length: When the length of recording reaches the setting each file length, the program will record the next segment, until the total recording length reaches the setting.
Pieces: When the length of recording reaches the setting each file length, the program will record the next segment, until the set number of segments is reached.
Ending Time: When the length of recording reaches the setting each file length, the program will record the next segment, until the computer system time reaches the setting ending time.
Recording File Size
If you choose "Recording File Size", the program will automatically stop according to the setting recording file size. Set each file size first.
Stop Recording Manually: When the file size of recording reaches the setting each file size, the program will record the next segment, until you stop the recording manually.
Total Recording Length: When the file size of recording reaches the setting each file size, the program will record the next segment, until the total recording length reaches the setting.
Pieces: When the file size of recording reaches the setting each file size, the program will record the next segment, until the set number of segments is reached.
Ending Time: When the file size of recording reaches the setting each file size, the program will record the next segment, until the computer system time reaches the setting ending time.
After setting, click "OK" to save the settings. Now, click REC button, you can continuously record videos according to the set video length or file size automatically.
A screenshot is an image that shows the contents of a computer screen. Screenshots allow you to capture what you see on the screen so you can share it with others or refer to it later. Taking, saving, and sharing screenshots can be beneficial.
Eassiy Screen Recorder Ultimate is a high-quality, excellent, and very usable screen casting software. It captures high-quality screenshots on your computer screen. You can grab videos and graphics, take screenshots of online education notes, and even live sessions.
How to Quickly Take Screenshot While Recording
There are three ways you could take screenshots on Eassiy while recording.
- Use hotkeys.
- Use the snapshot feature.
- Use the camera icon while recording.
Using Hotkeys
With the hotkeys feature on Eassiy, you can easily take screenshots by enabling it and then pressing the key when you want.
After downloading and installing the Eassiy Screen Recorder Ultimate software from its official website, open it to reach the main page.
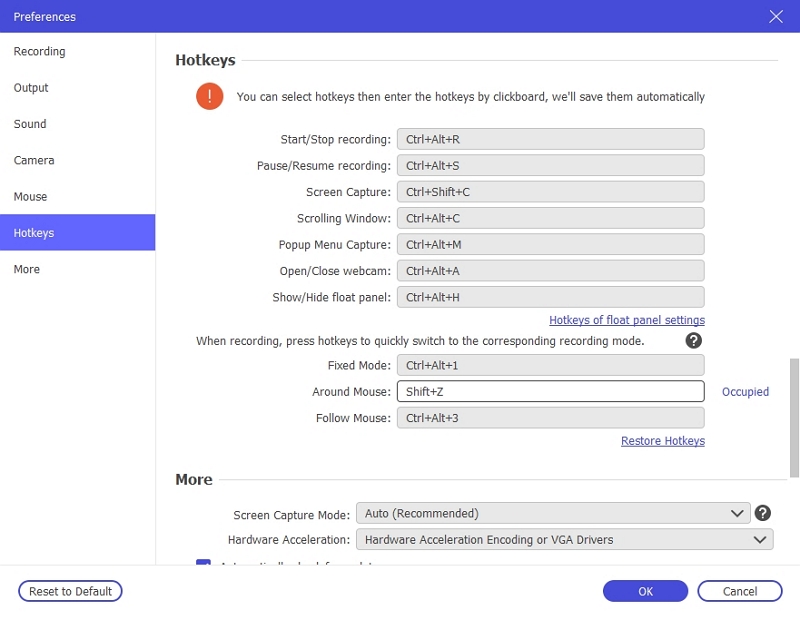
On the preferences page, select hotkeys and make changes where you want. Also, take note of the settings, then click Ok to save it.
For screen capture, the default setting is ctrl+shift+C to take a screenshot. Now press the keys to take a screenshot.
Using the Snapshot feature.
Open Eassiy Screen Recorder Ultimate, click on a build-in recorder, you will find the Snapshot icon at the upper right corner. Tab the Snapshot icon.
After clicking the snapshot icon, use the margin to select the window you want to screenshot.
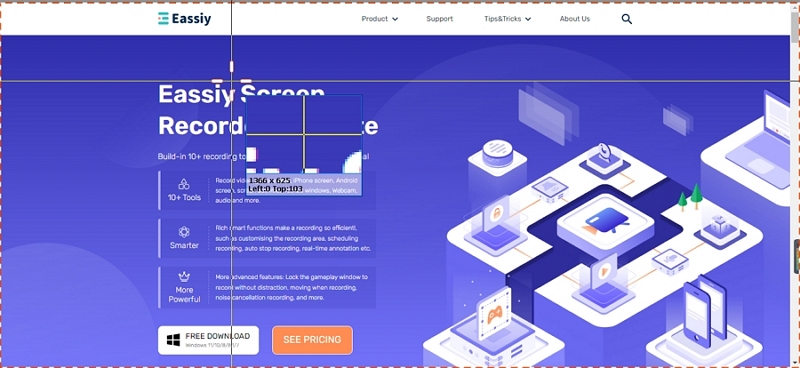
Using the Camera Icon On the Recording Window
To quickly take screenshots while recording, locate the camera icon on the recording window and click on it.
In addition to taking screenshots while recording, taking screenshots in scrolling window or taking full-page screenshots is an excellent feature of Eassiy Screen Recorder Ultimate. Many screenshot software in the market claim that they have this function, but the compatibility is not good. It only works on some devices without any problems. The feature of Eassiy Screen Recorder Ultimate will not disappoint you.
How to Capture Screenshots in Scrolling Window
There are three ways you could take screenshots on Eassiy while recording.
Download and install Eassiy Screen Recorder Ultimate on your computer, then launch it.
Method 1: Turn on Screenshot in Scrolling Window with Hotkeys
1. On the top right corner of your home page, click the three horizontal lines to access the preferences page.
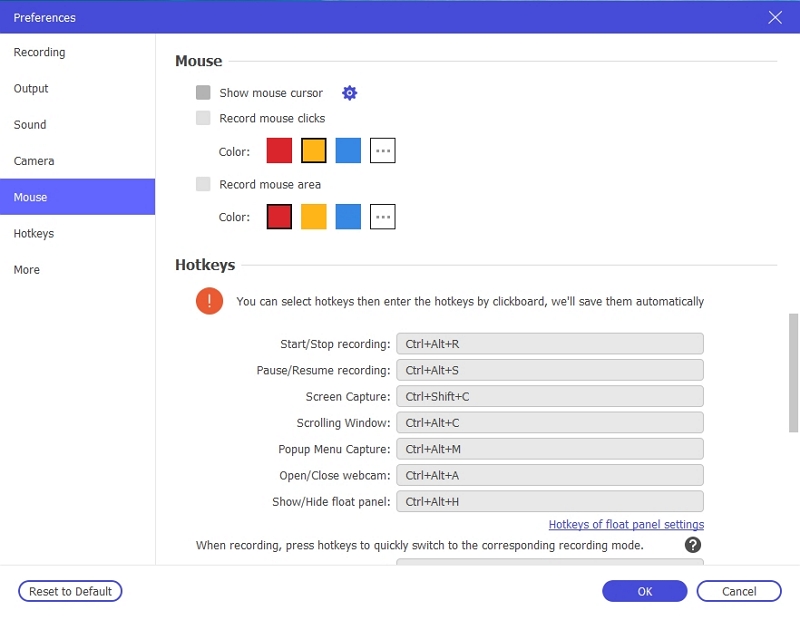
2. Change Hotkeys as per your choice by clicking the Hotkeys option. You can enable shortcuts to start/stop, pause, screen capture, open/close webcam, pop-up menu capture, scrolling window, and show/hide floating.
3. Once all set, click OK to save the changes. However, the default hotkey for taking a screenshot of the scrolling window is to hold Ctrl+Alt+C.
Now you can start taking screenshots with the shortcut key while recording with the Camera icon in the window.
Method 2: Turn on Screenshot in Scrolling Window in Build-in Recorders
1. Select a build-in recorder such as Video Recorder, Audio Recorder, Game Recorder etc.
2. Next to the camera icon on the top right, there is a drop-down menu, tap it and select Scrolling Window to turn on this feature.
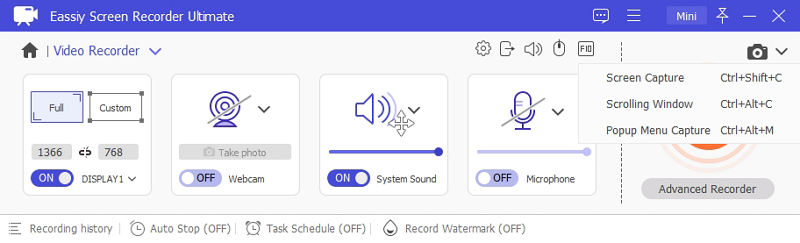
It will detect the page area automatically. Use the mouse wheel or the "Space" bar to scroll the page. "Left-click" to capture the screen to the bottom automatically. Press "Esc" to complete.
Eassiy Screen Recorder comes with lots of advanced features. If you have tried taking screenshots of the pop-up menu, you will understand how difficult this can be. Eassiy has made this very easy for you and me to do our work more effectively and keep images for reference purposes.
How to Take Screenshots of Pop-Up Menu When The Program is Operating
Install and launch Eassiy Screen Recorder Ultimate on your computer.
There are 2 ways to turn on Popup Menu Capture: turn on it with Hotkeys and turn on it in build-in recorder.
Method 1: Turn on Popup Menu Capture with Hotkeys
1. Click the top three horizontal lines on the right-hand side of the screen. Then, choose Preferences on your Eassiy Screen Recorder Ultimate interface.
2. Select hotkeys to change the settings per your requirements or choice of keys, then click OK to save the changes. You can decide to leave it as default which leaves the pop-up menu capture hotkey at Ctrl+Alt+M. After saving the changes, you can now hold the hotkey to turn on Pop-up Menu Capture feature.
Method 2: Turn on Popup Menu Capture in Build-in Recorders
1. Run a build-in recorder such as Video Recorder, Audio Recorder, Game Recorder etc.
2. Next to the camera icon on the top right, there is a drop-down menu, tap it and select Popup Menu Capture to turn on this feature.
When a pop-up window appears, move the mouse over it, the popup content will be selected automatically. Press "Space", "Ctrl" or "Shift" to complete the screenshot.
Eassiy Screen Recorder Ultimate is the best option to save time recording the entire or portion of the computer screen. It records both videos, audio, and the visual effect from the screen and works both on Windows and Mac. With this software, you can easily record your videos, audios, and gameplays using the Hotkeys option, irrespective if it's a live show or recorded.
How to Set Hotkeys for Eassiy Screen Recorder Ultimate
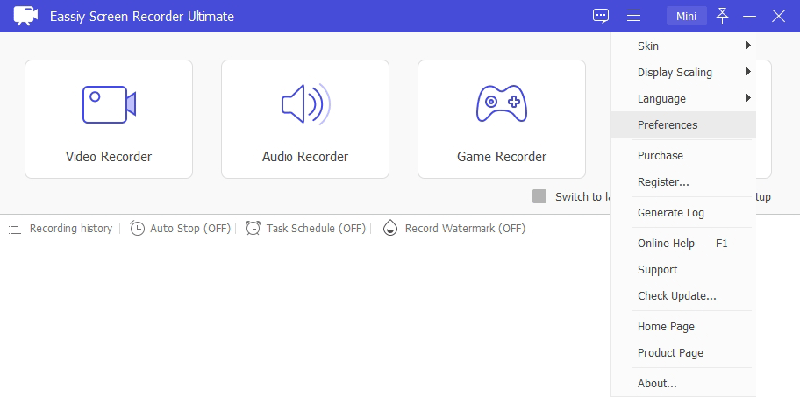
Install and launch Eassiy Screen Recorder Ultimate on your computer. Run the program, select the three horizontal lines on the top.
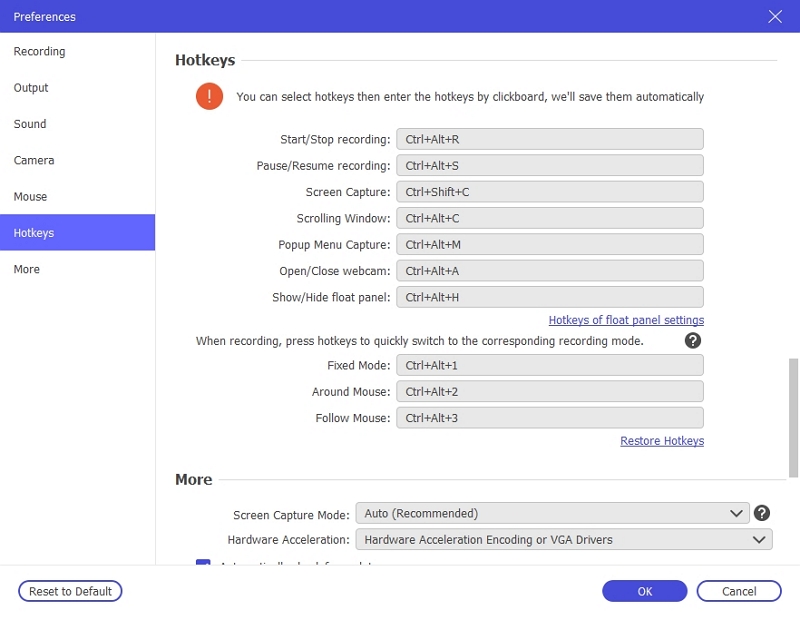
You will see a list of options like Skin, Display Scaling, etc. Choose Preferences. You will see a list with various options. Tap on Hotkeys to proceed.
The Hotkeys will be visible as per the default setting. You can modify these hotkeys based on your needs. For example, if you want the Hotkey of the Start/Stop recording option to set as Alt + Shift +S, select the input area and press/choose the keys from the keyboard to set the hotkeys for Start/Stop recording option.
Click OK once done with the changes. If you want Hotkeys to return to normal, there is an option to Restore Hotkeys as per the initial application stage.
So, that is how you set Hotkeys on Eassiy Screen Recorder Ultimate and make your job easier with shortcut keys.
If you want to convert any video into a GIF file, we need to understand precisely the GIF file. GIF stands for Graphics Interchange Format, a raster file format designed for relatively basic images that appear primarily on the Internet. GIF files also allow you to combine images or frames to create basic animations.
For converting any video to GIF format directly, Eassiy Screen Recorder Ultimate is excellent software if you follow the few graphically mentioned steps below on Windows or your Mac PC.
How to Capture Video to A GIF
Follow these steps to capture video to a GIF with Eassiy Screen Recorder Ultimate easily
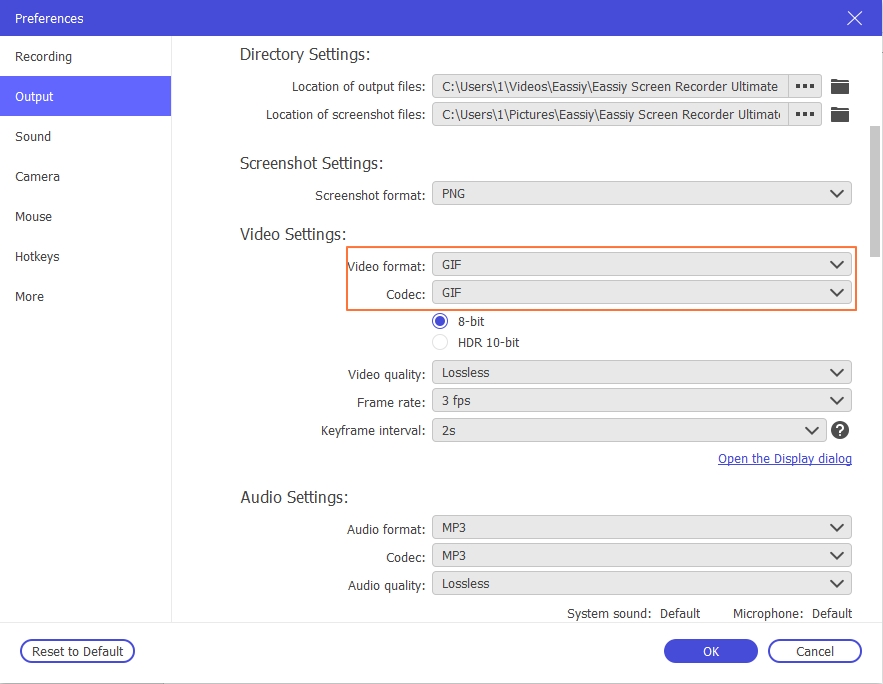
Launch Eassiy Screen Recorder Ultimate, click the three horizontal lines on the top right corner to access the preferences page. Tap Output, change Video Format as GIF. The recorded file size will be limited to 400MB if you change to GIF format.
You can also change video quality, Frame Rate and Keyframe Interval if you want, then click OK.
Open a video file which you want to convert to GIF, run Video Recorder, adjust the recording area, then click on REC to start the recording.
You can add text or image in the video while recording by clicking the briefcase icon on the top right corner. After completing the recording, click the stop button to end the recording. Cut the part you like on the popup window.
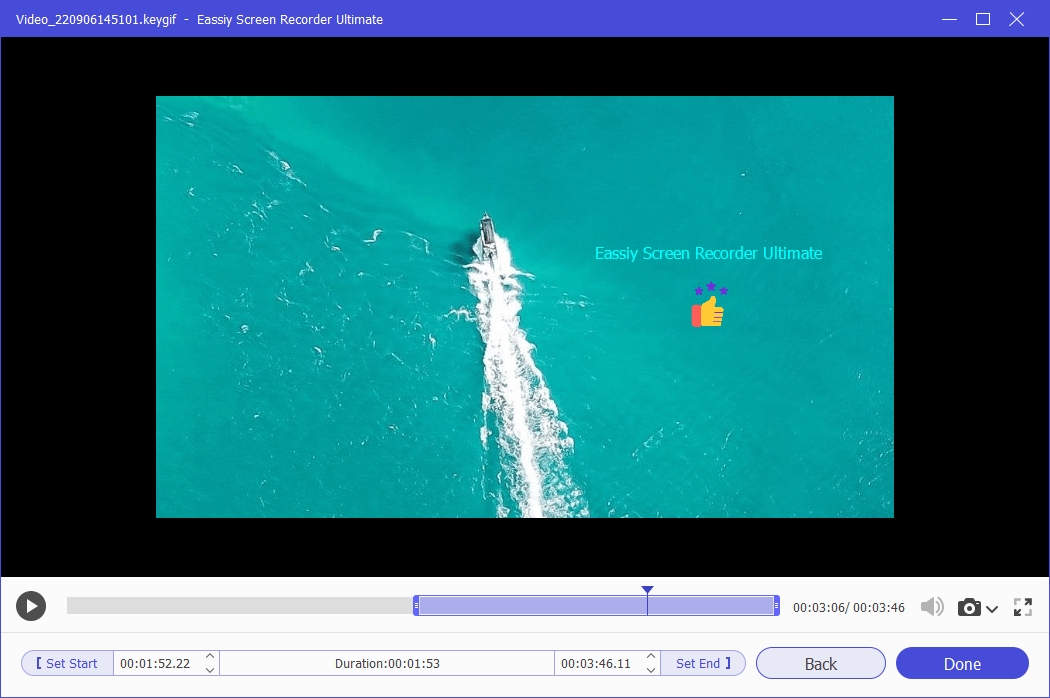
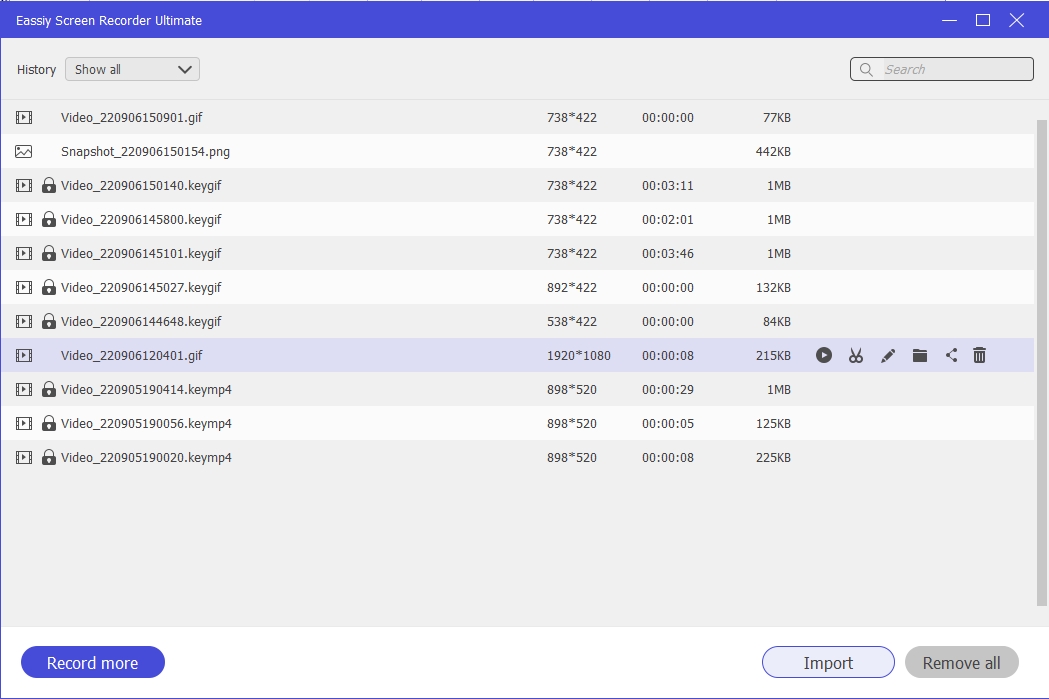
Finally, click Done to save the recorded video to GIF, you can find it in Recording history.
Exporting is the final stage of modifying or converting any file. In short, you can term it the completion stage.
With Eassiy Screen Recorder Ultimate, you can import any file format to make changes or modifications. After making changes and exporting, you can convert the videos to their best in respect of framerate, resolution, video format, and aspect ratio.
How to Export to the Format You Want with High Quality
Download the installation packages for either Windows or macOS. After downloading it, go to your destination folder and click on "Downloads." Here you can now see the downloaded program file to click on it.
Once you install Eassiy Screen Recorder Ultimate, you will see three recording options on the interface and four small icons on the right. Choose Video Recorder.
Clicking Video Recorder will open another window/gadget, where you will find two options; Full and Custom, wherein you can select the recording region, pixels, etc. Select the options you need for recording, and if required, use the microphone or webcam.
Click the three horizontal lines on the main page to reach the Preferences tab.
Once in, select the Output option and then Video Settings to choose the Video quality as High along with the Video format you want.
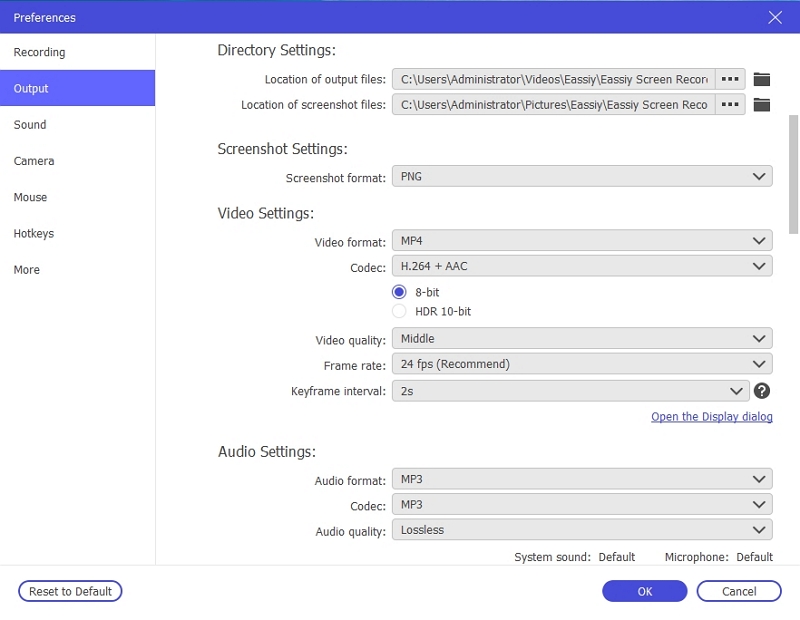
Click OK to go back to the main page and click the orange round button to start recording the video and then export in the format you selected with high quality.