
Updated on 2023-09-03
views
5min read
Hello,
Recently my MacBook Pro started running slower than expected. It takes several minutes to hours for it to respond to clicks or even load any program which is quite unusual. I have examined the system and deleted large files that are taking up so much space. However, unfortunately, the system is still displaying similar issues. So my friend suggested that I replace or upgrade the hard drive, which I don’t know how to do. Is there anyone that knows how to replace or upgrade a MacBook Pro hard drive?
Sounds familiar?
Replacing your Mac hard drive is one of the most challenging tasks to execute because of the solid packaging done by the parent company, Apple Inc. Though this is a great thing, as Apple is trying to ensure all the components of its devices are intact.
However, sometimes, a situation might arise where you need to replace or upgrade the hard drive to higher storage to boost the operations of the device so it runs at optimal levels. In such a scenario, you need a detailed tutorial guide on how to complete MacBook Pro hard drive replacement, and one will be shared with you here in this post. So continue reading!
Part 1. A Thorough Overview of MacBook Pro Hard Drive
Just before we delve into how to replace or upgrade a MacBook Pro hard drive, let's have an overview of what a MacBook Pro hard drive is. Check below some of the few things we’ve got to share with you:
1. Can I upgrade my MacBook Pro Hard Drive?
Yes, of course!
When you notice your MacBook Pro isn't running at optimal level, that's is not as fast and efficient as it has always been, then there's insufficient storage space on it. You need to opt to upgrade the hard drive. You can do this by simply attaching an external storage device to the MacBook or better yet you opt to replace it by buying a new one.
However, mind you, not all MacBook Pro have replaceable hard drives. You need to verify whether or not your Mac model supports such an operation. To the best of our knowledge, only older Mac models support hard drive upgrade or replacement.
2. How much does it cost to replace a MacBook Hard Drive?
The price for replacing the hard drive in your MacBook Pro computer isn't specific, as it can only be done outside the Apple store. So different engineers would have their prices they charge for replacing a MacBook Pro hard drive. You might be wondering why Apple stores don't support such services. Well, this is because the company wants to boost the sales of its products.
3. Signs of Upgrading Hard Drive
Here are some potential reasons for upgrading your MacBook Pro hard drive:
- Abnormal battery health status
- Frequent update to remind you that your startup disk is filled up even after clearing the culprit files.
- Unresponsive programs, and slow boot up speed.
- Sudden loss of data.
4. HDD or SSD, which one is better for MacBook Pro upgrade?
Find below a comparison table showing the difference between the SSD, and HDD hard drives:
Features |
SSD |
HDD |
Cost |
$120/TB |
$60/TB |
Life Span |
5 Yrs |
5 Yrs |
Read time speed |
3238.4 MB/sec |
57.01 MB/sec |
Write time speed |
2248.9 MB/sec |
30.87 MB/sec |
Time required to boot your macOS |
10 sec |
4 mins |
Durability |
❌ |
✅ |
From the chart above, you can see that the SSD hard drive has a better feature compared to HDD. However, the pricing is way more expensive. If you aren’t considering the price for SSD drives, you can invest in it. But if you are on budget, you can try HDD. It’s more durable compared to SSD drives.
Part 2. What To Do Before Upgrading Your MacBook Pro Hard Drive?
As previously mentioned, not all MacBook Pro models supports hard drive upgrade or replacement. You need to check and confirm first before pushing to replace or upgrade your hard drive. Find below the list of MacBook Pro models that supports hard drive replacement:
- MacBook from 2010 upwards.
- MacBook Air from 2017 to earlier models.
- MacBook Pro with Retina display from late 2016 to older models.
- MacBook Pro without Retina display from 2015 to earlier models.
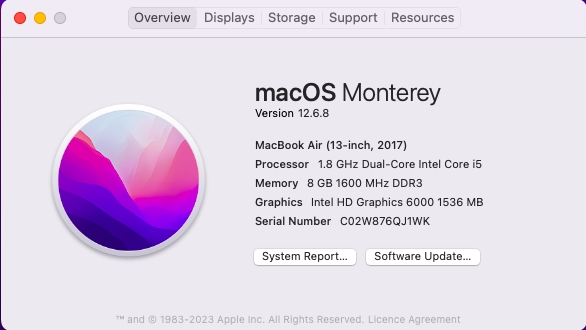
If you don’t know whether or not your MacBook Pro falls underneath any of the aforementioned list, kindly use the guide below to run a quick check on the specifications:
- With the aid of your cursor, head to the topmost left corner of your Mac home screen, and click on the Apple logo.
- Select About This Mac from the options displayed.
- Next, another page showing all info about your MacBook will come up, just as you can see below:
Part 3. How to Upgrade MacBook Pro with SSD
Using any of the 3 techniques below, you can quickly upgrade your MacBook Pro to SSD:
1. Clone Hard Drive with Cloning Software
Cloning is the first thing to do when you want to upgrade the hard drive in your MacBook Pro. This simply means copying all existing data files you have on your HDD drive into an external drive. We strongly suggest this so you don’t lose them in the process of upgrading or replacing your HDD drive.
However, mind you, cloning doesn’t occur manually. You need a professional cloning tool/software to help you move or copy data from your HDD to an external storage system. Alternatively, you can leverage the Disk Utility tool on your MacBook to help you clone your HDD drive.
Here’s how to do this using the Disk Utility program on your MacBook:
Step 1: With the aid of the hotkeys Command + Space bar, quickly launch the Spotlight search on your MacBook Pro. Enter Disk Utility in the search field and click the corresponding button.

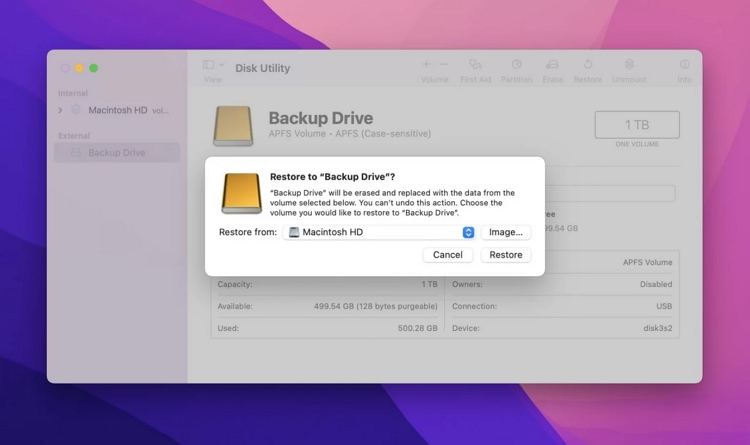
Step 2: Once the program comes up, connect an external hard drive where you want to move or copy the data on your HDD Drive. Disk Utility will display the external hard drive icon on the left sidebar. Kindly click on the icon.

Step 3: Now proceed to select confirm whether you are migrating from MacBook Pro HDD. Kindly do the needful, then hit the Restore button to proceed. Cloning will commence immediately.
2. Replace HDD with SSD
Having cloned your HDD drive, the next thing to do is to replace it with an SSD drive. As previously mentioned, SSD drives are better compared to HDD drives, so a replacement isn’t a bad thing to do. However, you have to be extra careful when doing this. Kindly get the following tools available before you proceed with replacing HDD with SSD:
- A Philips #00 screwdriver
- Spudger tool
- SSD Drive
Once the above is ready, follow the steps below to replace HDD with SSD on your MacBook Pro:
Step 1: Turn off your MacBook Pro computer system, close it and turn it upside down, just like you can see in the image below:
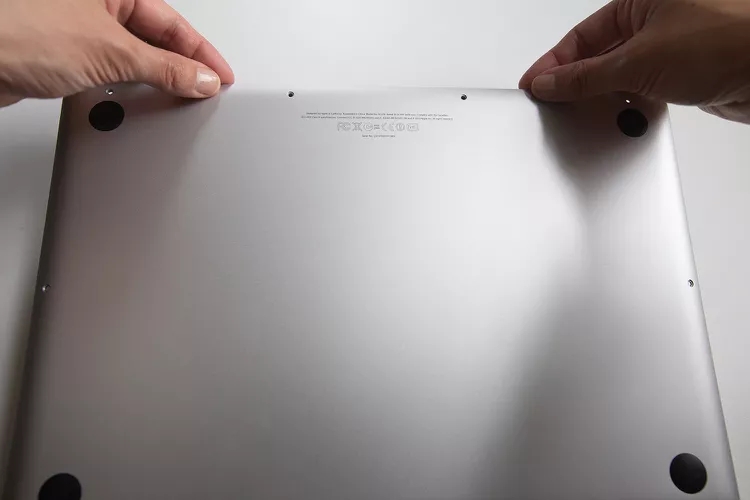
After that, proceed to unscrew the nuts, then remove the lid at the back of the system.
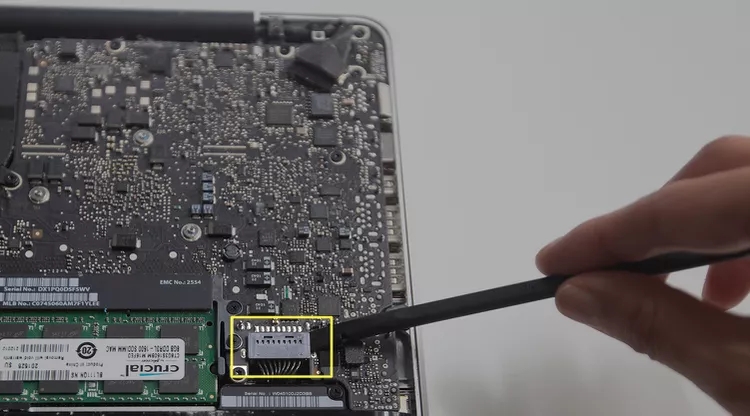
Step 2: Next, find the battery connector, which is situated above the battery. Once found, use the Spudger tool to detach it from the socket. Kindly do this with caution so you don't damage anything on your system.
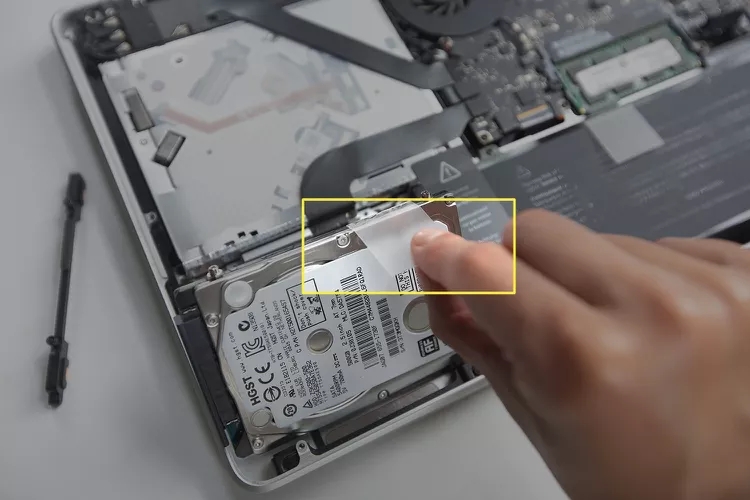
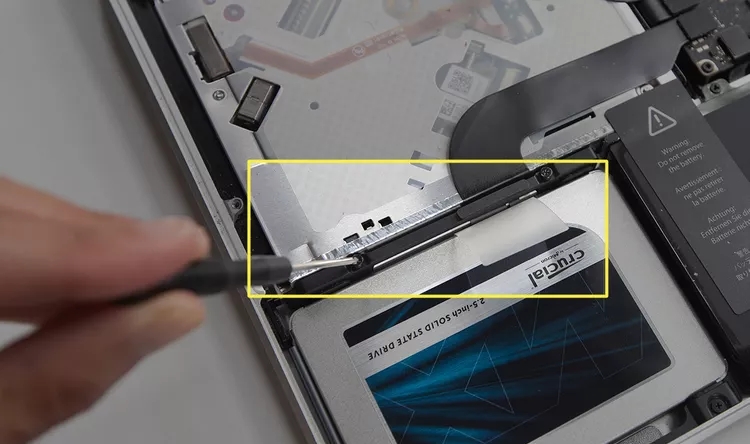
Step 3: Now locate the hard drive and unscrew all the nuts around the hard drive bracket. After that, remove the bracket, and use the tab on top of the hard drive to lift the hard drive from where it's sitted.
Step 4: Once you are done with the above, detach the hard drive connector cable from the edge of the hard drive, then connect it with SSD.
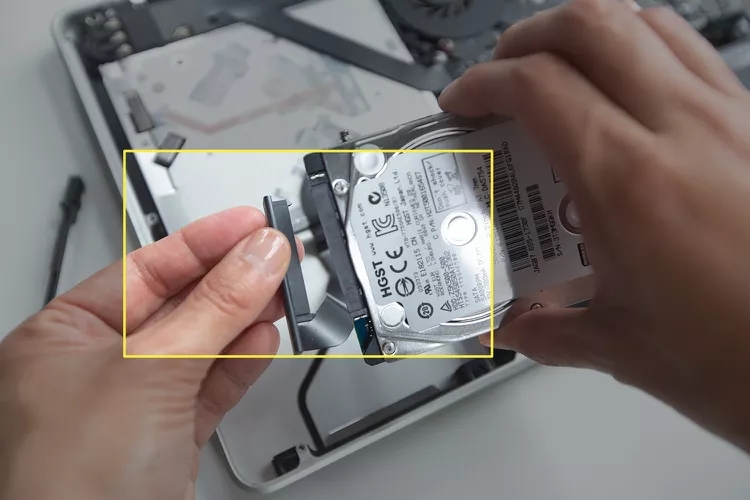
After that, place it back where it’s sitted, and recoup everything.
3. Restore Data to Newly Installed SSD
Now that you’ve successfully replaced the HDD drive with SSD, you can restore the cloned data moved to an external hard drive to the newly installed SSD drive. The approach you need to follow is similar to the one shown when moving data from HDD to an external hard drive. However, instead of selecting Mactonish HD when prompt in step 3 appears, just choose the external hard drive.
Part 4. Recover Lost Data from Old Mac Pro HDD
While you are replacing the hard drive associated with your MacBook Pro computer, you may experience data loss which is never your wish. When such happens, you don’t have to bother or fret so much because we’ve got the right solution for you- the Eassiy Data Recovery software. This is one of the many sophisticated data recovery suits available on the internet that you can rely on to help you retrieve your missing data files on your Mac or Windows hard drives.
Whether your data got missing due to accidental deletion, system crashing, raw partition, virus attack, or any related scenario, Eassiy Data Recovery tool is what you need to bring the data back in high quality. Besides your Windows or Mac hard drives, this software also extends its data recovery operations to other storage media such as SD cards, SSD, USB Drives, Camcorders, cameras, and more.
Experts recommend this software as the best for data recovery operations due to the first-class services it offers. Eassiy Data Recovery tool powers all the amazing functionalities that aids the successful recovery of data from your device. It’s one of the most nicely built data recovery solutions, as it features smooth interface, preview before recovery, selective retrieval of data to avoid overwriting, and more.
Key Features
- 1-click to retrieve more than 1000+ data from your MacBook Pro hard drive.
- Seamless data recovery operations from over 2000+ storage media, including SSD, HDD, USB Drive, camera, camcorder, recycle bin, trash, and more.
- Recovers data with high accuracy and precision, so you don’t have to worry about quality loss.
- Connects perfectly with Mac and Window computer systems.
Stepwise Guide to Recover Lost Data from Old Mac Pro HDD via Eassiy Data Recovery Tool
Go to the official homepage for Eassiy Data Recovery, and click on the right buttons to download the most recent version of the software on your Mac. Follow the guide below after that:
Step 1: Install the software, and launch it for data recovery operations from Old Mac Pro HDD.
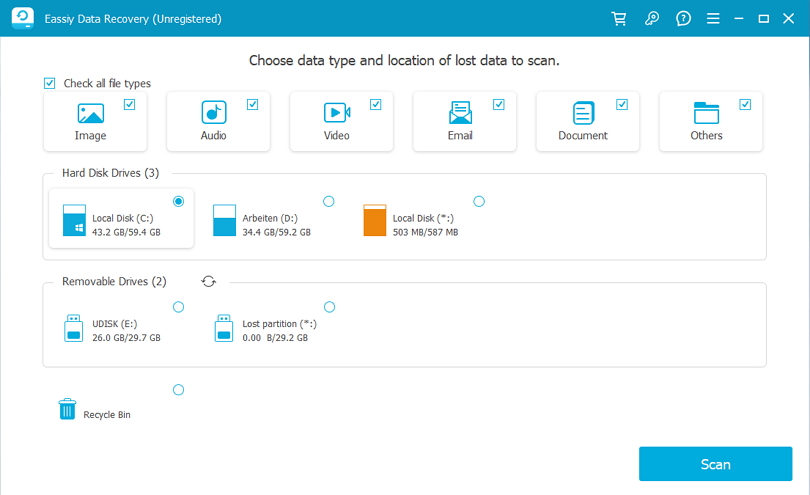
Step 2: Next, check the applicable boxes beside the data you will like to recover. After that, move to the Hard Disk Drive (HDD) section, and mark any of the folders underneath. Once done, navigate your cursor to the bottom right corner of your screen, and click on the blue Scan button.
Step 3: On the left sidebar, we have the categories of recoverable files from your MacBook Pro HDD. Click on any of them, and the corresponding data underneath will come up on the right hand panel. Do this for all the crucial categories of recoverable files on the left sidebar, and check the box beside each of the data displayed on the right.
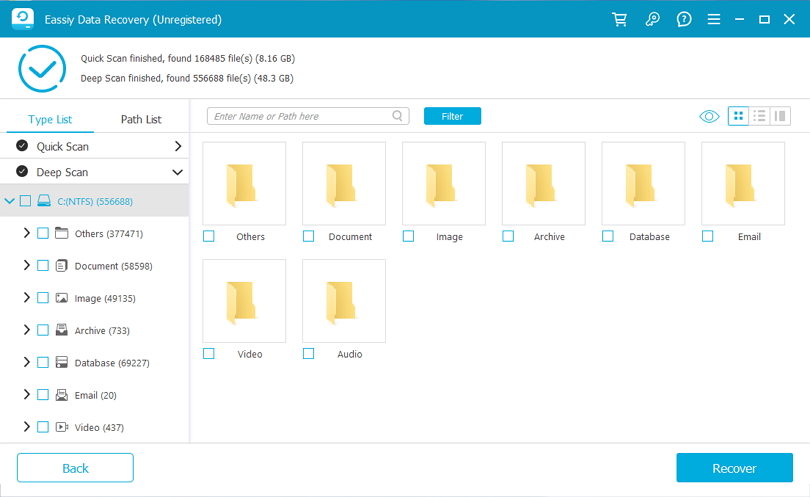
Step 4:After that, hit the Recover button situated at the bottom right corner of the software page, and Eassiy will commence data recovery immediately. This should take a few seconds to minutes depending on the size of data files you are retrieving from HDD.
Conclusion
Replacing or upgrading the hard drive in your MacBook Pro isn’t a challenge anymore now that you have this guide at hand. We’ve outlined the detailed steps to follow for you to successfully realize MacBook Pro hard drive replacement. You could follow it to upgrade your MacBook Pro with SSD. Follow the guide in the correct manner. Should you lose some crucial data during a hard drive upgrade, don’t hesitate to retrieve them via Eassiy data Recovery software. It’s the best tool to bring back your missing data on any storage media.