
Updated on 2023-01-13
views
5min read
If you’re an advanced Mac user, you may be familiar with the term bitrate or you may have even come across it while recording videos using QuickTime Player or VLC media player. But just what does this term mean? Bitrate in video recording means the total amount of bits that are processed within a given time. So, if you have the question ‘how can I configure bitrate when screen recording on my Mac OS?’ Then, this article has the answer to that question.
Here, we’ve explained the basics of bitrate and how to configure macOS screen recording bitrate X to maximize your performance and achieve either high-quality or lower-quality recordings with your video software.
Part 1: What Bitrate Should You Screen Record At?
The bitrate you used for recording a PC screen will depend on the scale of the video you're creating and the hardware. To record in 1080p at 60 frames, the bitrate ranges from 5,000 to 10,000 kbps, although can go up to 60,000 kbps for 4k. The audio bitrate can be as low as 64 kbps and can go up to 320 kbps for clearer sound.
Typically speaking, a higher bitrate with a high resolution will provide the best quality for screen recordings but this isn't always the case. It is possible to use lower resolutions at higher bitrates that offer the same quality of recording but at a smaller file size which may be advantageous for some people who have limited storage space on their computers. The below table shows the details of resolutions and bitrate for the Quality of the recording;
Quality |
Resolution |
Bitrate |
Size for 1 hour video |
4K |
3840x2160 |
20 Mbps |
20 – 22 GB |
1080p |
1920x1080 |
5 Mbps |
1.2 – 1.4 GB |
720p |
1280x720 |
1 Mbps |
800 – 900 MB |
480p |
640x480 |
500 Kbps |
2 MB |
Part 2: Configure macOS Recording Bitrate in Lower Quality to Reduce File Size
By default, macOS records audio at a high bitrate, which results in large file sizes. However, if you intend to reduce the size of the output file, you can easily configure the recording bitrate in lower quality, and there are several ways you can do that. Here, we’ve explained the different solutions that can come in handy to operate smoothly.
Solution 1: Change QuickTime screen recording quality settings from System Preferences
Changing the display resolution on Mac to a lower resolution can fix QuickTime lag and produce the recorded videos smaller in size. But keep in mind that this will lower the video quality.
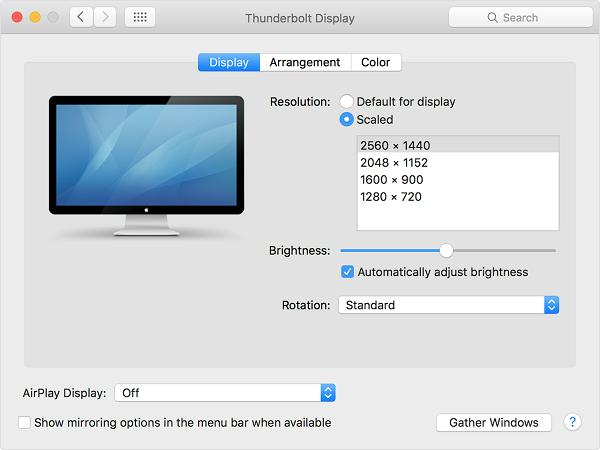
Step 1: Click on the gear icon (System Preferences) from the toolbar at the bottom.
Step 2: Click the menu icon on the top Click and select Displays.
- Choose Resolution as Scaled.
- Choose a comparatively lower resolution.
Solution 2: Export QuickTime Video as Medium Quality
You can also export your video as medium quality on QuickTime to configure bitrate as low quality. The steps to execute the process are as follows.
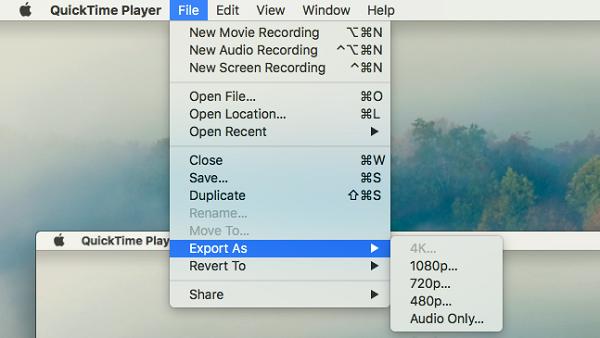
Step 1: Once you complete a recording with QuickTime, click File and select Export As.
Step 2: You’ll have 4 options from the drop-down list.
- 1080p
- 720p
- 480p
- Audio Only.
Select a medium or low definition (720p or 480p).
Users key problem for the solutions above;
- QuickTime can be counted as convenient and versatile. However, when it comes to its performance while recording the Mac screen and the file size of the recorded videos it produces, QuickTime will lose its competitive edge.
- QuickTime uses up a lot of hard drive space and has no preference/user settings that store preferred export settings. It has to be re-selected in the export settings each time of export.
Solution 3: Record Screen in Smaller File Size with High Quality Easily Without QuickTime
Instead of stressing to configure bitrate on Mac and lower your video quality to reduce file size, there is an alternative method to record Mac screen in smaller file size with high-quality. All you need is advanced screen recording software. Eassiy Screen Recorder Ultimate is a powerful yet easy-to-use screen recording tool that can help you record your screen with high quality in a smaller file size. You can use it to record all kinds of activities on your screen, such as Skype calls, webinars, online lectures, tutorials, etc.
It also supports capturing and recording full screen, windowed mode, and selected area (customizable region). The app allows you to choose bitrates from 8 kbps up to 32 Mbps, which is perfect for people who want to capture videos in smaller file sizes while maintaining the best possible video quality. Besides, it's simple to use and all it takes to use it is only a few clicks
The table below explains the quality at which Eassiy records video;
Video Time |
File Size using QuickTime |
File size using Eassiy |
40 Sec |
3.1 MB |
304KB |
Key features:
- Smaller File size – The video recorded at the same length and quality by Eassiy is considered to be smaller in size in comparison with QuickTime Player. For instance, a 40-sec video recorded by the Eassiy is 304 KB while the same recorded in QuickTime takes 3.1 MB.
- Never Lags - Eassiy Screen Recorder Ultimate records computer screen in 60fps. This helps in creating a smoother video and avoids lagging or delay while playing the recorded files.
- Various Video output formats - Eassiy can save files in diverse formats such as MP4, MOV, WMV, F4V, TS, AVI, and GIF while QuickTime saves only in MOV only
- Easy and User-friendly UI - Eassiy Screen Recorder Ultimate is user-friendly as there is a floating bar that lets you pause screen recording, enable the webcam and tell you how long you have recorded.
- Snapshot while recording - Eassiy allows taking screenshots while recording just by clicking the camera icon, a screenshot gets captured.
- Real-time Annotation – Eassiy allows adding a description and highlighting points of anything you're recording on the screen in real time.
Stepwise guide to Record Screen with Small File Size with High-quality on Mac
Eassiy Screen Recorder Ultimate has the special ability to record video in any resolution up to 60fps. Unlike QuickTime which lags when recording high-quality videos, it helps record video smoothly without lagging or delay while playing the recorded files. Also, it doesn’t occupy much storage space on the computer.
Method 1: Set the Video Quality First and Record with Eassiy
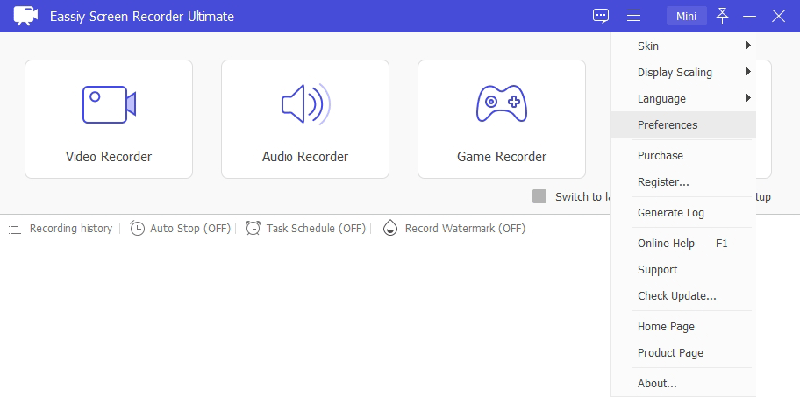
Step 1: Open Eassiy Screen Recorder Ultimate and click the Hamburger icon at the top-right side. Then, select Preferences.
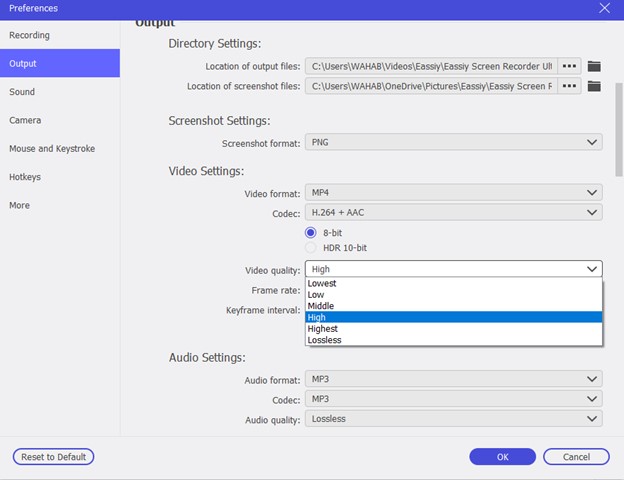
Step 2: Select Output from the left side of your screen and navigate to the Video Settings section. Then, click the drop-down icon next to Video Quality and select the quality at which you want the video to be recorded. Click OK once you’re done with the settings.
Step 3: After that, go back to the home page and click Video Recorder. Then, click Rec to start recording your PC’s screen.

Method 2: Record high-quality video then compress its size with Eassiy
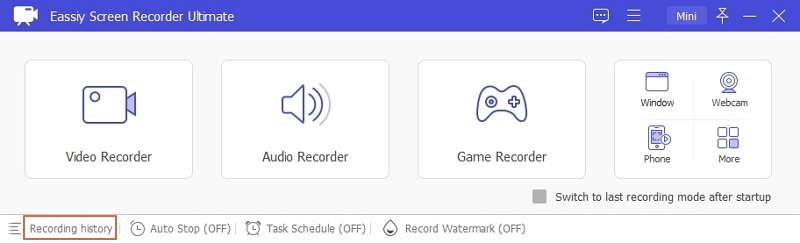
Step 1: After ending your recording, if you still want to reduce the video size, click “Recording history”.
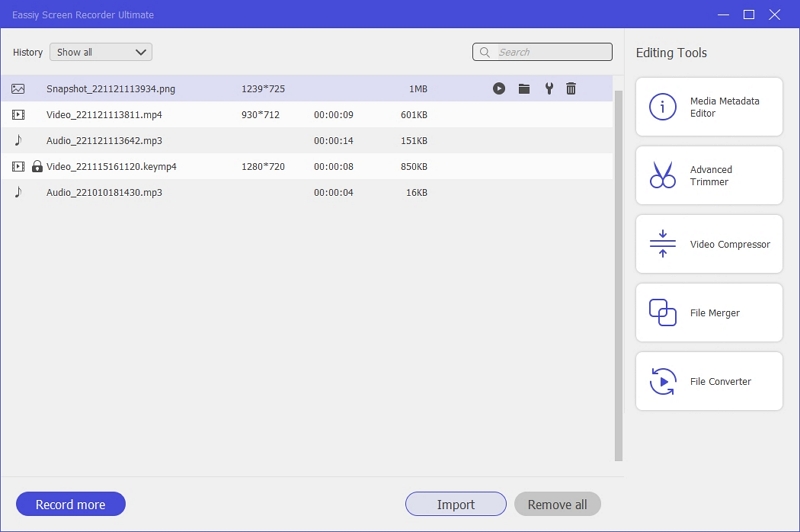
Step 2: You will find all recorded files, select the file you want to reduce size, then click “Video Compressor” tool.
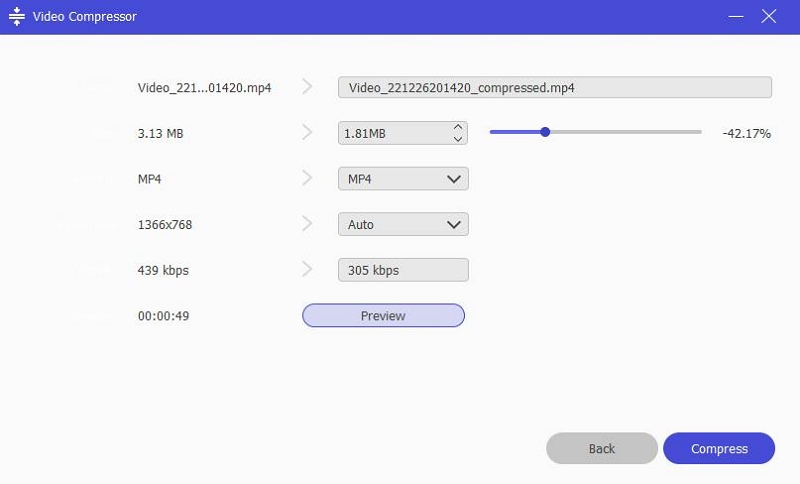
Step 3: Use the Slider next to your video file size to compress it to the size you want and click Preview to see the compressed version of your video. After that, click Compress to finish and save the File to your PC’s local storage.
Conclusion
There you have it! The solutions above can help you configure bitrate in high or low quality without hassles when you record videos with QuickTime. All you just need is to choose the right method that suits your requirements. However, we highly recommend using Eassiy Screen Recorder Ultimate for any kind of video recording operation on Mac, as it allows you to record videos in high or low bitrate with high quality.