
Updated on 2022-10-03
views
5min read
FAQ 1. Have you connected the device but cannot be found?
1. In this particular situation, you will need to click the drop-down list to change to a different connection mode, and then you will need to rejoin the device. MTP, PTP, and USB Mass Storage are the three different ways you may make a connection. The following section will provide an introduction to these three modes.
MTP: When Android employs this protocol, it presents itself to the computer as a "media device." The media transfer protocol got extensively pushed as a standardized mechanism for transmitting audio files to digital music players utilizing Windows Media Player and other apps of a similar kind.
PTP: When Android employs this protocol, it gives the impression to the computer that it is a digital camera. PTP is an abbreviation for "Picture Transfer Protocol."
USB Mass Storage: The standard protocol for USB storage devices such as flash drives, external hard drives, SD cards, and other USB storage devices is known as USB mass storage. The drive behaves precisely the same way as if it were an internal one, making itself accessible to the computer.
2. If the initial remedy does not work for you, check out the recommendations listed below.
- Check that you are using the most recent version of the vision. (You may get Eassiy Android Data Recovery for Android by visiting our main website and downloading it.)
- Check to see that there isn't an issue with your USB line.
If the issue persists, don't hesitate to contact our customer support team at support@eassiy.com.
- First, describe the issue you're having and the kind of device you're using to our customer service team.
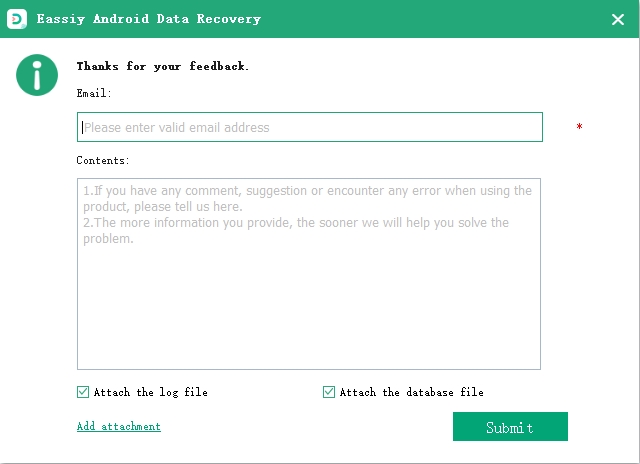
- Second, please email your log to the support team for our company. Open the feedback box by clicking the "Feedback" button in the upper right corner of our product.
FAQ 2. What is USB Debugging Mode?
The Android operating system includes a feature for programmers known as USB Debugging Mode. Users can install applications on Android devices, retrieve data from logs, copy and move data between their computers and Android devices, and more by using this capability.
You will not be able to establish the wired connection until you first enable the USB Debugging Mode. By default, you will not enable the USB Debugging Mode. You are going to have to turn it on manually.
FAQ 3. How to Open USB debugging Mode?
For versions of Android earlier than 2.3.
Step 1: Locate the Settings option on the device.
Step 2: Select the Application option.
Step 3: Click Development.
Step 4: Check USB Debugging Mode.
For Android 3.0-4.1
Step 1: Locate the Settings option on the device.
Step 2: Select the Developer Options menu item.
Step 3: Check USB Debugging Mode.
For Android 4.2 or later
Step 1: Locate the Settings option on the device.
Step 2: Locate the Settings option on the device.
Step 3: Locate the Build Number and repeatedly touch it seven times.
Step 4: To access the Developer Options, you must return to the Settings menu.
Step 5: Check USB Debugging Mode.
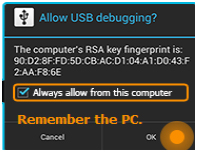
FAQ 4. It is necessary to get authorization for the device.
When connecting some devices to a computer, you must get authorization first. Please choose the option "Always allow from this computer on your device." If the prompt box is no longer visible as a result of other procedures, please unplug the device and make another attempt to connect it.
FAQ 5. How does one provide authorization for using a scanning device?
When you have successfully rooted your device, you will install a rooting administration application on your device immediately. This application (Super User, Super SU, KingUser, etc.) behaves differently depending on the rooting program used. However, they all perform duties comparable to controlling the permissions on your phone. Meanwhile, an application, part of our program called FoneGo, will ask permission to access your phone to scan the removed data from it. If, at this point, there is a reminder indicating that the scanning procedure was unsuccessful, then the default option on your phone may be to refuse the request made by FoneGo. Therefore, for FoneGo to proceed with the following activities, you will need to permit it. The information is broken out as follows.
a. If you have Super User installed on your phone, you should launch it, look for FoneGo, and then tab it. Then, to remove all the log files, click the symbol that looks like a trash can on the upper right.
b. If you can identify and launch Super SU on your phone, go to the FoneGo page, choose Grant Access, and tap Save.
c. If you discover that KingUser is running on your device, launch Super SU and choose Allow from the Allow drop-down box.
FAQ 6. Exception Handling
Suppose you have verified that USB Debugging Mode is enabled, successfully installed the driver, and trusted the device, but the device still can't be read. In that case, we suggest the following steps: 1. Unplug the USB cable attached to your device. 2. You may disable your device's USB debugging mode by going to Settings > Applications > Development, unchecking the box next to "USB debugging mode," and then rechecking the box. 3. Re-establish the connection between your device and the software. 4. If you still cannot properly connect the device after attempting the above procedures, please email our support team at help@eassiy.com for assistance.
FAQ 7. How do I install the driver for the device?
Suppose the software detects no driver for the connected device. In that case, a pop-up window will remind you to install the driver before continuing with the device's connection to the program. To begin, choose "Install."
If you loaded the driver correctly but cannot connect, check to see if the driver is turned off in the "Device Manager" application. You may discover the driver for your Android device by navigating to "Computer," "Properties," "Device Manager," and then "Android Phone."
Use the right mouse button to select the specific node, then check whether it is deactivated. If it is, you may successfully connect the device to the computer by clicking the "Enable" button when prompted.
FAQ 8. Why are there six different devices limitation? What should I do?
Why is there a restriction on six different devices, and what can I do about it?
Every device has a one-of-a-kind identifier; when you connect your device to our software and recover data using it, our program will record the one-of-a-kind identifier associated with it. Our software can only recover data for you on six distinct types of devices. However, our software may recover files without restrictions if you use the same device. If you have already used this program to recover a maximum of six devices and you want to use it to recover more, you will need to purchase it again.
We can offer you a thirty percent discount on your second transaction. You may contact our customer care staff for assistance, and they will provide you with the link to the purchase in a short time.