
Updated on 2023-02-05
views
5min read
On average, video files are used to take up more space compared to photos, music, documents, and other types of files you might keep on your Mac. In a generation of smartphone cameras and 4K screens, these file sizes help us to enjoy impressive videos but it is also worth mentioning that they take up a lot of computer storage and can be hard to share online. However, you can compress video on Mac. In this article, we are going to show you how to compress a video on Mac easily.
Part 1: Why Do I Need to Compress Video on Mac?
Compared to image and audio files, video files are far bigger and take up too much space on a Mac. It might take up to several GBs on your PC if you are recording a video at 1080 HD resolution. So, freeing up extra space that uncompressed video files have reserved is the biggest reason for compressing video on Mac. Sending video files to someone else is another reason to compress video size. It might take a long time, sometimes hours, to transfer a video when you have to send a heavy video. By compressing the video size, you can quickly send the video files to anyone easily.
Part 2: How to Compress a Video on Mac? [Best 7 Ways]
You can compress video on Mac as we mentioned above. Here are the best 7 ways to compress a video on Mac.
Way 1: Best Way to Compress Video Mac via Video Converter Ultimate
Many people want to know how to compress video on Mac without losing the video quality. The best way to compress video Mac without losing the original quality is by using a third-party professional video converter like Eassiy Video Converter Ultimate. This software works with 1000+ video/audio formats and batch conversion. Including video compressing, you can also convert videos, edit, make MV, and much more with this tool. The video conversion speed is 60X faster compared to other tools. While converting your videos, it doesn’t cause you quality loss.
Features:
- To convert, compress, edit, make MV, make college, and much more, this video converter provides 20+ multimedia tools.
- Supports 1000+ formats to convert video/audio files.
- With one click, you can batch-convert many videos simultaneously.
- Allows you to trim or cut unwanted parts of a long video efficiently.
- Helps you to convert video up to 8K without quality loss.
Steps to compress video Mac via Video Converter Ultimate
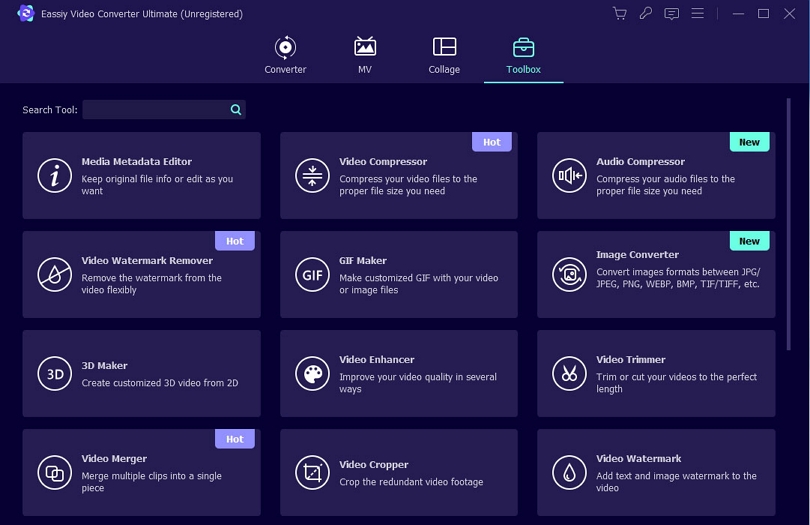
Step 1: Download and install Eassiy Video Converter Ultimate on your Mac. You have to reach the Toolbox option at the top after launching the program. After that, tap on the Video Compressor.
Step 2: A pop-up window will appear in front of you. You can add a video to the program by clicking the “+” sign or dragging and dropping videos.
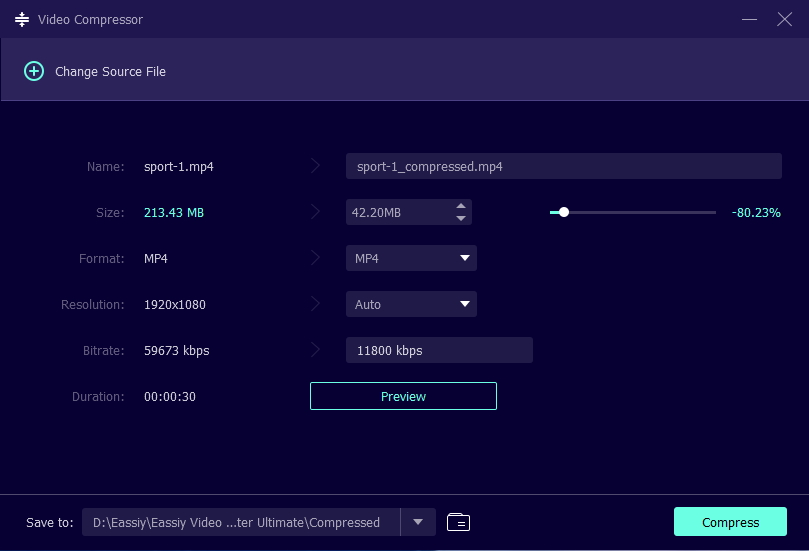
Step 3: You need to adjust the name, resolution, format, size, bitrate, and export location for the final result. If you want, you can slide the dot and resize the video file. You can compress the video file up to 90%.
Step 4: To check the video quality after setting, click on the Preview button. Tap the Compress button and compress the video to your desired size.
Way 2: How to Compress Video in iMovie Mac
Using the iMovie app is one of the most popular ways to compress your videos. This app comes standard with macOS, but you can download it from the Mac App Store if for some reason it is not on your computer. Here are the steps to compress video in iMovie Mac.
Step 1: Launch iMovie on your Mac and tap “Create New > Movie”.
Step 2: Choose the video you want to compress after clicking “File > Import”.
Step 3: In the browser window, your video will appear. You have to drag the video into the timeline window.
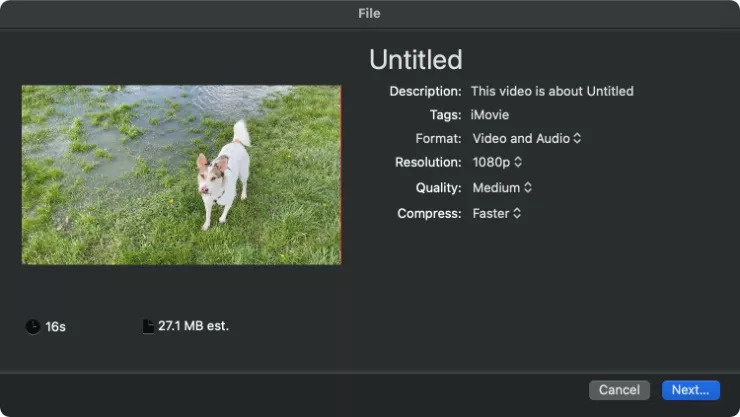
Step 4: Go to “File > Share > File” to compress the video.
Step 5: To choose your Resolution, Quality, and Compressed speed, use the various dropdown menus.
Step 6: To choose the filename and location of your compressed video, click “Next”.
Step 7: To start the compression, click “Save”.
Way 3: How to Compress Video on Mac Using QuickTime
QuickTime Player is another default macOS app you can use to compress your videos. People often forget that QuickTime has some basic editing tools built-in as well because its primary use is to playback videos. Follow the below steps to compress video on Mac using QuickTime.
Step 1: Launch QuickTime Player on your Mac.
Step 2: A popup will appear and ask you to choose your video. Click “File > Open File” if it doesn’t.
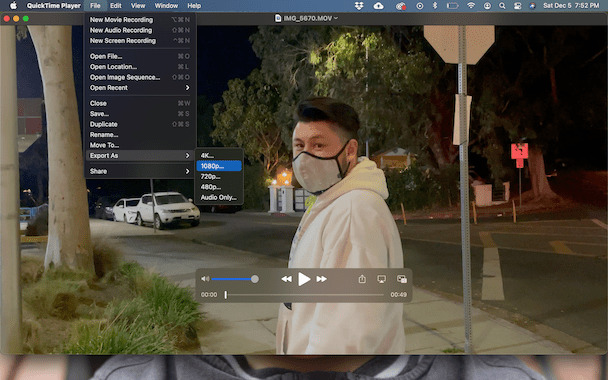
Step 3: After that, you have to tap “File > Export As” from the menu bar.
Step 4: You can see a list of video resolutions. Select the next lowest resolution.
Step 5: To save the video, name it and choose a location.
Way 4: Compress Video Files Mac on VLC
Another media player that can help you to compress a video on Mac is VLC. Including some old ones such as WMV, YUV, and 3GPP2, it supports most video formats. To control the file properties, it offers more options compared to QuickTime Player. You can customize the codecs, bitrate, and audio channel for instance. However, if you know little about video encoding, we don't recommend you play around with these options. Here are the steps to compress video files Mac on VLC.
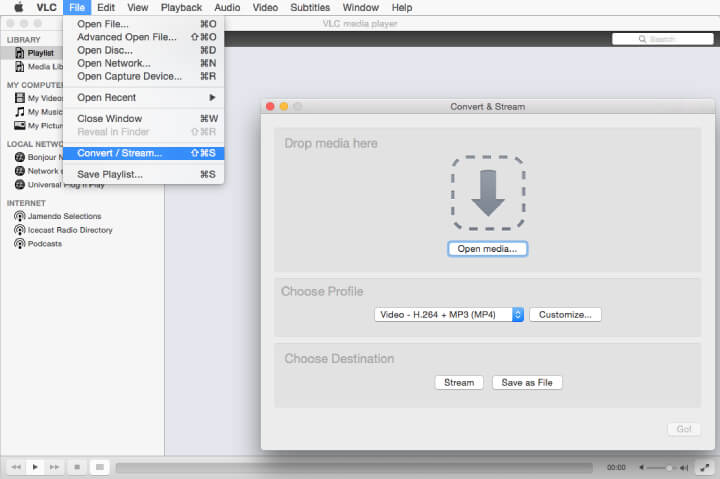
Step 1: On Mac, open the VLC media player. From the top menu bar, hit the “File” button. After that, click the “Convert/Stream” option from the drop-down menu.
Step 2: Choose the source video that you want to compress its size on Mac after clicking “Open media”.
Step 3: Select video – H.264 + AAC by going to the Choose Profile section.
Step 4: Choose the target output file folder after navigating to the Choose Destination section.
Step 5: VLC will start compressing your video on Mac once you click on “Save”.
Way 5: How to Compress a Video File on Mac with HandBrake
HandBrake is one of the most popular compressors and has been around for years. This program is popular because it's a simple and free video compressor for Mac. You can follow the given steps to compress a video file on Mac with HandBrake once you have downloaded it and installed it in your Applications folder.
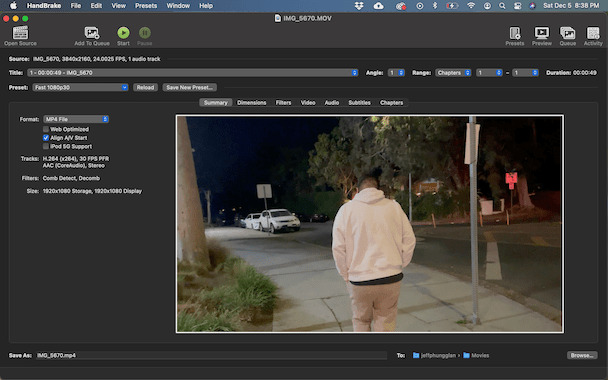
Step 1: Launch HandBreak on your Mac.
Step 2: Navigate to your video and click “Open” in the popup window.
Step 3: In the dropdown menu, you can choose from one of the Presets or the tabs above your video, and you can make your adjustments.
Step 4: At the bottom of the window, you can rename your video and select where you want to save it.
Step 5: Click the “Start” button at the top after you have adjusted all of your settings.
Way 6: Compress Video on Mac Using Clideo
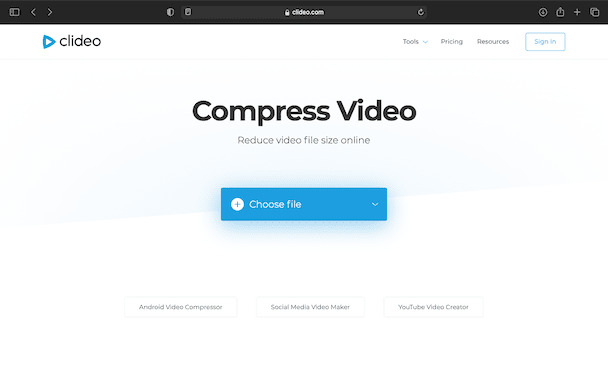
The free online compressor, Clideo is another option you have. You can upload a video using your browser as long as the video you want to compress is already under 500MB and Clideo will do the rest. And there is no software to install which is the best part. Here are the steps to compress video on Mac using Clideo.
Step 1: Go to “Clideo.com” in your browser.
Step 2: Select the video you want to compress by clicking on “Compress > Choose file”.
Step 3: Click “Edit result” if you want to make any adjustments after previewing the video.
Step 4: Click “Download” when you are happy with the quality of the video.
Way 7: How to Compress a Video on a Mac by FreeConvert
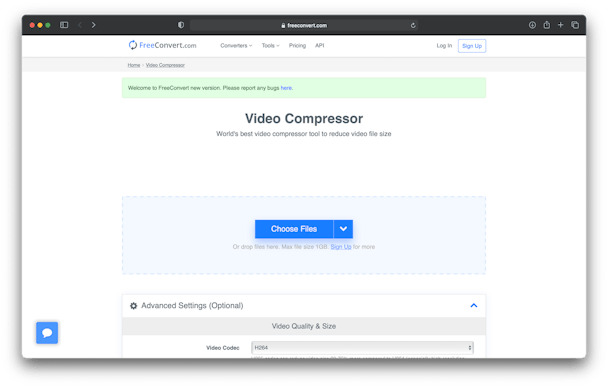
As there is no app you need to install, browser-based converters like FreeConvert make it easy to compress your videos. You can upload videos up to 1GB which is the bright side of Free Convert. But it does tend to compress your video a little more meaning you will probably notice some of the compression in the video quality although you get a little more control over the conversion settings. Follow the given steps to compress a video on a Mac by FreeConvert.
Step 1: Navigate to “FreeConvert.com” in your browser.
Step 2: After that, click on “Choose Files > Select the File > Upload”.
Step 3: You have to adjust your Output settings.
Step 4: Tap “Compress Now”.
Part 3: FAQ to Compress Video Mac
1. Is it possible to compress a video on Mac without losing quality?
Yes, it is possible to compress a video on Mac without losing quality. By using Eassiy Video Converter Ultimate, you can compress your video on Mac without losing its original quality.
2. How can I compress a video file to email on a Mac?
The easiest and quickest way of compressing a video file to email on Mac is by creating a zip file. All you have to do is install a zipping tool on your Mac and you are good to go.
3. How can I make a video smaller without compression?
There are a few other options you can try instead if you still need to make your video file smaller but you don't want to compress it anymore. Trim the video down is the first. You can use a video editor to cut them out, reducing the file size if there are sections of the video often at the beginning or the end that you don't need. Reducing the file size to a smaller format such as 720por 480p is the second option. When you choose to compress your video, this option is often presented. Choosing a lower resolution is an excellent way to reduce the file size without a noticeable loss in quality if you don't plan to play the video on a large screen.
Conclusion:
In this article, we have shown you how to compress a video on Mac easily. Among the methods described above, we would recommend you use Eassiy Video Converter Ultimate. Without losing the quality, this software can compress a video easily and quickly. You can also edit your video, convert, and much more with this tool besides compressing.