
Updated on 2024-01-05
views
5min read
Google Photos is a reliable and sophisticated platform that allows individuals to securely store and distribute their photographs. Using facial recognition, timestamps, geolocation, and other distinct attributes, Google Photos can intelligently organize your pictures into various albums. Nevertheless, users may experience frustration and annoyance if their images are inexplicably absent from Google Photos. Although it is unfortunate, the disappearance of photos on Google Photos is a typical issue that users may face. It can be heartbreaking to lose valuable photographs. However, you can recover deleted Google photos via some methods. In this article, we are describing how to recover photos from Google account. After reading this article, you will be able to easily perform Google Photos recovery.
Part 1: Can You Recover Photos from Google Account?
It is indeed feasible to retrieve photos from a Google account. In case you have erased a picture from your Google Photos account, it will stay in the "Trash" folder for a maximum of 60 days, following which it will be permanently deleted. To recover deleted photos, select the image and press the "Restore" button.
If the 60-day limit has already elapsed, you can still attempt to retrieve your deleted photos by contacting Google support. Depending on the deletion's circumstances, they may be able to assist you in recovering your missing photos.
It's crucial to keep in mind that removing a photo from your Google account will also delete it from all the devices that were synced with the account. Therefore, it's necessary to ensure that you have backed up your pictures before eliminating them.
Part 2: How to Recover Deleted Google Photos After 60 Days?
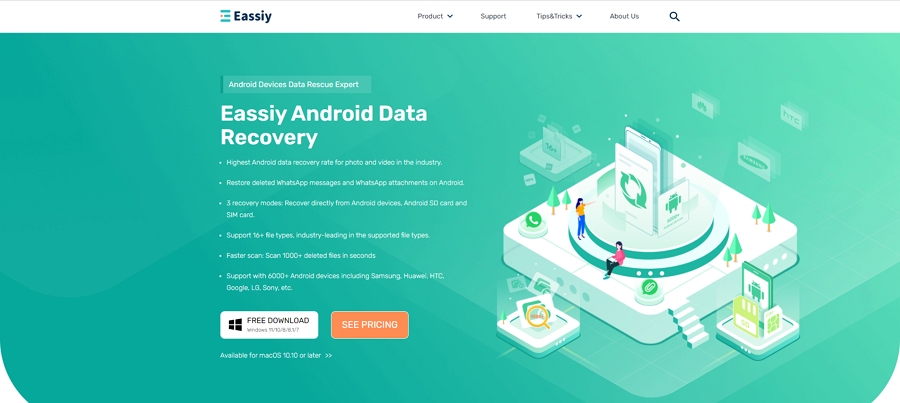
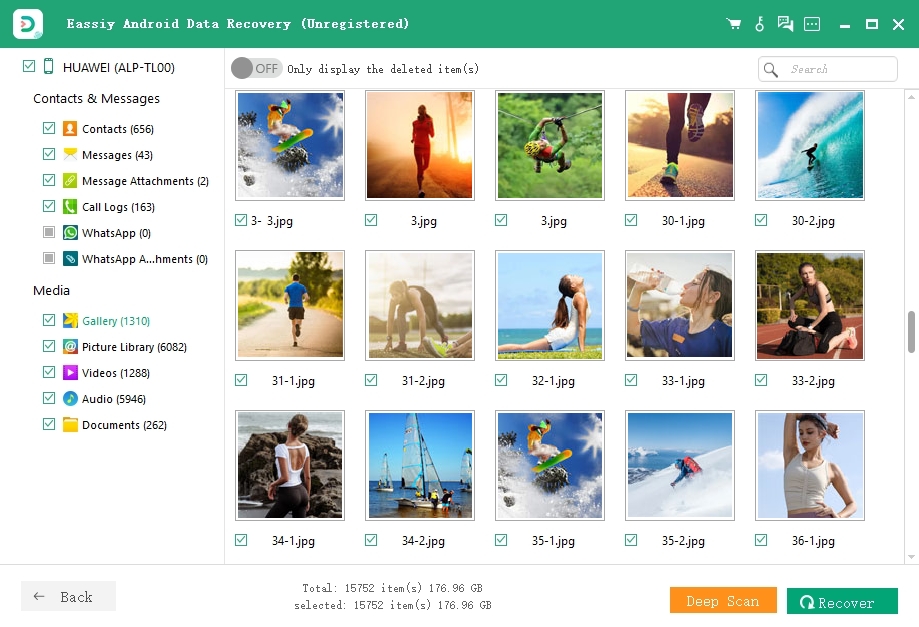
Eassiy Android Data Recovery is the ideal solution for recovering deleted photos on Android phones. This software is highly regarded in the industry, supporting more than 16 file types, such as photos, videos, audio, contacts, messages, call logs, and attachments. It stands out as the leading software in the industry with the highest recovery rate for photos and videos on Android devices. With three recovery modes, it enables you to recover data directly from Android devices, as well as from Android SD cards and SIM cards. Moreover, Eassiy Android Data Recovery is compatible with over 6000 Android devices and offers fast scanning speed to its users.
Key Features:
- Restores more than 16 file types, including photos, without any data loss.
- No technical skills are required to execute phone photo recovery.
- Offers three recovery modes that permit you to recover data from your Android device, including files that were previously deemed unrecoverable, as well as from your SD card and SIM card.
- You can employ the preview before recovery feature to choose the data you wish to recover initially.
- The Android data recovery function encompasses the capability to recover social app data, including WhatsApp messages and attachments.
Here are the steps to recover deleted Google photos
Step 1: To acquire and install the software version that corresponds to your system, click the button provided on the official webpage.
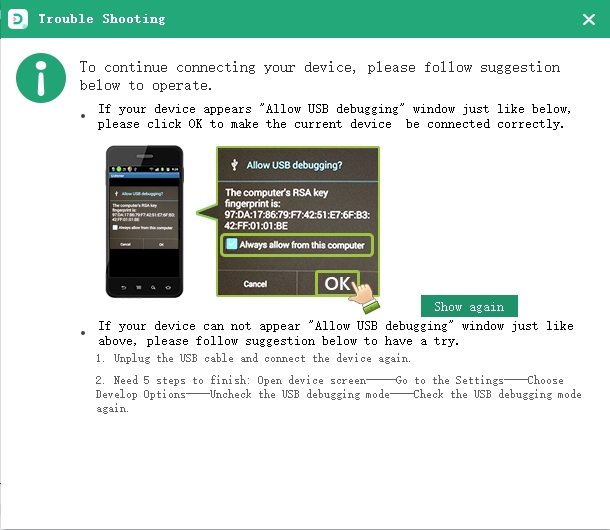
Step 2: Initially, connect your Android device to your computer, and subsequently activate "USB debugging" by navigating to the corresponding option on your phone.
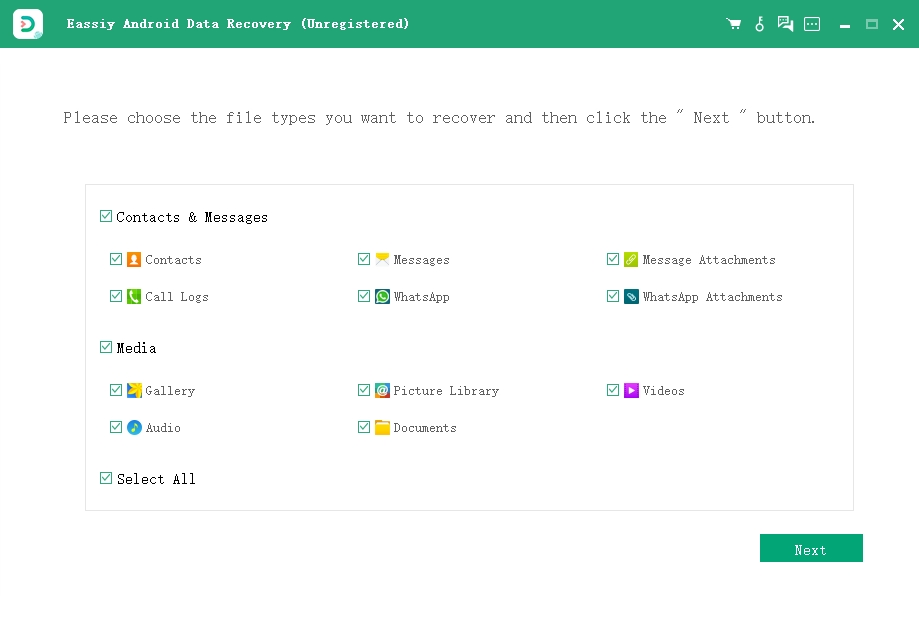
Step 3: After you have linked your Android device to your computer, choose the file category that you intend to restore, scan for any deleted items, and click on "Next."
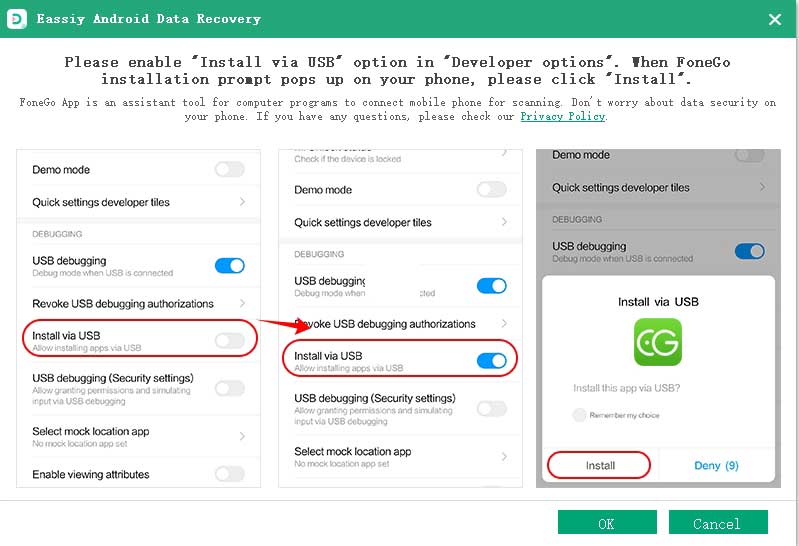
Step 4: Now enable "Install via USB" in the developer options and subsequently tap on "Install" to install Eassiy App when the pop-up appears on your Android device. Then allow Eassiy access to your device. click "Scan Authorized Files" to start scanning.
Step 5: It is crucial to maintain a connection between your phone and the system during the scanning process. Following the initial scan, verify the presence of the data you seek. If it is absent, press "Deep Scan" to hunt for any concealed data.
Part 3: Google Photos Recovery on Android Phone
The majority of users are aware that files erased from Google Drive are retrievable from the trash folder for only 30 days, and pictures removed from Google Photos are accessible in the trash for only 60 days. After this duration, the files are permanently deleted. Follow the below steps to perform Google Photos Recovery on Android Phone.
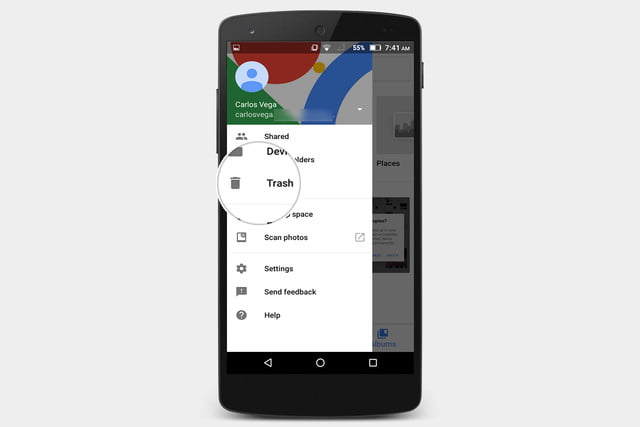
Step 1: To begin, launch the Google Photos app on your mobile device.
Step 2: Next, locate and tap on the three horizontal menu icons located in the top-left corner of the screen, and then select the "Trash" option from the menu.
Step 3: Navigate to the section containing all of the deleted photos and choose the ones that you wish to recover.
Step 4: Once you have chosen the deleted photos by pressing and holding the image, click on the "Restore" button to recover them.
Step 5: Restoring your deleted photos using this method will place them back into the original folder from which they were deleted.
Part 4: Google Photo Recovery on iPhone
Google Photos on iOS is similar to its Android counterpart, with only a few differences. Consequently, the photo recovery process is nearly identical on both platforms. Here are the steps to perform Google photo recovery on iPhone.
Step 1: Launch Google Photos from your home screen.
Step 2: Tap on the menu option located at the top-left section of the app window.
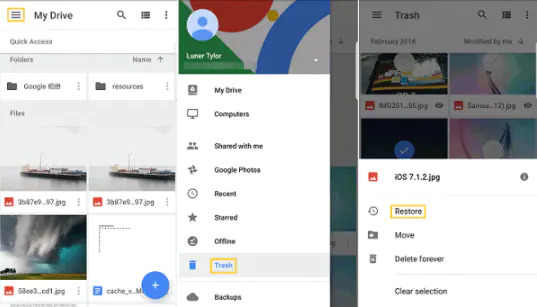
Step 3: Once you tap on the "menu" option, a list of choices will appear, and you can find "trash" among them. Click on "trash" to open the folder.
Step 4: To restore the necessary photos, start by selecting one of the photos and holding it. Once it's selected, you can proceed to tap on all the other photos that you need.
Step 5: Once you have made your selection, go to the bottom of the screen and click on "restore." This will promptly restore all the selected photos to their original folders within the app.
Part 5: Recover Photos from Old Google Account on Windows/Mac
To recover pictures from Google Photos using your computer, it's advisable to utilize the Google Photos web page. This way, you can retrieve your photos quickly without any concerns about "Google Photos not syncing." Operating on the web requires only a few straightforward steps. Follow the below steps to recover photos from old Google account on Windows/Mac.
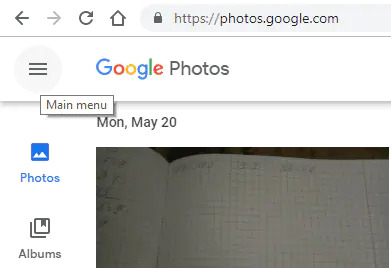
Step 1: Visit "photos.google.com" on your computer.
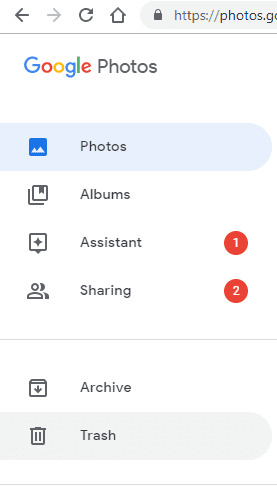
Step 2: Click on the menu option, which is illustrated in the image.
Step 3: Select "Trash" from the available options, as demonstrated.
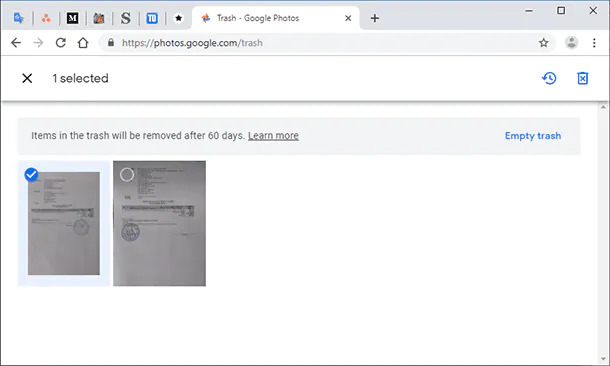
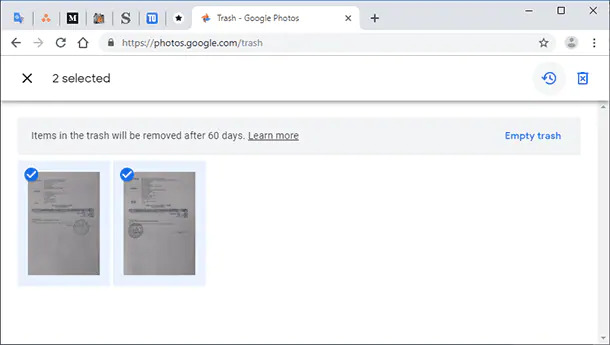
Step 4: Once you open the trash, all the deleted photos will become visible. You can then select the photos that you want to restore from the available options. Upon selecting a photo, the color of the button will change. You can choose to select a few or all the photos in a single attempt, as demonstrated.
Step 5: Once you have selected the desired photos, simply click on the restore option, which is represented by a rounded arrow in the top right corner. This action will restore your Google photos to the same folder from where they were previously deleted.
Part 6: Google Photos Recovery from Recycle Bin
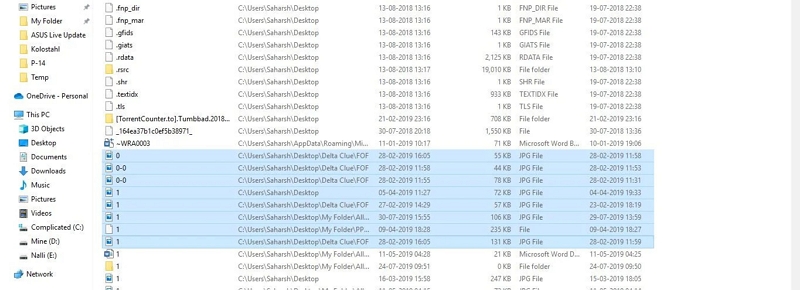
The recycle bin is a component in computer operating systems such as Windows and macOS, which permits users to store deleted files and folders temporarily. Instead of being immediately and permanently erased from the system, deleted items are transferred to the recycle bin, where they can be easily restored whenever necessary. The recycle bin acts as a safety feature for unintended deletions, empowering users to retrieve files that were erased mistakenly. Here are the steps to perform Google Photos recovery from recycle bin.
Step 1: To access the recycle bin, locate and click on the "Recycle Bin" icon on your desktop. If you cannot find the icon, you can type "recycle bin" into the search box and press enter to locate it.
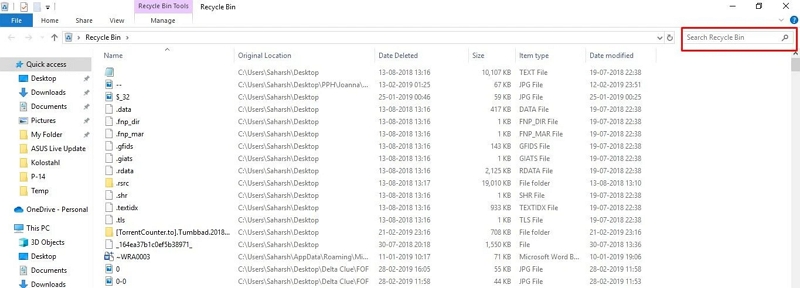
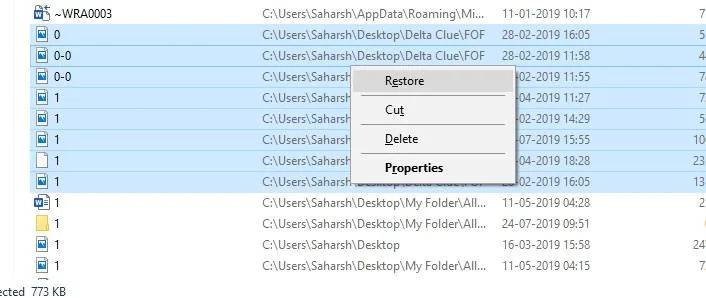
Step 2: Once you have opened the Recycle Bin, you can search for the photos you wish to restore. To facilitate your search, you can sort the files by date, size, item type, or date modified. Additionally, you can use the search bar, as shown in the image, to locate the desired photos more quickly.
Step 3: As demonstrated, you can choose to select a single photo, multiple photos, or all photos at once.
Step 4: Once you have finished selecting the photos you wish to recover, simply right-click the mouse and select the "Restore" option. This will restore the Google photos to their original location from where they were deleted.
Part 7: How to Recover Deleted Photos from Google Photos Support
If you need to recover deleted Google Photos that have been in the Trash folder for more than 60 days, it may be challenging to restore them. However, you can seek assistance from the Google support team. It is worth noting that Google ensures the safety of your data, and in certain cases, you can recover Google Photos up to 21 days after they were permanently deleted.
If you have a legitimate reason to recover your lost photos, you can contact the Google support team and request their assistance. If your request is valid, they will restore your photos from Google Photos. Follow the below steps to recover deleted photos from Google Photos support.
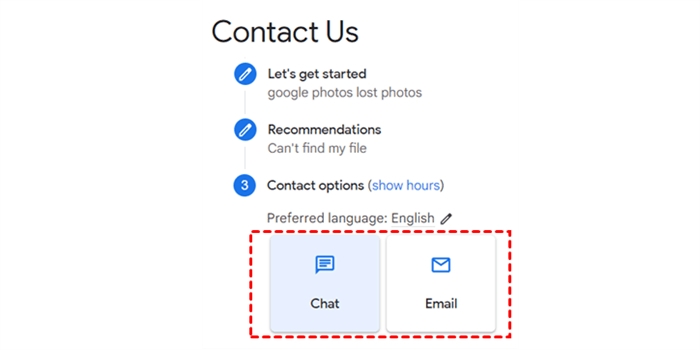
Step 1: Visit support.google.com/drive/.
Step 2: Scroll down until you see the "Need more help" option.
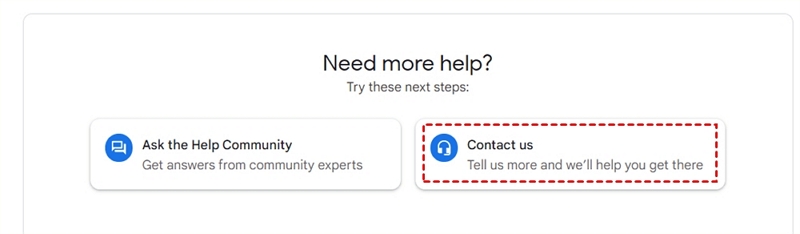
Step 3: Click on "Contact us" and describe the issue you are facing.
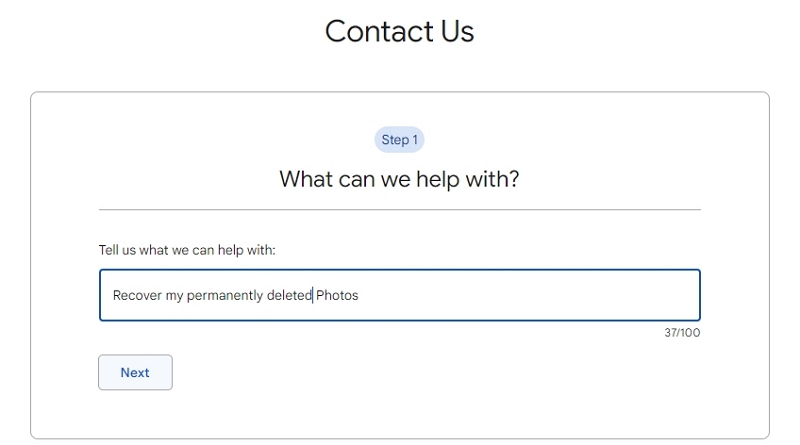
Step 4: Next, click on "Next". If you are unable to find a solution in the available resources, proceed to the next step.
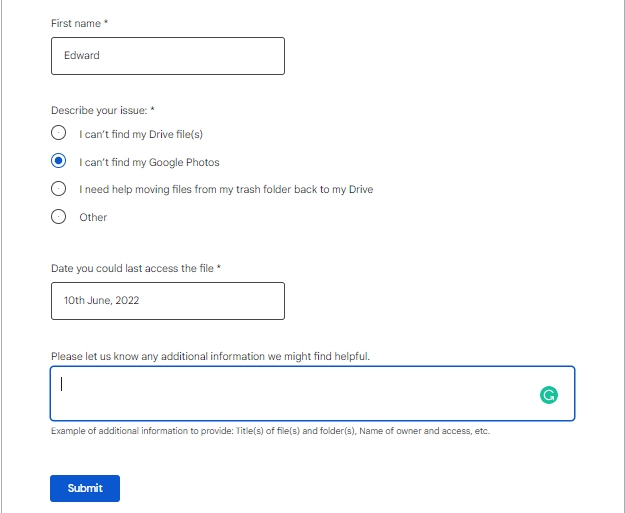
Step 5: Choose "Email" support from the available options.
Step 6: Please complete and submit the form below to contact Google Support and receive assistance with your issue.
Part 8: Troubleshooting Google Photos Recovery Issues
While recovering your Google photos, you might encounter some common error messages and problems like Item not found, No backed-up photos found, Unable to restore, Syncing issues, etc. If you encounter these issues, you can follow the below-given troubleshooting steps to fix Google Photos recovery issues.
- Check the "Trash" folder: Deleted photos are moved to the trash folder for 60 days. Launch Google Photos and click the three-line icon in the top-left corner, then choose "Trash". If your deleted photos are there, you can restore them.
- Check device folders: If you synced your photos to Google Photos, the photos may still be in the device folders even if you deleted them from the app.
- Check storage space: Ensure that your Google account has enough storage space to store the photos you're trying to recover. If you've reached your storage limit, you won't be able to recover the photos.
- Check account activity: If you suspect that someone else has deleted your photos, check your account activity for any unauthorized access. Go to myaccount.google.com/security and review the activity log.
- Check internet connection: Slow or unstable internet connections can cause syncing or uploading issues. Try connecting to a more stable network or restart your router.
- Contact Google Support: If the above steps don't work, contact Google Support for further assistance. Visit support.google.com/photos for more information.
Part 9: Backing Up Google Photos: Best Practices
To avoid losing your precious photos and videos, here are some tips on how to regularly back them up on Google Photos:
- Enable automatic backup: In the Google Photos app, turn on the "Back up & sync" toggle to ensure that all new photos and videos are automatically backed up as soon as they're taken.
- Choose backup quality and size: Select "Original" in the "Upload size" option of the "Back up & sync" settings if you prefer to back up your photos in their original quality, but keep in mind that this will use up more storage space.
- Regularly check backup status: Ensure that all your photos and videos are being backed up by checking the backup status in the app's "Photos on device" section. If any files haven't been backed up, restart the backup process or check for connectivity issues.
- Keep device folders clean: Deleting photos and videos from your device folders won't delete them from Google Photos if they've been backed up. Keep your device folders tidy to free up space and maintain an up-to-date backup.
- Use the Google Photos website: If you need to back up a large number of files from your computer, sign in to your Google account on photos.google.com and upload them from there.
By following these tips, you can ensure that your photos and videos are regularly backed up on Google Photos and avoid losing them in the first place. Also, you can consider other backup solutions like manual downloads, external hard drives, and cloud storage solutions such as Dropbox or OneDrive, etc.
Conclusion
Google Photos is a highly favored choice for cloud storage, enabling users to store their photos and videos from phones, iPads, or computers on the cloud. However, several circumstances may cause significant data loss for users, leaving them uncertain of how to recover lost data from Google Photos. In this article, we have described how to recover photos from Google account. The previously mentioned techniques are likely to assist you. If you want to retrieve deleted Google photos after 30 or 60 days, it may be worth giving Eassiy Android Data Recovery a shot.