
Updated on 2025-04-29
views
5min read
In this age of subscription-based online streaming platforms and cable connections, OTA TV comes as a breath of fresh air. However, it is suitable for watching live TV shows. Besides, it is free as long as you use a TV antenna. You cannot record TV shows or watch replays. What is the solution if you want to record and watch OTA TV shows later? This article resolves the issue and discusses four methods of recording OTA TV shows for offline watching. Please learn about a unique screen-recording software solution that permanently lets users save OTA TV shows on their devices.
Before we discuss the solutions, let us understand how OTA TV works.
Part 1: How Does OTA TV Work?
As the name suggests, OTA TV is completely free. All you need is the right equipment to receive broadcast signals. Usually, TV stations broadcast signals for free. Anyone can pick up these signals using an indoor or outdoor antenna. Receiving OTA TV signals does not require users to sign contracts or pay subscriptions. For example, you have free channels like ABC, NBC, CBS, FOX, PBS, CW, and many more.
The Equipment Required:
You will need the following equipment to receive OTA TV signals.
- A TV with a Digital Tuner: Most TVs since 2007 have one. To check whether your TV is compatible, look for "ATSC" support.
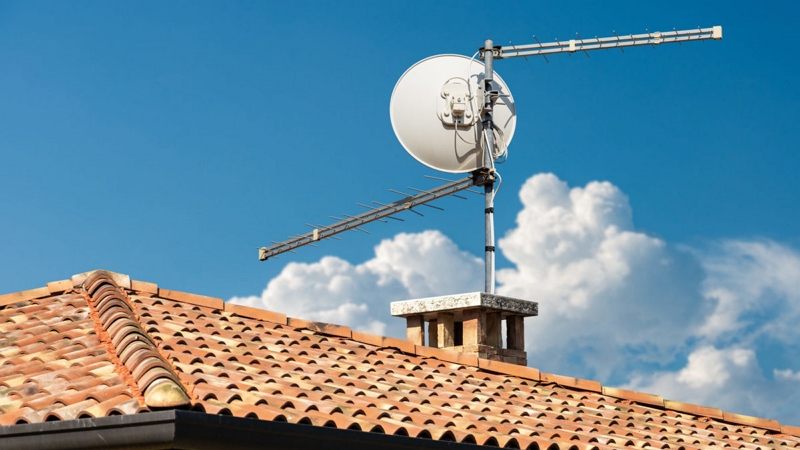
- An antenna: Your TV needs an antenna to receive the broadcast signals. If you live in cities, an indoor antenna should suffice. Otherwise, you will need an outdoor antenna.
Point to Note: OTA TV enables viewers to watch live TV shows. Therefore, you will need a DVR (Digital Video Recorder) to record them.
Getting Started:
Step 1: Plug in the antenna. Switch on the TV and scan for channels. Then, go to Settings > Antenna > Auto-Tune.
Step 2: Watch free HD TV.
Free Channels:
In major cities such as New York, Los Angeles or Chicago, you can receive over 50 free channels from major networks and sub-channels such as MeTV and Comet. However, if one lives in a rural or suburban area, the number of free channels will be reduced to around 30 depending on the distance from the transmission tower. You can check your reception quality by visiting sites like FCC DTV Maps or AntennaWeb.
Pro Tip: OTA TV does not require subscriptions. You get local news, sports, and primetime shows for $0. The only cost is purchasing an antenna, which is a one-time purchase between $20 and $100.
Pros: No subscription fees, cost-effective option for viewers who watch live TV
Cons: No choice of programs. You watch what the channels broadcast
Common Myths About OTA TV:
Myth 1: Only a few channels are available for viewing.
Reality: No, you can get as many as 30+ HD channels for free, depending on your location.
Myth 2: You need a fancy antenna to receive broadcast TV signals.
Reality: No, a simple antenna worth $20 often works in most cities.
Myth 3: The broadcast is SD or low quality.
Reality: No, OTA is 1080p/4K uncompressed, much better than cable TVs.
Bottom Line:
- OTA TV is cost-effective. Once you buy an antenna, it is 100% free.
- You do not incur any recurring bills like cable TV or online subscriptions.
- You get better picture quality than cable TV.
Part 2: Is It Possible to Record OTA TV and Watch It Later?
Yes, you can. You will need additional equipment. We shall discuss four ways to do so.
Method 1: Use Eassiy Screen Recorder Ultimate (Fastest to Start)
Using screen recording software is a convenient solution for recording and watching OTA TV shows later. Eassiy Screen Recorder Ultimate is an excellent option. Let us discuss its features. Users can record screen activity in 4K resolution. It is ideal for recording tutorials, online games, and software demos. You can record TV shows also. Eassiy supports 60 FPS for smooth playback.
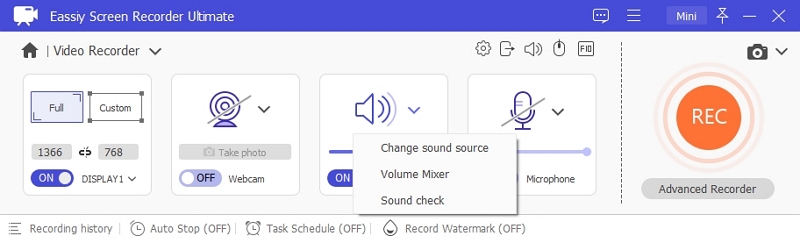
Eassiy allows for multi-source audio. Users can capture system sound and microphone separately and simultaneously depending on their preferences. The “Noise Reduction” feature filters background noise to enable clearer voiceovers.
Eassiy also enables users to screen-record in various modes. For example, you can use the “Full Screen” mode to record entire displays. Similarly, you can select specific regions using the “Custom Area” option. The Picture-in-Picture mode works for face cam overlays.
Key features:
- Scheduled Recording: Set start/stop times for webinars or unattended captures.
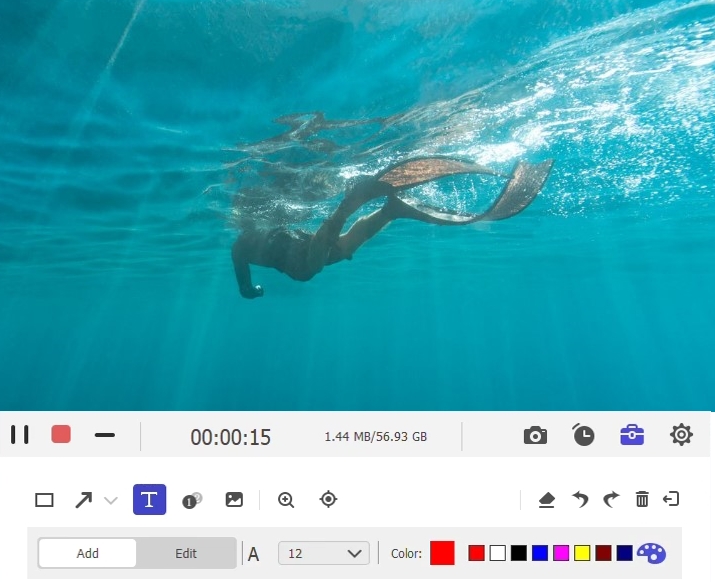
- Real-time Annotation: Highlight, draw, and add text during recording—no extra software needed.
- Game & Webcam: Low CPU use, HD webcam capture, and adjustable settings for smooth gameplay recording.
- Multiple Formats: Save in various formats; share via YouTube, Dropbox, or Google Drive.
- Privacy & Security: Add watermarks and password protection to safeguard your content.
Equipment required:
Eassiy does not require any separate equipment to work. Users can download the software onto their PCs. However, your PC must have a TV tuner or streaming access to OTA channels.
Step-by-Step Process:
Step 1: Download Eassiy Screen Recorder Ultimate from the official website. Follow the instructions on the screen to install it on your PC. While you can opt for a free trial, purchasing the software ensures you enjoy all its benefits.
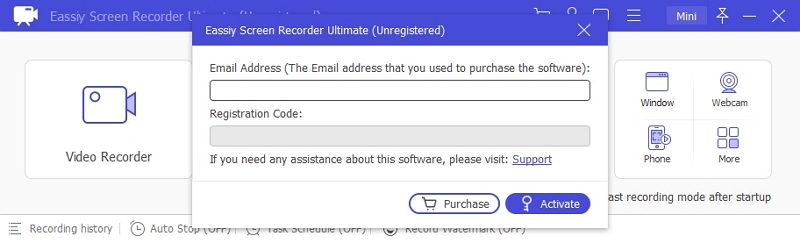
Step 2: Open Eassiy and select “Video Recorder.” Look to the left of your screen and select between “Full” and “Custom.” The Full option allows full-screen recordings, whereas you can select specific recording areas when you choose Custom.
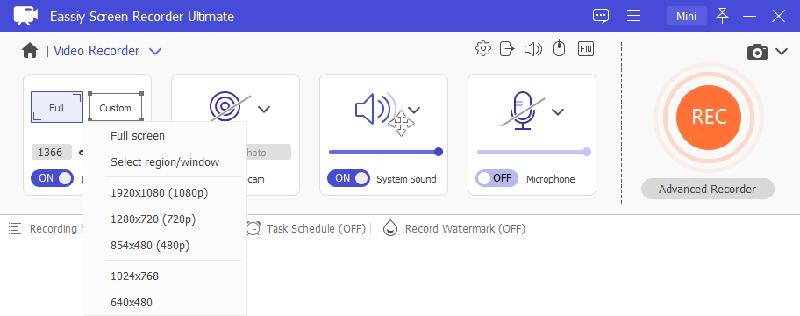
Step 3: Continue on the same screen and select the “Microphone” icon. Switch on “System Sound.” Add “Microphone” to record audio.
Step 4: Switch to the "Preferences" option to select your preferred hotkeys to simplify your screen recording activities.

Step 5: Access OTA TV on your PC to view your live TV show. Click "REC" to start recording the desktop screen. Click the "Stop" button to finish the recording.
Now, you can view your recording offline. This method is the fastest to start.
Advantages: Easy setup, no extra hardware required
Disadvantages: Manual control, PC must stay on
Method 2: Standalone OTA DVR (e.g., Tablo DVR)
The easiest method to record OTA TV shows is using a standalone OTA DVR, such as Tablo DVR.
Equipment Needed:
- You will need an OTA antenna (either indoor or outdoor).
- A standalone DVR, such as Tablo DVR
- An external storage device, such as a USB hard drive
- A streaming device, such as Roku or Fire TV.
Steps:
Step 1: Connect your OTA antenna to the Tablo DVR by plugging it into the DVR’s coaxial input.
Step 2: Connect your DVR to the power source and the network. Ethernet or Wi-Fi can connect the Tablo DVR to your router.
Step 3: Plug a USB hard drive into the DVR to save your recordings.
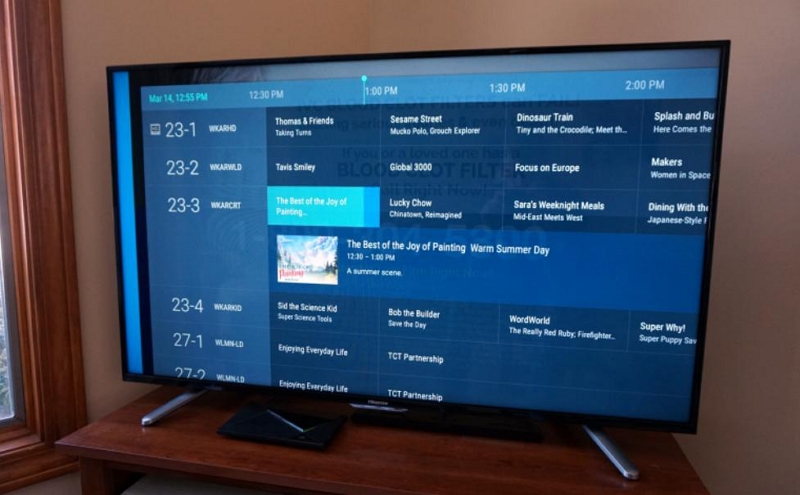
Step 4: Install the Tablo app on your streaming device. Follow the instructions on the screen to set up OTA TV.
Step 5: Browse the TV guide, select the OTA TV show you want to record, and click "Record."
Advantages: Simple method, does not require a PC, and works with all streaming devices
Disadvantages: Requires a subscription ($5 per month) for advanced guide data
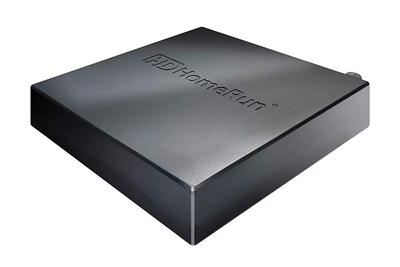
Method 3: PC-based DVR with Plex + HDHomeRun (Most Flexible)
The PC-based DVR with Plex + HDHomeRun is the most flexible method for recording OTA TV shows.
Equipment Needed:
- The OTA antenna is a common feature because you cannot access OTA TV without it.
- A digital TV tuner like HDHomeRun lets you watch live TV on PCs, smartphones, and tablets.
- Plex Media Server (on PC/NAS) plus a Plex Pass subscription.
- External storage device for recordings.
Step 1: Connect your antenna to HDHomeRun by plugging it into the tuner.
Step 2: Connect HDHomeRun to the internet using Ethernet or Wi-Fi,
Step 3: Install Plex on your PC/NAS and activate Plex Pass. Go to Settings – Live TV & DVR – Set Up.
Step 4: Scan for channels. Plex will detect the HDHomeRun and scan for OTA channels.
Step 5: Use the Plex TV guide to set your recordings.
Step 6: The recordings are saved to your Plex library, which is accessible on any device. You can transfer the recordings to an external storage device.
Advantages: Full-featured DVR integrates with Plex.
Disadvantages: It requires a Plex Pass ($5 per month or go for a lifetime subscription).
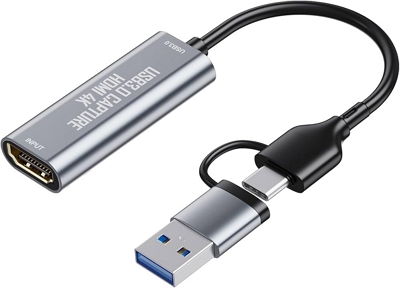
Method 4: USB Tuner + OBS Studio (Free and DIY)
The USB Tuner + OBS Studio is a free and DIY method.
Equipment Needed:
- OTA Antenna
- USB Tuner
- OBS Studio (free software)
- PC with storage
Step 1: Connect the antenna to the USB tuner and the PC.
Step 2: Go to the tuner manufacturer's website and install the appropriate drivers.
Step 3: Open OBS and go to Sources – Add – Video Capture Device. Select your tuner as the source.
Step 4: Play your OTV TV show and click “Start Recording” in OBS to record the TV show manually.
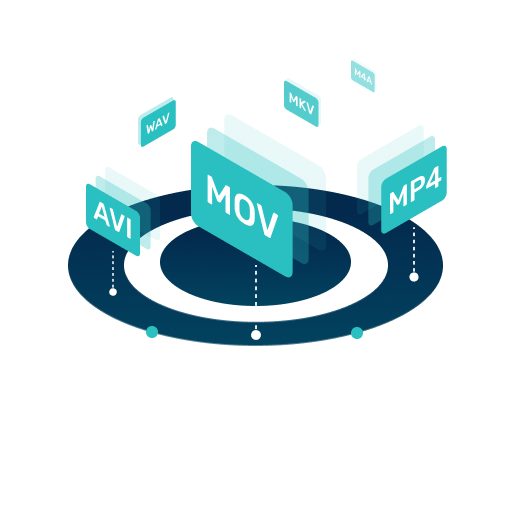
Step 5: The recordings are saved as MP4 or MKV files on your PC. You can watch them offline.
Advantages: Free, and does not need any subscription
Disadvantages: The recording is manual. You do not have any guide. Besides, scheduling the recording is not available.
This tabular comparison should simplify matters.
| Method | Ease of use | Cost | USP |
|---|---|---|---|
| Eassiy Screen Recorder Ultimate | Most convenient | Medium cost | Fastest to start |
| Standalone DVR (Tablo) | Easiest | Medium cost | Streaming facility |
| PC-based DVR (Plex + HDHomeRun) | Moderate | Medium cost | Best for tech-savvy users |
| USB Tuner + OBS | Moderate | Free | DIY method |
Part 3: FAQ
Q1. How can I get OTA channels without an antenna?
You can get OTA channels without an antenna but have limited options.
- Free streaming services like Tubi TV, Pluto TV, Xumo, or The Roku Channel can be used. Services like Crackle and Peacock (Free Tier) offer some NBC/CW content. PBS.org and PBS Kids offer PBS shows online.
- Networks like ABC, NBC, CBS, and FOX have free apps, but you might require a cable/streaming login. Some networks like CBS News and Fox Sports offer free episodes without a login.
- YouTube, Hulu + Live TV, Fubo TV, and DirectTV Stream offer local channels in most markets.
Q2. How far can an OTA antenna reach?
Factors like terrain, obstacles, signal strength, antenna height, frequency band, and amplifiers affect an OTA antenna’s reach. Tall buildings and hills can block signals. Placing your antenna at a height gives it a better range. The frequency band is crucial. For example, VHF travels faster but requires a larger antenna, but UHF is more common and has a shorter range.
| Antenna Type | Range in miles | Best for |
|---|---|---|
| Indoor (Flat/leaf) | 10 to 30 | Urban and suburban areas |
| Amplified Indoor | 30 to 50 | Weak signal areas |
| Attic-mounted | 30 to 60 | Suburban/rural |
| Outdoor (Roof) | 50 to 80+ | Rural and remote areas |
| Long-Range | 80 to 150+ | Extreme distances |
Q3. What are the considerations when choosing an OTA DVR
- Look for storage capacity – Ideally, the minimum storage should be 500GB to 1TB. It impacts your recording quality. For example, HD uses 5GB to 8GB per hour, whereas 4K uses 15GB to 20GB per hour. The minimum retention time for a 1TB hard disk is around 150 to 200 hours of HD content.
- Look for tuners: Solo viewers can go for 1-2 tuners, whereas families might require four tuners.
- User Interface: Look for a simple user interface. Some tuners come with a paid guide.
- Cost: You must consider hardware price, subscription fees, and hidden costs.
Conclusion
OTA TV is best for watching TV shows live. It does not cost much because you can set up an OTA TV with minimum equipment like a TV and an antenna. The content is available for free. However, OTA TV has one disadvantage: it does not offer a recording facility. You will need a DVR to record OTA TV. This article discussed four methods to record and watch OTA TV shows offline.