
Updated on 2026-07-03
views
5min read
Does taking scrolling screenshots Windows 10 sound like a myth to you? Well, you can easily capture normal screenshots on Windows using different commands like Ctrl + PRTSC or Fn + PRTSC. However, taking a scrolling screenshot on Windows 10 is different as you need to capture a whole page in one shot, and we can’t take multiple screenshots. There are several tricks that you can utilize to take a pc scroll screenshot in Windows 10. You can either use advanced third-party tools or built-in tools. Irrespective of what method you're looking to use, this article has the right solutions for you. In this post, you will learn how to take scrolling screenshots on Windows 10. So, let’s start!
Part 1: Take Scrolling Screenshots on Windows With the Best Screenshot Tool
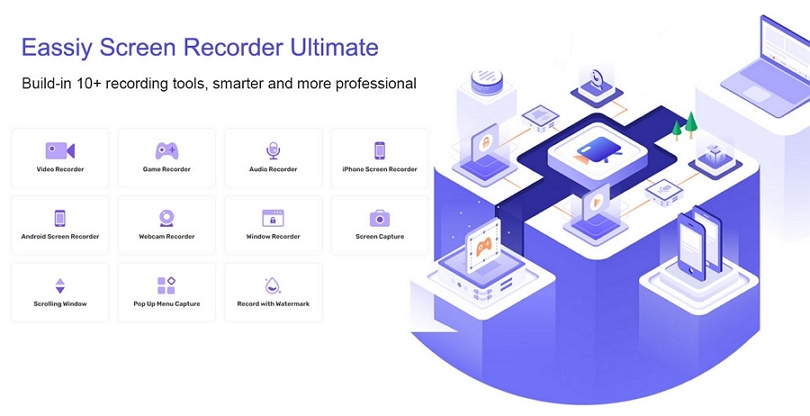
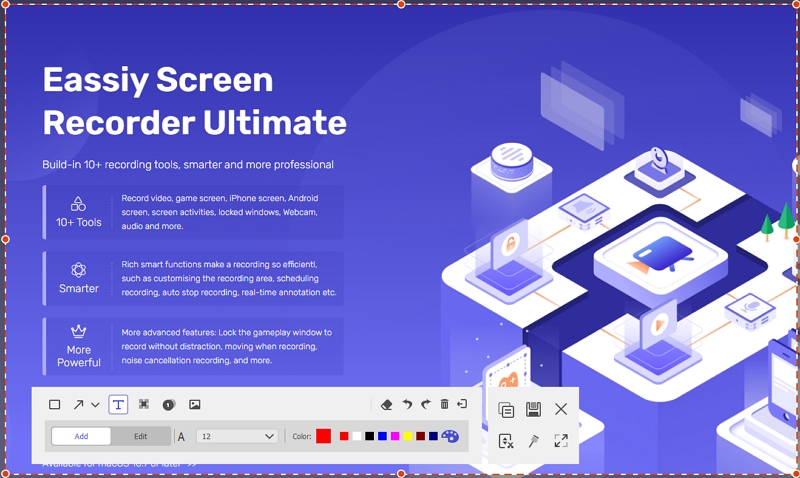
The best way to take a PC scroll screenshot on Windows is by using the powerful Eassiy Screen Recorder Ultimate software. An efficient software that always comes in handy to help you solve your daily PC screen capture problems. With Eassiy Screen Recorder Ultimate, you can take scrolling screenshots using set hotkeys, and the presence of advanced features makes it possible for users to take scrolling screenshots while recording PC screen with or without a webcam. Besides, this multifunctional software supports a plethora of screenshot tools that not only allows users to take scrolling screenshots, but also full-screen screenshots, custom screen screenshots, and pop-up menu screenshots within just a few clicks, it doesn't matter if you're not tech-savvy.
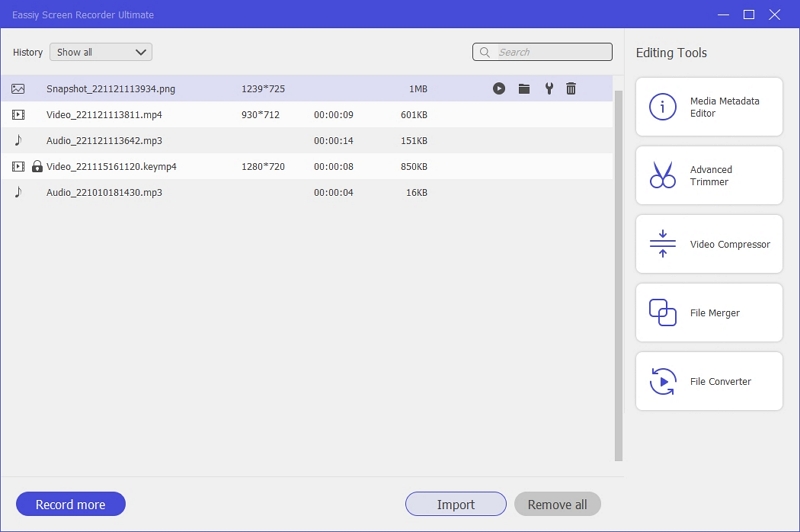
Another amazing thing about Eassiy Screen Recorder Ultimate is that it's not limited to taking scrolling screenshots on PC. You can also utilize the tool to take screenshots on your Android or iPhone from your PC. Plus, screenshots made using the tool can be edited using robust editing tools like real-time annotation and many others. There are even various formats like PNG, GIF, JPEG, etc for users to export their screenshots.
Key Features of Eassiy Screen Recorder Ultimate
- Extensive screenshot settings to take full, partial, or scrolling screenshots seamlessly.
- Provide the feature to take real-time annotations and snapshots simultaneously.
- Support different screenshot export formats including JPG, GIF, PNG, BMP, and TIFF.
- Boasts 4 screen capture modes such as Auto, Magnifier, DXGI, and WinRT
- Directly capture any video to use it as a GIF for tutorials, entertainment, etc.
- More than 10 recording tools with advanced and smart functions
How to Take a Scrolling Screenshot of a Whole Web Page on Windows?
To take a scrolling screenshot of a whole web page on Windows, try using Eassiy. Let’s see how you can use this tool to capture a scrolling screenshot on Windows 10.
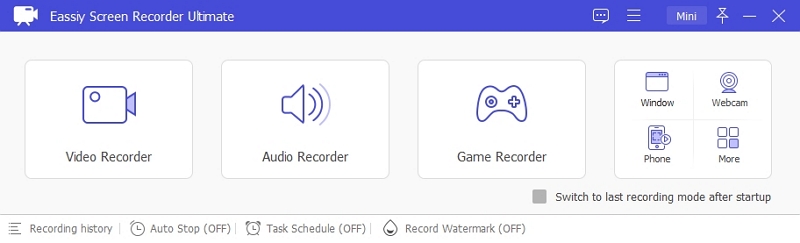
Step 1: Download the Eassiy application for Windows. Once the application installation is done, open the Eassiy Screen Recorder Ultimate on your laptop or PC. Doing this will open the Eassiy menu.
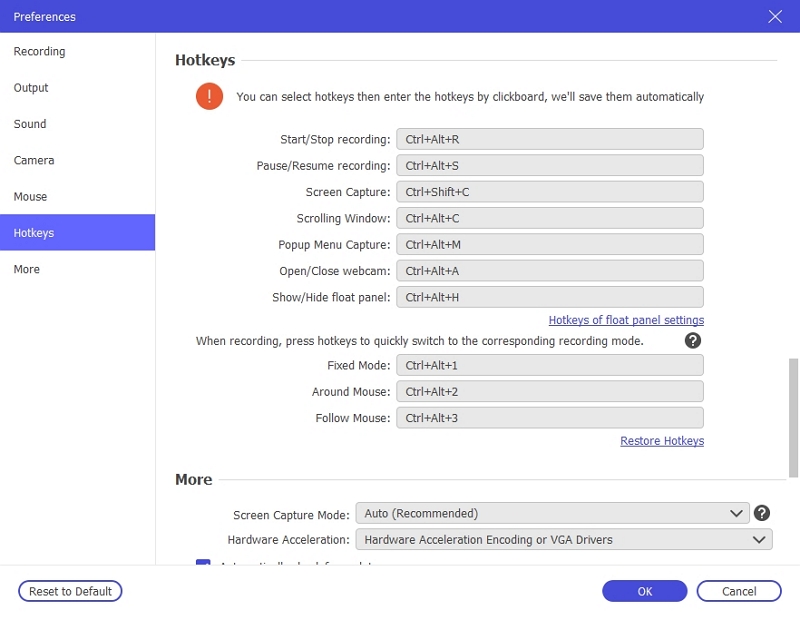
Step 2: Now click on the three-line menu icon at the top bar and select ‘Preference’. In the pop-up interface, customize screenshot settings like hotkeys, mouse tracking, and output formats. Then click OK to save the settings.
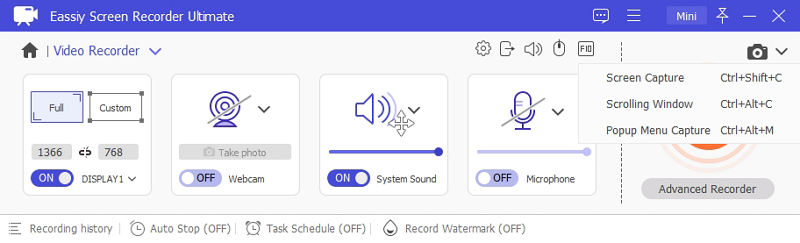
Step 3: Go to “Video Recorder”, click the crop-down menu next to the camera icon in the upper right corner, then select “Scrolling Window”. Or you can simultaneously click ‘CTRL + Alt + C to take the scrolling screenshot.
Step 5: Once you've finally taken scrolling screenshot windows, you can preview and edit the screenshot using real-time annotation features to add text, arrow, rectangle, line, text, and brush.
Finally, save the screenshot by clicking Save to upload the screenshot to your PC or export it to other platforms.
Pros of Eassiy Screen Recorder Ultimate
- Edit screenshot using advanced tools.
- Take scrolling screenshots during the screen recording process without any compromise.
- Convert the pc scroll screenshot into any format including PNG, GIF, etc.
- The software doesn't lag or compromise computer functionality.
- Many powerful and advanced recording features
Cons of Eassiy Screen Recorder Ultimate
- You need to download and install the software.
Part 2: Take Screenshot on Windows Without Software
In case you don’t want to use any external software, you can also take a Windows scrolling screenshot without using any third-party software on Windows 10. Although Eassiy Screen Recorder Ultimate is the best tool for scrolling screenshots, built-in programs like Spinning tools and Snip and Sketch can also come in handy to perform the operation.
Method 1: How to Take a Scrolling Screenshot on Windows Spinning Tool?
The spinning tool is a free and easy-to-use built-in tool that can take scrolling screenshots on Windows 10. It can be used to capture activities and web pages on a computer screen seamlessly. All you need to do is to locate the tool the Windows men and utilize the ‘Capture Scrolling Window’ feature to perform the task. The stepwise guide to taking scrolling screenshots on Windows with the Snipping tool is outlined below;
Step 1; Start your Windows computer. Then navigate to the page where you want to take a scrolling screenshot.
Step 2: Click on the ‘Windows’ icon at the bottom left corner and type ‘Snipping tool’ in the search box. Select the top result.
Step 3: Once the snipping tool pop-up appears on your PC screen, click on the drop-down icon next to ‘Mode’, then select ‘Windows Snip’.

Step 4: Drag the cursor to highlight a Window screen that you want to screenshot and left click. The Snipping tool will instantly capture everything on the page.
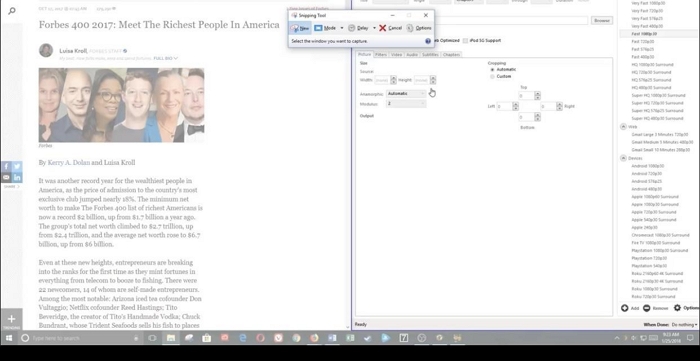
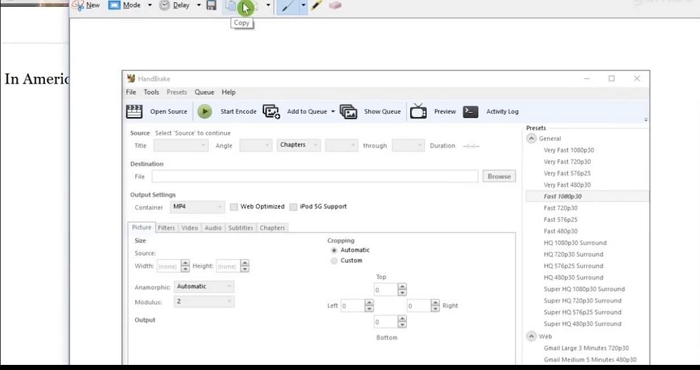
Step 5: A preview of the screenshot you made will appear on your screen. You can just edit it from there, then press the ‘Floppy disk’ icon at the top bar to save the screenshot to your PC storage.
Pros
- Support different capturing modes.
- It doesn't require installation of third-party tools.
- It's 100% free and supports helpful tools to edit the screenshots.
Cons
- It's not effective for advanced screenshot editing.
- Screenshots can't be shared directly to other platforms.
- It's an old tool. So, it might not be found on all Windows 10 PCs.
Method 2: Snip and Sketch Scrolling Screenshot Windows 10
Snip and Sketch is a new free tool on Windows 10 that is effective for screenshots. This screenshot tool allows you to take a screenshot of an entire webpage, while scrollable screenshot only allows you to take a screenshot of what’s visible on your screen. You can increase your productivity by taking screenshots of your entire screen or just a portion of it. Plus, you can annotate and crop your screenshots before saving them. To use Snip & Sketch on to take scrolling screenshots on Windows 10, just follow the step-by-step instructions explained below;
Step 1: Firstly, open the page where you want to screenshot > navigate to the bottom left of the taskbar and type ‘Snip and Sketch’, then select the tool.

Step 2: Click on the ‘Drop down’ icon at the top left corner of the Snip and Sketch tool window and select ‘Snip Now’. Then click ‘New’.
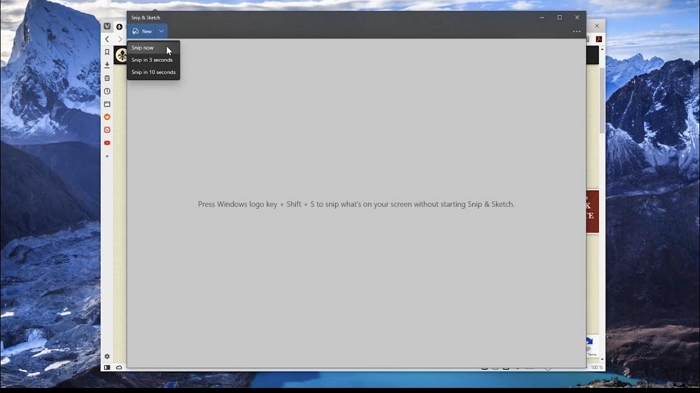
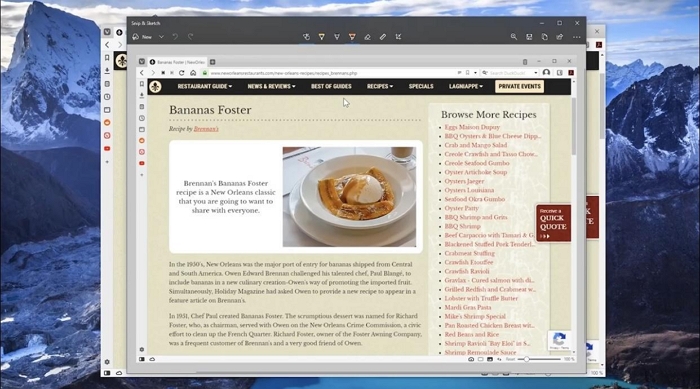
Step 3: Choose ‘Windows Snip’ from the top bar and click on the page which you want to take a scrolling screenshot of.
Step 4: Once you've successfully taken the scrolling screenshot, edit the screenshot as per requirement and save the screenshot to your PC.
Pros
- Snip & Sketch is a user-friendly screenshot tool that is built into Windows 10.
- It allows you to take scrolling screenshots of entire web pages or long documents without having to install any third-party software.
- You can choose where the screenshot will be saved, whether it be in the Pictures folder, on OneDrive, etc.
Cons
- Snip & Sketch has a tendency to freeze up my computer when I try to take a screenshot.
- It doesn't show the cursor, so it's hard to know where you're going to end up taking the screenshot.
- The drawing features are too rudimentary. You can only draw one line at a time and they don't even save in the app unless you export them as PNGs.
Part 3: Other Helpful Tools To Take Scrolling Screenshots on Windows
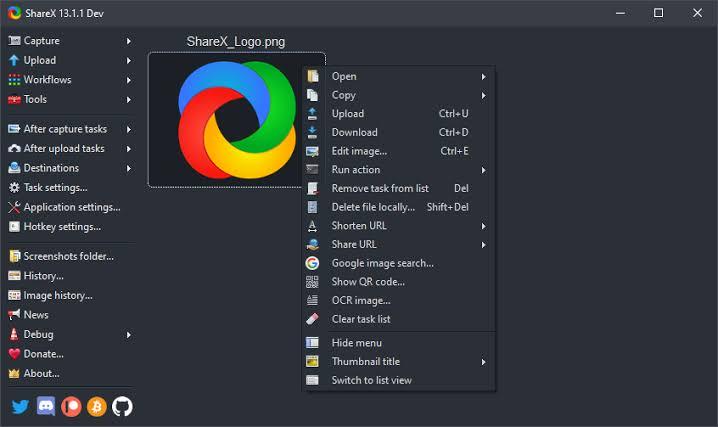
1. ShareX
ShareX is a free, open-source program that lets you take scrolling screenshots of your computer screen. You can even edit the screenshots to get rid of all the excess and extraneous parts. It’s easy to use and doesn’t take up much space on your computer. The only downside is that you have to install it on your computer, but this usually just takes a few minutes.
Pros:
- Free to use.
- Multiple options to record screen, GIFS, etc.
Cons:
- Available only for Windows.
- Complicated user interface for beginners.
- The scrolling screenshot feature may lag at times.
2. Snagit
Snagit is a tool from TechSmith that takes scrolling screenshots on Windows. It's great for capturing web pages, long chat logs, or anything else that you need to scroll to see. To use Snagit, simply launch the app and click the Capture button. Then, select the Scroll Window option from the capture menu. Once you've done that, just click and drag to select the area you want to capture. The cons are it can be difficult to precisely align the window with the selection you want, so it may take some trial and error before getting your desired shot.

Pros:
- Easy and quick to use.
- You can also record video calls using this application.
- Option to convert PC scrolling screenshot into an animated GIF.
Cons:
- It’s a paid tool.
- Provides minimal video-editing options.
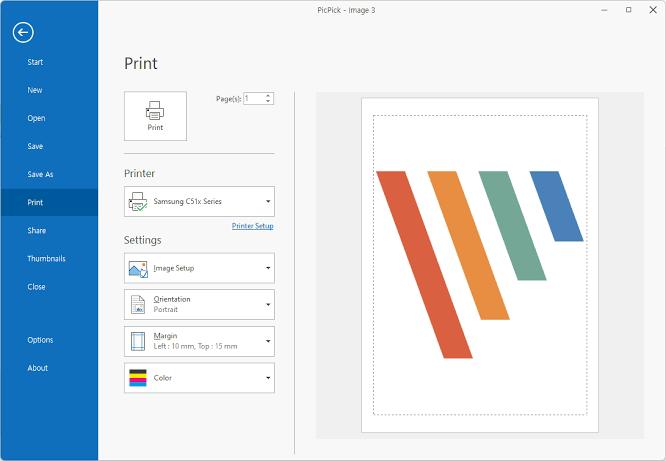
3. PickPick
PickPick Tool To Take Scrolling Screenshots on Windows is an app that lets you take scrolling screenshots with just a few clicks. The app is free to download, but if you want more features, there are in-app purchases available. The downside of this app is that it's quite big at over 80MB, so make sure you have enough space on your device before downloading it.
Pros:
- Multiple options to select from like full-screen capture, fix region, etc.
- It has a complete suite of graphic editing features.
Cons:
- Not available for free. The paid version will cost you around $30.
- It might be difficult to use for beginners.
4. Greenshot
Greenshot is a handy tool to take scrolling screenshots on Windows. It has a user-friendly interface that enables you to edit your screenshots before saving them as image files. Despite being free, this tool supports lots of effective configurations that allow users to take different types of screenshots on a single page.
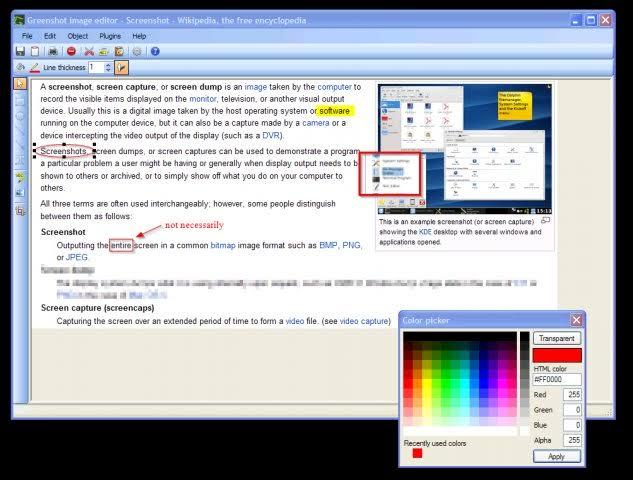
Pros:
- Easy-to-use interface
- Options to apply labels, numbers, annotations, and highlights on scrolling screenshots.
- It's free.
Cons:
- Limited video editing features
- You can only capture up to 100 lines of scrollable content at once, which means you’ll have to keep hitting the print screen button until you get all the lines that are needed.
Conclusion
How do I take a scrolling screenshot on a window? Well, you can take a windows scrolling screenshot using any of the solutions explained on this page. As you can see, we've explained the step-by-step process to take scrolling screenshots using either advanced Eassiy Screen Recorder Ultimate software or the Windows-free built-in screenshot tools. Irrespective of what method you're using, make sure you follow the steps correctly. But if you ask ‘Which is the best method to take a scrolling screenshot on Windows?’ We advise you utilize Eassiy Screen Recorder Ultimate for a problem-free Windows scrolling screenshot operation.