Updated on 2025-06-03
views
5min read
iCloud Music Library promises convenience: all your music, seamlessly synced across every device you own. Under the surface, however, it may cause some problems: Your local files can get silently replaced with Apple Music’s cloud versions. Many users also find it frustrating that metadata gets overwritten—and in some cases, songs even disappear.
If you’d rather avoid all of that, it’s available to learn how to turn off iCloud Music Library. Yes, the steps themselves are simple. However, turning off this feature requires the right preparation. That’s exactly what this guide will help you navigate. It explains what to expect, how to prepare, and finally, how to disable iCloud Music Library (or Sync Library) on iPhone, Mac, Windows, and even iTunes.
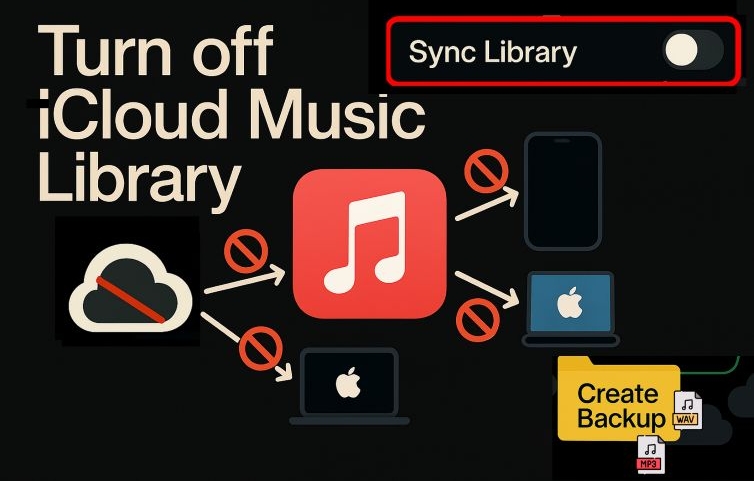
What Happens If You Turn off iCloud Music Library?
iCloud Music Library (now called Sync Library) is a mirroring feature. When it’s turned off, any changes you make to your Apple Music library on that device will not reflect on other devices. For example, when you:
- Like a song
- Add a new track or album to your library
- Create or modify a playlist
- Edit album artwork or song metadata
- Remove a track from your library
And similar changes will remain local. Nothing will sync to your other devices.
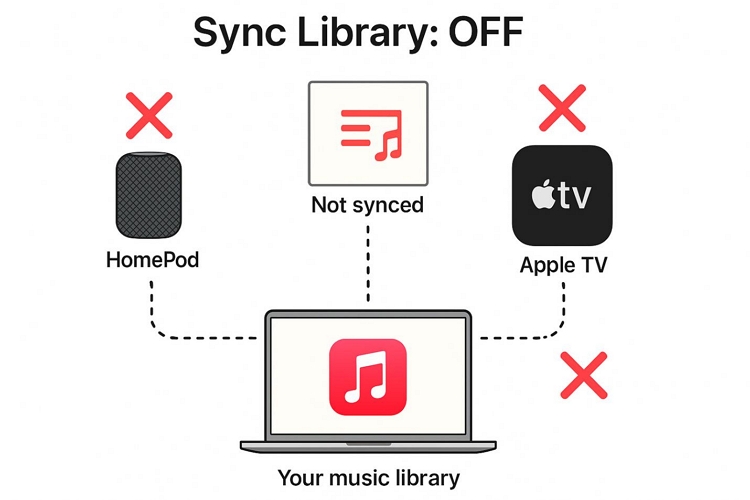
Even with Sync Library turned off, you can still stream Apple Music songs on any device, such as iPad, iPod, Mac, iPhone, CarPlay, Apple TV, Homepod or wherever your subscription is active. That part of the service continues unaffected.
You can also continue playing your local music files. Apple Music will treat them like standard audio files. It functions purely as a media player, without scanning or matching metadata, and without syncing these songs to your other devices.
That said, manual syncing still works. You can plug your iPhone into your Mac and use Finder or iTunes to copy over songs.
In short: Turning off Sync Library removes Apple’s cloud influence. Your music stays yours, in original quality and without interference, but you lose the seamless sync across devices feature.
Preparation: Back up Your iCloud Music Library

Apple makes it very clear that iCloud Music Library (or Sync Library) isn’t a backup service. So if you’re planning to turn off the feature, cancel your subscription, or make any major changes, it’s smart to back up your music ahead of time.
We’ll walk you through how to back up nearly anything, whether it’s a song you uploaded, purchased through iTunes, or added from the Apple Music catalog.
For Uploaded Music/Purchased Songs
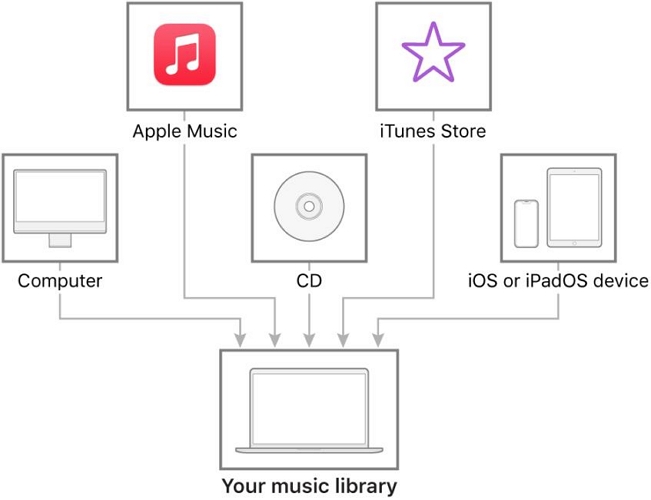
To back up your iCloud Music Library, it’s important to understand that the download quality depends on how the track originally entered your library:
- Purchased Songs and Matched Songs (i.e., tracks Apple replaced from its own catalog) are both available for re-download in 256kbps DRM-free AAC (.m4a) format.
- Uploaded Songs, on the other hand, behave differently. If it was already an MP3 or AAC, it will download in its original format and bitrate. However, if you uploaded lossless formats like WAV, ALAC, or AIFF, they will be transcoded into 256kbps AAC when you download them from iCloud, meaning the original lossless quality could lost.
That said, here’s how to download local files from iCloud Library to your computer first.
On Mac
Step 1. Once Apple Music is open on your Mac, navigate to the menu bar at the top, click Account, and then select Purchases or Family Purchases from the drop-down.
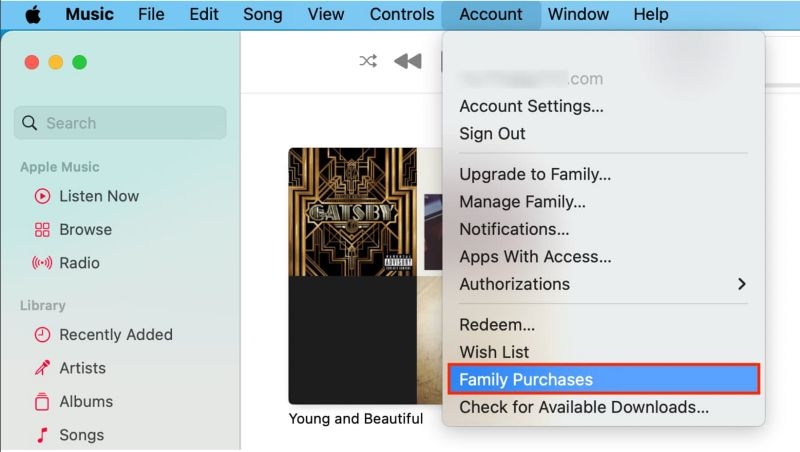
Step 2. At the top, make sure All is selected to view every song but not just what’s not in your library. Then, click Download All in the bottom-right corner to begin saving your music.
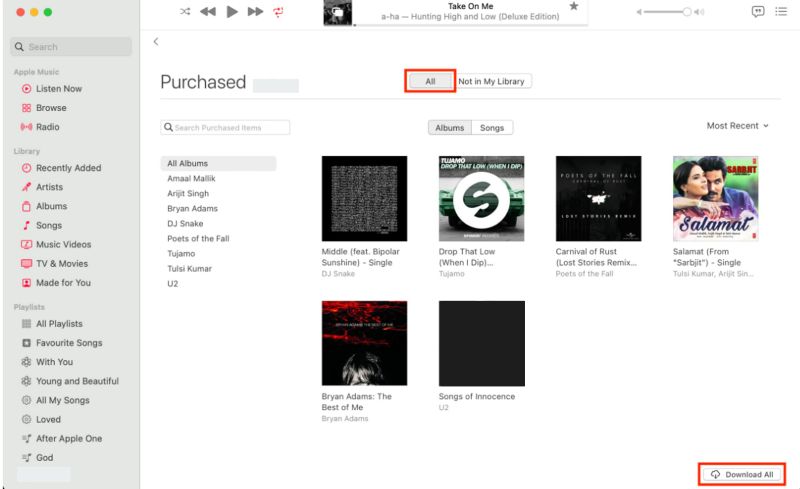
Step 3. As songs start downloading, Apple Music shows their status in a pop-up panel at the bottom—this lets you track progress in real time.

Your files are saved to the Music > Media > Music folder by default on Mac, unless you've changed the location before.
On Windows
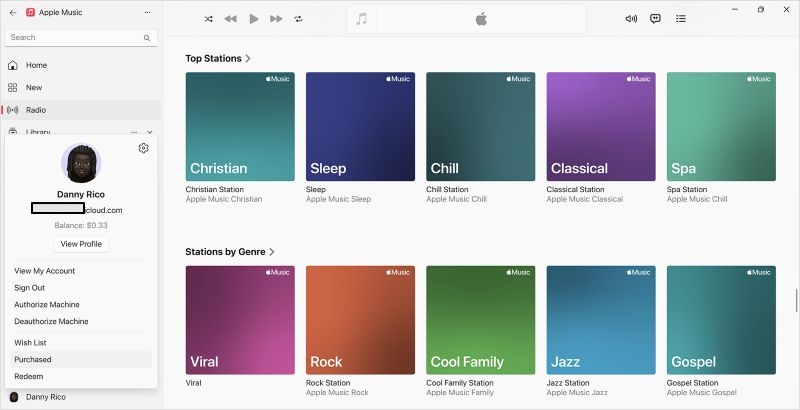
Step 1. In the Apple Music app, click your profile icon on the bottom left. In the popup panel, choose Purchased.
Step 2. Select the song or album and click the download button to back it up to your local storage.
If you're still using iTunes on Windows:
Step 1. Click the Store tab in the top menu.

Step 2. Then, under Music Quick Links on the right, select Purchased.
Step 3. You’ll see all your past purchases, matched songs, and any uploaded tracks associated with your account. From here, just click the cloud icon to download each track individually.

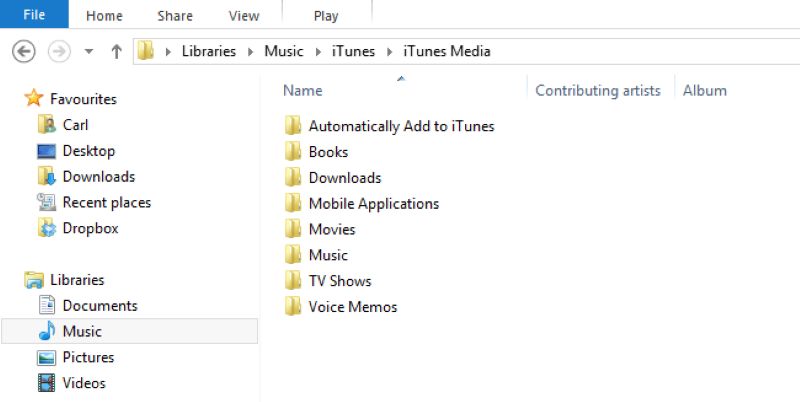
To locate your uploaded songs, go to Music > iTunes > iTunes Media > Music.
For Apple Music
Backing up Apple Music streaming tracks is a bit trickier. Any song you add from Apple’s vast streaming catalog comes protected with FairPlay DRM, meaning even if you hit Download, it only becomes available offline within the Apple Music app but not as a standalone file. To truly back up Apple Music tracks, you’ll need StreamFox for Music, the Eassiy All-in-one Music Converter.
StreamFox for Music lets you download any track from your Apple Music library, including full playlists, albums, or liked songs as permanent yet high-quality files in MP3, M4A, FLAC, or WAV formats. This allows you to create a fully DRM-free music backup you can keep forever, even after canceling your Apple Music subscription.
Once downloaded, your Apple Music tracks appear in the Downloads folder on either Mac or Windows. From there, you can play them with any media player like VLC or easily transfer them to external devices, such as USB drives, iPods, or smartphones.
Eassiy All-in-one Music Converter
Download music from Spotify, Apple Music, Amazon Music, and three other music services as local MP3 in 320kbps with ID3 tags retained.
Key Features
- Drag and drop songs directly from your Apple Music account using the integrated web player.
- 50x speed with batch downloads enables full Apple Music library backup in one continuous session.
- Preserve cover art, artist name, album name, and track order exactly as listed in Apple Music.
- Support Spotify, Apple Music, YouTube Music and Amazon Music, converting music from any platform using one tool.
Steps to Download Apple Music as MP3s
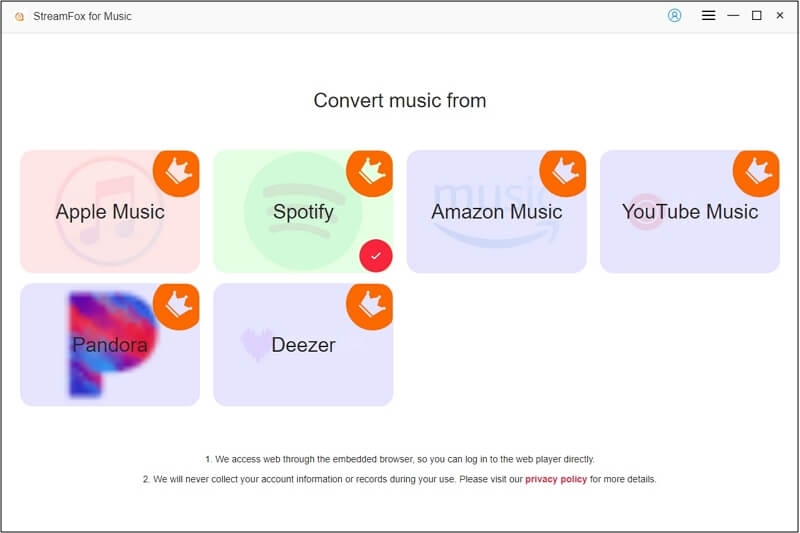
Step 1. Launch StreamFox for Music and select Apple Music from the main dashboard. This will open up a built-in browser that connects you directly to your Apple account.
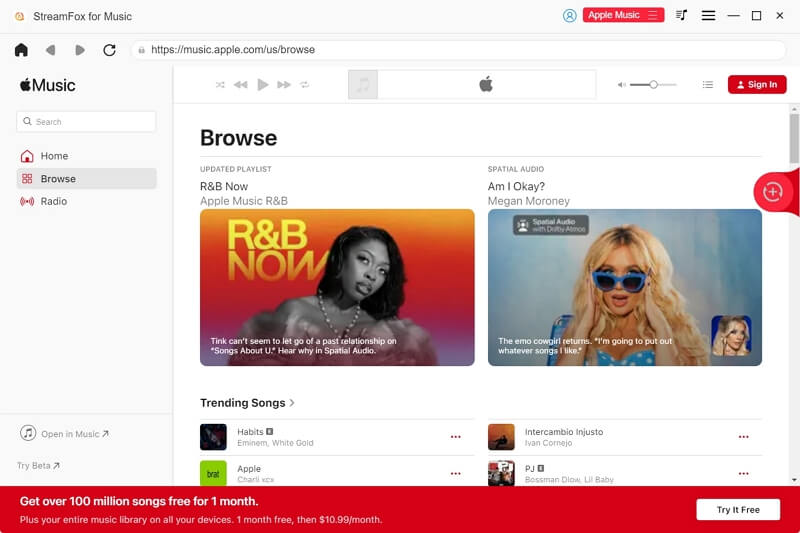
Step 2. Sign in to your Apple Music Web Player within the app. You’ll see your full library and playlists appear just like they would in a regular browser, but this time inside StreamFox’s interface.
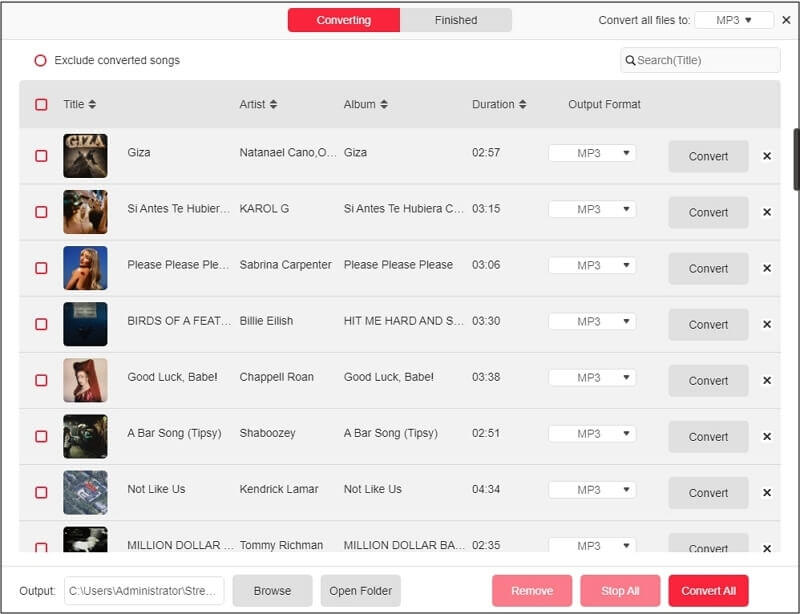
Step 3. Hover over any album, track, or playlist you want to back up. Then, drag it into the red + icon in the top-right corner. You can add one or many at once—everything gets queued instantly in the conversion tab.
![]()
Step 4. Look over your conversion list and then hit Convert All. Your selected songs will now be saved to your Downloads folder in DRM-free MP3. You can also choose another file type before conversion.
Once downloaded, you can store the songs to a secure location like external hard drives, play them with any media player, or transfer them to other devices.
How to Turn off iCloud Music Library on iPhone/iPad
Once you turn off iCloud Music Library, your iPhone will no longer sync its Apple Music content with the cloud. And that has a few upsides:
- Manual changes to your playlists will not result in changes on other devices.
- Any accidental deletion or sync-related overwrite will no longer happen.
- Battery and data usage on iOS can improve, since your music no longer updates or streams from the cloud.
- It becomes ideal if you want your iPhone to stay offline or manage its own music files, especially useful for travel or kids’ devices.
However, it also means you lose access to any music that wasn’t downloaded already. So be sure to back up or download anything you want to keep.
To Disable the iCloud Music Library/Sync Library:
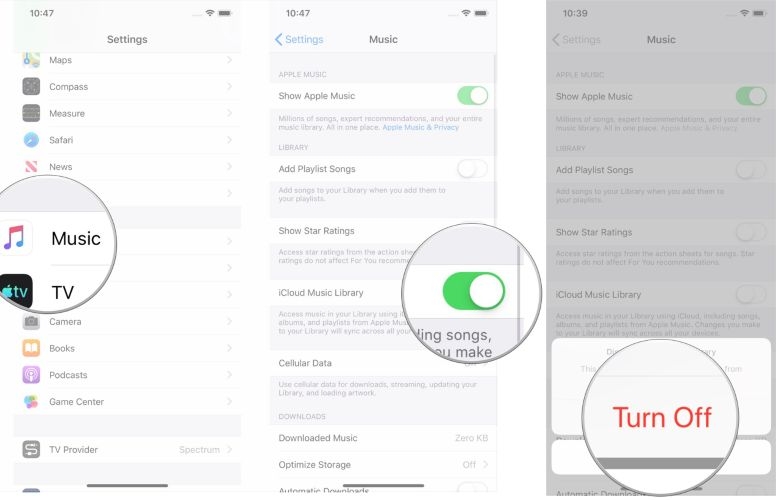
Step 1. Open Settings on your iPhone.
Step 2. Scroll down and tap Music.
Step 3. Turn off the toggle next to Sync Library (for iOS 13 and above).
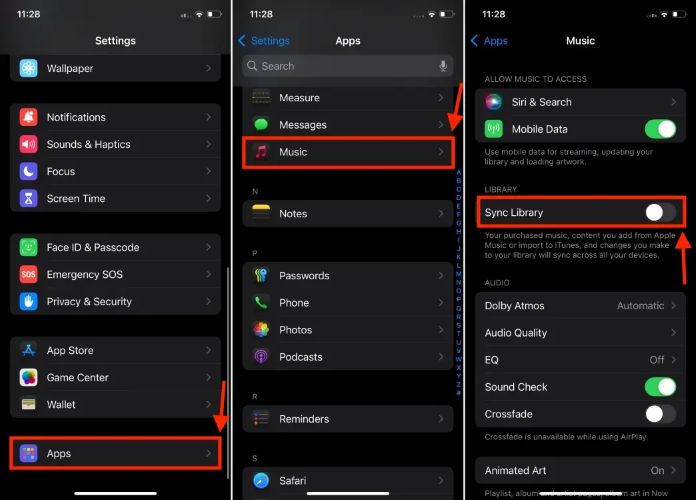
If you're on iOS 12 or earlier, look for iCloud Music Library instead and disable that.
How to Turn off iCloud Music Library on MacBook/iMac
The Apple Music app on macOS gives you the same control as the iPhone. Here are the steps:
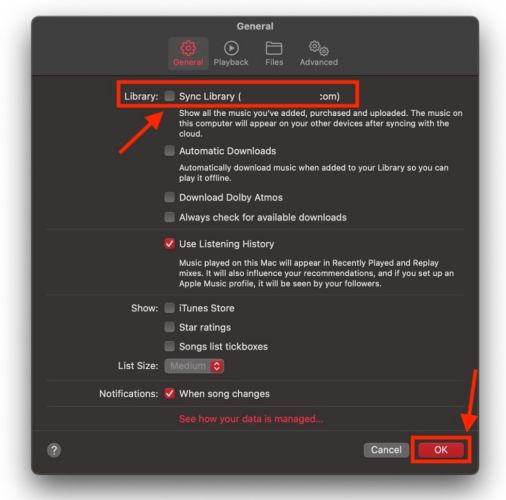
Step 1. Launch the Apple Music app on your Mac or iMac.
Step 2. In the top-left menu bar, click Music, and then select Settings from the drop-down.
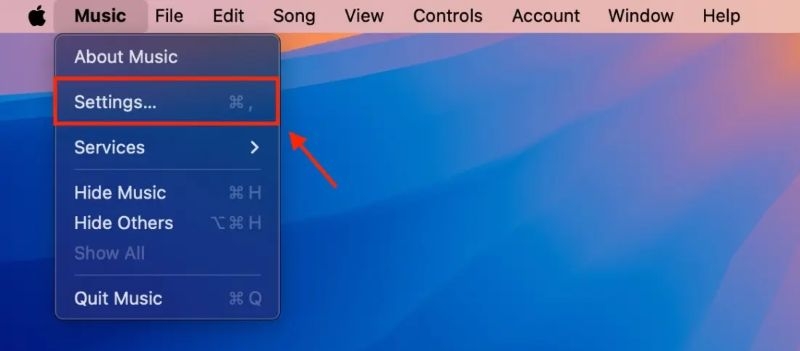
Step 3. Under the General tab, locate the Sync Library checkbox and uncheck this box. Then click OK at the bottom to confirm.
How to Turn off iCloud Music Library on Windows
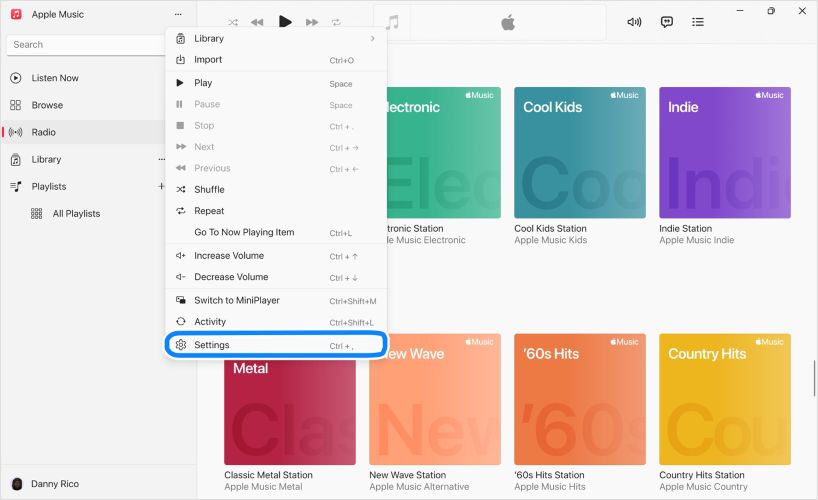
If you're using the new Apple Music app on Windows, the process looks closer to that of macOS, except a few buttons are placed differently. Here’s how to disable iCloud (Sync) Library with Apple Music on Windows:
Step 1. In the sidebar, click the three dots icon (•••) located near the top.
Step 2. From the drop-down menu, choose Settings.
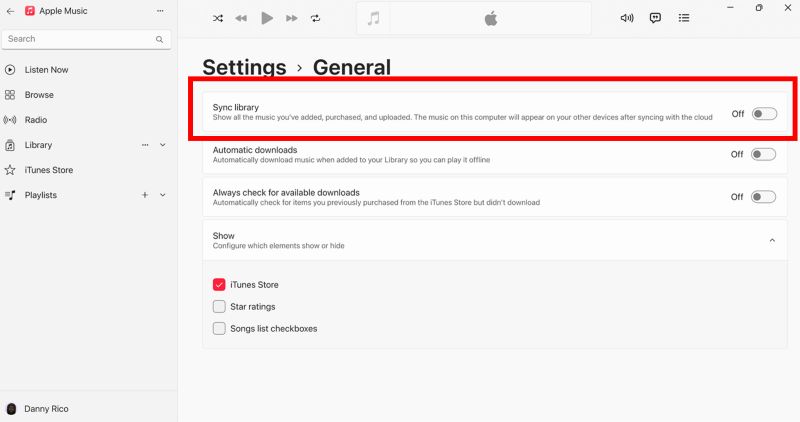
Step 3. In the General tab, locate the Sync Library toggle. Turn it off.
That’s it! Your PC will stop sending or receiving any music changes through iCloud.
If you are still using iTunes on Windows
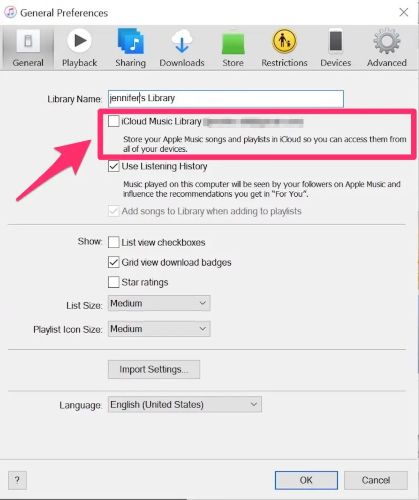
If you're using the older iTunes app, the setting is still called iCloud Music Library. It functions the same and here’s how to disable it:
Step 1. Open iTunes on your PC.
Step 2. Click Edit in the top-left corner and choose Preferences.
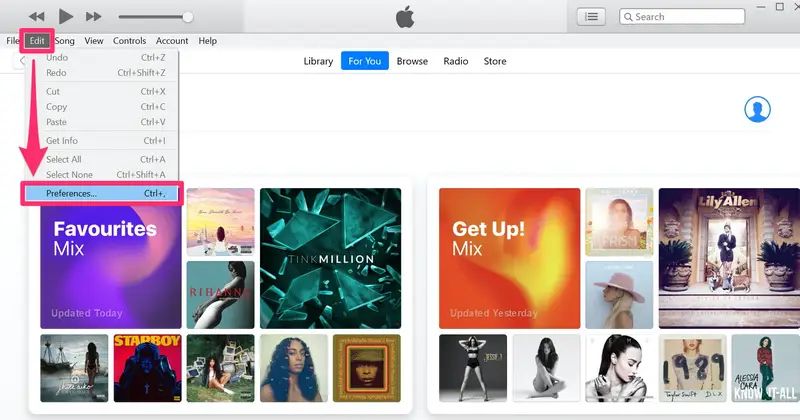
Step 3. In the General tab, uncheck the iCloud Music Library option.
Step 4. Click OK to save your changes.
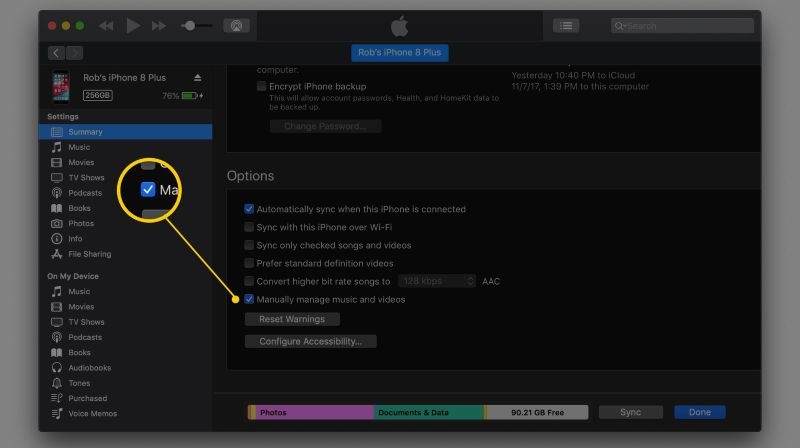
iTunes Sync Music VS iCloud Music Library: Which One Is Better?
iCloud Music Library offers a hands-off approach which is perfect if you want everything synced automatically across devices without doing much. On the other hand, iTunes or Finder manual sync is the traditional iPod era method, where you choose exactly what goes on your device and when.
Still, to make the differences crystal clear, here’s a quick table that breaks it all down:
| Feature | iCloud Music Library (Sync Library) | iTunes/Finder Manual Sync Music via USB |
|---|---|---|
| Require Apple Music/iTunes Match | Yes | No |
| Sync automatically across devices | Yes | No (device-specific only) |
| Work with HomePod/Apple TV | Yes | No (requires AirPlay or Bluetooth) |
| Control over what gets synced | Limited (everything in library) | Full control (albums, playlists, artists, even genre-based) |
| Support local-only lossless files | No (may transcode or replace) | Yes (original format is preserved) |
| Needs internet connection | Yes | No (USB-based local transfer) |
| Backup or offline music ownership | No (streaming-based, songs may expire) | Yes (files are yours, stay on device) |
| Best use case | Passive syncing across Apple ecosystem | Precise, offline control without a subscription |
Summary
And that’s everything you need to know before turning off a feature as simple as iCloud Music Library/Sync Library. For something that sounds minor, it comes with a surprising amount of preparation. Still, once you turn it off, you take the control back.
And if you're looking to keep your Apple Music songs—not just stream them, but truly save them as MP3, AAC, or even lossless formats like FLAC and WAV, then StreamFox for Music can help. StreamFox lets you download those tracks without DRM, so they remain yours even long after your subscription ends.