Updated on 2025-06-29
views
5min read
If you’re seeing charges on your credit card like something labeled Amazon Music, AMZN Digital, or anything close, you obviously wonder: Why am I being charged for Amazon Music?
This question has become common, especially for people who use Amazon Echo, Fire TV, or the Amazon Music app at home. And no, it’s not always your fault. Amazon’s system is confusing sometimes and it’s easy to trigger something without realizing it.
So in this article, we’ll walk you through why you’re being charged. More importantly, you will learn how to stop it, depending on how you subscribed in the first place. Plus, we’ll show you how to download Amazon Music as MP3 using Eassiy All-in-one Music Converter, so you don’t need to pay for a music service again.

Why Am I Being Charged for Amazon Music [Common Case Analysis]
Before jumping into how to cancel the charges, it’s important to first understand why you’re being charged in the first place. That’s the only way to ensure you don’t start it again in the future by accident.
Now, there are usually two types of situations:
- Some users suddenly see a charge for Amazon Music without ever subscribing manually.
- Others notice a separate payment for Amazon Music, even though they already have Prime, which can be confusing.
We’ll cover both cases here so you can figure out exactly what happened and then cancel it the right way.
Case 1: Why Have I Suddenly Been Charged for Amazon Music?
Let’s start with clearing the most common confusion — being charged for a subscription you never knowingly signed up for.
Reason 1: Forgot to Cancel the Free Trial Before It Ended
One of the most common reasons you’ve been charged is simply this: you forgot to cancel the trial. As a new user, you typically get a 30-day free trial. Sometimes this is even extended to 90 days or five months through special offers.
And here’s the catch: Amazon doesn’t send a clear reminder before the trial expires, unless you’ve explicitly asked for one through the main website. And since it already asks you for a payment method when signing up for the trial, you’ll automatically get charged when the time is up.
So the best strategy is to cancel immediately after starting the trial and still enjoy the full duration.

Reason 2: Subscribed to Amazon Music by Accident via Alexa
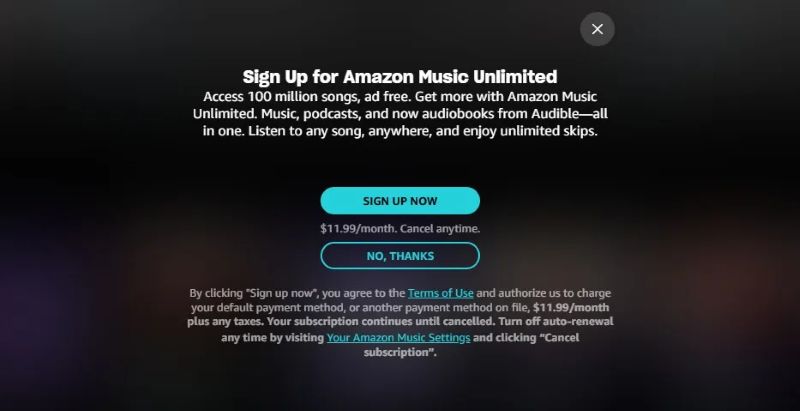
Alexa constantly nudges users to sign up for Amazon Music. And here’s the worrying part: it doesn’t need a PIN or app confirmation and a simple voice command is enough to trigger a subscription.
There are plenty of Reddit threads filled with users saying they just asked Alexa to “play some music” and that one sentence led to an active paid subscription.
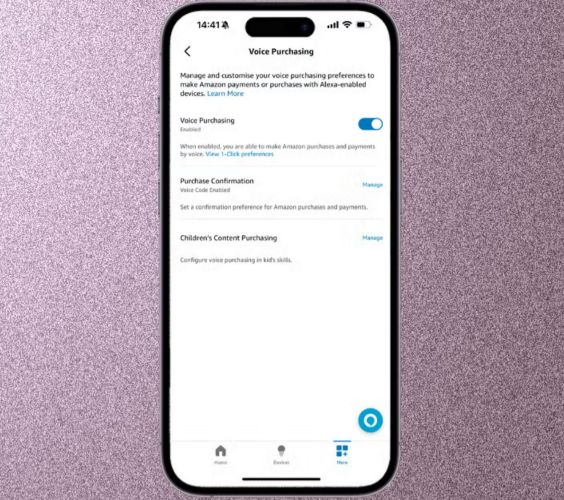
To stop the Amazon Music subscription via Alexa: you’ll need to disable voice purchasing. Just open the Alexa app and go to Settings. Under Account Settings, look for the toggle called Voice Purchasing and turn it off.
Alternatively, you can set a PIN, so no one else can activate purchases using your device.
Reason 3: A Family Member or Friend Subscribed Using Your Account
If someone else has used your Fire TV, Echo speaker, or any device linked to your Amazon account, they could have unknowingly started a subscription.
It’s even more likely if you have Alexa devices at home, which allows voice-based purchasing by default.
Moral of the story? Don’t share your login details and don’t let autofill store your payment info on shared devices.
Reason 4: Errors on Amazon’s Platform
You wouldn’t expect the world’s biggest e-commerce platform to have billing issues, but it could happens. It’s not rare for users to see duplicate charges, unexpected holds, or phantom payments.
Thankfully, Amazon does offer a way to fix this. You can raise a dispute through the A-to-Z Guarantee Claim and they usually resolve such issues within 45 days. We’ll also show you how to file this claim step by step.
Case 2: Why Am I Getting Charged Separately for Amazon Music?
Amazon Music Unlimited isn’t included in Prime. Amazon Music Prime and Amazon Music Unlimited are two separate services and that’s the confusion for most people.
For instance, Prime Music is free with your Prime subscription. For music Unlimited? That’ll cost you US$10.99 per month on top of what you’re already paying for Prime.

Moreover. If you own an Echo speaker or Fire TV and are seeing a separate charge of US$5.99/month, it means that you’ve subscribed to the Single Device Plan of Unlimited via Alexa voice commands.
Don’t worry! We’ll also discuss how you can cancel the Unlimited subscription as we move along.

How Do I Stop Amazon Music from Charging Me?
So, how do you stop Amazon Music from charging you? Well, it all depends on how you started your subscription.
You’ll need to cancel it through the same platform, whether that’s Amazon itself, Apple, Google, or your mobile carrier. Here are all the ways.
Way 1. Via Amazon Site
One of the best things about your Amazon subscription is that you can manage everything directly from your Amazon profile, whether you're on your phone or using the main site. This includes both Amazon Prime Music and any individual Amazon Music Unlimited subscription you wish to cancel.
And regardless of which one you’re trying to end, the steps are nearly identical. So even if you’ve landed here to cancel Amazon Prime Music (that is, your Prime membership), you can follow the same process.
Here’s how to cancel from the website:
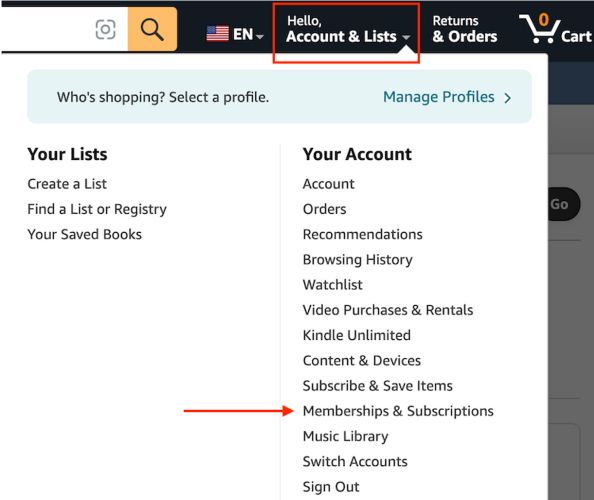
Step 1. Go to amazon.com and sign in. Once signed in, hover over the top-right section that says Hello, Account & Lists.
Step 2. Select Memberships & Subscriptions under the Your Account section.
Step 3. Once the page loads, look for your Amazon Music Unlimited listing. On the right side, select Cancel Subscription.

Step 4. Confirm and follow through with the cancellation steps.
Way 2: Via Desktop App
If you want to end the Amazon Music Unlimited plan specifically (not the Prime one), you can cancel it directly from the Amazon Music app. This works on desktop apps. Follow these steps:
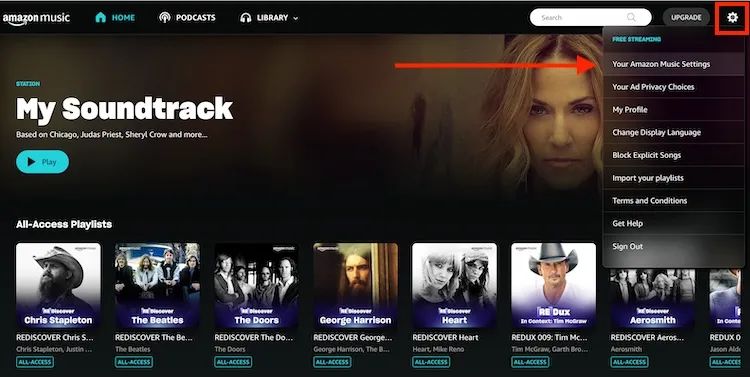
Step 1. Click the gear icon in the upper-right corner and choose Your Amazon Music Settings.
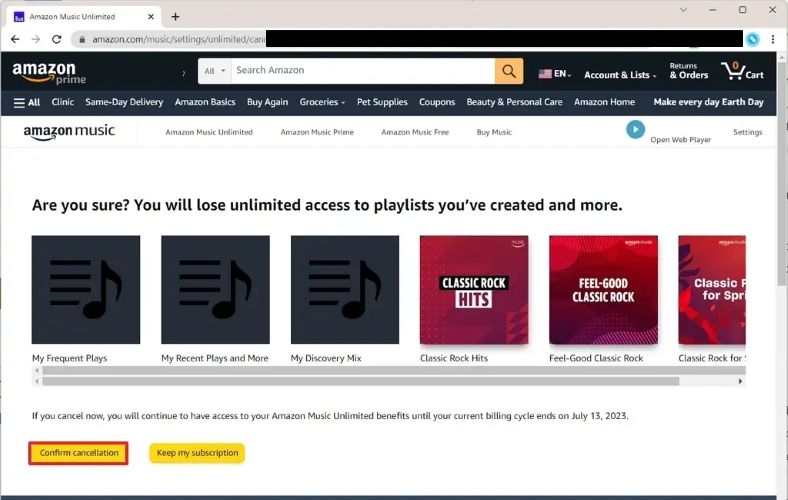
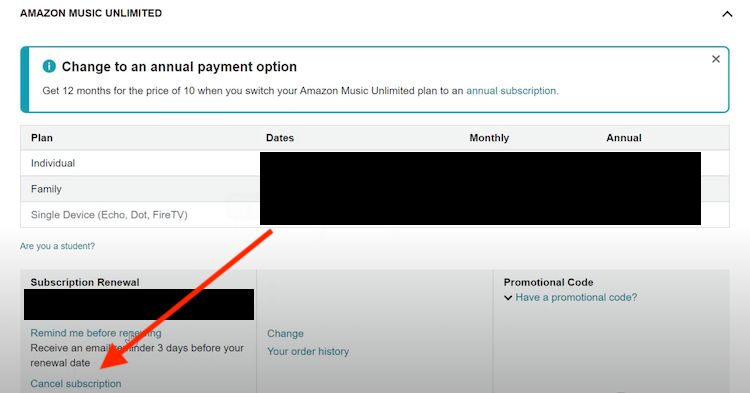
Step 2. Scroll and then click the Cancel subscription link.
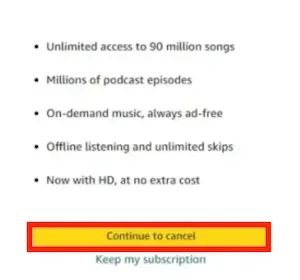
Step 3. You’ll be prompted with a confirmation screen. Just hit Continue to cancel and you're all set.
Way 3: Via Apple
When your Amazon Music subscription or free trial is started using your Apple ID (for example, confirmed through Face ID or saved Apple Pay method), you won’t be able to cancel it through Amazon. The billing is managed entirely by Apple, so cancellation must be done through your iPhone’s settings. Here’s how to do it:
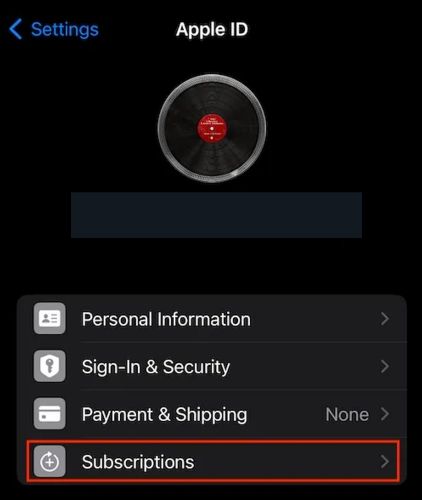
Step 1. Head into your iPhone Settings and tap your name at the top. This opens your Apple ID dashboard.
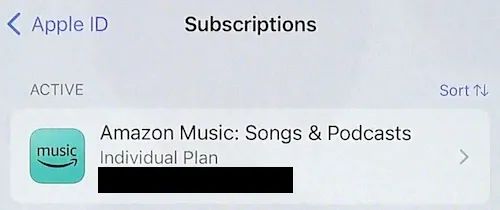
Step 2. From the list, choose Subscriptions to view all your active plans.
Step 3. Locate the one labeled Amazon Music: Songs & Podcasts or Amazon Music Unlimited and select it.
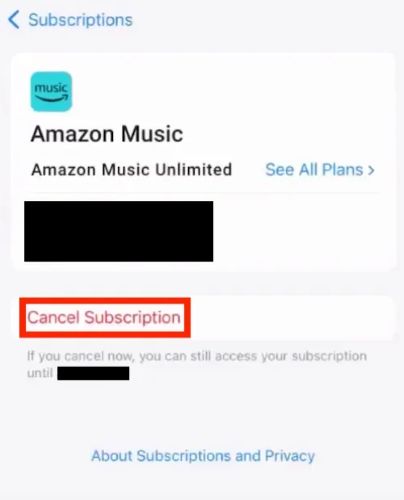
Step 4. Scroll to the bottom of the plan screen and hit Cancel Subscription.
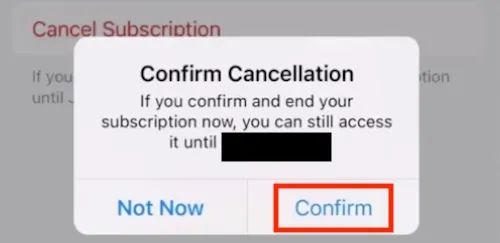
Step 5. Finalize by selecting Confirm when prompted and you're done.
Way 4: Via Google Play
Many Android users' subscriptions are managed by Google Play but not Amazon. Once you cancel, the auto-renewal will stop. And in case there are already unauthorized charges, you can ask Google for a refund within 48 hours, but in some cases, it may take up to 128 days. Here’s how to cancel your Amazon Music plan via Google:
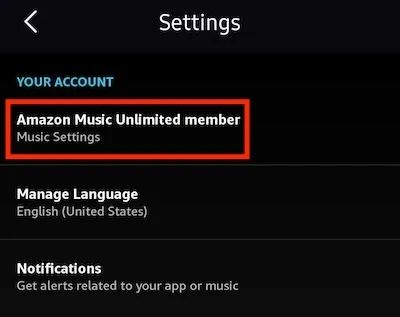
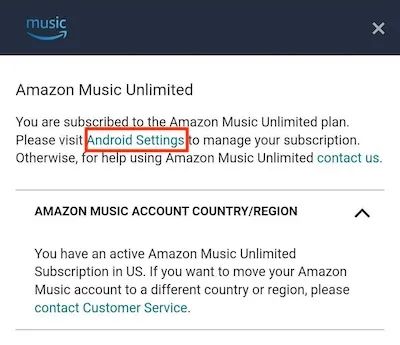
Step 1. Go to Amazon Music’s Settings page and tap on Amazon Music Unlimited member under the Your Account section.
Step 2. You’ll see a message guiding you in managing your subscription. Tap on Android Settings, which will take you to Google Play’s subscription page.
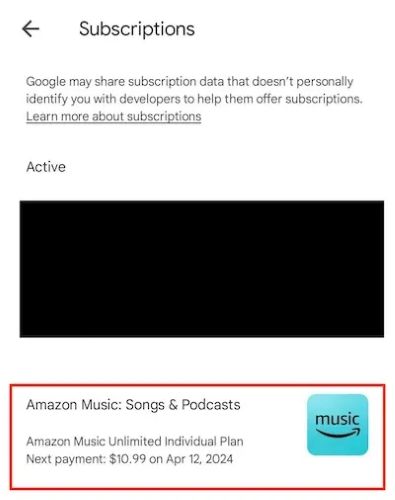
Step 3. In the list of active subscriptions, select Amazon Music: Songs & Podcasts card.
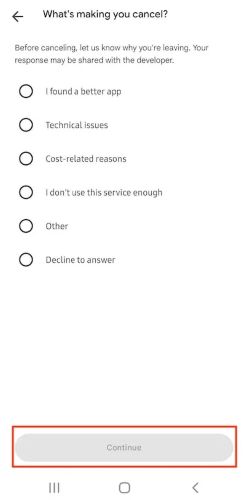
Step 4. Tap on Cancel Subscription. You’ll be asked to choose a cancellation reason. Either pick one or simply select Decline to answer.
Step 5. Tap Continue to confirm the cancellation. And the subscription will be marked as “Canceled” in red color.
Way 5: Via Mobile Service Provider
Some mobile carriers actually bundle Amazon Prime (which includes Prime Music) into your phone plan and others even throw in Amazon Music Unlimited as part of their entertainment add-on packs. While it starts as a promotional deal, once that period is over, the subscription could silently renew and start billing you monthly. You’ll need to cancel through the carrier’s platform, like their app or website.
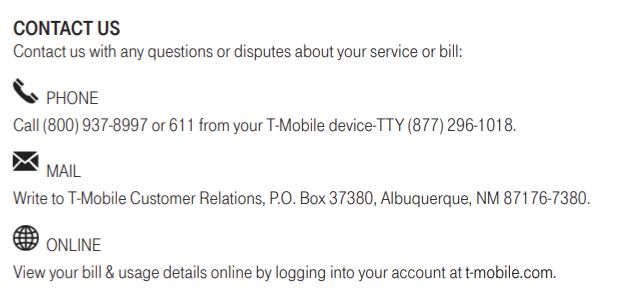
For example, if you're a T-Mobile user, you can log in to your T-Mobile account, head over to the Add-ons or Entertainment Packages section, and find and turn off the Amazon Prime or Amazon Music entry.
If you're unsure where to go, just call your service provider’s support team and they will cancel the Amazon Music subscription for you.
Way 6: Via Amazon Support
When you’re facing unauthorized charges or just a subscription error, it’s best to reach out to Amazon Support directly.
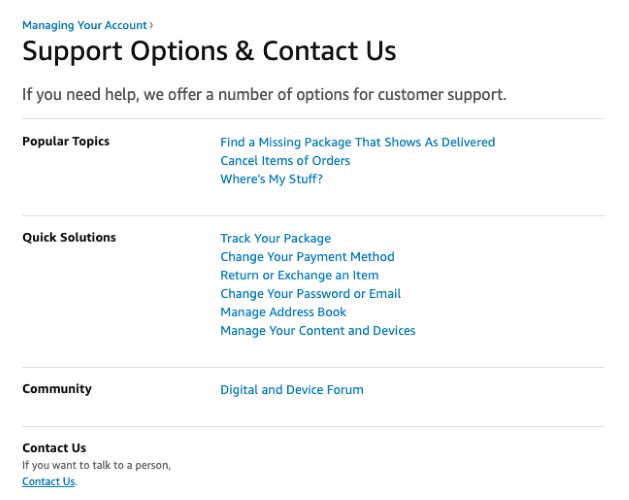
You can call their support line at 1-888-280-4331. Or start a live chat, by going to Amazon Help (from the official Amazon site), under the Contact Us section.
Once you're connected, the support team will check your account and let you know what can be done. They’ll usually cancel the subscription for you right away if something’s gone wrong. While the issue is often resolved instantly, the refund (if applicable) will take around 3 to 5 business days to appear in your account.
Bonus: How to Download Amazon Music Without Subscription
Canceling Amazon Music subscription doesn’t always mean you lose all the benefits. You can still enjoy offline listening, shuffle-free playback, and full access to your music, all without paying. So how do you do this? You can use StreamFox for Music, the Eassiy All-in-one Music Converter, which allows you to download songs directly from your Amazon Music library and save them in high-quality formats like MP3, WAV, or FLAC.
And don’t worry! StreamFox isn’t one of those paste-the-link tools. It actually comes with a built-in Amazon Music Web Player, so you can select whatever you like, a playlist, an album, or single songs and download it to your computer in one go. You can save as many songs as you want. And since these files come in open formats, they’ll play just fine on any media player of your choice. The best part is you don’t need an active Amazon Music subscription to use StreamFox.
Eassiy All-in-one Music Converter
Download music from Spotify, Apple Music, Amazon Music, and three other music services as local MP3 in 320kbps with ID3 tags retained.
Key Features
- Retain all metadata, including song title, artist name, album tags, and even the original cover art.
- Batch download tracks at 50x speed.
- Choose any format and bitrate you prefer: 320 kbps, 256 kbps, or even 128 kbps.
- Work across multiple services, including Amazon Music, Spotify, Apple Music, Deezer, Pandora and YouTube Music.
Steps to Save Amazon Music as MP3
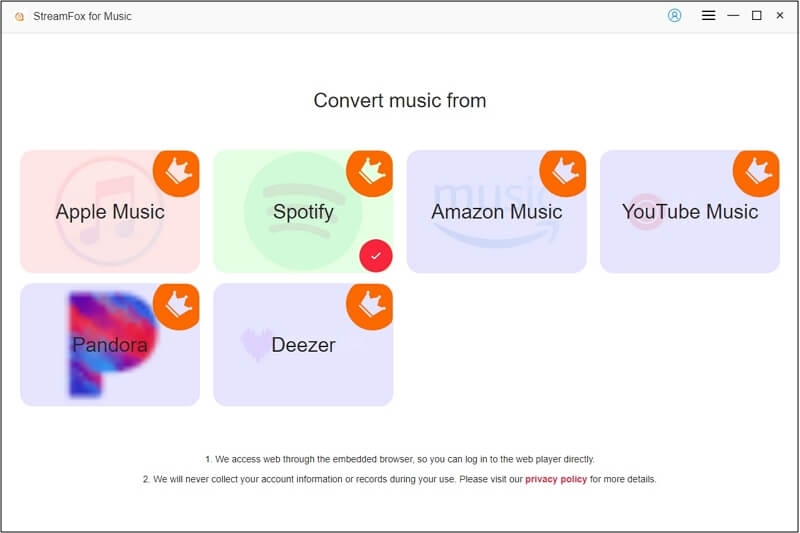
Step 1. After installing StreamFox for Music, open it and select Amazon Music from the main dashboard to get started.
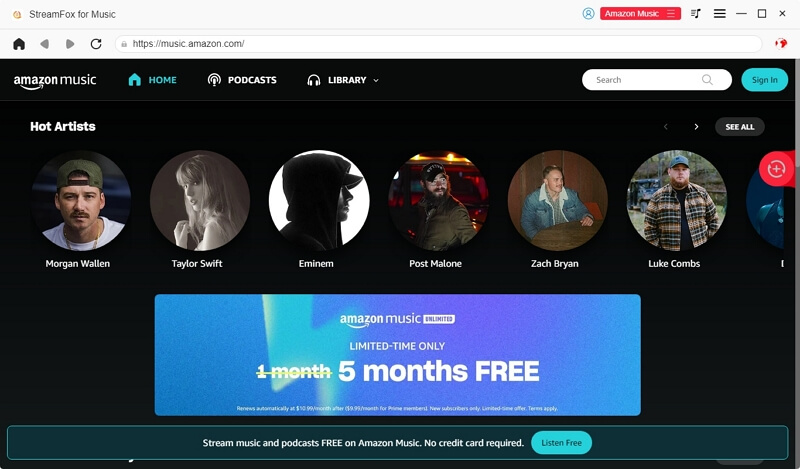
Step 2. You’ll be taken to a built-in Amazon Music browser. Just sign in with your Amazon credentials. Whether you're using a Prime, Unlimited, or even a free account, it works the same.
Step 3. Browse as usual, pick any title of a single song, full album, or entire playlist and drag it to the conversion queue on the right.
![]()
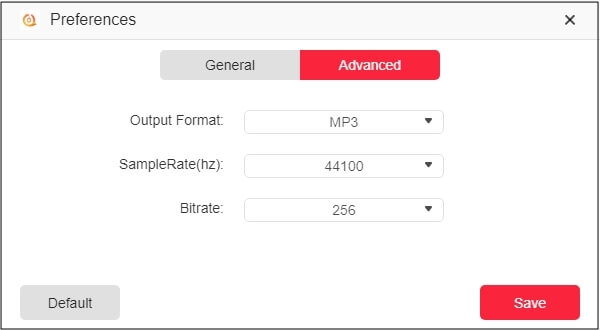
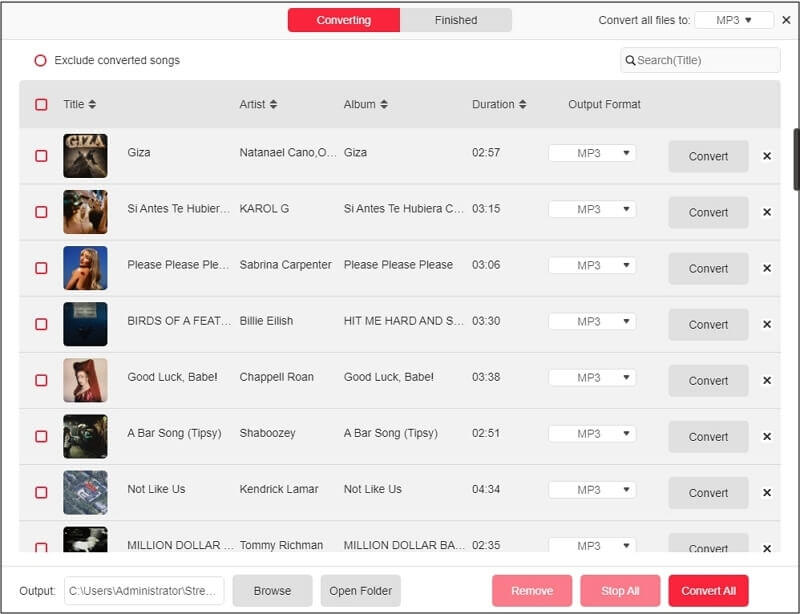
Step 4. Before you begin, check the output settings. You can keep it set to MP3 or switch to another format. To choose your preferred quality level, click the menu icon and choose Preferences.
Step 5. Hit the Convert All button in the bottom right corner. All selected tracks will begin downloading.
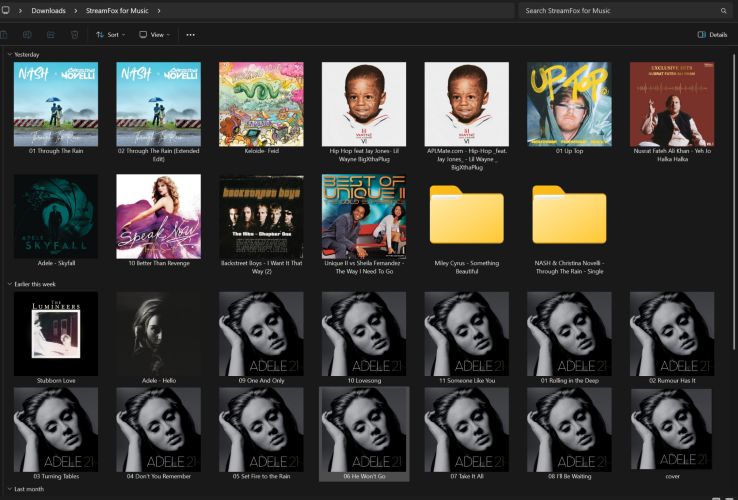
Once done, your music gets saved to your Downloads folder while they are neatly organized. Albums and playlists become a folder, keeping your library structured on its own.
Final Words
When you opt for an Amazon Music free trial and realize it’s not for you, it’s best to cancel before it ends. For paid Amazon Music subscriptions, make sure you cancel through the same method you used to subscribe. And if you’ve been wrongly charged, the Amazon support team is always your next stop.
StreamFox for Music is the way to go when you want high-quality Amazon Music as MP3 saved directly to your computer, so you can keep enjoying the benefits, like listening offline. Plus, there are no shuffle restrictions, since you can play the tracks using any media player you like.