
Updated on 2023-02-05
views
5min read
Accommodating the files becomes difficult due to the shortage of storage space with too many QuickTime videos on your desktop. So many people delete their videos from their computers to make some space. But you can keep all of the videos by resizing and compressing their size instead of deleting them. There are several ways to compress QuickTime video. But to make your work fast and easy, we are describing how to compress video QuickTime fast in this article.
Part 1: Can You Compress Video QuickTime?
Yes, you can compress video QuickTime. By compressing a QuickTime video, you can easily free up some storage space on your computer. As we have mentioned above that several ways are available to compress QuickTime video file. You can change the file parameters or trim unwanted video parts to compress video QuickTime. Or you can also use a professional compression tool to compress a QuickTime video.
Part 2: How to Compress Video QuickTime Easily? [Best 5 Ways]
Video compression might look like a difficult job to you though it is not that much difficult. Here we are presenting the best 5 ways to compress video QuickTime easily.
Way 1: Best Way to Compress QuickTime Video via Video Converter Ultimate
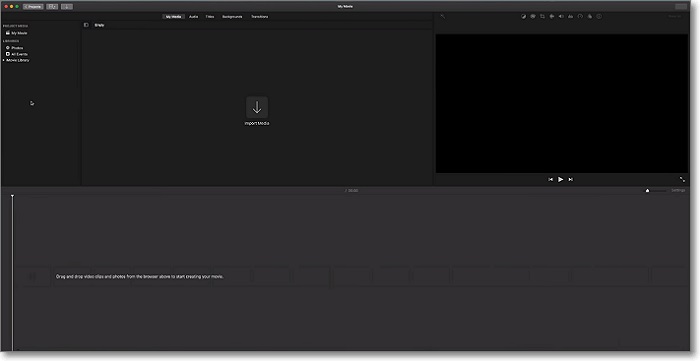
When compressing your QuickTime videos on the computer, you can attain high-quality files at a fast speed by using Eassiy Video Converter Ultimate. This program is compatible with both Mac and Windows systems. Without losing quality, you can compress single or multiple files with this software. This software not only helps you to compress videos, but also allows you to convert, edit, and make MV or college, etc. You can convert videos up to 8K without losing the video quality at all. You can also trim videos, merge, add subtitles, watermark, video effects, change video speed, and much more with this tool. This software is available in both free and paid versions.
Features:
- 1000+ video/audio formats are supported.
- Provides video production features such as merge, cut, crop video, add effect, subtitle, watermark, etc.
- Videos can be converted to 4K, up to 8K, and HD with 60X faster conversion speed.
- For all kinds of files, this tool offers 20+ multimedia tools.
- Allows you to cut or trim unwanted parts of a long video.
Steps to compress QuickTime video via video converter ultimate
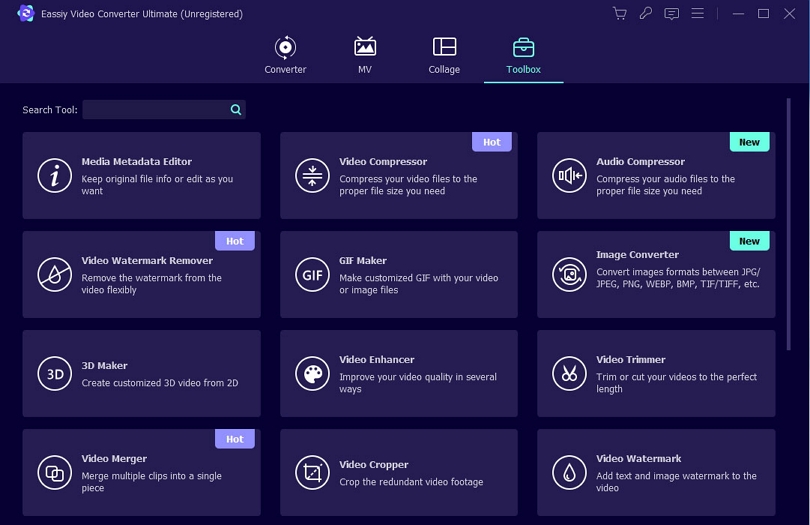
Step 1: Download and install Eassiy Video Converter Ultimate on your desktop. You need to reach the Toolbox at the top after opening the program and click on the Video Compressor.
Step 2: A window will pop up in front of you after that. Tap the "+" sign or drag and drop videos to add a video to the program.
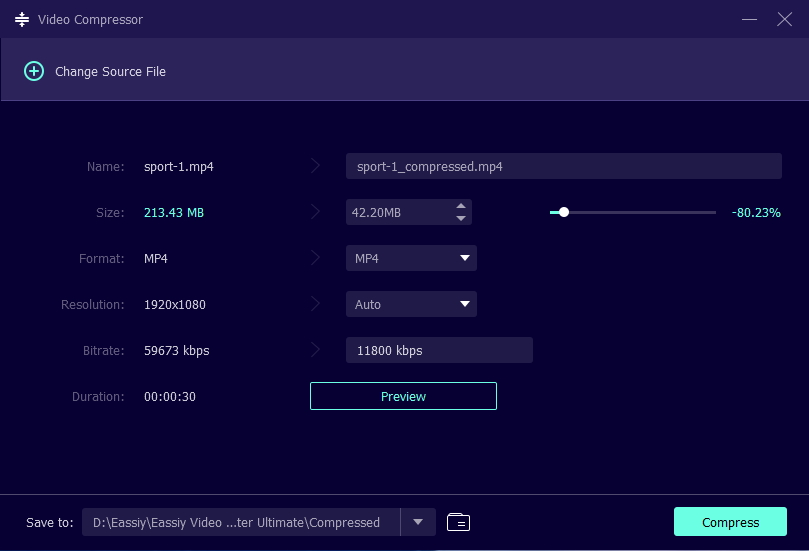
Step 3: For the final video, you need to adjust the size, name, bitrate, resolution, format, and export location. You will be able to resize your video file by sliding the dot. You can compress the video file up to 90%.
Step 4: Tap on the "Preview" button and check the video quality after setting. To compress your video to your desired size, you need to press the Compress button.
Way 2: How to Compress a Video on QuickTime
On your Mac, QuickTime is the default video player. For quick and easy video compression, it is a great option that lets you choose the video resolutions between 480p, 720p, 1080p, and 4K. If you choose a lower video resolution and apply more compression, then the video will result in a smaller video file size. But over the compression quality, QuickTime doesn't offer any other controls. You can compress MOV, MP4, and other common video file types with QuickTime. However, the videos you compress with this tool will be exported as MOV files. Here are the steps to compress a video on QuickTime.
Step 1: Launch QuickTime Player on your computer.
Step 2: To select the video you want to compress, use the file browser.
Step 3: By going to “Edit > Trim”, you can take this opportunity to trim the video if desired.
Step 4: Go to “File > Export As” from the menu bar.
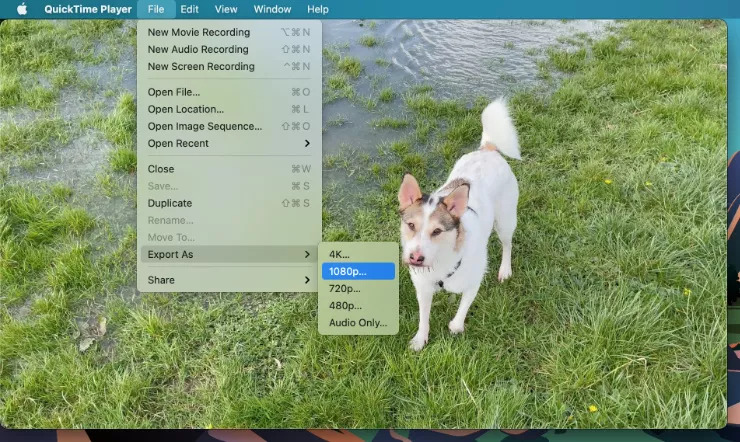
Step 5: Choose the video resolution that you want to export your file as.
Step 6: Save the location for the compressed video after choosing a file name.
Step 7: From the dropdown menu, select Greater Compatibility which uses the more common H.264 compression codec.
Step 8: Wait for the compression to complete after clicking “Save”.
Way 3: How to Compress a QuickTime Video on iMovie
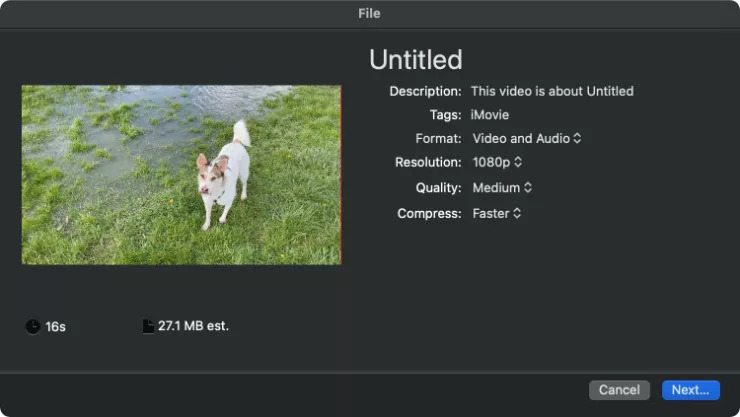
You can use iMovie instead if you want more options over the video compression quality that you get with QuickTime. It is a brilliantly simple video editor that also helps you to cut together multiple clips, add effects, and apply filters to videos. You might need to make sure that you have got one of the best Macs for video editing if you want to use a lot of effects. This app allows you to choose the video resolution, compression quality, and compression speed, which is the benefit of using iMovie to compress your videos. The final size of your compressed video is predicted by it and before actually processing it, it provides a preview. However, any video you compress using iMovie will be exported in MP4 format. Follow the given steps to compress a QuickTime video on iMovie.
Step 1: Select the Media tab from the top of the window after launching iMovie.
Step 2: Go to “File > Import Media” from the menu bar.
Step 3: Click “Import Selected” after using the file browser to select your video.
Step 4: You can take this opportunity to trim, crop, or apply effects to your video if desired.
Step 5: Go to “File > Share > File” to compress the video.
Step 6: To choose your Resolution, Quality, and Compressed speed, use the various dropdown menus.
Step 7: To choose the filename and location of your compressed video, click “Next”.
Step 8: To start the compression, click “Save”.
Way 4: How to Compress QuickTime Video with VLC
Another media player that will help you to compress QuickTime video is VLC Media Player. Including some old video formats like YUV, WMV, and 3GPP2, this app supports most video formats. Compared to QuickTime Player, this app offers more options to control file properties. For instance, you will be able to customize the codecs, bitrate, and audio channels. But if you know little about video encoding, we don't recommend you play around with these options. Its function might lead to A/V out-of-sync, compression failure, and a few other issues if you click a button without knowing. Here are the steps to compress QuickTime video with VLC.
Step 1: On your desktop, open VLC Media Player. Hit "Convert/Stream" after hitting the File button located at the top.
Step 2: Select the source video that you want to compress after hitting “Open Media”.
Step 3: Choose video –H.264 + AAC after going to the Choose Profile section.
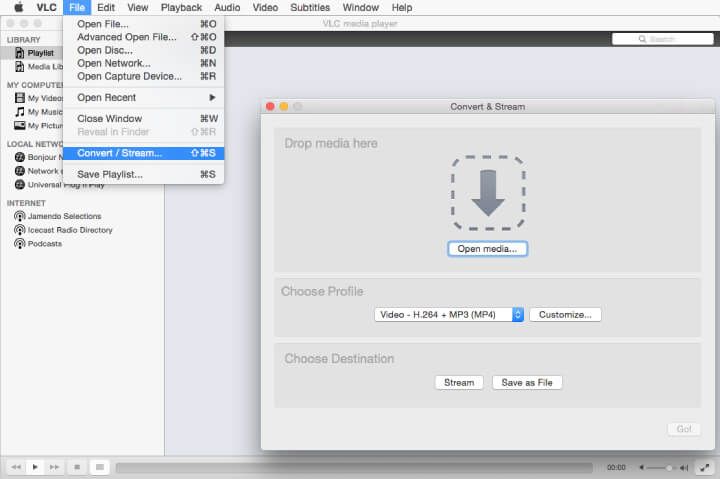
Step 4: Select the target output file folder after navigating to Choose Destination.
Step 5: VLC will start to compress your video once you hit the “Save” button.
Way 5: Compress QuickTime Video File Using HandBrake
HandBrake is a famous video converter that you can use to convert your video clips from pretty much any format to widely supported codecs. To shrink your video files, you can use the app. Follow the below steps to compress QuickTime video file using HandBrake.
Step 1: Launch HandBrake on your desktop after you download and install the app.
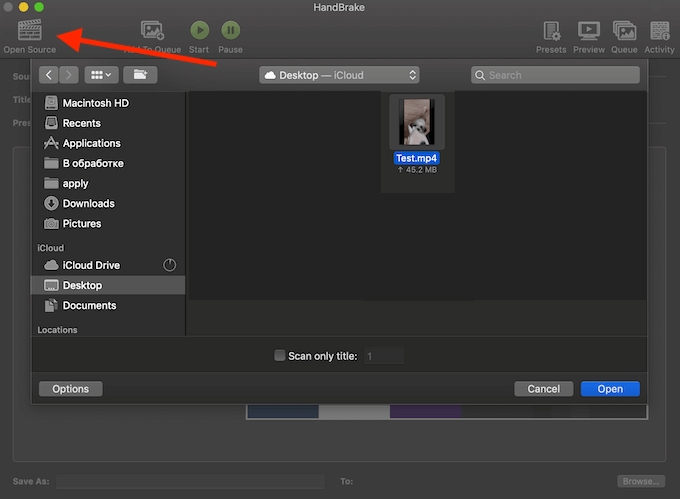
Step 2: Select “Open Source” to open your video in the upper-left corner of the app.
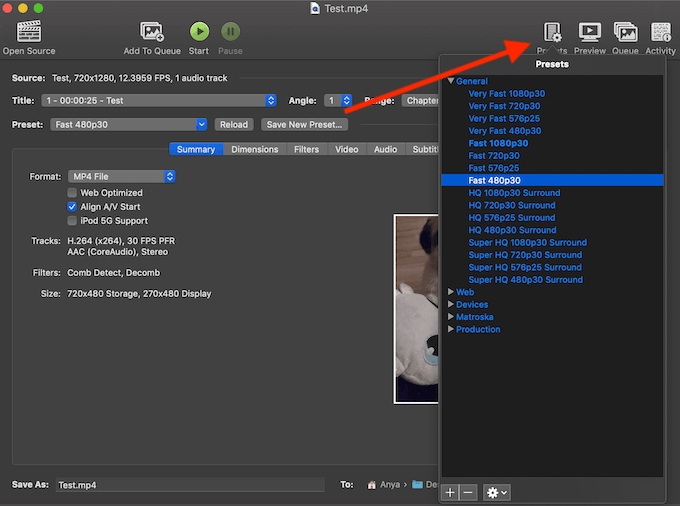
Step 3: Select “Presets” in the upper-right corner of the app. After that, you have to choose the desired quality of your output video.

Step 4: Under “Save As”, make sure to select a new name and destination under “Browse” for the output video.
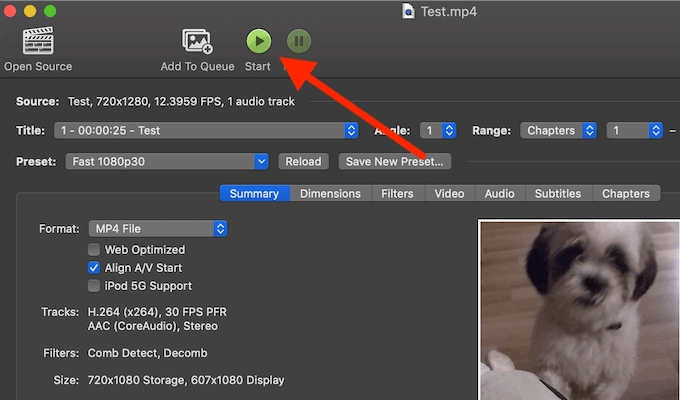
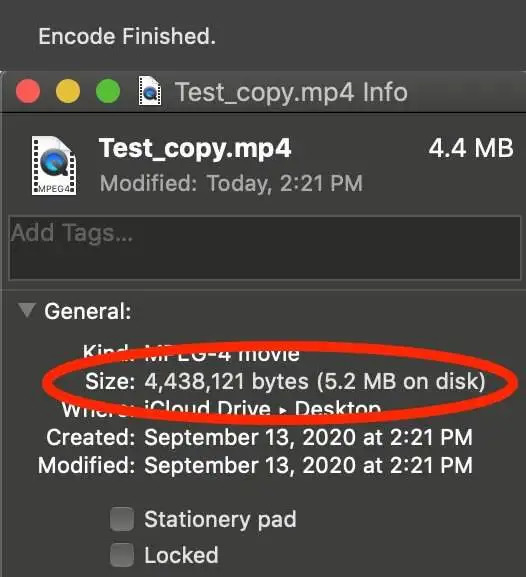
Step 5: To begin the compression, select the “Start” button on top of the window.
Part 3: FAQ for QuickTime Compress Video
1. How can I compress QuickTime video on Mac?
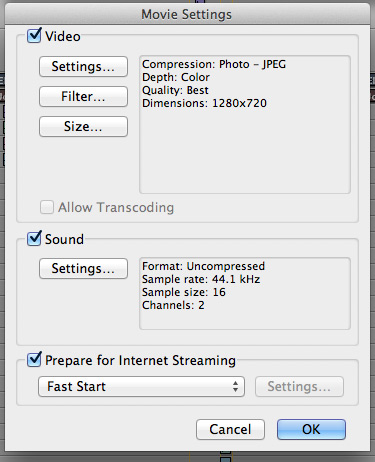
To compress video on Mac, you can also try to use QuickTime Pro. Select the "Files" option after opening up your video and select the "Export As" option. After that, you need to save your video with a lower resolution.
2. How can I reduce video size without losing any quality?
To reduce video size without losing any quality, you might try these two unconventional methods: Either remove the audio track of your video or cut off the redundant parts of your video.
3. How does the video compression work?
To downsize a video, most video compressors use the following two types of algorithms: inter-frame redundancies or reducing intra-frame. In your video, they will go over the repetitive frames and remove the unnecessary parts. Thus, the video file will get reduced.
Conclusion:
In this article, we have described how to compress video QuickTime fast. You can select any of the above-given methods. But we would like to recommend you use Eassiy Video Converter Ultimate. This software is an all-in-one multimedia toolbox that helps you to compress any kind of video without losing its quality. So try out Eassiy Video Converter Ultimate now!