
Updated on 2022-12-12
views
5min read
When you delete any data from your Android device, it will stay in the recycle bin folder. Recycle Bin is a storage area that stores your deleted data for a certain period. You can simply restore the deleted files by undoing the deletion if you have accidentally deleted them. But what to do if you have emptied the Recycle Bin of your Android device? Don't fret because you can still recover them on your device. In this article, we are presenting 5 working methods for Android Recycle Bin recovery.
Part 1: Can I Recover Items After Emptying Recycle Bin?
Yes, you can recover items after emptying Recycle Bin if you don't create any new data on your Android device. You can restore the deleted items by using backup files. Or you can also use a professional Android data recovery tool to get back your lost items. But you have to follow a few things to avoid overwriting your deleted items with new data. Make sure to stop accessing your device as early as possible. You have to turn off the internet connection on your device to get back your deleted data. Before you find an effective recovery method, power off your phone.
Part 2: How to Recover Files from Recycle Bin Android? [Best 5 Methods]
To help you in recovering files from Android Recycle Bin, there are proven solutions. We are introducing the best 5 methods to recover files from Recycle Bin Android below.
Method 1: Best Way for Android Recycle Bin Recovery with Data Recovery Tool
The simplest and most effective way to recover deleted files is using a third-party data recovery application. You can use Eassiy Android Data Recovery software without wasting your precious time. It is one of the best Android recycle bin data recovery tool that allows you to recover accidentally deleted files easily. Including WhatsApp messages and WhatsApp attachments, this software supports 16+ file types. It provides you fast recovery process and 100% safety as well. You can recover your lost data by using this program no matter how you have lost the data. Again, you don’t have to worry about compatibility issues because it supports 6000+ Android devices including Android 12.
Features:
- More than 16+ different file types are supported to perform Android data recovery.
- Unlimited free scanning and preview feature is offered in the free version.
- Allows you to recover deleted items with just a few simple clicks.
- Doesn't require your rooting and technical knowledge.
- It has the highest Android data recovery rate for photo and video in the industry.
- It can recover deleted WhatsApp messages, WhatsApp attachments and other app data on Android.
- 3 different recovery modes available including recover directly from Android devices, Android SD card and SIM card.
Steps to perform Android rata recovery with data recovery tool:
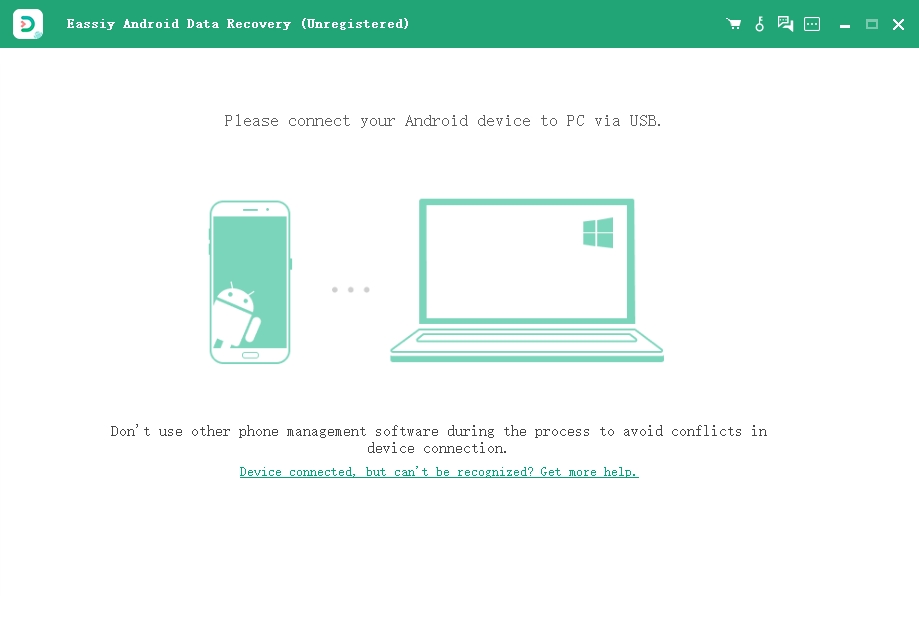
Step 1: Install Eassiy Android Data Recovery on your computer from their official website and launch it. Connect your Android phone to the PC once you have launched the tool on your system. Enable “USB Debugging” after navigating to your phone.
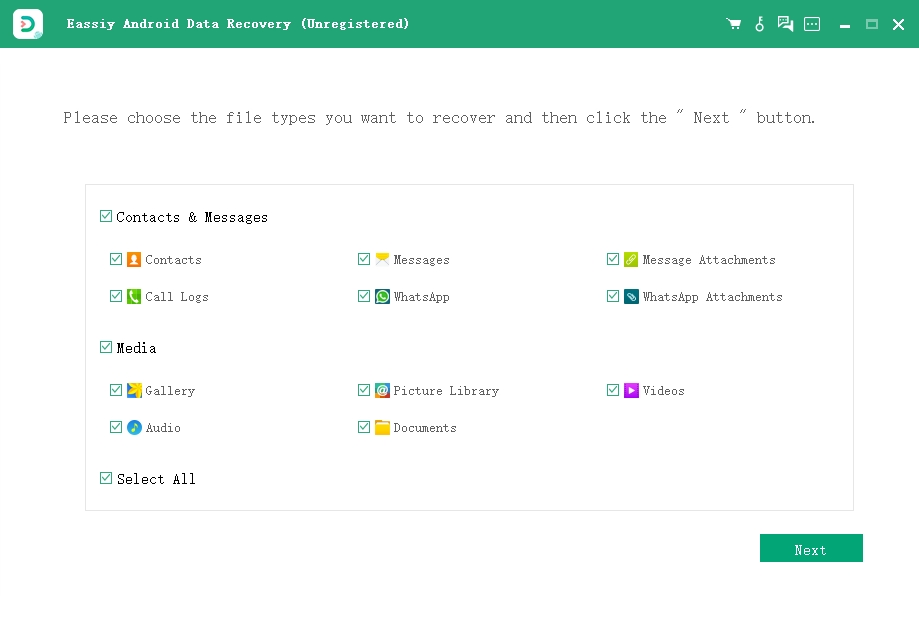
Step 2: Now, you have to select a file category to scan for your deleted items. Tap on the “Next” button once you are done choosing the file type.
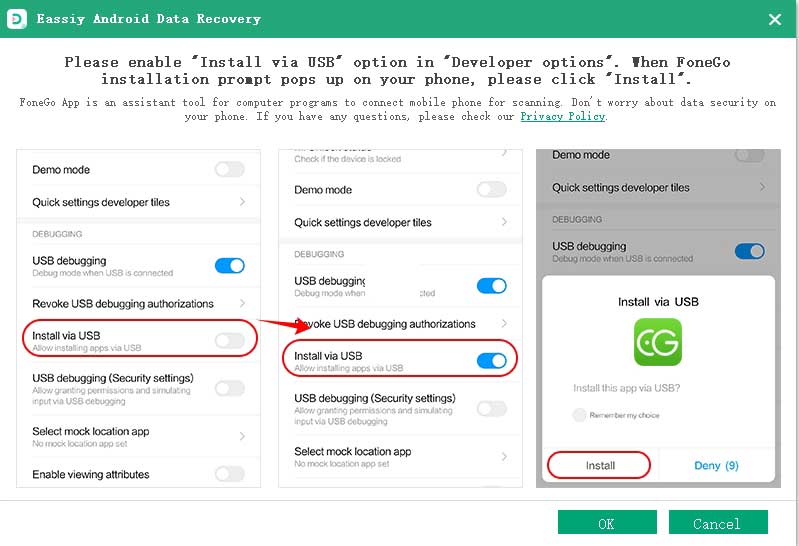
Step 3: To access your device, the program needs to be installed on your phone. Tap on the “Install” button once you see the pop-up on your phone after enabling “Install via USB” in the developer options of the software. As the program requires your permission to read the phone memory, make sure to tap on “Allow” once the Eassiy pop-up comes on your phone. After that, you have to click on “Scan Authorized Files” on the computer program to begin scanning for the deleted items.
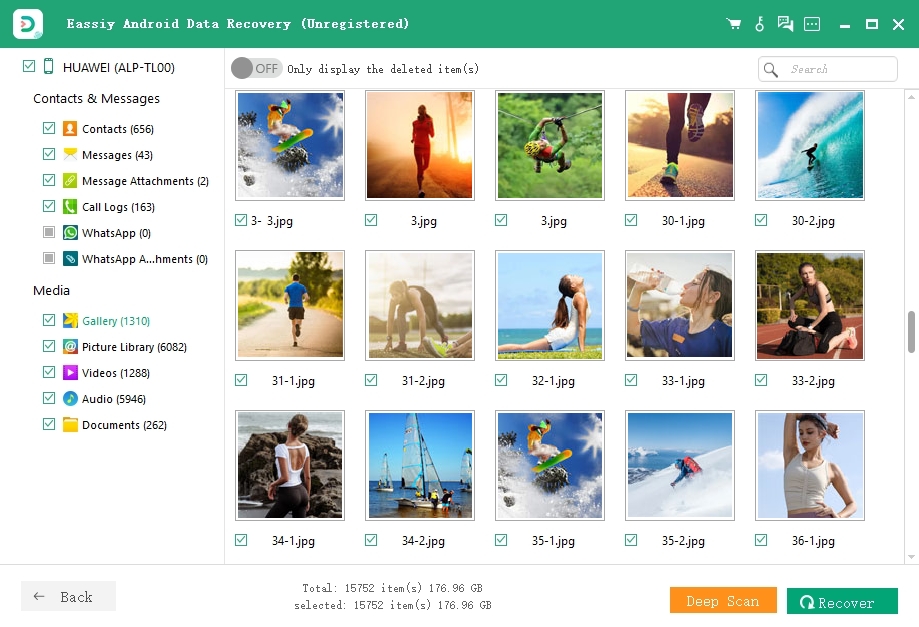
Step 4: Once the scanning is done, check if your deleted items are present there. If you find your deleted items, choose them and click on the "Recover" button. If you can't find them, tap the "Deep Scan" button.
Method 2: Android Recycle Bin Recovery from Gallery (Recently Deleted/Trash)
You can directly restore the deleted items from the Gallery trash bin if you delete them only from your Android phone. But remember that you cannot restore your deleted items after 30 days. Here are the steps to perform Android Recycle Bin recovery from Gallery.
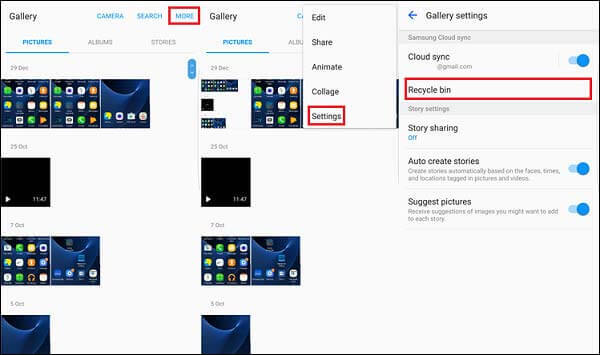
Step 1: On your Android device, please open the Gallery app.
Step 2: Tap the “Menu” feature like three-dot from the top.
Step 3: After that, you can see the “Recycle Bin” option.
Step 4: Click the "Restore" icon after selecting the items you want to recover. After that, the deleted items will be restored to the original album.
Method 3: Recover Files from Recycle Bin Android Using Google Photos
Google Photos is an excellent cloud storage service that helps you to store your Android data. Your device photos and videos will be automatically uploaded to the Google cloud once you have enabled the automatic backup of photos in Google Photos. You can retrieve the deleted items from the Google Photos Trash folder with ease when you delete them from your phone. Follow the given steps to recover files from Recycle Bin Android using Google Photos
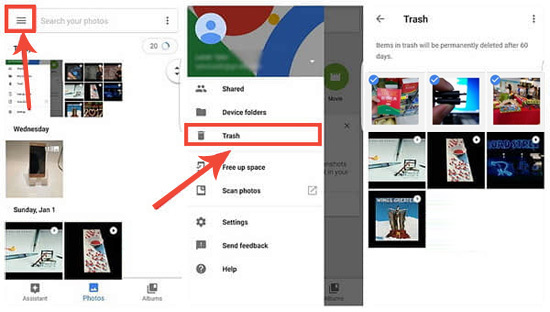
Step 1: Launch the “Google Photos” app on your Android phone first.
Step 2: Tap on the menu to choose the Trash option as shown after going to the top left corner.
Step 3: By clicking and holding, choose the deleted items that you want back on your device.
Step 4: After that, click on the “Restore” option and you will be done.
Method 4: Android Recycle Bin Recovery with Dumpster
To get a trash folder on your Android phone, you can also use the Dumpster app. All you have to do is to set the app to work with audio, videos, documents, and other kinds of files. Until you manually delete the data, these files will be kept in the bin. Here are the steps to perform Android Recycle Bin recovery with the dumpster app.
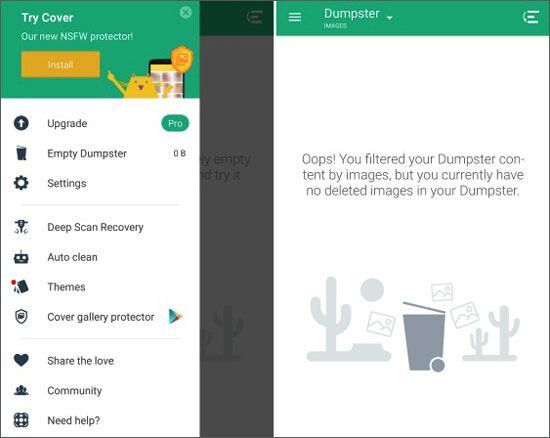
Step 1: On your Android phone, download and install the Dumpster app. After that, open the app on your phone to start the recovery process.
Step 2: This app will give you the option to choose the kind of files you need to be protected. This will include photos, audio, videos, and documents. Click on the "OK" button after simply checking the box that is against the type of item you need to be protected.
Step 3: Choose all the files that you need to recover after previewing all the files that have the potential to be recovered.
Method 5: Recover Files from Recycle Bin Android with Recycle Bin
Another suitable form of recovering files from your Android phone is the Recycle Bin app. However, this app cannot recover the files that were deleted before the installation of the app. Follow the given steps to recover files from Recycle Bin Android with Recycle Bin app.
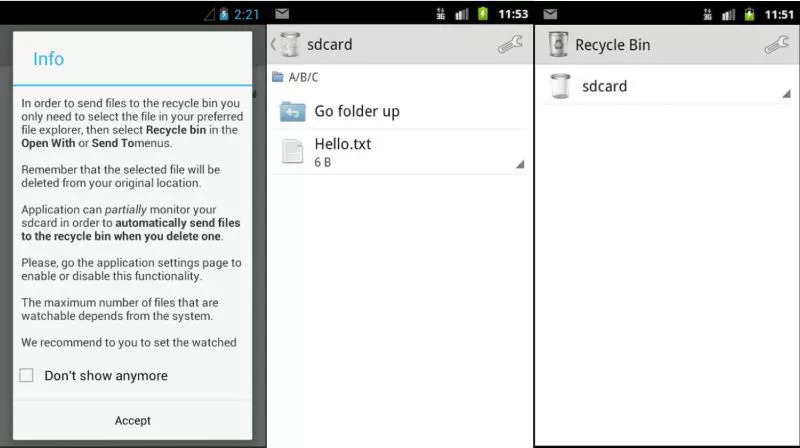
Step 1: To enable the app to recover your lost files from your Android phone, you need to install and configure it on your phone.
Step 2: Selecting the “Recycle Bin” option is the next step. You can find it in the “Open With” or “Share it” menus. Via the “Open With” or “Share it” options, you can send any file to the recycle bin and the file will be moved to the recycle bin app folder automatically.
Step 3: Just enter the Recycle Bin and then click on the “Restore” button whenever you need to restore files from Android trash.
Part 3: FAQs for Android Recycle Bin Recovery
1. Is there a Trash Bin on Android devices?
On an Android phone, there isn't a Recycle Bin or Trash folder. It is not impractical to have a Recycle Bin to collect deleted files like a computer since most Android devices have a limited storage space ranging from 8GB to 256GB. However, some apps might have a separate Recently Deleted folder to store the deleted data such as the Photos app temporarily.
2. Where can I find the Trash on my device?
There is no Trash Bin on an Android phone as we mentioned above. Thus like what you do on a computer, you cannot access the Recycle Bin on Android. But to restore the recently deleted media files and documents within 30 days or so, some apps do provide a Trash folder for you like the built-in Photos app, Google Photos, Dropbox, etc.
Conclusion:
There might have been times when you accidentally deleted some important data from your Android device and then you panic about what is going to happen next. In this article, we have presented 5 working methods for Android Recycle Bin recovery. Among the above methods, the most recommended method is using Eassiy Android Data Recovery software to perform android recycle bin recovery. You can recover your deleted Android data easily and safely with this tool. So try Eassiy Android Data Recovery now!