Updated on 2023-05-15
views
5min read
A familiar file extension for Mac users, M4A, is found in Apple’s iTunes Store as the format of the song downloaded. M4A uses MPEG-4, which is similar to MP4 and uses the same MPEG-4 codec encoded with advanced audio coding (AAC). Sometimes these files can also be lossless if they utilize the Apple Lossless Audio Codec.
But we are not here to discuss what an M4A file is, rather how to trim M4A files on Windows and Mac devices. And this guide provides you with the list of options and tools to trim M4A files effortlessly.
Scroll down to find how to trim M4A files on Mac, Windows, and online.
Part 1: Easily and quickly trim M4A File on Windows/Mac PC with high-quality - Eassiy Audio Editor
Are you looking for an M4A file trimmer for Windows/Mac PC? Here, we are recommending Eassiy Audio Editor for both Windows and Mac. It is one the best audio editor in the industry that can trim, split, cut, merge, convert, and compress your M4A files. You don’t have to worry about compatibility issues as it supports numerous audio formats. Even newbies will be able to navigate the program without acquiring any technical knowledge. With its built-in feature, you can easily enrich your audio file. This software lets you extract or remove audio of any segments from your M4A file. Besides, this is also a video editing tool that can help you in video editing, compressing, and converting. It makes sure the original quality of your file remains untouched.
Key Features:
- Allows you to add or remove audio from any segment.
- Supports conversion between multiple audio and video files in batch.
- Enables you to edit your M4A files with split, cut, trim, and merge.
- Can synchronize audio and image seamlessly.
- Industry-leading tool in the supported video and audio formats.
Steps to easily and quickly trim M4A files on Windows/Mac PC with high quality
Step 1. Run Eassiy Audio Editor on the computer after installing it. You will see an interface where you can choose the file you want to trim after running the software. Select “Toolbox” option from the upper tabs and go to “Video Trimmer” tool.
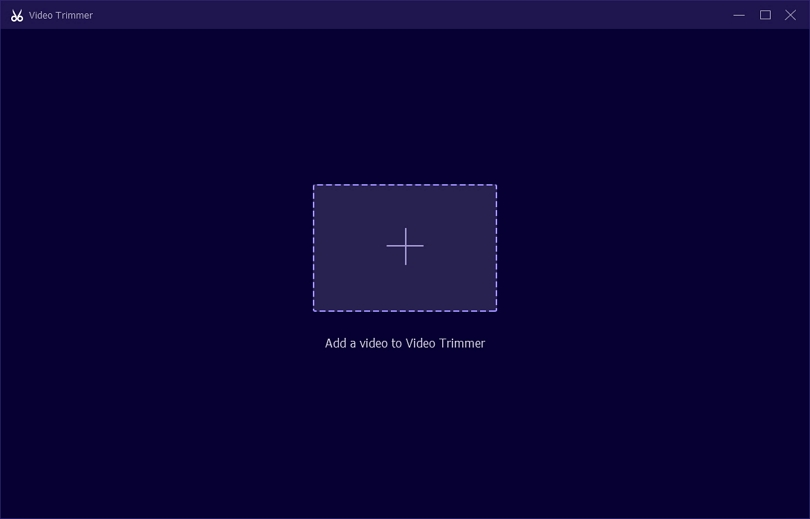
Step 2. Drag and drop the M4A file into the window or tap “+” to upload your file. The uploading time of your file will depend on the file size.
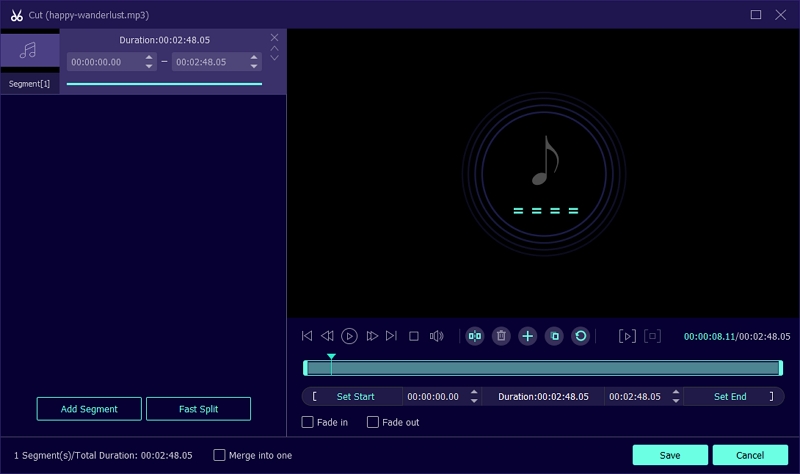
Step 3. After importing the M4A file, select a starting and ending point of the audio to trim it accordingly by selecting the “Split” icon. Easily delete a segment or copy/paste any segment to set them according to your choice. You can also add “Fade in” and “Fade out” effect and easily cut your audio into multiple segments before exporting. You won’t be needing to cut/trim one by one.
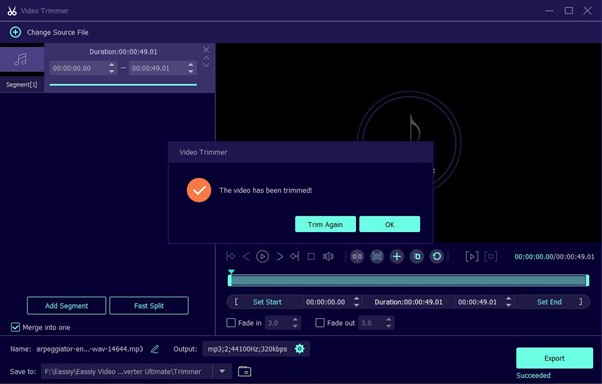
Step 4. Finally, you can rename your file if needed from the “Name” option. Set an output format by clicking on the “Output Settings” option. Now export the final M4A file by clicking on the “Export” button. Keep patience till the exporting process is complete and you’ll see a pop up notification on your screen where you can click “OK” or “Trim Again”.
Part 2: How to trim M4A file on Windows/Mac without using third party software
In case you are looking to trim M4A files on Windows and Mac without installing any third-party, these alternatives to Eassiy Audio Editor will help you. However, these tools don't offer any advanced editing options. So, if you are looking to only trim the M4A file, they can always help you with that.
Follow along to learn how to trim M4A files without third-party software (without needing to install any third-party application).
Method 1: Trim M4A file using VLC on Windows
The VLC media player is a free, open-source, cross-platform multimedia player that supports almost all multimedia file formats, including M4A audio file extensions. Available to download for free with great functionality, the VLC media player is the application that is present on every Windows device (not by default). In case you haven’t installed the application, you can visit the official page of the VLC media player and download it for free. Yes, that negates the definition of trimming M4A files without third-party software, but a VLC media player will help you in a lot of ways.
Follow these simple steps to trim the M4A file using the VLC media player on Windows:
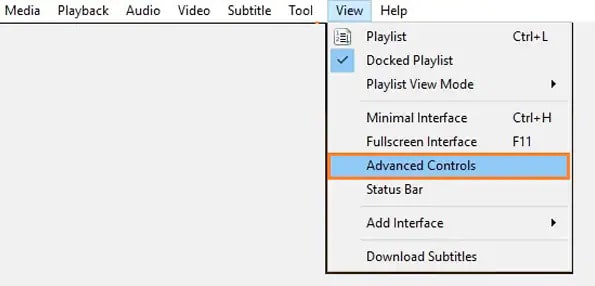
Step 1. Launch VLC media player > select View from the Main menu > click on Advanced Controls from the drop-down menu. Once you've completed that, you'll notice a red button (recording button) at the bottom left corner of the page.
Step 2. Now go to Media and select ‘Open file’. A windows page displaying files on your PC will pop. Just search for the M4A file you're looking to trim and click Open to proceed.
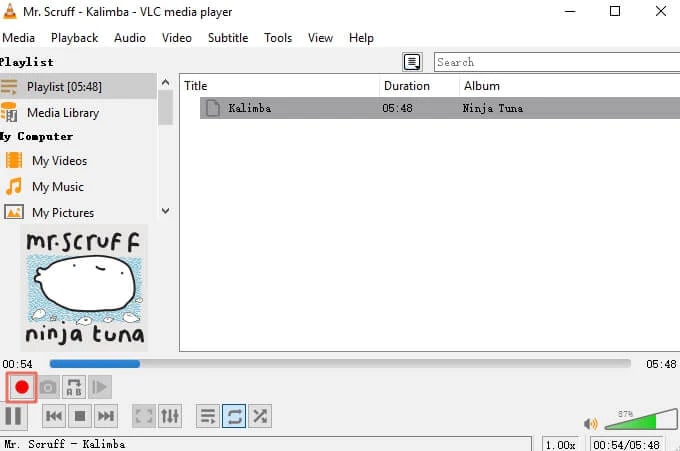
Step 3. After you've successfully uploaded the M4A file, click the red button located at the bottom-left corner of the screen to start recording, and once it gets to the point where you want it to end, click the red button again to stop the recording.
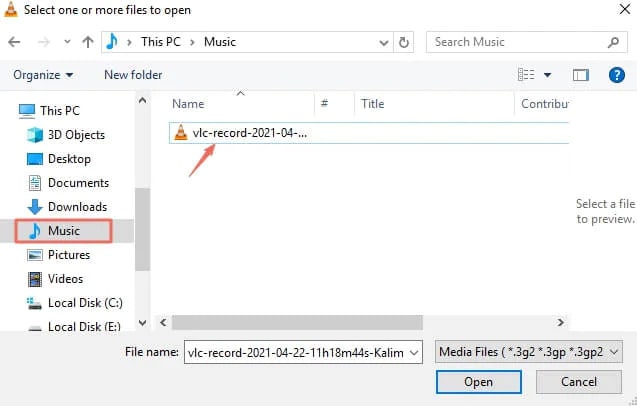
That is it! The recorded file will be available in the Music folder under This PC.
Method 2: Trim M4A using Quicktime on Mac
QuickTime is an in-built multimedia program by Apple. Being Apple’s own entity, it is available on every Mac device by default. Supporting all multimedia file formats including videos, audio, images, and carrying some editing functions within it, QuickTime can help you trim M4A files effortlessly.
Here’s how to trim M4A using QuickTime on Mac:
Step 1. Launch the QuickTime application on your Mac computer > click File at the top left corner of the page > Select Open file from the drop-down and select the relevant M4A file you want to trim.

Step 2. After opening the file, choose Edit.
- Under Edit, choose Trim.
- Once chosen, you will see the Yellow selection tool on the audio.
- Mark a start and endpoint using the selection tool.
- After marking the selection, choose Trim from the Edit section at the top bar.


Step 3. Preview the trimmed M4A file and if you are not happy with the result — do it again. However, if you're satisfied with the marking, navigate to File and select Save to finalize the operation.
There you go! QuickTime lets you edit all types of multimedia files without needing any third-party application. However, the functionality of the QuickTime freeware tool is limited to trimming and conversion of the audio files.
Method 3: Trim M4A on Windows/Mac using an Online tool
MP3Cut.Net is one of the best online platforms to trim M4A files online. The online platform supports all major audio files, including M4A. And also support the conversion of audio files from one format to another file format if need be.
Follow these simple steps to learn how to use an online M4A audio trimmer on Mac or Windows:
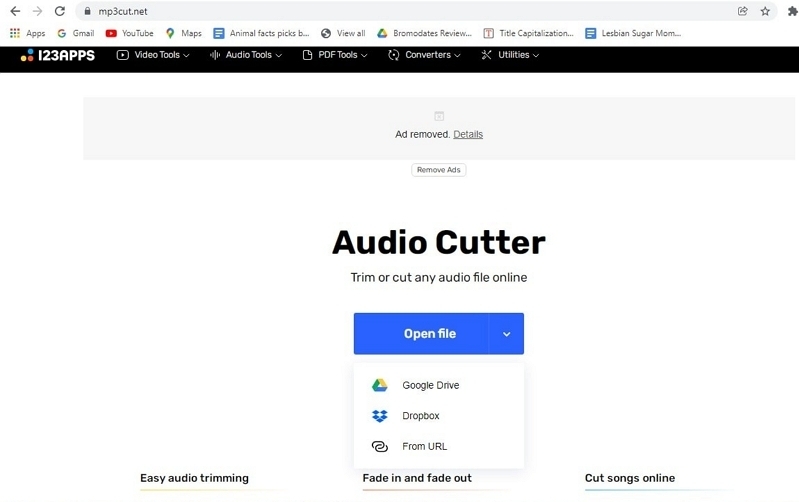
Step 1. Visit the official MP3Cut.Net website. From the main interface, click Choose File. You can choose to upload the file from your local hard drive or cloud storage like Google Drive or Dropbox.
Step 2. Once you've successfully uploaded the M4A file, use the selection tool to mark the start and end points on the track. Then, click ‘Cut’ to trim the file instantly. You can also edit the song by applying effects and adjusting the critical parameters like Volume, Pitch, Rate, and more.
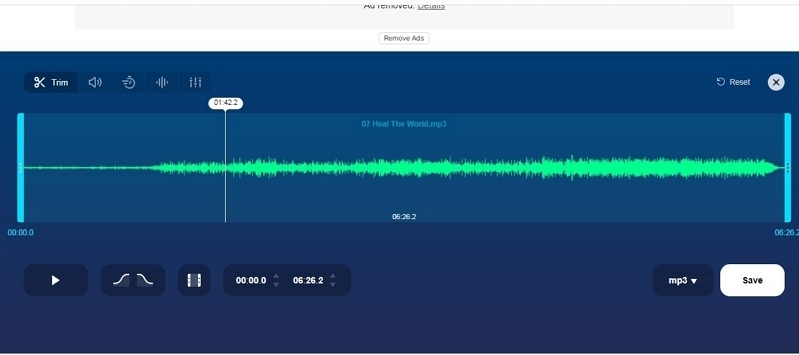
Step 3. After the trimming process, hit the ‘Save’ button to download the trimmed file to your PC.
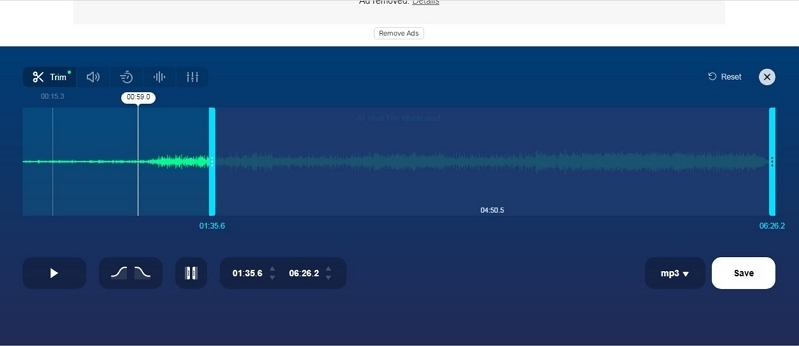
Again, MP3Cut.Net is one of the best methods to trim M4A files online; however, the platform is inadequate for users looking to edit the audio with advanced features. Still, it gets the job done, i.e., trim M4A files online without third-party application.
Conclusion:
Hopefully, this guide would have answered your request, i.e., taught you how to trim M4A files on Mac and Windows without any hassle. Of course, the most effective method to trim the M4A file is via Eassiy Audio Editor. The tool not only supports all audio file extensions, but also includes essential audio trimming tools. Hence, don't hesitate to download the software application and enjoy a seamless audio trimming operation. However, if you do not want to install any third-party software, the other M4A trimming methods mentioned on this page will serve you right.


